
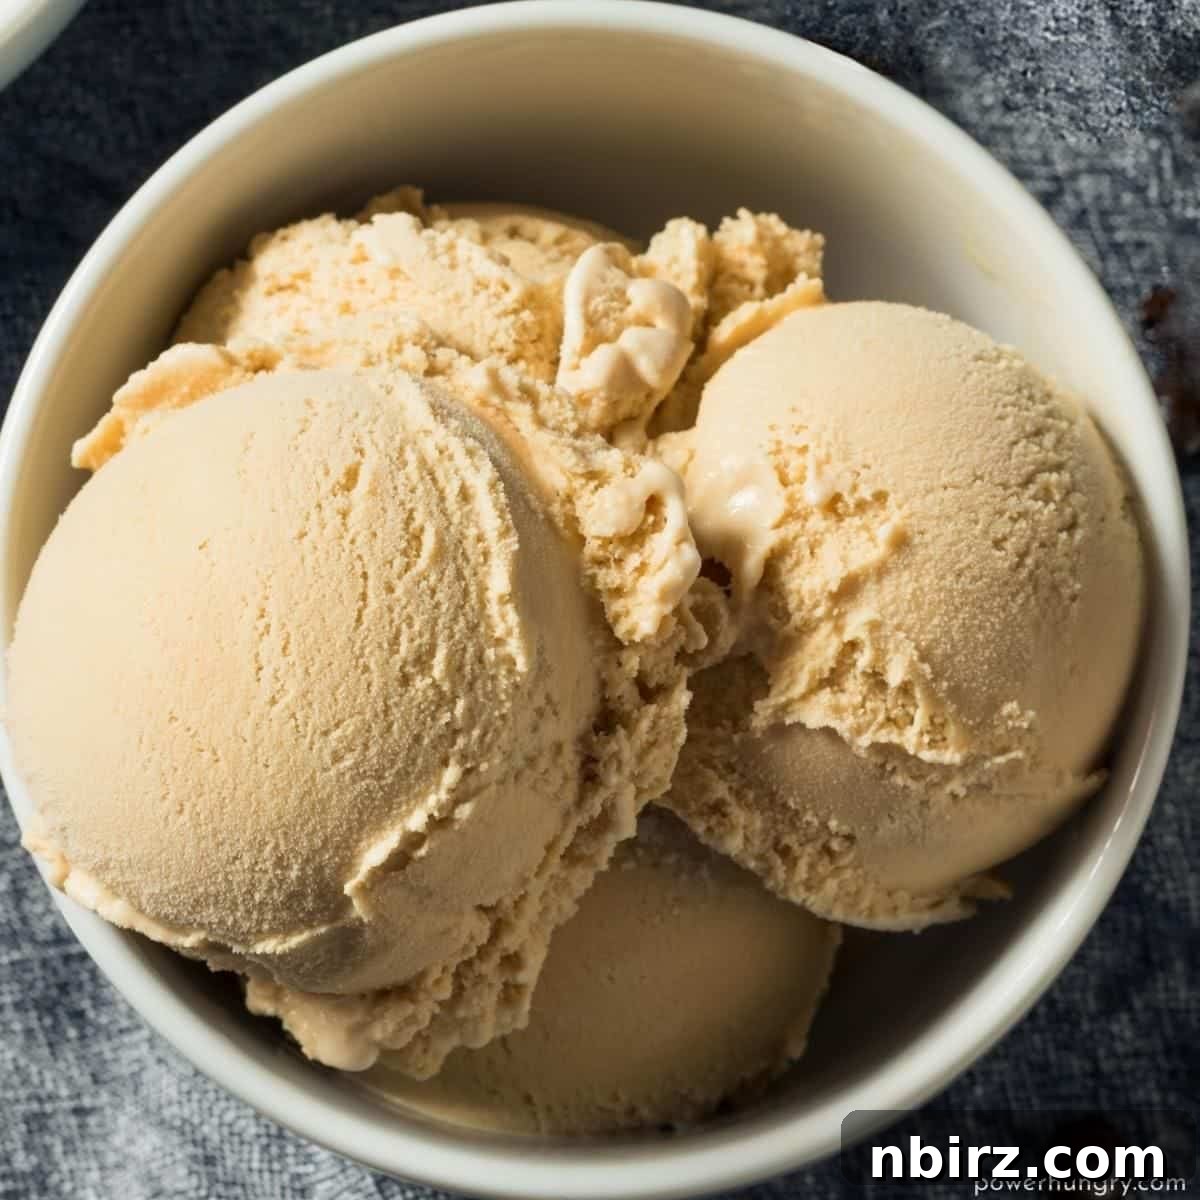
Indulge in the ultimate homemade vegan ice cream experience with this incredibly simple, 4-ingredient recipe. Crafted for supreme creaminess without a trace of cashews or coconut, this oat-based delight is a game-changer for anyone seeking a pure, allergen-friendly, and utterly delicious frozen treat. Get ready to scoop up pure joy in minutes!
Are you on a quest for an effortlessly creamy, homemade vegan ice cream that skips the common allergens like cashews and coconut? Your search ends here! This groundbreaking recipe delivers a rich, smooth texture and delightful flavor using minimal, readily available ingredients. Say goodbye to complex preparations and expensive specialty items – hello to your new favorite dairy-free dessert!
What makes this recipe truly special is its reliance on simple pantry staples. Forget expensive store-bought oat milk; we’re using whole rolled oats to create a remarkably silky base from scratch. This not only makes the recipe incredibly cost-effective but also ensures a fresh, wholesome foundation for your frozen treat, perfect for topping other homemade desserts.
Why You’ll Love This Vegan Oat Ice Cream Recipe
This isn’t just another ice cream recipe; it’s a culinary revelation for anyone navigating dietary restrictions or simply looking for healthier, simpler dessert options. Here’s a comprehensive breakdown of the incredible benefits and why this will become your go-to vegan ice cream:
- Truly Vegan & Dairy-Free: Our recipe is entirely free from all animal products. This means no dairy cream, no whole milk, no condensed milk, and absolutely no eggs or egg yolks. It’s perfect for those following a vegan lifestyle, individuals with lactose intolerance, or anyone avoiding dairy for health, ethical, or environmental reasons. Enjoy a guilt-free treat that tastes incredibly indulgent.
- Allergen-Friendly (Nut-Free & Coconut-Free): This is arguably one of the biggest benefits! Many vegan ice cream recipes rely heavily on raw cashews, almonds, or full-fat coconut milk to achieve a creamy texture. Our unique formula avoids all nuts and coconut products, making it a safe and delicious option for individuals with common nut allergies or those who prefer to avoid the distinct flavor of coconut.
- Gluten-Free Option Available: To cater to everyone, this recipe can easily be made gluten-free. Simply ensure you use certified gluten-free rolled oats. This makes it a fantastic dessert choice for individuals with celiac disease or gluten sensitivities, allowing them to enjoy a classic frozen treat without worry.
- Nutrient-Rich: Beyond being delicious, each serving of this oat ice cream offers nutritional benefits. It contains approximately 5 grams of protein and 3 grams of fiber, contributing to a more satisfying and wholesome dessert experience compared to many traditional ice creams. These nutrients aid in satiety and support digestive health.
- No Gums or Stabilizers: You won’t find any artificial thickeners like xanthan gum or guar gum in our ingredient list. The natural starches present in the rolled oats, combined with the healthy fats from the sunflower seeds, provide all the necessary creaminess and stable texture without any need for synthetic additives.
- Oil-Free & Soy-Free: Many plant-based desserts incorporate added oils or soy-based ingredients such as silken tofu or soy milk for texture. This recipe is meticulously crafted to be clean, relying solely on whole food ingredients for its decadent texture and natural richness, making it suitable for those avoiding added oils or soy.
- Refined Sugar-Free (with versatile options): We utilize coconut sugar as our primary sweetener, offering a natural, unrefined sweetness with subtle caramel notes. For those with different preferences or dietary needs, the comprehensive recipe card provides various alternative sweeteners, including organic cane sugar, lightly packed brown sugar, and liquid options like pure maple syrup or agave nectar.
- Fast & Easy to Prepare: The active preparation time for this ice cream is remarkably minimal. The base comes together in a high-speed blender in about two minutes, making it one of the quickest homemade ice creams you’ll ever undertake. The majority of the time is hands-off freezing, making it perfect for busy schedules.
- Only 4 Core Ingredients: Simplicity is at the heart of this recipe. It beautifully demonstrates that you don’t need a pantry full of obscure or expensive ingredients to create a truly spectacular and satisfying frozen dessert.
- Versatile Base for Customization: The neutral, creamy vanilla flavor of this oat ice cream serves as an ideal blank canvas for endless creative customization. It’s perfect for a myriad of additions, from fresh fruit purees and chocolate chunks to robust coffee infusions or bright citrus zests.
Essential Ingredients for Creamy Oat Ice Cream
For precise measurements of each ingredient, please refer to the detailed recipe card conveniently located at the end of this article. You can easily switch between US Customary (volume) and Metric (weight) units for your preference.
- Rolled Oats: The undisputed star of our show! These inexpensive, widely available, and nutrient-dense grains are the fundamental secret to achieving the incredible, naturally creamy texture of this vegan ice cream. When blended thoroughly with water, they magically transform into a rich, smooth “oat cream” that forms the perfect, wholesome base, completely eliminating the need for expensive store-bought oat milk or other specialty plant-based milks. For those managing gluten sensitivities or celiac disease, always opt for certified gluten-free rolled oats to ensure your dessert is safe and worry-free. It’s important to use rolled oats, as quick oats or steel-cut oats will not yield the same silky-smooth consistency.
- Sunflower Seed Kernels: These unassuming powerhouses play a crucial supporting role in delivering the luxurious, full-bodied texture that beautifully mimics traditional dairy ice cream. They contribute beneficial healthy fats and a notable amount of protein, adding richness and a subtle, delightful nutty flavor profile without containing any actual nuts. You have the flexibility to use either raw or roasted sunflower seed kernels, each imparting a slightly different depth of flavor. Roasted seeds often lend a toastier note.
- Coconut Sugar: Our preferred unrefined sweetener, coconut sugar not only adds sweetness but also contributes a wonderful, nuanced caramel-like flavor that beautifully enhances the overall profile of the ice cream. It’s a fantastic, natural alternative to more refined sugars. However, to ensure flexibility, the recipe card includes various other sweetener options to perfectly suit your taste preferences and dietary needs, such as organic cane sugar, lightly packed brown sugar, or liquid sweeteners like pure maple syrup or agave nectar.
- Vanilla Extract: A truly crucial flavor enhancer, vanilla extract elevates this ice cream from merely sweet to utterly sublime. The quality of your vanilla can significantly impact the final taste, imparting warm, aromatic, and comforting notes. While standard pure vanilla extract works wonderfully, for an even more pronounced, luxurious, and gourmet vanilla flavor, consider using high-quality vanilla bean paste or carefully scraping the delicate seeds directly from a fresh vanilla bean.
You’ll also simply need cold water to create the base for this extraordinary vegan ice cream. Yes, you read that correctly – just water! The ingenious combination of rolled oats and water efficiently creates a velvety, naturally neutral-tasting “oat cream” that establishes the perfect, clean canvas for crafting the best vegan vanilla ice cream. This brilliant approach not only saves you from having to use up your favorite almond milk or other specialty plant-based milks but also makes the recipe incredibly economical and widely accessible.
However, if you prefer to use a plant-based milk in place of water, you are absolutely welcome to do so! Any non-dairy milk you enjoy, such as hemp milk, unsweetened almond milk, or even store-bought oat milk, will work effectively and can add its own subtle, delicious flavor dimension to the finished product, giving you further customization options.
Optional Flavor Enhancers and Texture Boosters
1. A Pinch of Salt
While often underestimated in sweet preparations, a small amount of salt can dramatically amplify and balance all the other flavors present in the ice cream. It expertly cuts through the sweetness and profoundly brings out the subtle vanilla and creamy oat notes, preventing the ice cream from tasting one-dimensional. We strongly recommend adding at least a quarter teaspoon. If you’re using already salted, roasted sunflower seed kernels, you might only need an extra pinch to achieve perfect balance.
2. Clear Alcohol for Enhanced Creaminess
For an even more incredibly smooth, consistently scoopable texture that resists freezing rock-solid, consider incorporating a tablespoon (approximately 1 ounce or 30ml) of clear alcohol, such as unflavored vodka or gin, into your ice cream base before blending. The alcohol effectively helps to interfere with the formation of large, undesirable ice crystals, which results in a noticeably smoother, less icy, and more pliable final product. Rest assured, the small amount of alcohol will cook out or freeze, leaving no alcoholic taste, and the ice cream will still be wonderfully creamy and delicious without it, so its inclusion is entirely based on your preference for maximum scoopability.
Choosing Your Sunflower Seeds: Raw vs. Roasted for Distinct Flavors
The type of sunflower seeds you select for this recipe will subtly but distinctly influence the final flavor profile of your ice cream, offering a nuanced choice for your palate:
- Raw Sunflower Seeds: Opting for raw sunflower seeds will produce a cleaner, more neutral-flavored ice cream. This choice allows the pure vanilla essence to truly shine through, resulting in a classic, unadulterated vanilla ice cream experience that is crisp and bright.
- Roasted (and often Salted) Sunflower Seeds: These are typically easier to find in most general supermarkets. Roasted sunflower seeds impart a deeper, more intensely flavored, and wonderfully toasty character to the ice cream. If you appreciate a slightly more complex, warm, and comforting “nutty” (yet still nut-free!) taste, this is an excellent choice. The added salt often found in roasted varieties also contributes an extra layer of flavor enhancement, as discussed previously, perfectly balancing the sweetness.
Essential Equipment You’ll Need for Perfect Vegan Ice Cream
While the ingredients are minimal, having the right tools can make all the difference in achieving that professional-level creamy texture at home:
- High-Speed Blender: This is an absolutely essential piece of equipment for this recipe. To achieve that coveted silky-smooth, lump-free ice cream base, a powerful high-speed blender is crucial. Regular blenders might struggle to thoroughly break down the oats and sunflower seeds into the fine emulsion required, which could result in a grainy or less creamy final product.
- Ice Cream Maker (Optional for Churn Method): An ice cream maker (or ice cream machine) is highly recommended if you desire the absolute creamiest and lightest texture, as it continuously churns the mixture while freezing, incorporating air and preventing large ice crystals. While a no-churn method is possible (detailed in the FAQ), a machine will yield superior results. Always follow your specific manufacturer’s instructions for best performance.
- Freezer-Safe Container: You’ll need a suitable container for freezing your ice cream. A standard loaf pan works exceptionally well because its rectangular shape allows for relatively even freezing. Any other airtight, freezer-safe plastic container with a lid will also do the trick to prevent freezer burn.
- A Sturdy Ice Cream Scoop: To easily portion and serve your delightful homemade creation once it’s perfectly firm.
Step-by-Step Guide to Making Your Dreamy Vegan Oat Ice Cream
For the complete, concise, and detailed directions, please refer to the recipe card located directly below this section.
Step One: Blend All Ingredients to Perfection
Begin by carefully placing all the core ingredients – the specified amount of cold water, rolled oats, sunflower seed kernels (raw or roasted), coconut sugar, and vanilla extract – into the container of your high-speed blender. If you’ve chosen to include the optional flavor enhancers, such as a pinch of salt and/or the clear alcohol, add those in now as well. Ensure all ingredients are well-situated. Blend the mixture on high speed until it becomes incredibly smooth and has a luxurious, velvety texture. This critical step typically takes a couple of minutes. During blending, you will need to pause the blender a few times to thoroughly scrape down any ingredients that cling to the sides of the container with a spatula. This ensures all the oats and seeds are completely pulverized and perfectly incorporated, guaranteeing a truly lump-free and exquisitely smooth base. If the mixture appears too thick for your blender to process efficiently, add a tiny splash more cold water, no more than one tablespoon at a time, until it blends smoothly. Once you achieve that perfect consistency, transfer the blended base into an airtight container and refrigerate it for a minimum of 2 hours, or ideally overnight, until it is thoroughly chilled. A very cold base is absolutely vital for proper churning and the best final texture.
Step Two: Churn for Creamy Texture (If Using an Ice Cream Maker)
Once your ice cream base has been thoroughly chilled to perfection, gently pour the prepared blended mixture into the bowl of your ice cream maker. Proceed to churn the mixture according to your specific manufacturer’s instructions. The churning process typically takes approximately 20 to 30 minutes, depending on the model and efficiency of your machine. The primary objective of churning is to continuously incorporate air into the mixture while simultaneously beginning the freezing process. This crucial action prevents the formation of large, undesirable ice crystals, which are the enemy of creamy ice cream. At the conclusion of the churning cycle, the ice cream will possess a consistency similar to a very soft, freshly dispensed soft-serve ice cream – it will be pliable and not yet firm, and this is precisely the ideal stage we aim for.
Step Three: Freeze Until Firm and Solid
Carefully and promptly transfer the freshly churned ice cream (or the thoroughly blended base, if you are opting for the no-churn method detailed in the FAQ) into a suitable freezer-safe container. A standard loaf pan is an excellent choice, as its rectangular shape promotes more even and consistent freezing. Ensure you tightly cover the container with a secure lid or plastic wrap. This is a critical step to prevent the formation of ice crystals on the surface of your ice cream, which can detract from its creamy texture. Place the covered container in your freezer for approximately four to eight hours, or until it reaches a very firm, scoopable consistency. Bear in mind that the depth of your chosen container will directly influence the freezing time: shallower containers will typically freeze faster, whereas deeper containers will require a longer duration. It is important to note that this vegan oat ice cream, particularly without the high fat content of coconut cream or cashews, tends to freeze quite solid, often much harder than traditional dairy ice creams. This is perfectly normal and an expected characteristic, so there’s no need for concern if it’s not immediately scoopable straight from the freezer.
Step Four: Thaw Slightly & Master the Scoop
To fully enjoy your perfectly firm vegan oat ice cream with its optimal creamy texture, you’ll need to allow it to soften slightly before attempting to scoop it. Remove the container from the freezer and let it rest at room temperature for approximately 10 to 15 minutes. This brief thawing period is usually sufficient to soften the ice cream just enough to become wonderfully scoopable. As an alternative, if your chosen container is verified as microwave-safe, you can carefully microwave the ice cream in short bursts, typically 10 to 15-second intervals, checking the consistency after each burst, until it reaches your desired level of softness. Once softened to perfection, grab your favorite sturdy ice cream scoop and serve generous portions into cups, bowls, or gracefully atop cones, as desired. Prepare yourself for a truly delightful and satisfying frozen treat!
Storage Tips for Your Homemade Ice Cream
To preserve the exquisite freshness, creamy texture, and delightful flavor of your homemade vegan oat ice cream, it is crucial to store it properly. Always transfer the ice cream into an airtight, freezer-safe container immediately after freezing. This vital step effectively prevents the formation of undesirable freezer burn and significantly helps to maintain its optimal quality and taste for an extended period, typically up to 3 months. When you’re ready to indulge in another serving, simply follow the thawing instructions detailed in Step Four to ensure perfect scoopability and enjoyment.
The Exquisite Taste & Texture of Vegan Oat Ice Cream
Prepare to be utterly amazed by the remarkably rich, smooth, and supremely creamy texture, coupled with the subtly nuanced flavor, of this unique oat-based ice cream. The finely blended rolled oats, in perfect harmony with the beneficial fats contributed by the sunflower seeds, collectively create an exceptionally smooth and truly decadent mouthfeel that genuinely rivals, and often surpasses, that of traditional dairy ice cream. There is absolutely no hint of iciness, grittiness, or any undesirable textures – just pure, melt-in-your-mouth goodness that coats the palate beautifully.
The coconut sugar plays a pivotal role, not merely in sweetening, but by imparting a beautiful, rich depth to the sweetness. It carries subtle, natural caramel undertones that exquisitely complement the creamy oat base, creating a sophisticated and harmonious flavor profile without any artificial aftertastes. And, of course, the vanilla extract is more than just an ingredient; it’s a vital component that infuses the entire ice cream with its warm, aromatic, and classic notes. The better the quality of your vanilla, the more pronounced and luxurious the vanilla flavor will be, transforming each spoonful into a truly memorable experience. This recipe is a testament to how simple, wholesome ingredients, when thoughtfully combined, can create something truly extraordinary and profoundly satisfying.
Endless Flavor Variations for Your Oat Ice Cream
One of the most exciting and versatile aspects of this vegan oat ice cream is its beautifully neutral yet deliciously satisfying vanilla base, making it an incredibly adaptable canvas for limitless customization. Think of it as your culinary playground, awaiting your creative touches. Here are some fantastic ideas and inspirations to elevate your next batch:
- Vibrant Citrus Zests & Distinctive Flavorful Extracts: For a bright, invigorating, and refreshing twist, consider incorporating finely grated zest from lemons, limes, or oranges directly into the blender along with the other base ingredients. Alternatively, explore different extracts like almond for a delicate marzipan-like note, peppermint for a cool and festive treat, a touch of rum extract for a sophisticated tropical flair, or even coffee extract for an intense boost.
- Rich Coffee or Espresso Infusion: Transform your creamy oat ice cream into a coffee lover’s ultimate dream! Simply replace a portion of the cold water with an equal amount of cold, strong brewed coffee or robust espresso for a truly invigorating and deep coffee flavor. For a decadent mocha variation, you could also swirl in some rich vegan chocolate syrup or melted chocolate chips after churning.
- Decadent Chocolate Add-ins: For the chocoholics, fold in generous amounts of chopped vegan chocolate chunks, mini chocolate chips, or even finely chopped dark chocolate after the ice cream has finished churning. For an extra layer of rich intensity, you could swirl in some melted vegan chocolate just before transferring the churned ice cream to the freezer for hardening.
- Crunchy Seed or Nut Additions: While the base is intentionally nut-free, if allergies are not a concern in your household, you can introduce a delightful textural contrast and crunch with additions like chopped peanuts, pecans, walnuts, or even more sunflower seeds or pumpkin seeds. Lightly toasting these additions beforehand will significantly enhance their flavor and aroma.
- Crumbled Cookies & Biscuits: Create an irresistible “cookies and cream” sensation by gently folding in crumbled vegan sandwich cookies, crunchy shortbread biscuits, or even homemade oat cookies after the ice cream has been churned. This adds both texture and a familiar, comforting flavor.
- Fresh Fruit Purees & Syrups: Swirl vibrant, homemade fruit purees or delicious fruit syrups into the freshly churned ice cream before its final freeze. Imagine a luscious strawberry swirl, a tangy raspberry ripple, a sweet blueberry ribbon, or even a tropical mango swirl for an incredible burst of natural fruitiness. You could also gently fold in small pieces of chopped fresh berries, peaches, or cherries for a more textural fruit experience.
For any hard mix-ins such as chocolate chunks, chopped seeds, nuts (if using), or crumbled cookies, it is always best practice to fold them into the ice cream immediately after it finishes churning, right before you spread it into your freezer-safe container. This method ensures an even distribution throughout the ice cream and prevents these heavier additions from sinking to the bottom during the freezing process.
Frequently Asked Questions (FAQ)
- Can I Make This 4-Ingredient Vegan Oat Ice Cream Without an Ice Cream Maker? Yes, absolutely! If you don’t have an ice cream maker, you can still achieve a delicious result using the “no-churn” method. After blending your ice cream base until it’s super smooth, pour it into a shallow, freezer-safe container (a metal loaf pan works exceptionally well). Place it in the freezer for 1 hour, then remove and vigorously stir or scrape the mixture with a fork or sturdy spoon to break up any ice crystals. Return it to the freezer and repeat this stirring process every 30-45 minutes for the first 3-4 hours, until it becomes too firm to stir easily. Finally, allow it to freeze solid for another 4-8 hours. When serving, remember to let it thaw at room temperature for about 20-30 minutes, then scoop into creamy, delightful portions. This manual method helps to prevent excessive iciness, though the texture might be slightly denser than a churned version.
- What Is a Good Substitute for Coconut Sugar? You have several excellent options to choose from! You can substitute an equal amount of lightly packed brown sugar, which will offer a similar caramel note and rich flavor. Alternatively, use your preferred granulated sugar, such as organic cane sugar, for a more neutral sweetness that lets the vanilla shine. For liquid sweeteners, 1/2 cup (118 mL) of pure maple syrup or agave nectar can be used in place of the coconut sugar. Keep in mind that using liquid sweeteners might slightly alter the final texture, sometimes making the ice cream a bit softer.
- What Can I Use in Place of Oats in This Specific Recipe? For this particular “4-Ingredient Vegan Oat Ice Cream,” rolled oats are the foundational and most critical ingredient. They are what provide its unique creaminess, structure, and the delightful body without relying on cashews or coconut. Therefore, there isn’t a direct substitute that would yield the same result while maintaining the specified 4-ingredient simplicity and the “no cashew, no coconut” profile. However, if you are looking for other types of non-dairy ice cream options that specifically do not contain oats, we encourage you to explore other recipes (some fantastic examples are listed below) that utilize different bases like frozen bananas, soy milk, or sunflower seeds (as a primary base) for their creamy textures.
- Can I Make This Non-Dairy Ice Cream in a Food Processor? While a food processor can handle various blending tasks, I strongly advise against using it for this specific recipe. A high-speed blender is absolutely essential for truly breaking down the robust rolled oats and the sunflower seeds into a completely smooth, fine, and velvety emulsion. A typical food processor usually won’t achieve the necessary fine, creamy texture, often leaving a slightly grainy or gritty mouthfeel that would detract from the luxuriousness of the ice cream. For optimal results and the silkiest texture, investing in or borrowing a good quality high-speed blender will make a significant and noticeable difference in the final quality of this extraordinary ice cream.
- Why Does My Vegan Oat Ice Cream Freeze So Hard? It is a common characteristic for homemade vegan ice creams, especially those crafted without the high fat content typically found in coconut cream or cashews, to freeze firmer than traditional dairy ice cream. This phenomenon is primarily due to a relatively higher water content and the absence of dairy fats, which contribute to a softer freeze. The excellent news is that this is easily remedied! Simply allow your ice cream to thaw for 10-15 minutes at room temperature before you plan to serve it. The optional addition of clear alcohol (as thoroughly discussed above) can also be highly effective in mitigating this by interfering with the formation of larger ice crystals, resulting in a more consistently scoopable texture.
Happy scooping and enjoy your delightful homemade vegan oat ice cream – a truly simple pleasure!
More Dairy-Free Ice Cream Recipes
- 1-Ingredient Banana Ice Cream
- Mango Banana Coconut Ice Cream
- 3-Ingredient Chocolate Banana Peanut Butter Ice Cream
- Strawberry Hemp Ice Cream
- 2-Ingredient Strawberry Sorbet
- Vegan Vanilla Sunflower Seed Ice Cream (4 ingredients, no churn)
Print Recipe
4-Ingredient Vegan Oat Ice Cream (No Cashews, No Coconut)
By: Camilla
This exceptionally creamy and easy-to-make vegan oat ice cream uses just four core ingredients, completely free of cashews and coconut. Master both churn and no-churn methods for a delightful dairy-free treat.
Prep Time: 5 minutes
Cook Time: 0 minutes
Additional Freeze Time: 4 – 8 hours
Total Time: Approximately 4 hours 5 minutes (including initial freezing)
Servings: 7 (1/2 cup) servings
Ingredients
- 1 2/3 cups cold water
- 1 cup rolled oats (use certified gluten-free if needed)
- 1 cup raw sunflower seed kernels (roasted will also work)
- 1/2 cup coconut sugar (see notes for alternative sweeteners)
- 2 teaspoons vanilla extract
- Optional: 1 ounce (2 tablespoons) clear alcohol (vodka or gin, helps maintain creaminess)
- Optional: 1/4 teaspoon salt (enhances flavor)
Instructions
- Blend the Base: Combine the cold water, rolled oats, sunflower seed kernels, coconut sugar, vanilla extract, and any optional clear alcohol or salt in a high-speed blender. Blend on high speed until the mixture is completely smooth and velvety. You may need to stop and scrape down the sides a few times. If too thick, add a tiny splash more water.
- Chill Thoroughly: Transfer the blended ice cream base to an airtight container and refrigerate for at least 2 hours, or until thoroughly cold. This step is crucial for optimal texture during churning.
- Churn (if using an ice cream maker): Pour the chilled mixture into your ice cream maker and churn according to the manufacturer’s instructions, typically 20-30 minutes. The consistency should be like very loose soft-serve.
- Freeze Until Firm: Immediately transfer the churned ice cream (or the blended base if using the no-churn method) into a freezer-safe container. Cover tightly and freeze for 4 to 8 hours, or until very firm. Shallower containers will freeze faster.
- Thaw and Serve: Before serving, remove the ice cream from the freezer and let it sit at room temperature for 10 to 15 minutes to soften. Alternatively, microwave in 10-15 second bursts if using a microwave-safe container. Once scoopable, serve and enjoy!
Notes
- Why Alcohol is Included (Optional): A small amount of alcohol helps prevent large ice crystals, keeping the ice cream creamier and less solid when frozen. It is completely optional, and the ice cream is still delicious without it.
- Storage: Store the ice cream in an airtight container in the freezer for up to 3 months.
- Sunflower Seed Substitution: If not avoiding nuts, an equal amount of raw cashews can be used in place of sunflower seeds, though this changes the “no cashew” aspect of the recipe.
- How to Freeze Faster: For quicker freezing, use a shallower dish, which allows the ice cream to freeze more uniformly and rapidly.
- Sugar Options: You can substitute coconut sugar with an equal amount of natural cane sugar, regular granulated sugar, or lightly packed brown sugar. Alternatively, use 1/2 cup (118 mL) of maple syrup or agave nectar for a liquid sweetener.
Nutrition (Per 1/2 Cup Serving)
Calories: 203kcal | Carbohydrates: 25g | Protein: 5g | Fat: 10g | Saturated Fat: 1g | Polyunsaturated Fat: 8g | Sodium: 1104mg (Note: High sodium could be from salted sunflower seeds or added salt. If using unsalted seeds and minimal added salt, this value would be lower.) | Fiber: 3g | Sugar: 15g
Enjoyed this recipe? Please consider rating and leaving a comment below to share your experience!