
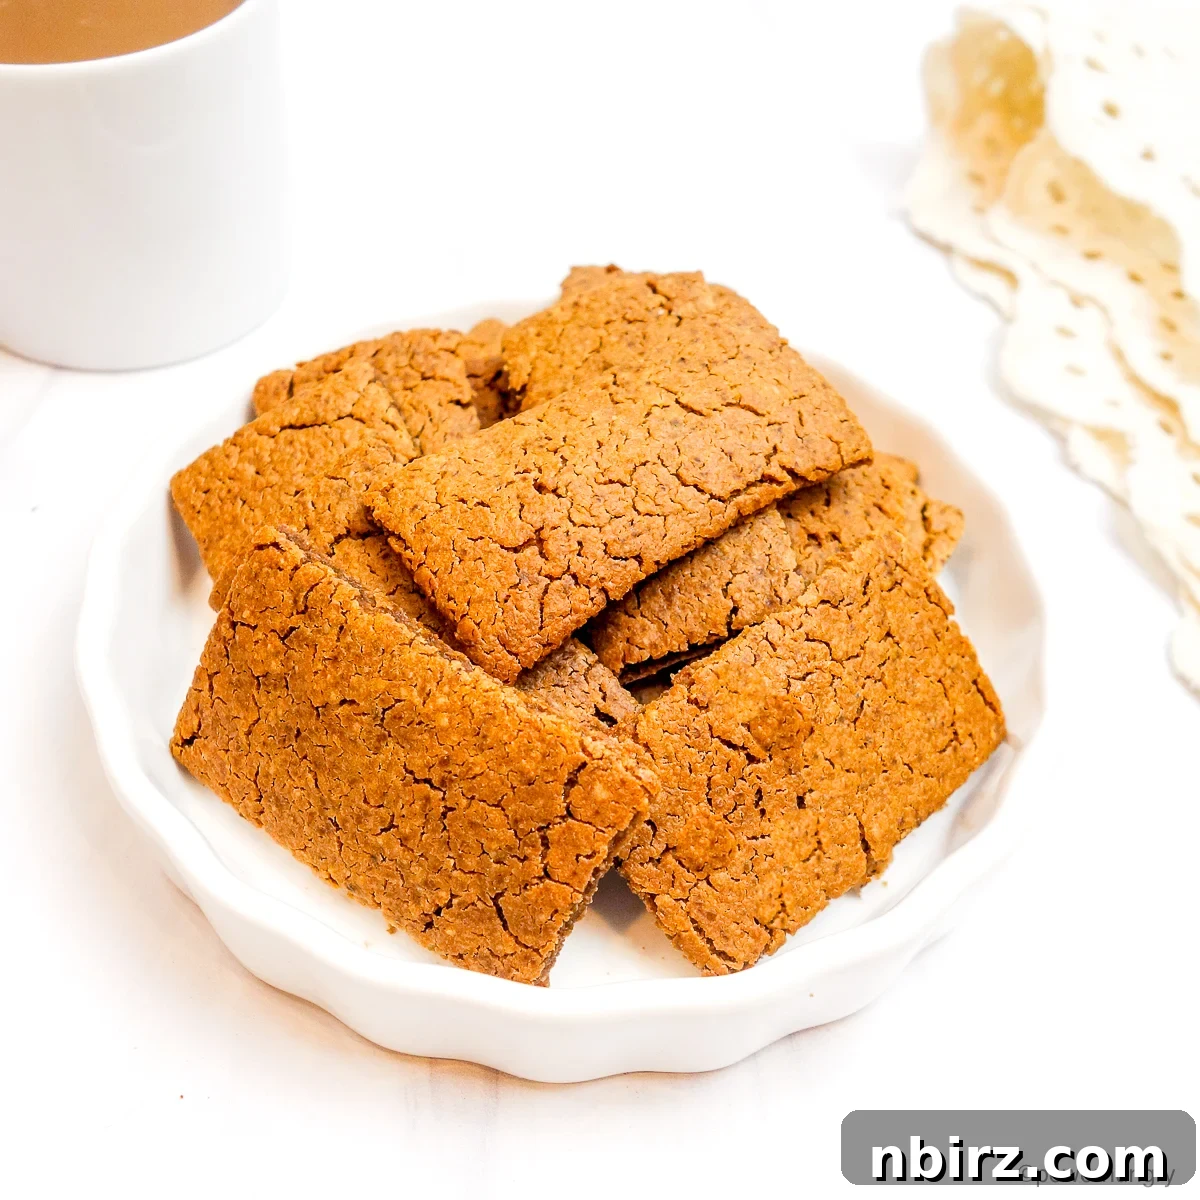
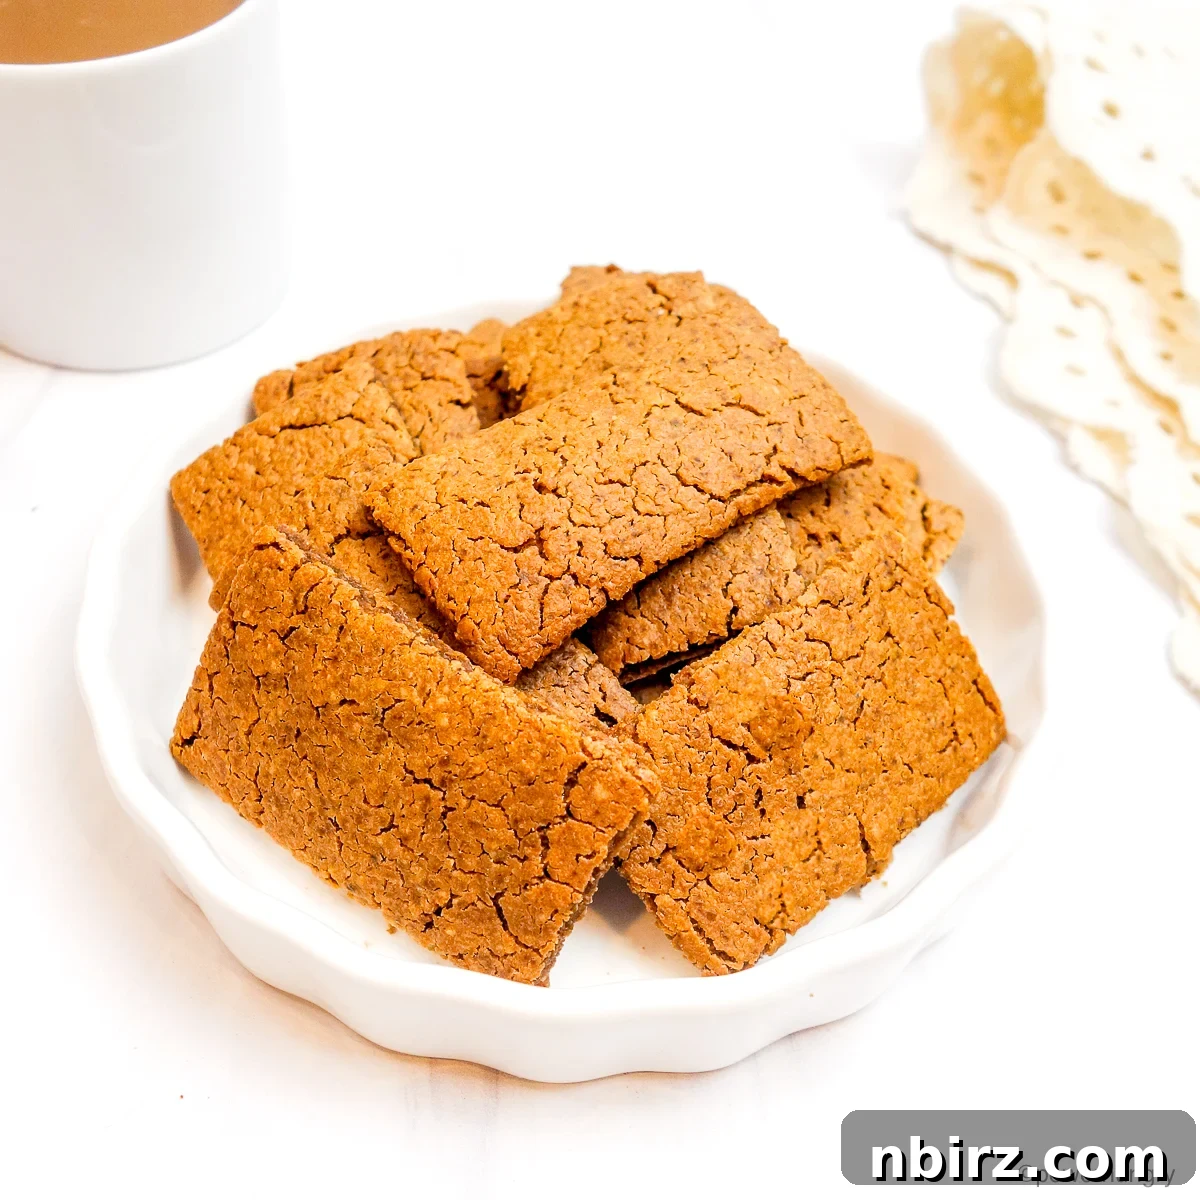
Experience the magic of no-roll oat speculaas cookies (just like Biscoff!) with this incredibly easy recipe. Simply blend, pour, and bake your way to these not-too-sweet, perfectly spiced treats that are both gluten-free and oil-free.
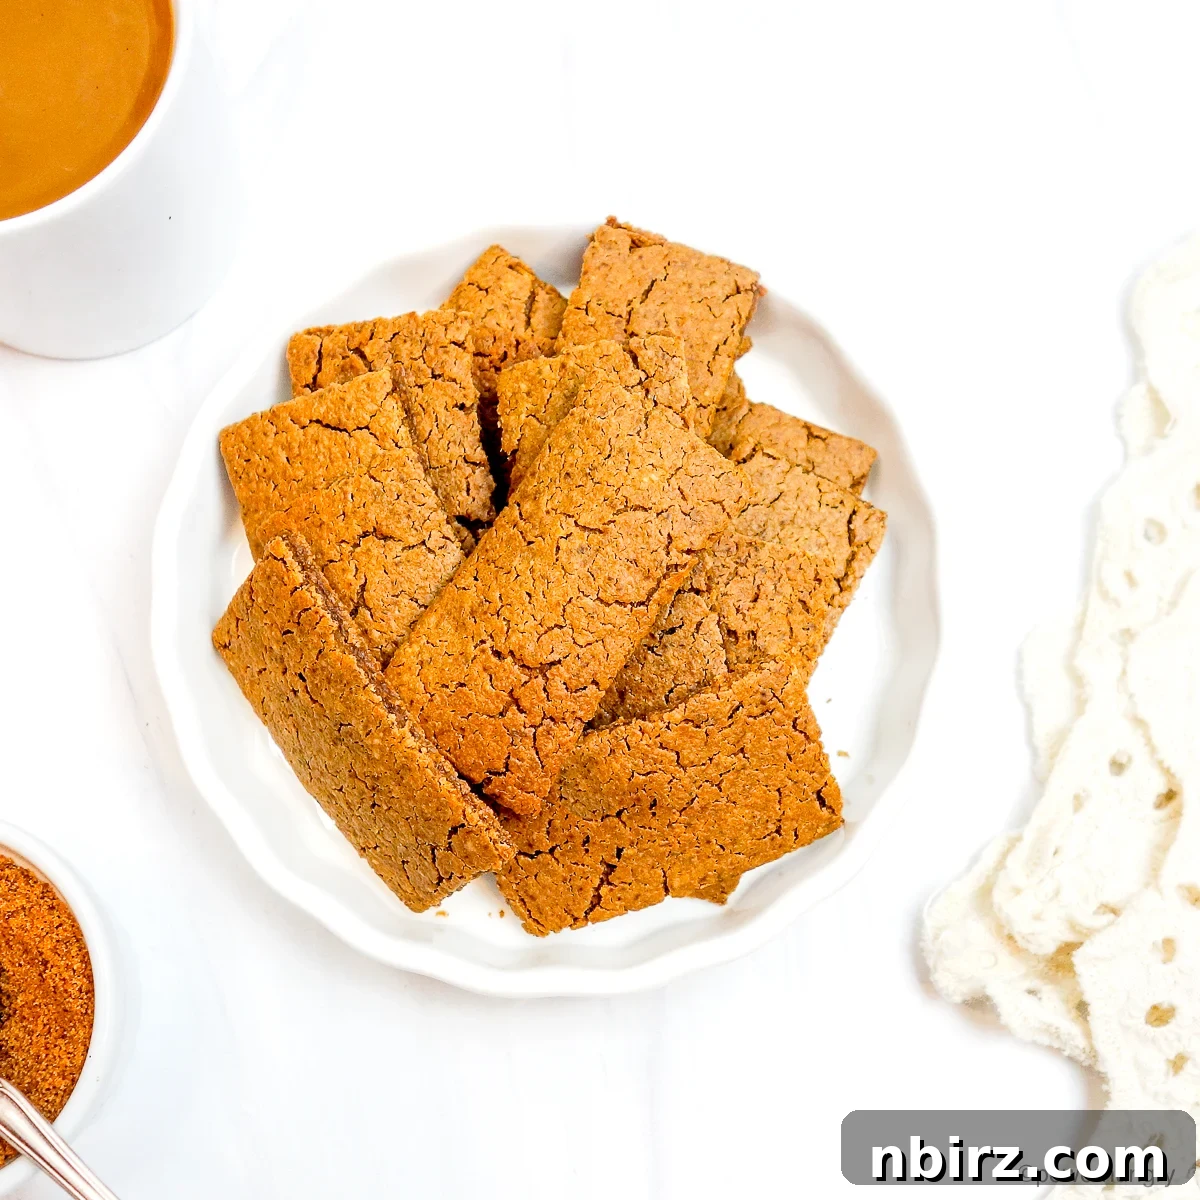
Easy No-Roll Vegan Oat Speculaas Cookies: Your Homemade Biscoff Alternative
In an age where modern airline travel often feels stripped of its simple pleasures, one delightful tradition occasionally persists: those iconic red and white packets of Biscoff cookies. These beloved treats, known for their unique caramelized and spiced flavor, are happily plant-based, making them a favorite among many. Biscoff is essentially a brand name for a popular rendition of speculaas, traditional lightly spiced cookies originating from the Netherlands and Belgium. If you’ve ever encountered those charming tan, windmill-shaped cookies, often displayed around the holidays or with coffee, you’ve likely sampled speculaas.
Traditional speculaas recipes are typically crafted with a combination of rich butter, eggs, caramelized sugar, and wheat flour, then meticulously rolled out and cut (or molded) into intricate shapes. However, our recipe takes a delightful detour from tradition, offering an exceptionally easy, wholesome, and oat-centric version. We’ve ventured far beyond the conventional to bring you a cookie that skips the fuss without sacrificing flavor or texture. This innovative approach means no oil, no butter, no eggs, no wheat, and absolutely no rolling, cutting, or molding required. While it might be considered a ‘smidge of cookie heresy’ by purists, the results are undeniably delicious and incredibly convenient.
Despite these modern adaptations, we remain committed to preserving the heart of what makes speculaas so special: its distinctive blend of warm, inviting spices. Equally important is retaining that signature crisp, light texture and mild, comforting sweetness. These cookies are perfectly designed to complement a warm cup of tea or coffee, offering a moment of pure bliss. We’re confident you’ll find immense enjoyment in these homemade delights – no boarding pass or arduous journey required, just simple ingredients, a blender, and a love for perfectly spiced cookies.
Why You’ll Love This Recipe: Incredible Benefits & Ease
This unique oat speculaas recipe is designed for ease, health-consciousness, and pure enjoyment. It offers a multitude of benefits that make it a standout choice for anyone seeking a delicious, wholesome cookie:
- **Effortless Preparation (No Rolling Required):** Say goodbye to your rolling pin and cookie cutters! This “no-roll” recipe eliminates the need for any complicated shaping, making cookie baking simpler and faster than ever. Just blend, pour, and score!
- **Completely Vegan & Dairy-Free:** Crafted without eggs or any dairy products, these cookies are 100% plant-based, making them suitable for vegan diets, those with dairy or egg allergies, or anyone looking for a compassionate treat.
- **Naturally Gluten-Free:** By utilizing whole rolled oats as the base, this recipe is inherently gluten-free. For individuals with celiac disease or severe gluten sensitivities, simply ensure you use oats that are certified gluten-free to avoid cross-contamination. It’s a fantastic wheat-free alternative!
- **Oil-Free Goodness:** We’ve skipped the added butter and oils, focusing instead on the natural fats provided by your choice of nuts or seeds. This results in a lighter, healthier cookie without compromising on flavor or crispness.
- **Budget-Friendly & Pantry-Staple Ingredients:** Made with common, affordable ingredients you likely already have in your pantry, these cookies are an economical treat that doesn’t require specialty shopping.
- **Quick & Easy Blender Method:** The entire cookie batter comes together effortlessly and quickly in a blender. This means less time on prep and significantly less cleanup, making it perfect for spontaneous baking sessions.
- **Authentic Spiced Flavor Profile:** Despite the modern twists in preparation, the rich, aromatic spice blend remains true to the classic speculaas profile, delivering that comforting, familiar taste.
- **Perfect Crisp-Tender Texture:** Achieve that highly desirable crisp yet tender cookie texture that melts in your mouth, all without any traditional fats.
- **Versatile & Customizable:** This recipe is highly adaptable! Easily swap out different nuts or seeds to create personalized flavor profiles that cater to your preferences.
Gather Your Simple Ingredients for These Spiced Oat Cookies
One of the best aspects of these cookies is their reliance on readily available, unfussy pantry ingredients. This means you can whip up a batch on a whim whenever a craving for a warm, spiced treat strikes! While the exact measurements for each component are detailed in the comprehensive recipe card at the end of this post, here’s a look at the simple, wholesome components you’ll need. Remember, you can easily toggle between US Customary (volume) and Metric (weights) for your preferred measurement option within the recipe card.
Essential Ingredients:
- **Rolled Oats:** These are the star of our gluten-free cookie base, providing a hearty texture and wholesome foundation. If you require it for dietary reasons, opt for certified gluten-free rolled oats.
- **Nuts or Seeds of Your Choice:** Crucial for imparting both crispness and a delicious, deep toasty flavor that beautifully stands in for traditional butter or oil. You have many options here, which we detail in the section below.
- **Coconut Sugar:** Our preferred sweetener, offering a mild, caramel-like sweetness without being overpowering. If you don’t have coconut sugar, don’t fret – we provide easy substitution options in the recipe notes.
- **Water:** Essential for bringing the batter together into the perfect smooth, pourable consistency needed for our no-roll method.
- **Vanilla Extract:** A touch of vanilla enhances the overall aroma and complements the warm spices beautifully.
- **Speculaas Spices:** This is the heart of the “Biscoff” flavor! A fragrant blend typically comprising cinnamon, ginger, cloves, cardamom, nutmeg, and a hint of black pepper. This combination creates that signature warm, inviting spice profile.
- **Salt:** A small amount of salt is vital to balance the sweetness and intensify the complex flavors of the spices, making every bite more impactful.
- **Baking Soda:** Our chosen leavening agent, added at a specific stage in the blending process to ensure the cookies achieve their desired light and crisp texture.
Please don’t be concerned if your spice rack doesn’t contain every single spice listed for the speculaas blend. These cookies are wonderfully forgiving! You can easily adapt by using a combination of what you have on hand. For instance, you could use 1.5 teaspoons of cinnamon alone for a delightfully simplified spiced flavor, or even a pre-made pumpkin pie spice blend for ultimate convenience. The goal is a warm, aromatic cookie, and flexibility with your spice choices is absolutely encouraged to suit your pantry and palate.
Customizing Your Cookies: The Versatile Role of Nuts & Seeds
While hearty rolled oats form the foundational base of these remarkable cookies, the second most influential ingredient in achieving their delightful crispness and rich, complex flavor is your strategic choice of nuts or seeds. In the clever absence of traditional butter or oil, these healthy additions play a pivotal role. They not only contribute an incredibly satisfying crunch but also impart a wonderful depth of toasty, nutty flavor that truly elevates the speculaas experience, making them irresistible.
The true beauty of this recipe lies in its adaptability and your creative freedom. You have the flexibility to use almost any nuts or seeds you prefer, or simply whatever you happen to have stocked in your pantry. Popular and highly recommended choices include walnuts, pecans, pepitas (shelled pumpkin seeds), peanuts, almonds, cashews, or sunflower seed kernels. Each option will lend a slightly different, nuanced flavor profile to your finished cookies, allowing you to customize them perfectly to your personal taste preferences. For an even easier preparation option, you can substitute the whole nuts or seeds with 70 grams (approximately 1/4 to 1/3 cup, depending on consistency) of your favorite smooth nut butter or seed butter, such as almond butter or sunflower seed butter.
This recipe specifically calls for a precise 70 grams (about 2.5 ounces) of your chosen nuts or seeds. When measuring by volume, it’s important to note that this amount can vary slightly depending on the size, shape, and density of your chosen ingredient. For larger nuts like whole walnuts, pecans, or cashews, 70 grams will typically measure between 1/2 cup and 2/3 cup. If you’re using smaller nuts or seeds, such as pepitas, sunflower seeds, or already chopped nuts, the same 70-gram weight will generally fall between 1/3 cup and 1/2 cup.
For the most consistent and optimal results – which is especially important in baking where precision truly matters – we highly recommend **weighing your nuts or seeds** using a digital kitchen scale. This simple yet indispensable tool provides incredible accuracy and completely eliminates the inconsistencies that can arise from volume measurements, ensuring your cookies turn out perfectly crisp and delicious every single time. A digital kitchen scale is truly one of the most valuable and frequently used tools in any baker’s arsenal, guaranteeing reliability and success.
**Pro Tip for Enhanced Flavor:** To significantly intensify the nutty flavor of your chosen nuts or seeds, consider toasting them lightly before adding them to the blender. Simply spread them in a single layer on a baking sheet and toast them in the preheating oven for about 5-10 minutes, or until they become wonderfully fragrant. Remember to keep a close eye on them to prevent burning, as smaller seeds and chopped nuts can toast very quickly!
Step-by-Step Guide to Baking Your Easy No-Roll Speculaas Cookies
**For the full, detailed instructions and precise ingredient quantities, please refer to the complete recipe card provided at the very end of this post.** This section offers a simplified, step-by-step overview to confidently guide you through each stage of the baking process.
Step One: Prepare Your Oven and Baking Sheet
Begin by preheating your oven to a steady 350°F (180°C). Next, it’s time to prepare your baking surface. Line a large, rimmed baking sheet with parchment paper to prevent sticking and ensure effortless cleanup. A standard half-sheet pan, typically measuring 18 x 13 inches (45 x 32.5 cm), works perfectly for this recipe. If you are comfortable with a minimal amount of oil, you can also lightly spray the pan with nonstick cooking spray. Alternatively, if you own a ceramic nonstick half-sheet pan, no paper or spray is necessary, making cleanup even easier.
Important Note on Pan Size: The thickness of your cookie sheet directly impacts baking time and crispness. If your baking sheet is smaller than a half-sheet pan, your cookie batter will spread thicker, consequently requiring a longer baking time to achieve the desired crisp texture. In such instances, it’s advisable to divide the batter and spread it across several smaller metal pans (such as cake pans or square pans) to maintain an optimal, thin layer for even and thorough baking.
Step Two: Craft the Smooth Speculaas Cookie Batter
In your high-speed blender, combine the rolled oats, your chosen nuts or seeds, water, coconut sugar, the aromatic speculaas spices, vanilla extract, and salt. **It is crucial to note: do NOT add the baking soda at this initial stage.** Process these ingredients on high speed until the mixture is completely blended and wonderfully smooth. You’ll need to pause periodically, scrape down the sides of the blender container, and continue blending to ensure a perfectly uniform, creamy consistency. The final batter should visibly resemble a medium-thick pancake batter – pourable yet substantial enough to hold its shape when spread.
Achieving a truly smooth batter is a foundational step and key to the cookie’s optimal final texture. Do not rush this step; take your time to ensure all ingredients are fully integrated, and no large oat or nut pieces remain. This thorough blending process helps to properly activate the starches in the oats, which significantly contributes to the eventual crispness of the cookies.
Step Three: Incorporate the Baking Soda
Once your batter has reached its perfectly smooth consistency, and only at this point, carefully add the baking soda to the blender. Blend for just a few additional seconds – enough time to thoroughly and evenly combine the baking soda into the mixture. This strategic, late addition helps to ensure that the leavening agent is activated at the opportune moment during baking, contributing to the light and airy internal structure that will ultimately crisp up beautifully.
Step Four: Evenly Spread the Cookie Batter
Carefully pour all of the prepared cookie batter onto your lined baking sheet. Using a spatula, spread the batter evenly across the entire surface of the baking sheet. The goal is a consistent thickness from edge to edge, as this promotes even baking and uniform crispness. An offset spatula is particularly effective for this task, allowing for smooth, uniform coverage with minimal effort. However, a regular silicone spatula or even the back of a large spoon will perform the job just as well. The main point is simply to ensure the batter forms an even, thin layer over the entire pan surface.
For an extra level of precision and evenness, once you’ve spread most of the batter, gently lift and tilt the baking sheet from side to side. This simple technique helps the batter settle into any small gaps or uneven areas, ensuring a perfectly flat and consistent canvas for your future cookies.
Step Five: Initial Bake and Scoring
Place the baking sheet with the evenly spread batter into your preheated oven and bake for an initial 10 minutes. This crucial short bake time allows the cookie batter to firm up slightly, making it significantly easier to portion into individual cookies without them sticking, tearing, or losing their shape. Keep the oven on after this step, as the cookies will return for their final bake.
After the initial 10 minutes, remove the baking sheet from the oven. Using a pastry scraper or a knife (it doesn’t need to be exceptionally sharp, as the cookies are still tender), gently score the semi-baked cookie sheet into your desired shapes. Rectangles are a classic and highly efficient choice; for example, cutting into 7 x 8 rows will easily yield 56 perfectly sized rectangular cookies. The cookies will still be soft and tender at this stage, so cutting through them is remarkably easy and takes only a moment. This pre-scoring ensures clean breaks and defined shapes once they are fully crisp.
Step Six: Final Bake to Golden Perfection
Return the scored cookies to the oven for their final and most important bake. Continue baking for an additional 30 to 35 minutes. During this phase, you’re looking for the cookies to undergo a beautiful transformation: they should turn a deep golden brown color, become wonderfully crispy to the touch, and appear thoroughly dry. As they continue to bake, the remaining moisture evaporates, and the cookies will naturally begin to pull away from each other along the scored lines, making eventual separation even easier and cleaner.
It’s important to keep a close watch during this stage, especially on the cookies along the outer edges of the baking sheet. These tend to brown and crisp up more quickly due to greater heat exposure than those in the center. Once they reach a deep golden brown and feel firm and dry, carefully remove these finished cookies to a wire cooling rack. If any cookies in the center still appear lighter or feel slightly soft, simply return the baking sheet to the oven for a few more minutes, checking frequently, until they achieve that same desirable crisp, dry, and deeply golden state. Don’t be afraid to give them the extra time they need; this is crucial for achieving ultimate crispness and the authentic speculaas texture!
Step Seven: Cool Completely and Indulge
Once all your delicious speculaas cookies are baked to golden perfection, gently transfer them to a wire cooling rack. This step is essential: it’s crucial to let them cool completely before tasting or storing. While they cool relatively quickly, this process is vital for them to fully firm up and reach their peak crispness. Once thoroughly cooled, prepare to sample your delightful work – we have a strong feeling they won’t last long, as their enticing aroma and irresistible taste will call to you!
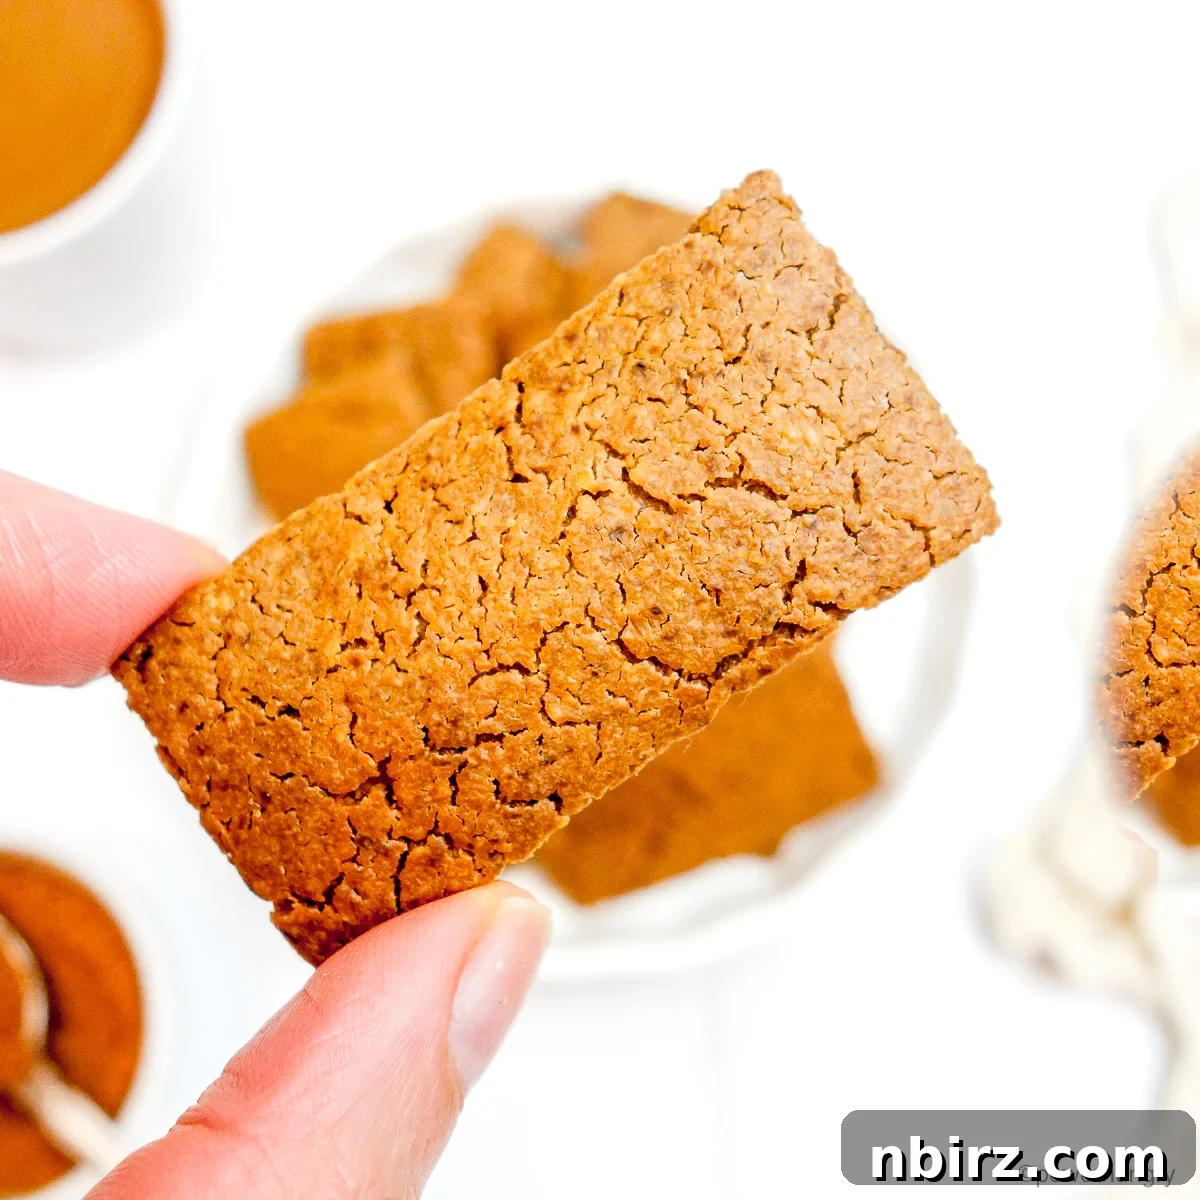
The Exquisite Taste and Texture of These Vegan Oat Speculaas Cookies
Prepare your palate for a truly satisfying and memorable experience with these homemade vegan oat speculaas cookies. Their flavor profile is beautifully complex yet subtly balanced, designed to captivate your senses without overwhelming them. While the specific variety of nuts or seeds you choose will impart a slight, delightful variation in taste, the overall essence is consistently wonderful: a lightly spiced, not-too-sweet, wonderfully toasty, and nutty flavor that lingers pleasantly on the tongue, inviting another bite.
These cookies are an absolute dream alongside your favorite hot beverage, making them the perfect companion for a cozy moment. Imagine savoring their warmth and spice with a steaming cup of freshly brewed coffee, a comforting mug of fragrant herbal tea, or even a rich, indulgent hot chocolate. The harmonious interplay of the warm, festive spices with your chosen drink creates an unparalleled comforting and cozy experience, perfect for any time of day.
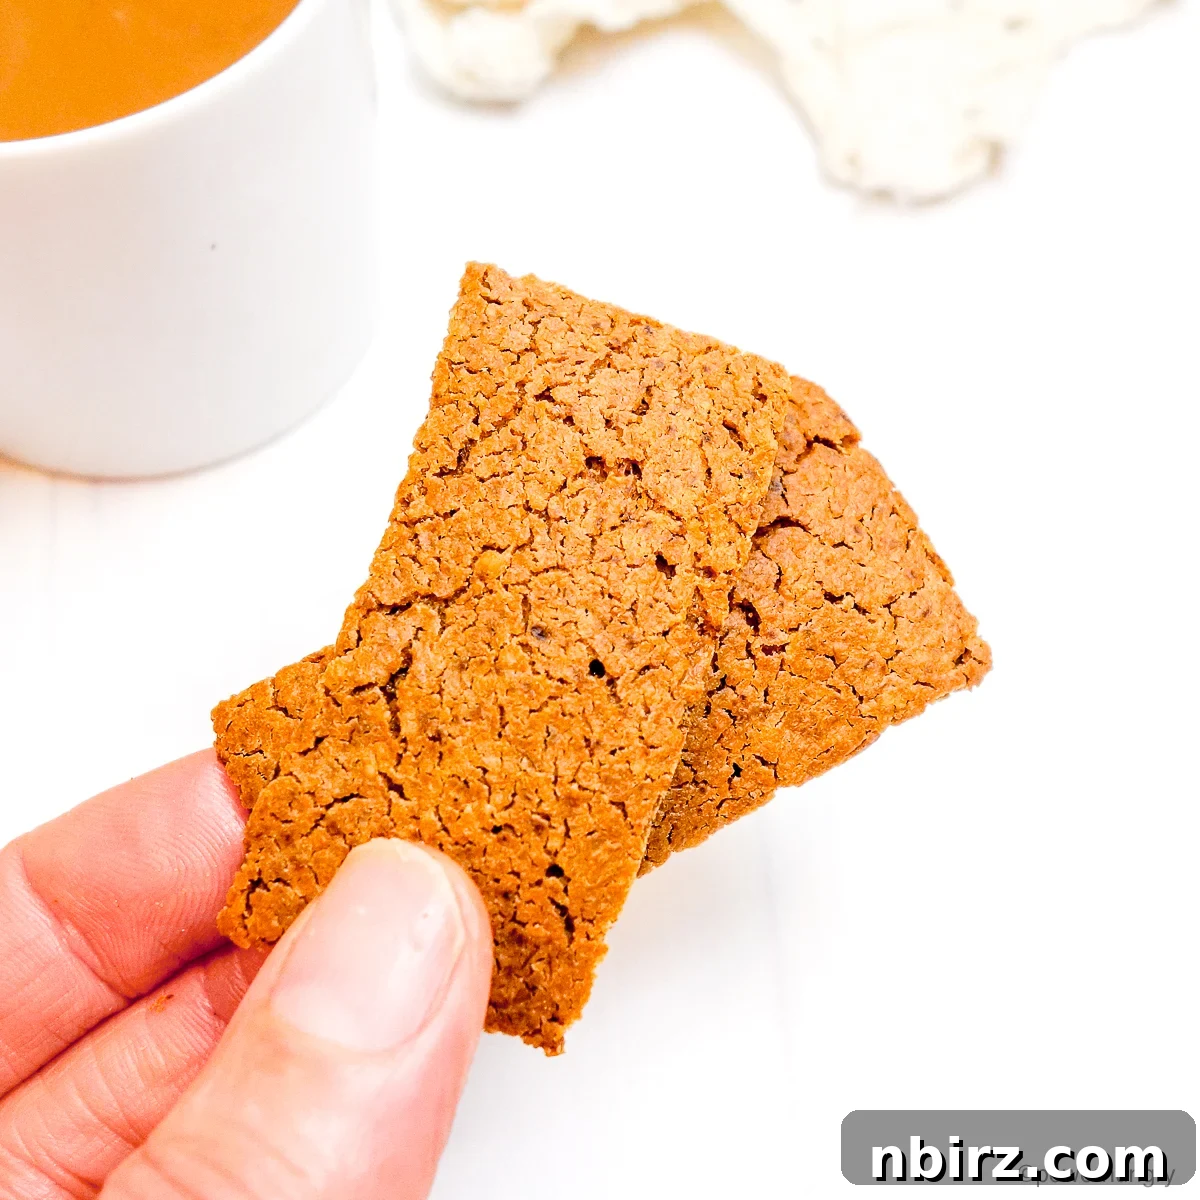
Beyond the taste, the texture is a true highlight and a testament to the recipe’s ingenuity. These speculaas cookies achieve a perfect crisp-tender consistency – they are firm enough to snap satisfyingly when broken, yet tender enough to melt delicately in your mouth without being overly hard or brittle. This unique and desirable texture, achieved remarkably without any added oils or butter, is a testament to the thoughtful balance of ingredients and precise baking technique. Each bite offers a delightful initial crunch followed by a gentle, comforting crumble, making them utterly addictive and thoroughly enjoyable.
Frequently Asked Questions (FAQ) About Our Oat Speculaas Cookies
Have questions about making or enjoying your delicious vegan oat speculaas cookies? Here are some common queries and helpful, detailed answers to ensure your baking success and enjoyment:
-
How Should These Gluten-Free Cookies Be Stored to Maintain Freshness?
For optimal freshness and to preserve their delightful crispness, store the completely cooled cookies in an airtight container at cool room temperature for up to 5 days. If you wish to extend their shelf life further, they can be kept in the refrigerator for up to 2 weeks. For long-term storage, these cookies freeze beautifully for up to 6 months. Rest assured, they maintain their wonderful crisp texture remarkably well after any storage method.
-
Can These Be Made into Bigger or Smaller Oat Cookies?
Absolutely, this recipe is incredibly versatile and allows for creative customization! You can easily cut the semi-baked cookie sheet into any shape or size you desire. Whether you prefer larger, more substantial cookies for a heartier snack or smaller, bite-sized treats perfect for sharing, the baking process remains fundamentally the same. When opting for larger cookies, the total baking time will stay approximately similar, but it’s always wise to start checking for doneness around the 30-minute mark during the second bake to ensure they don’t overcook and become overly dark.
-
Is There a Way to Make The Cookies Even Crispier?
Indeed there is! If your dietary preferences permit the inclusion of oils, you can further enhance the crispiness of these cookies by replacing a small portion of the water with a neutral-flavored oil. Excellent choices include avocado oil, light olive oil, or safflower oil. For every tablespoon of oil you choose to add, simply reduce the amount of water in the recipe by 1 tablespoon. This adjustment will yield an even snappier, more robustly crisp cookie texture.
-
Can I Use Roasted Nuts or Seeds, or Should They Be Raw?
Yes, absolutely! Using pre-roasted nuts or seeds will impart an even deeper, more complex toasted flavor to your cookies, which is highly recommended for an extra layer of deliciousness. If you only have raw nuts or seeds on hand, you can easily toast them yourself before adding them to the blender. Simply spread them in a single layer on a baking sheet and toast them in the oven while it preheats. Be mindful if your roasted nuts or seeds are already salted (e.g., store-bought salted peanuts); in that case, you might want to slightly decrease the total amount of added salt in the cookie batter to maintain optimal flavor balance and prevent over-salting.
-
Can I Omit the Nuts/Seeds and Replace with More Oats?
While theoretically possible to substitute the nuts or seeds with an equal amount of additional oats, we strongly advise against this modification for this particular recipe. The nuts or seeds are absolutely essential for providing the necessary healthy fats and structural integrity that contribute directly to the desirable crisp, rather than tough, texture of these oil-free cookies. Without them, the cookies may become too dense or chewy. For the best, most satisfying, and crispiest results, we highly recommend adhering to the specified amounts of nuts or seeds as listed in the recipe.
-
Can I Use a Food Processor Instead of a Blender?
Yes, a food processor can certainly be used as an effective alternative to a blender for this recipe. However, it’s worth noting that a high-speed blender typically yields a smoother batter more quickly and efficiently, especially when processing harder nuts or seeds into a very fine consistency. If you’re using a food processor, you may need to blend the batter for a slightly longer duration, stopping and scraping down the sides of the bowl more frequently, until it achieves a very smooth and uniform texture, similar to a thick pancake batter.
-
Can I Use Oat Flour in Place of the Rolled Oats?
Absolutely, you can confidently substitute oat flour for the rolled oats in this recipe. For the most accurate and consistent results, ensure you use the exact same weight (175 grams) of oat flour as you would rolled oats. This critical step ensures the correct dry-to-liquid ratio for the batter, which is vital for the cookies’ final texture and structure.
-
What Is a Good Substitute for Coconut Sugar if I Don’t Have Any?
If you don’t have coconut sugar on hand, an equal amount of packed brown sugar makes an excellent and highly recommended substitute. Brown sugar will impart a very similar caramelized sweetness and will also contribute a slightly deeper color to your finished cookies, aligning well with the speculaas flavor profile.
Happy baking, and enjoy your delightful homemade speculaas cookies!
Related Wholesome & Easy Baking Recipes You’ll Love
If you thoroughly enjoyed making these no-roll oat speculaas cookies, you might also be interested in exploring other similarly easy, healthy, and incredibly delicious baking recipes from our collection. Here are some favorites that share common themes of being plant-based, gluten-free, or oil-free, perfect for expanding your repertoire of wholesome snacks and delightful treats:
- 2-Ingredient Almond Flour Crackers (Vegan, Keto, Oil-Free)
- Almond Oat Chickpea Flour Crackers (Vegan, Gluten-Free, Oil-Free)
- 3-Ingredient Teff Crackers (Gluten-Free, Vegan)
- Easy No-Roll Oat Crackers (Oil-free, Vegan, Gluten-Free)
- Easy No-Roll Cassava Flour Crackers (2 Ingredients)
Vegan Oat Speculaas Cookies (Easy, GF, Oil-Free)
By: Camilla
No roll vegan oat speculaas cookies (like Biscoff) that are as easy as blend, pour and bake! These not-too-sweet cookies are also gluten-free and oil-free.
5 minutes
45 minutes
50 minutes
56 rectangular cookies
5 from 4 votes
Equipment
- 1 Large Baking Sheet (light in color)
- Blender (preferably high-speed)
- Spatula or Offset Spatula
- Pastry Scraper or Knife
- Wire Cooling Rack
- Optional: Digital Kitchen Scale
Ingredients
US Customary – Metric
- 1.75 cups rolled oats (certified GF as needed)
- 1/2 cup coconut sugar (see notes for options)
- 70 grams nuts or seeds of choice (approx. 1/3 to 2/3 cup, see notes)
- 1.5 cups water
- 1.5 teaspoons speculaas spice combination (see notes below)
- 1 teaspoon vanilla extract
- 1/2 teaspoon salt
- 1/2 teaspoon baking soda
Instructions
- **Preheat Oven & Prep Pan:** Preheat your oven to 350°F (180°C). Line a large, rimmed baking sheet (an 18×13 inch half sheet pan is ideal) with parchment paper. Alternatively, you can lightly spray with nonstick cooking spray if you use oil.
- **Blend Wet & Dry (No Baking Soda):** In a high-speed blender, combine the rolled oats, coconut sugar, nuts or seeds, water, speculaas spices, vanilla extract, and salt. Process on high speed until the mixture is completely smooth. Stop and scrape down the sides of the container several times to ensure all ingredients are fully incorporated.
- **Add Baking Soda:** Once the batter is smooth, add the baking soda to the blender. Blend for just a few seconds to thoroughly combine.
- **Spread Batter:** Pour the batter onto the prepared baking sheet. Use a spatula (an offset spatula works best) to spread it into an even, thin layer across the entire surface. Gently lift and tilt the pan to help achieve uniform coverage.
- **Initial Bake & Score:** Bake in the preheated oven for 10 minutes. Remove the baking sheet from the oven. Using a knife or a pastry scraper, carefully cut the semi-baked cookie sheet into rectangles (e.g., 7×8 rows for 56 cookies) or your desired shapes.
- **Final Bake:** Return the scored cookies to the oven and continue baking for another 30 to 35 minutes, or until they are deep golden brown, appear dry, and feel firm to the touch. The cookies will separate along the cut lines as they bake.
- **Cool Completely:** Monitor the cookies closely; those on the outer edges may brown faster. Remove any fully baked, crispy cookies to a wire cooling rack. If center cookies need more time, return the sheet to the oven for a few minutes until they reach desired crispness. Transfer all cookies to a wire cooling rack and allow them to cool completely before serving or storing.
Notes
- **Speculaas Spice Combination:** To make your own, combine 3/4 tsp ground cinnamon, 1/4 tsp ground ginger, 1/8 tsp ground cardamom, 1/8 tsp ground nutmeg, 1/8 tsp ground black pepper, and a pinch of ground cloves. Adjust amounts or substitute with what you have (e.g., all cinnamon or pumpkin pie spice).
- **Storage:** Store cooled cookies in an airtight container at cool room temperature for 5 days, in the refrigerator for 2 weeks, or freezer for up to 6 months. They stay crisp!
- **Nut & Seed Suggestions:** Use any nuts or seeds you prefer: walnuts, pecans, pepitas, peanuts, almonds, cashews, or sunflower seed kernels. Toasted or roasted nuts can also be used; if salted, consider reducing the added salt.
- **Sugar Options:** An equal amount of brown sugar can be used in place of the coconut sugar.
Nutrition Information
- Serving:
- 2 cookies
- Calories:
- 112 kcal
- Carbohydrates:
- 15 g
- Protein:
- 4 g
- Fat:
- 4 g
- Saturated Fat:
- 1 g
- Polyunsaturated Fat:
- 3 g
- Sodium:
- 98 mg
- Fiber:
- 2 g
- Sugar:
- 1 g