
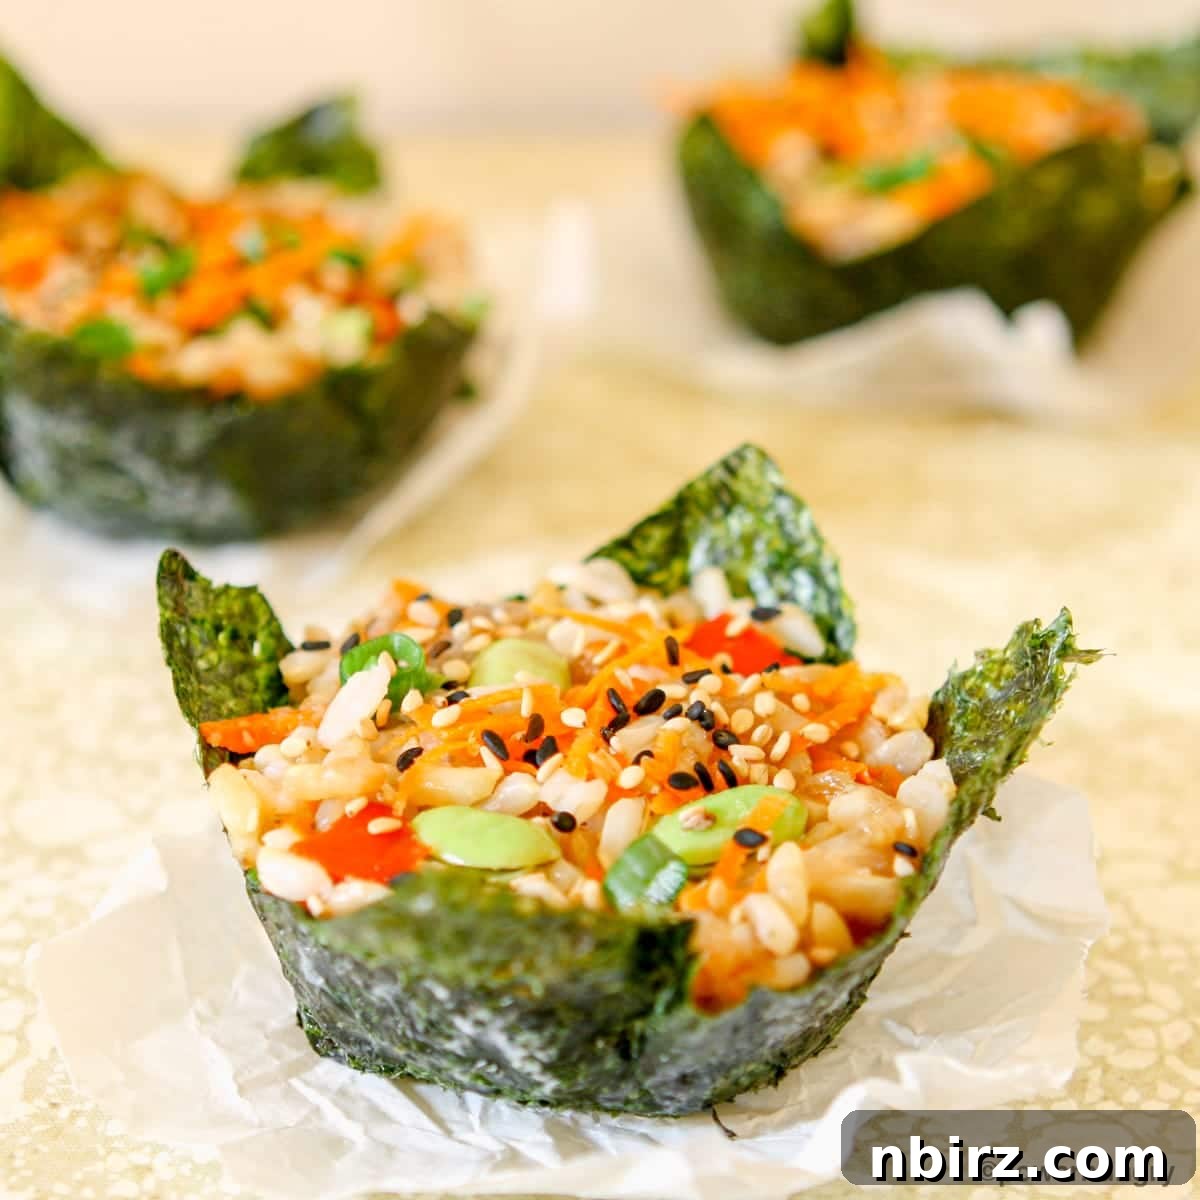
Looking for a hassle-free, nutritious, and incredibly tasty meal prep solution? My vegan, easy muffin tin sushi is the answer! This innovative recipe transforms traditional sushi into convenient, bite-sized “muffins” that are perfect for lunches, snacks, or even a light dinner. It’s naturally gluten-free, entirely oil-free, and loaded with the goodness of whole grains and fresh vegetables.
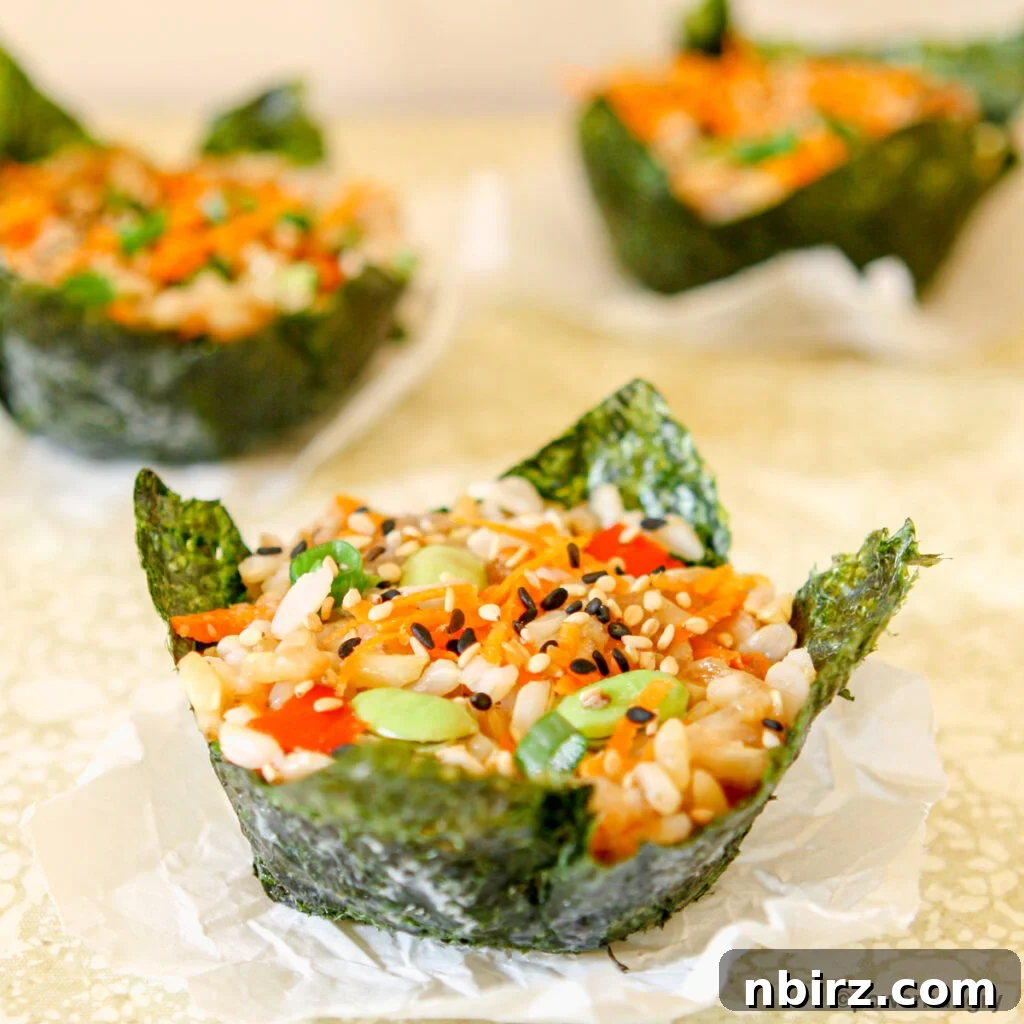
Easy & Healthy Vegan Muffin Tin Sushi: Your New Go-To Meal Prep!
My culinary journey with sushi was, to put it mildly, a late blooming affair. For many years, the very thought of it was tied to my lifelong aversion to fish. The idea of raw fish, no matter how artfully presented, was simply not for me. This preconception kept me from exploring a vast and vibrant culinary world. However, a significant culinary turning point arrived when I finally decided to try my first California rolls. To my surprise and delight, these were made with wholesome brown rice and generously packed with a colorful array of my favorite crisp, fresh vegetables.
It was a true revelation. The experience was a harmonious symphony of flavors and textures: the satisfying chew of whole grains, the deep, savory umami, a delightful salty edge, the invigorating, pungent kick of wasabi and ginger, all exquisitely balanced with subtle sweet and sour notes. This delightful combination encompassed everything I loved about healthy eating, presented in one wonderfully convenient package. From that moment, I was captivated by the potential of sushi, particularly its plant-based variations.
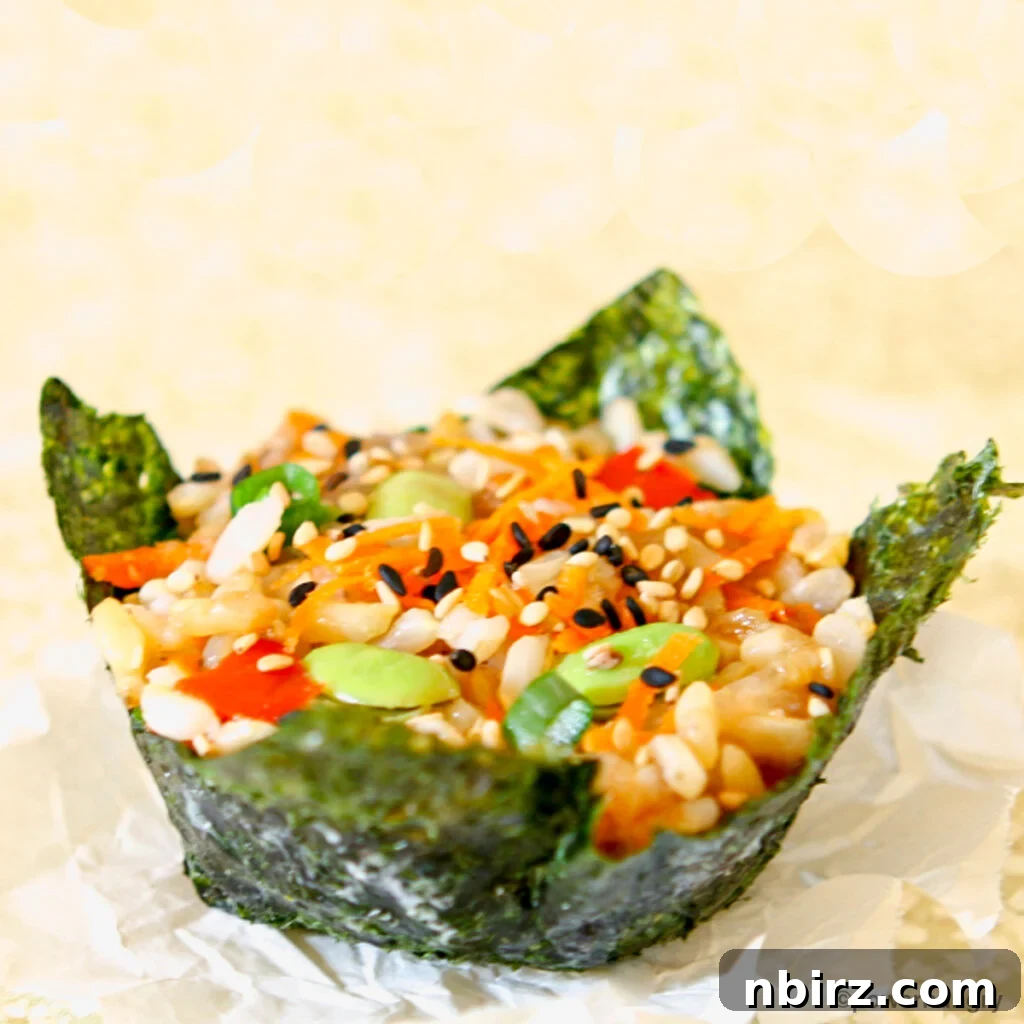
If you, like me, are a fan of the diverse flavors of sushi but prefer a fish-free, plant-based, or simply a less complicated approach, then I have the perfect, quick, and simple solution for you: my easy muffin tin sushi. This ingenious method elegantly bypasses the often-intimidating art of sushi rolling. Instead, perfectly seasoned sushi rice, combined with a vibrant assortment of fresh vegetables, is pressed firmly inside seaweed (nori)-lined muffin cups. The results are not only beautifully simple and incredibly delicious but also generous in size, making them an ideal choice for nutritious lunches, satisfying on-the-go snacks, or even a creative appetizer.
Why Choose Muffin Tin Sushi? The Health & Convenience Benefits Unveiled
Beyond its undeniable ease of preparation and delightful taste, this muffin tin sushi offers a wealth of benefits that make it a standout choice for health-conscious individuals and busy lifestyles alike:
- Completely Vegan: Crafted entirely from plant-based ingredients, this recipe is naturally egg-free and dairy-free. It’s a perfect option for anyone following a vegan diet, those with specific dietary restrictions, or simply exploring the vast possibilities of plant-forward cuisine. It demonstrates how satisfying and flavorful vegan meals can be.
- Naturally Gluten-Free: By utilizing brown rice and opting for gluten-free soy sauce (such as tamari) or amino alternatives, this recipe is inherently safe and delicious for individuals with gluten sensitivities, celiac disease, or those choosing a gluten-free lifestyle.
- Oil-Free & Wholesome: We deliberately skip any added oils, allowing the natural, fresh flavors and inherent textures of our chosen ingredients to truly shine. This approach makes for a lighter, cleaner, and even more heart-healthier meal option without sacrificing taste.
- Packed with Whole Grains: Brown rice forms the robust foundation of our sushi. Unlike white rice, brown rice retains its bran and germ layers, making it an excellent source of dietary fiber, complex carbohydrates, and essential micronutrients. This provides sustained energy, promotes better digestive health, and contributes to overall well-being.
- Effortlessly Easy to Make: Forget the frustrations often associated with mastering traditional sushi rolling techniques. If you can confidently cook a pot of rice and perform some basic vegetable chopping, you possess all the skills required to create this delicious sushi. It’s a beginner-friendly recipe that delivers impressive results.
- Perfectly Portable Portions: The individual, muffin-sized portions are incredibly convenient and designed for modern, active lifestyles. They are ideal for effortless meal prepping at the start of your week, making it easy to grab and pack for work, school lunches, picnics, road trips, or any occasion where you need a healthy, satisfying snack or meal on the go.
- Highly Customizable: This recipe provides a wonderfully versatile base that welcomes an extensive array of vegetable fillings and allows for flavor adjustments to perfectly suit your personal taste preferences and what you have available in your pantry.
Essential Ingredients for Your Muffin Tin Sushi Masterpiece
Crafting these delectable sushi bites requires a few key ingredients, most of which are readily available in well-stocked supermarkets or Asian grocery stores. We’ll be focusing on fresh, wholesome components to build layers of irresistible flavor and robust nutrition. Remember to check the recipe card at the end of this post for precise measurements and quantities, with options to toggle between US customary and metric units for your convenience.
- Uncooked Short-Grain Brown Rice: This is the crucial foundation of our sushi. Short-grain rice, specifically brown rice, is preferred here because it offers a satisfyingly chewy texture and the necessary stickiness that holds well in the muffin tin, while also delivering more fiber and nutrients than its white rice counterpart.
- Rice Vinegar (or Alternatives): Absolutely essential for seasoning the sushi rice, providing that classic, subtly sweet, and tangy flavor profile that defines sushi. If traditional rice vinegar is not at hand, good quality apple cider vinegar or even white vinegar can be used as effective substitutes.
- Soy Sauce (or Aminos): This ingredient adds invaluable depth, a rich umami flavor, and a pleasant saltiness. We recommend opting for a low-sodium variety if possible, or for those seeking a soy-free option, liquid aminos or coconut aminos are excellent, flavorful alternatives.
- Cane Sugar (or Your Preferred Sweetener): A small, carefully measured amount of sugar is vital for balancing the acidity of the vinegar and the savoriness of the soy sauce, contributing to the signature complex flavor of sushi rice. Feel free to use unrefined alternatives such as coconut sugar, maple syrup, or agave nectar, adjusting to your taste.
- Powdered Wasabi: This provides that distinctive, delightful pungent kick associated with sushi. You can typically find small containers of powdered Japanese horseradish in the Asian foods section of most well-stocked supermarkets. If powdered wasabi is unavailable, a small pinch or splash of cayenne pepper or your favorite hot sauce (such as sriracha) can mimic the heat effectively (refer to the notes section for more options).
- Nori (Roasted Seaweed Sheets): These edible seaweed wrappers are indispensable, not only holding all our delicious ingredients together but also imparting an authentic, oceanic sushi flavor that is irreplaceable.
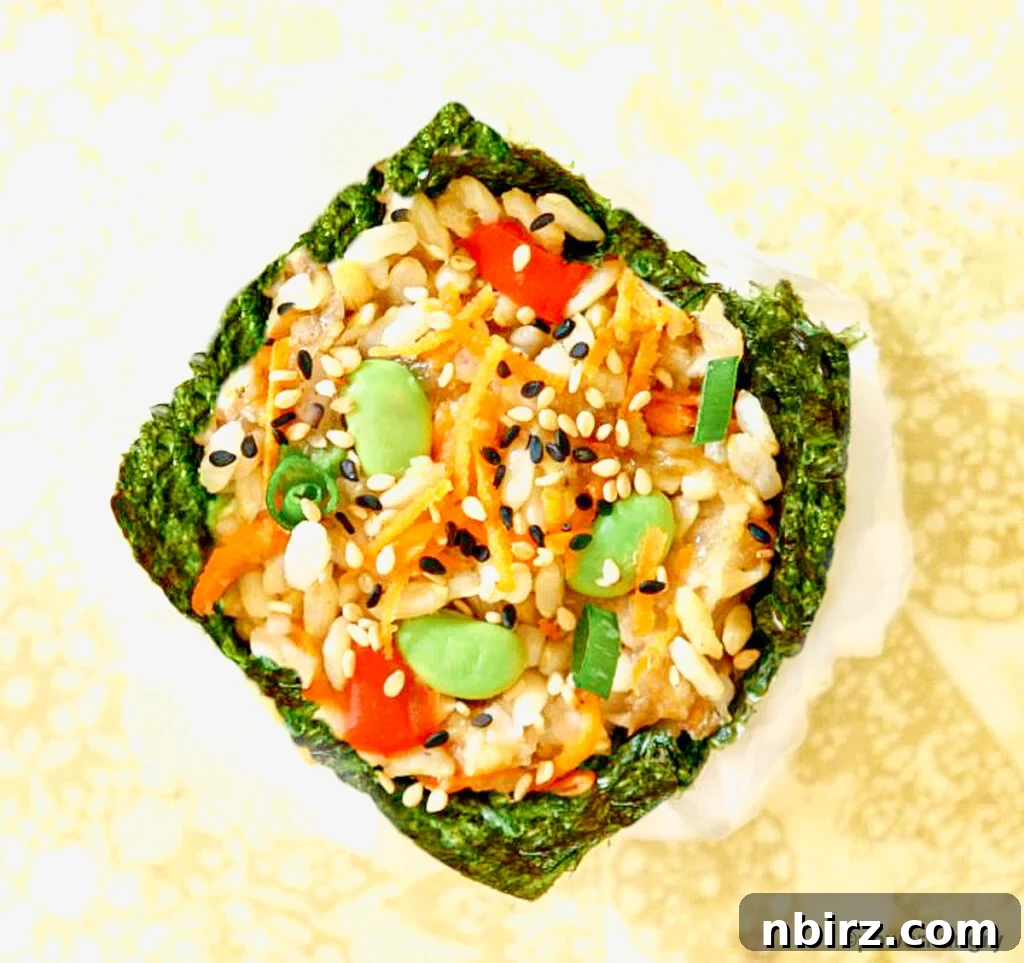
- Frozen Shelled Edamame: A fantastic source of plant-based protein, these vibrant green beans add a wonderful, slightly firm texture and a pop of color to the sushi mix. Ensure they are cooked and thoroughly cooled according to package directions before incorporating.
- Peeled, Shredded Carrots: Carrots contribute a natural sweetness, a satisfying crunch, and a beautiful burst of orange hue, enhancing both the flavor and visual appeal of the sushi. Approximately one medium carrot should yield the desired amount.
- Red Bell Pepper: Finely chopped red bell pepper adds a sweet, crisp texture and a striking red color, complementing the other vegetables beautifully.
- Green Onions (Scallions): Thinly sliced green onions provide a subtle, fresh oniony flavor and a touch of delicate crunch, lifting the overall taste profile.
- White or Black Sesame Seeds: Used primarily for garnish, these tiny seeds add a delicate nutty flavor and an appealing visual contrast to the finished sushi “muffins.”
Prepping Your Nori: A Simple Cut for Perfect Muffin Cups
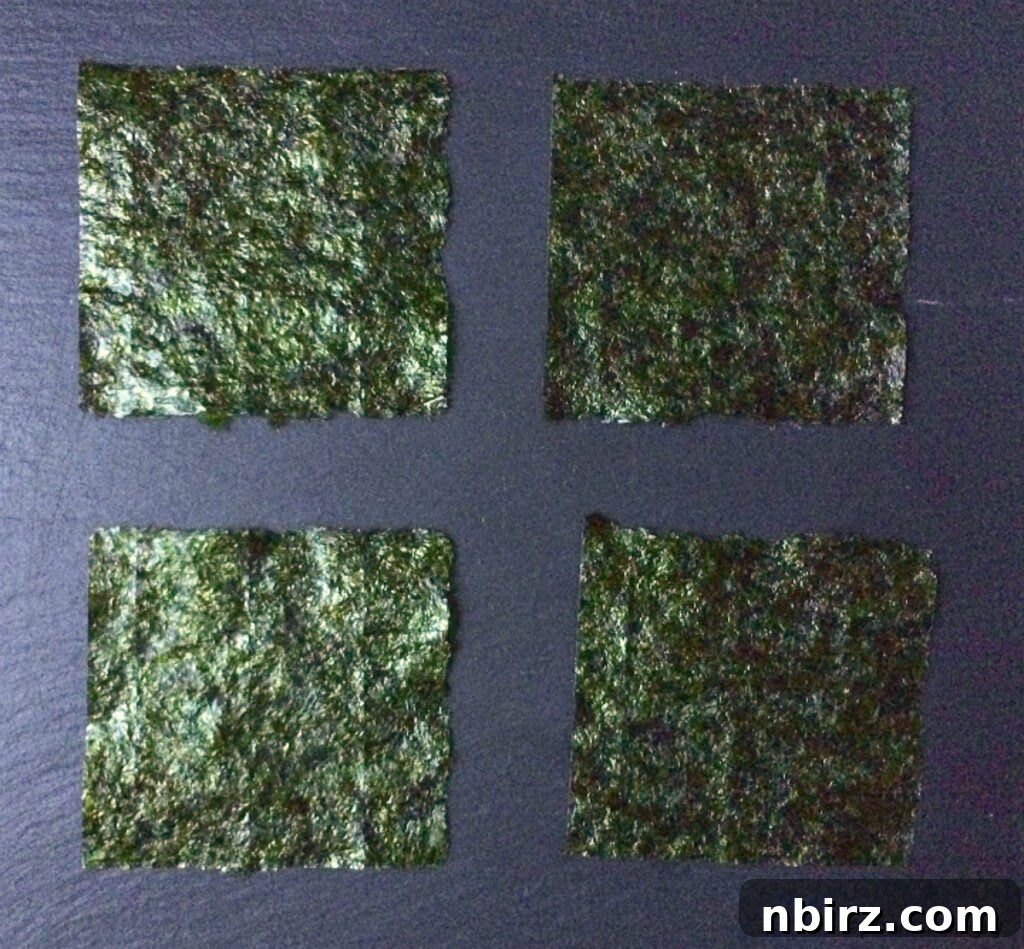
Nori sheets are typically sold in large, square pieces, which conveniently simplifies their preparation for our muffin tin sushi. You’ll find that each standard sheet can be easily quartered into smaller, equally sized squares. This simple cut creates perfectly dimensioned linings for your muffin cups, ensuring minimal waste and maximum convenience as you assemble your sushi.
Step-by-Step Directions: Crafting Your Muffin Tin Sushi
Creating these delightful sushi bites is a wonderfully straightforward process that absolutely does not require any specialized sushi-making expertise or tools. Just follow these clear, simple steps, and you’ll soon have perfectly formed, incredibly delicious sushi “muffins” ready to enjoy in no time. For your convenience, the complete recipe card with detailed measurements and instructions is also provided at the very end of this post.
- Cook the Brown Rice: Begin by preparing the short-grain brown rice according to the specific package directions. For optimal sushi texture, the goal is tender rice that retains a slight chewiness but is certainly not mushy. Once thoroughly cooked, transfer the hot rice to a large mixing bowl.
- Prepare the Seasoning Mixture: While your rice is cooking, turn your attention to the flavorful seasoning. In a small bowl or cup, vigorously whisk together the rice vinegar (or your chosen alternative), soy sauce (or aminos), cane sugar (or your preferred sweetener), powdered wasabi, and 1 tablespoon of hot water. Continue stirring until both the sugar and the wasabi powder are completely dissolved. Taste this mixture and adjust the seasoning as needed with a pinch of salt or a bit more soy sauce if desired, and a dash of freshly ground black pepper. This seasoned liquid is absolutely crucial for imparting that distinct, authentic sushi flavor to your rice.
- Combine Rice and Seasoning: Drizzle the prepared vinegar seasoning mixture evenly over the warm, cooked brown rice in the large bowl. Stir gently but thoroughly, ensuring that every single grain of rice is perfectly coated with the flavorful liquid. Allow the seasoned rice to cool for approximately 10 minutes. This brief cooling period is important as it helps the rice to fully absorb the delightful flavors and develop a slightly stickier, more cohesive texture.
- Mix in the Vegetables: Once the rice has cooled sufficiently, add the pre-cooked and thoroughly cooled shelled edamame, finely shredded carrots, chopped red bell pepper, and thinly sliced green onions to the bowl. Gently fold all these vibrant vegetables into the rice mixture until they are completely and evenly distributed throughout, creating a colorful and appetizing base.
- Prepare the Nori Liners: Take each full square sheet of nori and carefully fold it into quarters. Press firmly along the fold lines to create clear, defined creases. Unfold the sheet, and then, using kitchen shears or a sharp knife, cut precisely along these creases to create four equally sized squares from each larger nori sheet. These perfectly portioned squares will serve as the essential liners for your muffin cups.
- Fill the Muffin Tin: Prepare a standard 12-cup muffin tin by lightly greasing each cup or, for even easier removal, lining them with parchment paper muffin liners. Center one of your freshly cut nori squares over each prepared muffin cup. At this stage, do not push the nori down into the cup; simply let it rest over the opening.
- Form the Sushi Pucks: Take approximately ½ cup of your delicious rice and vegetable mixture and place it firmly in the very center of each nori square, directly over the muffin cup opening. Using your fingers or the back of a spoon, firmly press the rice mixture down into the muffin cup. As you do this, simultaneously press the nori paper against the sides of the cup, molding it around the rice to form a compact, perfectly shaped sushi “muffin.” Repeat this exact process for all remaining rice and nori squares until your muffin tin is full.
- Garnish and Chill: For an added layer of flavor and appealing visual contrast, sprinkle the tops of each muffin tin sushi generously with either white or black sesame seeds.
- Refrigerate and Serve: Refrigerate the fully prepared sushi for a minimum of 2 hours. This crucial chilling period allows the sushi to firm up significantly, making it much easier to carefully remove from the muffin tin without losing its shape. Once thoroughly chilled and firm, gently remove the sushi “muffins” from the muffin tin and serve. They are absolutely delicious on their own, or you can pair them with your favorite dipping sauce like extra soy sauce, a dollop of sriracha, or some sweet chili sauce.
Frequently Asked Questions (FAQ) About Muffin Tin Sushi
Here are answers to some common questions you might have about making, storing, and enjoying your delightful muffin tin sushi:
- How should I store the easy muffin tin sushi?
To maintain freshness and flavor, store your finished sushi “muffins” in an airtight container in the refrigerator. They will keep well for up to 3 days. We strongly advise against freezing the muffin tin sushi, as the delicate texture of the cooked rice and fresh vegetables can significantly degrade upon thawing, leading to a mushy or undesirable consistency. - Where can I find wasabi?
You can typically locate small containers of powdered wasabi (also known as Japanese horseradish) in the Asian foods section of most large, well-stocked supermarkets. It often comes in a small tin or pouch. If you are unable to find powdered wasabi, or if you prefer a different kind of heat, feel free to substitute with a small pinch or a dash of cayenne pepper, or a bit of your favorite hot sauce, such as sriracha, for a similar spicy kick. - What can I use as a sweetener in place of cane sugar?
Sushi rice traditionally incorporates a touch of sugar to expertly balance the tanginess of the vinegar. You are absolutely welcome to use any sweetener of your choice, even if it might be considered unconventional for traditional sushi. Popular and healthier alternatives include coconut sugar, maple syrup, or agave nectar. Adjust the quantity to achieve your personal preferred level of sweetness. - Can I vary the vegetables with other options?
Absolutely! This recipe is incredibly adaptable and encourages creativity. While we’ve suggested a delicious combination of shredded carrots, cooked edamame, green onions, and red bell pepper, please feel free to experiment with any vegetables you personally enjoy or happen to have on hand. Finely diced cucumber, thinly sliced radishes, blanched and chopped asparagus, or even thinly sliced bell peppers of different colors are all excellent additions that can add new textures and flavors. - What are some other ways to vary the muffin tin sushi?
Beyond simply mixing vegetables directly into the rice, you can also opt to keep the seasoned rice mixture relatively plain and then add toppings later. This method works exceptionally well for more delicate ingredients such as fresh avocado slices or crisp cucumber pieces, which are best added right before serving if you intend to store the sushi for several days. Other exciting topping ideas include a drizzle of spicy vegan mayo, a sprinkle of toasted cashews or peanuts for extra crunch, or a dollop of pickled ginger. - Can I add pickled ginger to the muffin tin sushi?
Yes, and it’s highly recommended for an extra burst of that authentic sushi flavor! If your supermarket happens to sell pickled ginger in its Asian foods section, consider adding a chopped tablespoon or two directly into the rice mix for an integrated flavor. Alternatively, for a vibrant and tangy garnish, simply place a small amount of pickled ginger on top of the prepared sushi “muffins” just before serving.
Happy, healthy, and perfectly portable eating!
Related Plant-Based Recipes You’ll Love
If you enjoyed crafting and savoring this easy vegan muffin tin sushi recipe, we encourage you to explore more wholesome and delicious plant-based dishes from our diverse collection. Expand your culinary repertoire with these fantastic options:
- Brown Rice Chickpea Flour Breads {4 ingredients, vegan, gluten-free}
- Easy 2-Ingredient Brown Rice Chips (oil-free, V, GF)
- Vegan Baked Rice Pudding Cups (vegan, gluten-free}
- Vegan Gluten-Free Oat Sandwich Bread {oil-free, yeast-free}
- Flourless Brown Rice Yeast Bread (oil-free, no psyllium)
Easy Muffin Tin Sushi (Vegan, Gluten-Free) Recipe Card
Effortlessly make delicious, portable sushi at home with this simple muffin tin method. Perfect for healthy, plant-based meals and snacks!
Prep Time: 10 minutes
Cook Time: 50 minutes
Total Time: 1 hour
Servings: 8 sushi “muffins”
Ingredients
- 1 cup uncooked short-grain brown rice
- 2 tablespoons (30 mL) vinegar (rice vinegar, apple cider vinegar, or white vinegar)
- 2 teaspoons (10 mL) soy sauce (or liquid aminos, or coconut aminos)
- 1 ½ teaspoons cane sugar (or sweetener of your choice like coconut sugar, maple syrup, or agave nectar)
- 1 teaspoon powdered wasabi (or a pinch of cayenne/hot sauce)
- 2 sheets nori (seaweed paper), cut into quarters
- ¾ cup shelled edamame, cooked and cooled
- ½ cup peeled, shredded carrots (about 1 medium carrot)
- ⅓ cup chopped red bell pepper
- 2 small green onions, thinly sliced
- 2 teaspoons white or black sesame seeds
- Salt and pepper to taste
Instructions
- Prepare the brown rice according to package directions.
- Meanwhile, in a small bowl, whisk together vinegar, soy sauce, sugar, wasabi, and 1 tablespoon hot water. Season with salt and pepper to taste.
- Transfer cooked rice to a large bowl. Drizzle with the vinegar mixture, stirring to combine. Cool for 10 minutes.
- Stir in the edamame, carrots, bell pepper, and green onions until combined.
- Fold the nori sheets into quarters, pressing along fold lines. Unfold and cut along the fold lines to create 8 nori squares.
- Center 1 nori square over each cup of a lightly greased or parchment-lined standard 12-cup muffin tin (do not push down into cup yet).
- Place about ½ cup of the rice mixture in the middle of each nori square. Firmly press the rice and nori mixture into the muffin cup, shaping it into a compact “muffin.” Repeat with the remaining rice and nori.
- Sprinkle the tops of the muffin tin sushi with sesame seeds.
- Refrigerate for at least 2 hours until cold and firm. Remove sushi “muffins” from the muffin tin and serve.
Notes
- Storage: Store in an airtight container in the refrigerator for up to 3 days. Freezing is not recommended as it can negatively impact the texture.
- Wasabi Alternatives: If powdered wasabi is unavailable, a pinch of cayenne pepper or a splash of sriracha can provide a similar spicy kick.
- Sweetener Options: Feel free to use coconut sugar, maple syrup, or agave nectar in place of cane sugar to suit your dietary preferences.
- Vegetable Variations: Customize your sushi with other favorites like diced cucumber, avocado (add just before serving to prevent browning), thinly sliced radish, or blanched asparagus.
- Pickled Ginger: For an extra layer of authentic flavor, chop and mix 1-2 tablespoons of pickled ginger into the rice, or serve it on top of the finished sushi.
Nutrition Information (Approximate per sushi “muffin”)
- Serving: 1 sushi “muffin”
- Calories: 131 kcal
- Carbohydrates: 22.3 g
- Protein: 5.4 g
- Fat: 2.3 g
- Sodium: 86 mg
- Fiber: 2.4 g
- Sugar: 1.1 g