
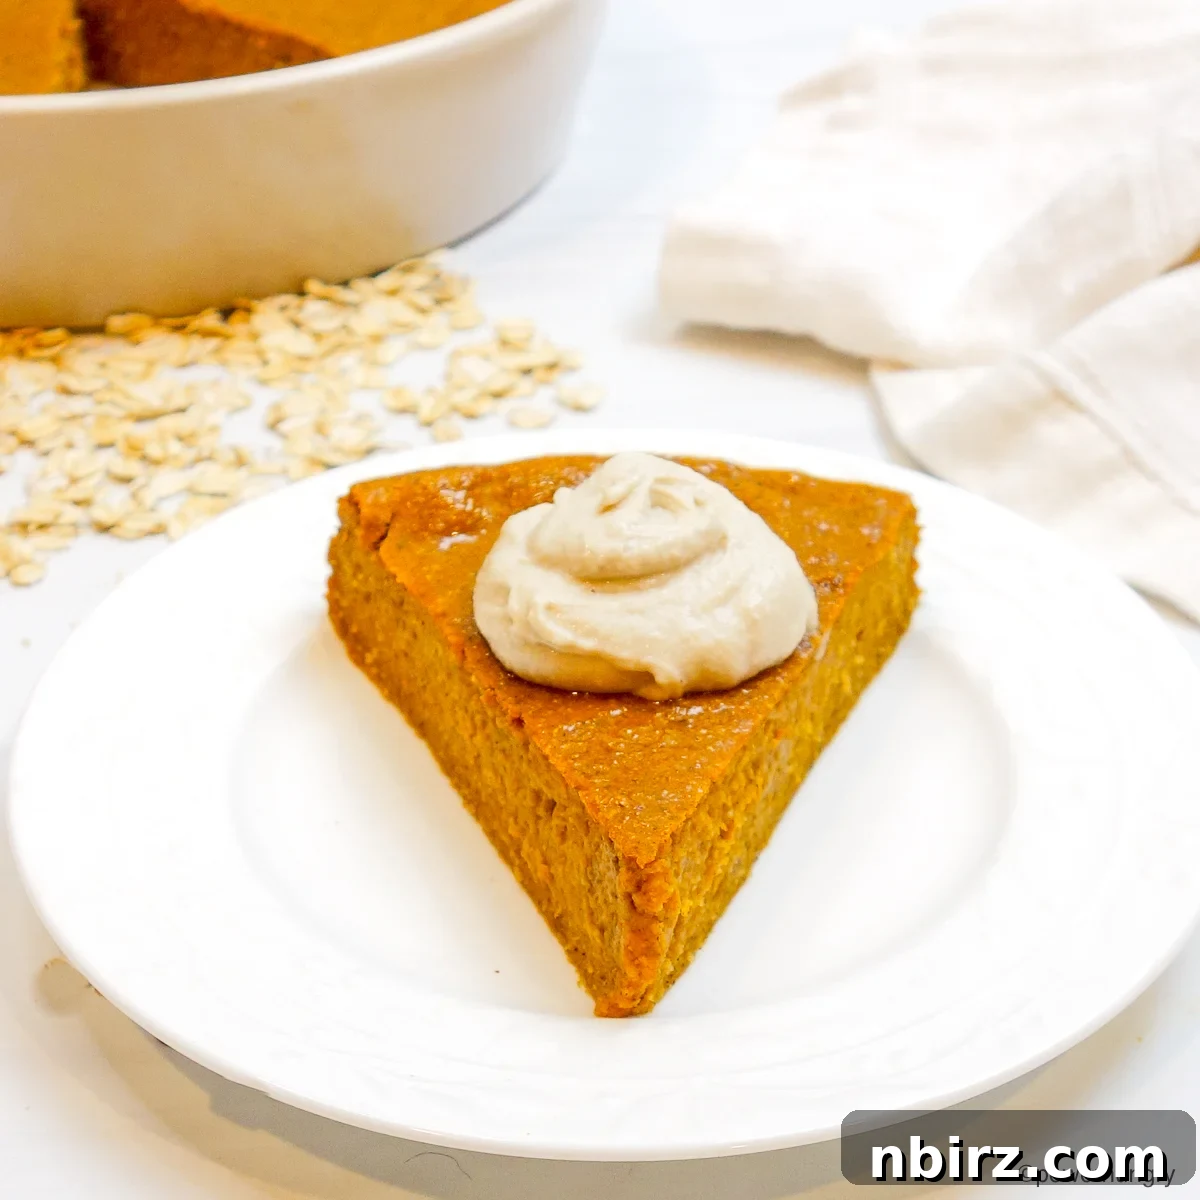
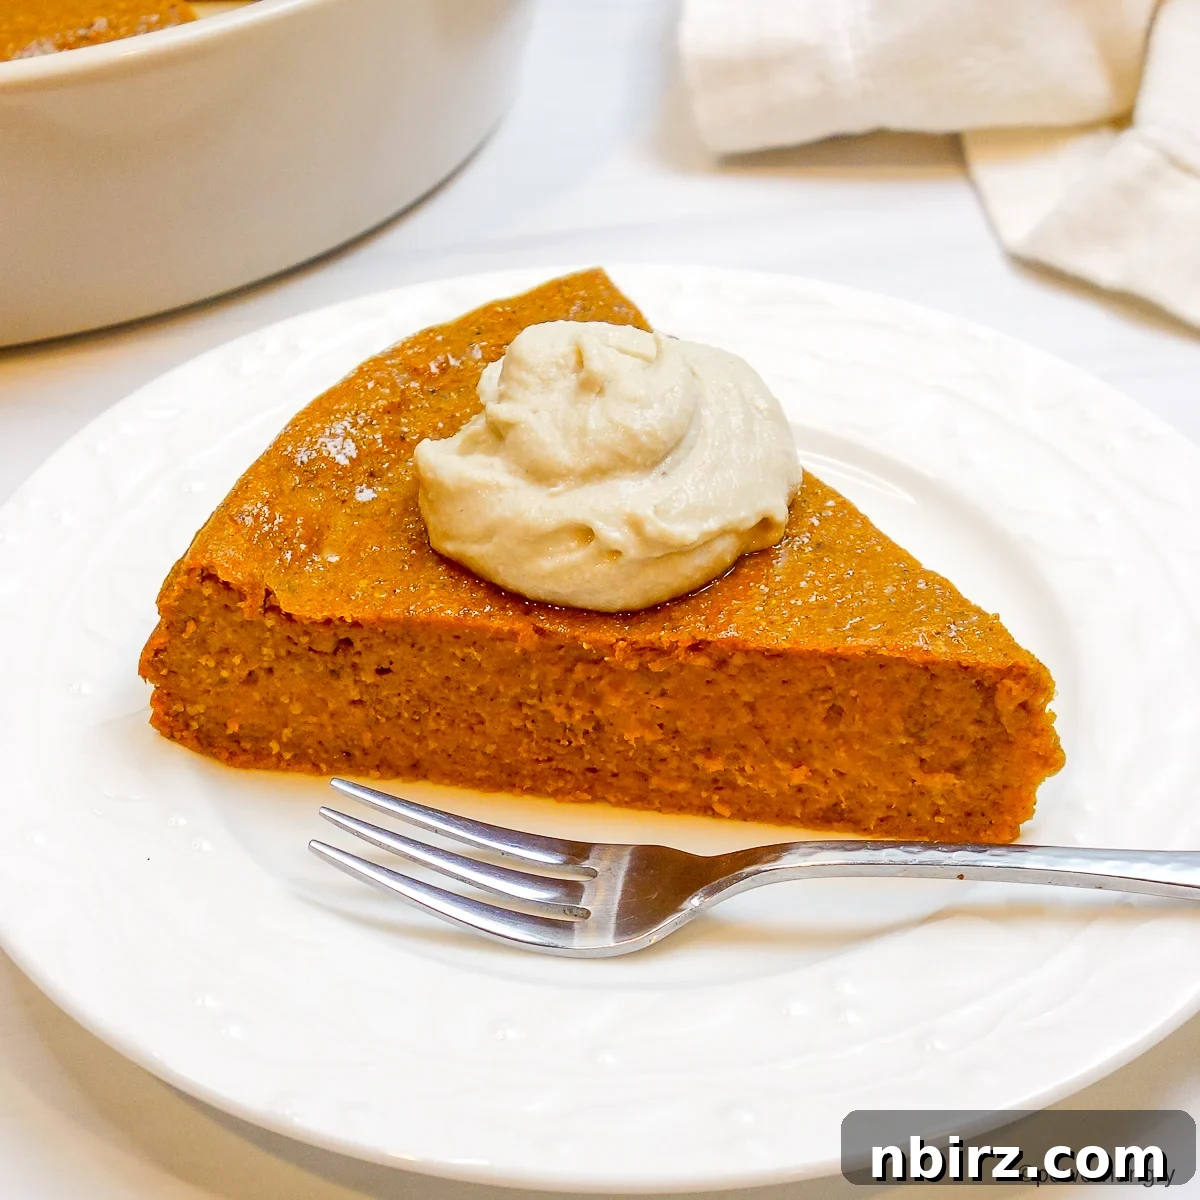
Craft a remarkably silky smooth, incredibly easy vegan pumpkin pie using just a handful of wholesome ingredients: pumpkin, oats, and common pantry essentials. Simply blend everything, pour into a pie pan, and bake for a rich, creamy, and satisfying dessert that also happens to be crustless, gluten-free, and oil-free. It’s the perfect guilt-free indulgence for any time of year!
The Easiest and Most Delicious Vegan Pumpkin Pie Recipe: A Modern Classic
There’s a special joy in discovering a recipe that feels both refreshingly new and deeply nostalgic. This crustless vegan pumpkin pie perfectly embodies that feeling – a contemporary culinary marvel inspired by the beloved “impossible pies” that Bisquick famously featured on their pancake mix boxes decades ago. Those ingenious recipes were celebrated for their magical ability to form their own crust as they baked, all thanks to a clever trick involving pancake mix. Our modern interpretation captures that same spirit of effortless simplicity, but with a focus on nourishing, whole-food ingredients.
Instead of relying on processed mixes, this recipe harnesses the humble power of oats to work its culinary magic. With nothing more than oats, pure pumpkin, and a few everyday pantry staples, you can effortlessly blend, pour, and bake your way to a truly sensational dessert. The result is a wonderfully silky, custard-like pumpkin pie that boasts incredible flavor and a delightful texture – a far cry from baked oatmeal, despite its oat-based foundation. Its creamy consistency and perfectly spiced profile will surprise and delight even the most discerning palates.
This “impossibly easy” pie is a dream come true for those seeking a healthier dessert option. It’s naturally vegan, gluten-free, oil-free, and refined sugar-free, making it suitable for a wide range of dietary needs and preferences. Despite its health-conscious attributes, it tastes every bit as rich and satisfying as a traditional pumpkin pie. Serve it as the crowning dessert for your Thanksgiving feast, bring it to fall gatherings to impress friends and family, or embrace the best kind of healthy indulgence by enjoying a slice for a wholesome breakfast. Each creamy, perfectly spiced bite offers pure comfort and joy.
Why You’ll Love This Vegan Oat Pumpkin Pie: Unbeatable Benefits
This unique pumpkin pie isn’t just easy to make; it comes packed with numerous benefits that make it a standout choice for any dessert lover, especially those following specific dietary guidelines. Here’s a closer look at what makes this recipe truly special:
- Effortless Preparation (No Pie Crust Required!): Say goodbye to the stress and time-consuming effort of making a traditional pie crust. This recipe simplifies the entire process – just blend the ingredients and pour them directly into your pie pan. It’s ideal for busy bakers or anyone new to making pies.
- 100% Vegan (Dairy-Free & Egg-Free): This pie is entirely plant-based, making it perfect for vegans, those with dairy or egg allergies, or anyone looking to incorporate more plant-based foods into their diet. You won’t miss the traditional ingredients thanks to the clever use of oats for structure and creaminess.
- Naturally Gluten-Free: By utilizing rolled oats (ensure they are certified gluten-free if necessary), this pie is completely free of wheat and other gluten-containing grains. It’s a fantastic option for individuals with celiac disease or gluten sensitivity.
- Refined Sugar-Free: We sweeten this pie exclusively with natural maple syrup, avoiding any processed white or brown sugars. This not only offers a healthier sweetness but also imparts a delicious, subtle caramel note.
- Nut-Free & Seed-Free: For those with nut or seed allergies, this recipe provides a safe and delicious dessert option, as it contains neither. This makes it a great choice for school potlucks or gatherings where allergies might be a concern.
- Coconut-Free: Unlike many vegan dessert recipes that rely on coconut milk or coconut cream for richness, this pie is completely coconut-free. This is excellent news for anyone with coconut allergies or those who simply prefer not to use coconut products.
- Oil-Free (No Added Fats): This pie is made without any added oils, such as coconut oil, vegan butter, or olive oil. The natural fats from the oats and pumpkin are sufficient, contributing to a lighter, healthier dessert without sacrificing flavor or texture.
- Crustless by Design: The beauty of an “impossible pie” is its self-forming crust-like base. This means fewer ingredients and less fuss, resulting in a unique, perfectly moist texture throughout the pie.
- Flourless: Beyond being gluten-free, this recipe uses no traditional flours, relying solely on rolled oats (which are blended into a ‘flour’ consistency within the batter) for its structure. This contributes to its unique and healthy profile.
- No Added Starches: You won’t find any cornstarch, arrowroot powder, or other thickeners in this recipe. The oats naturally create the perfect custard-like consistency when blended and baked.
Essential Ingredients for Your Vegan Oat Pumpkin Pie
The precise measurements for each ingredient are provided in the comprehensive recipe card at the end of this post. You can easily switch between US Customary (volume) and Metric (weights) units to suit your preference.
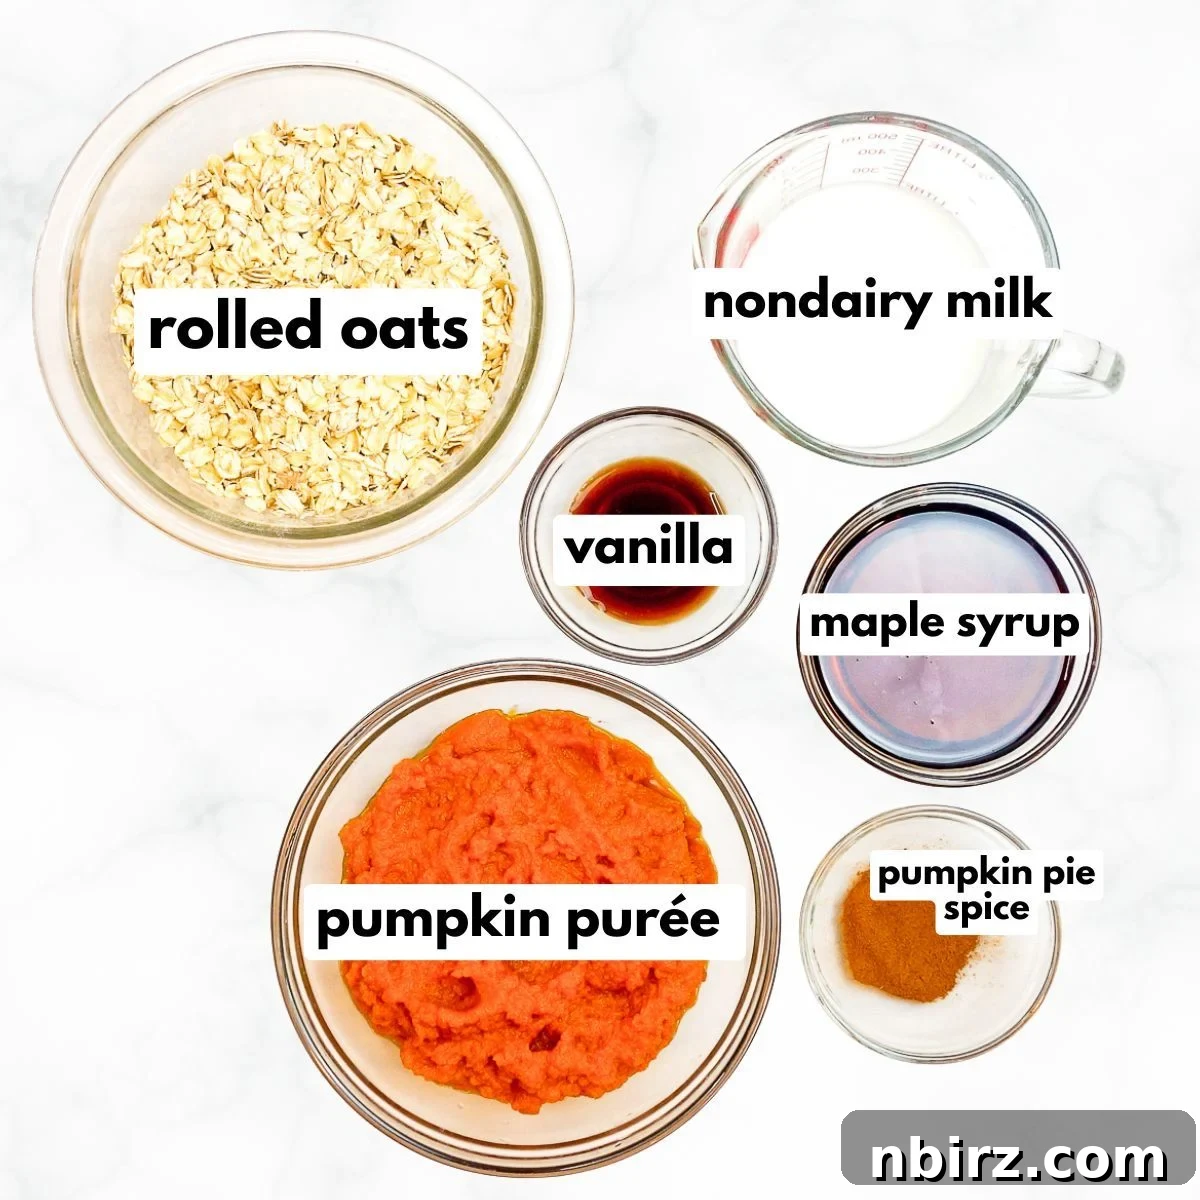
Crafting this impossibly easy vegan pumpkin pie requires just a few simple, accessible ingredients. Each one plays a crucial role in achieving the perfect flavor and texture:
- Unsweetened Pumpkin Puree: This is the star of the show, providing the classic pumpkin flavor and vibrant color. Always opt for plain, unsweetened canned pumpkin puree, not pumpkin pie filling, which contains added sugar and spices. Pumpkin is packed with Vitamin A, fiber, and antioxidants, contributing significantly to the pie’s nutritional value.
- Nondairy Milk: Essential for achieving a creamy, smooth texture. You have several excellent choices here, each offering a slightly different nuance. Hemp milk, oat milk, almond milk, and cashew milk are all fantastic options. Choose an unsweetened variety to control the overall sweetness of your pie. Oat milk tends to make the pie extra creamy, while almond or cashew milk offer a lighter touch.
- Rolled Oats: The secret ingredient that creates the unique custard-like consistency and forms the “crust” without any traditional flour or separate crust preparation. When blended, oats become a fine powder that acts as a natural thickener and binder. If you need this recipe to be strictly gluten-free, be sure to use certified gluten-free rolled oats.
- Maple Syrup: Our preferred natural sweetener, maple syrup lends a rich, warm flavor that complements the pumpkin and spices beautifully. It also contributes to the smooth texture of the pie. See our tips below for other natural sweetener alternatives if maple syrup isn’t available or preferred.
- Pumpkin Pie Spice: This blend of warm spices is what truly defines a pumpkin pie. It typically includes cinnamon, ginger, nutmeg, and cloves. Using a pre-mixed pumpkin pie spice makes preparation incredibly convenient. If you don’t have it on hand, or prefer to customize your spice profile, we’ve included a simple DIY recipe below.
- Vanilla Extract: A touch of vanilla enhances all the other flavors, adding depth and a comforting aroma. High-quality vanilla extract or even vanilla bean paste or powder will elevate the taste of your pie.
- Salt: A small amount of salt is crucial for balancing the sweetness and intensifying the overall flavor profile of the pie. It prevents the pie from tasting flat and brings out the best in the pumpkin and spices. You can adjust the amount according to your dietary needs and taste preferences.
Step-by-Step Instructions: Creating Your Perfect Pumpkin Pie
For quick reference, the complete, concise directions are also conveniently located in the recipe card at the bottom of this page.
Step One: Preheat Oven & Prepare Pie Dish
Begin by preheating your oven to 350°F (180°C). Next, lightly spray a 9-inch (22.5 cm) pie pan with a nonstick cooking spray. This crucial step ensures that your beautifully baked pie releases easily from the pan without sticking. If your goal is a 100% oil-free dish, we highly recommend using a silicone pie pan. These pans are naturally nonstick and require no additional oil or spray, making cleanup a breeze and keeping your pie completely oil-free.
Step Two: Blend All of the Ingredients Until Smooth
This is where the magic truly happens! Gather all your ingredients: the unsweetened pumpkin puree, your chosen nondairy milk, maple syrup, rolled oats, pumpkin pie spice, vanilla extract, and salt. Carefully place all of these components into a high-speed blender container. Secure the lid and blend until the mixture is completely smooth and uniform. You’ll want to pause the blender once or twice during this process to scrape down the sides of the container with a spatula. This ensures that no oat particles are left unblended, resulting in that wonderfully silky, custard-like texture that defines this “impossible” pie.
Step Three: Pour Into Prepared Pan
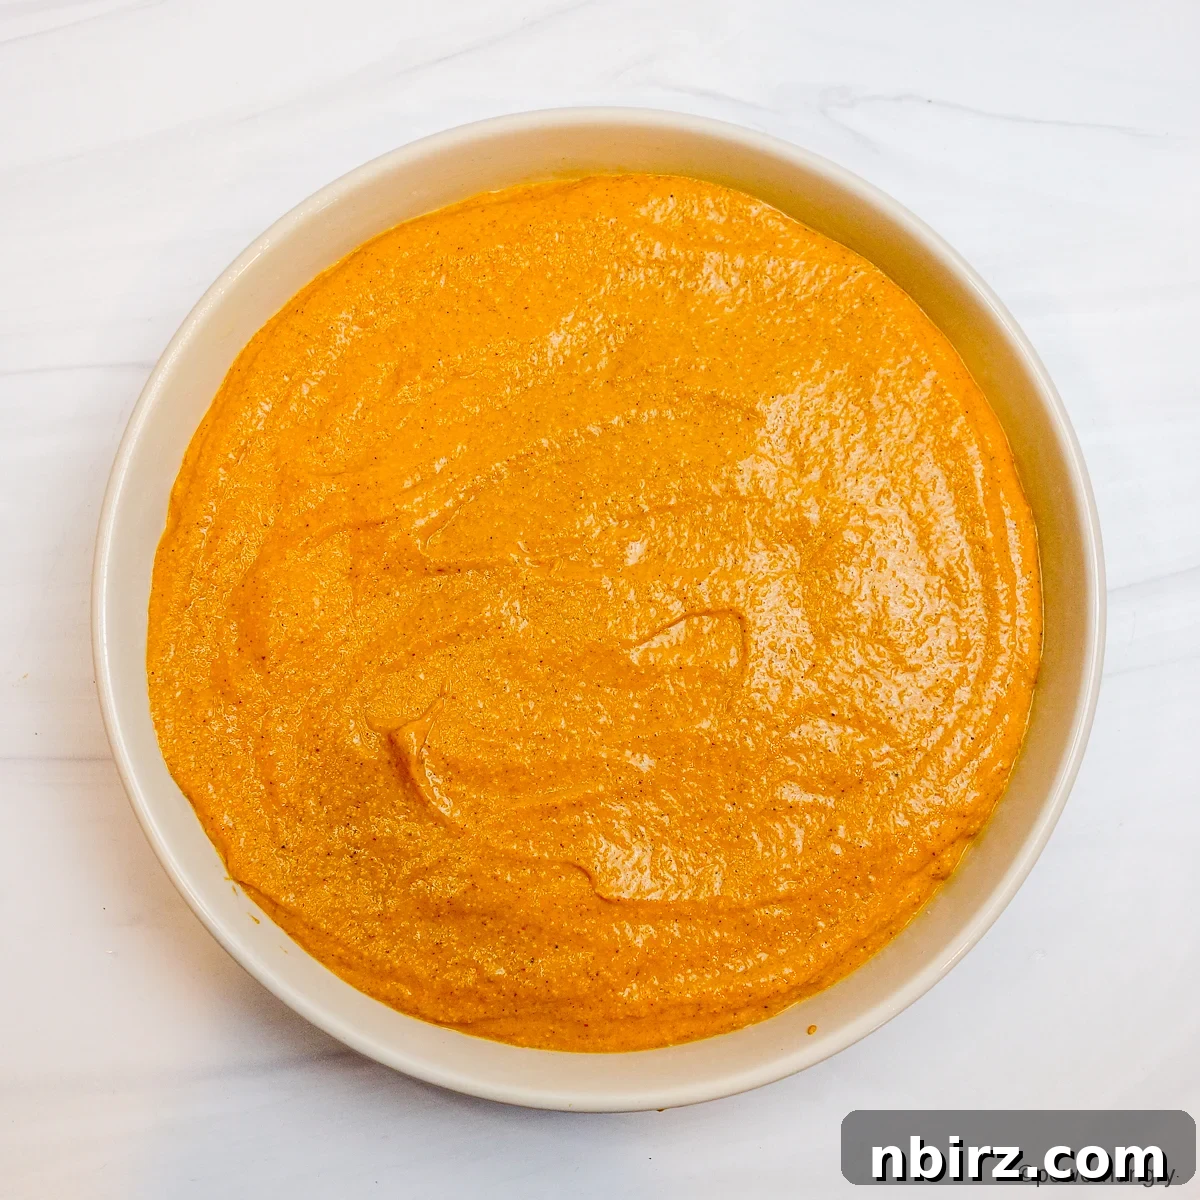
Once your pumpkin pie mixture is perfectly smooth and velvety, carefully pour it into the pie pan you prepared in Step One. Gently use a spatula or the back of a spoon to smooth the top surface of the batter. This ensures an even bake and a beautifully finished pie. At this stage, the mixture will be liquid, but don’t worry – the oats will work their magic in the oven to create the desired texture.
Step Four: Bake to Perfection
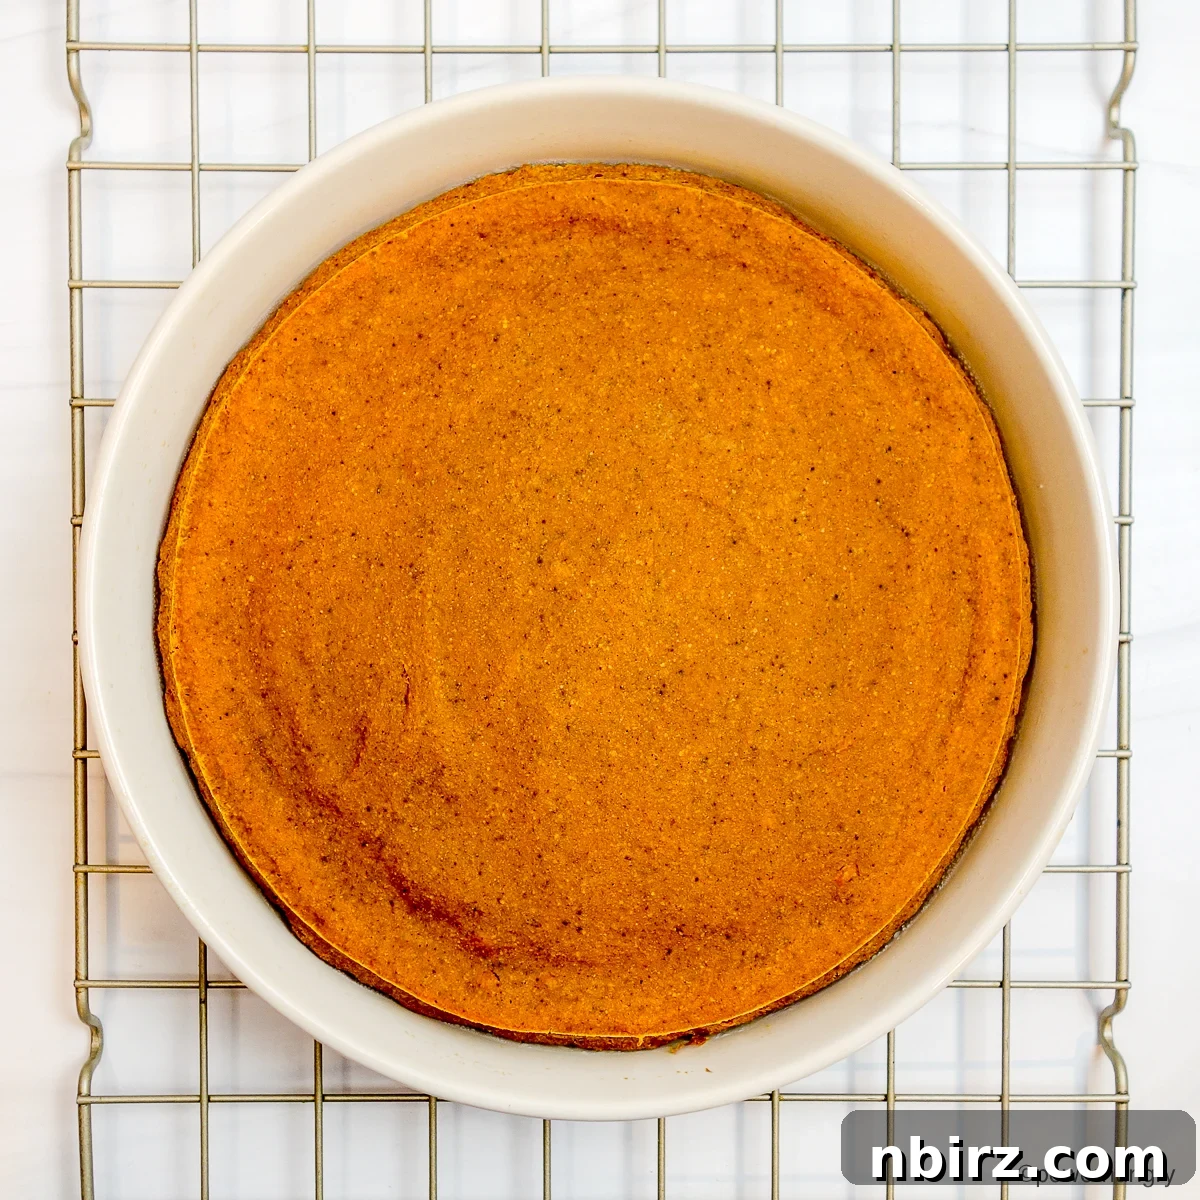
Carefully transfer the pie pan to your preheated oven. Bake for approximately 37 to 42 minutes. The key to a perfect custard-like texture is not to overbake. You’ll know the pie is ready when the surface appears dry and slightly firm, but the center still exhibits a gentle jiggle when the pan is very gently shaken. This slight jiggle is essential; it indicates that the pie will set up beautifully as it cools, resulting in that desirable rich, creamy, and custard-y consistency. Overbaking can lead to a drier, more crumbly texture, so keep a close eye on it!
Step Five: Cool, Chill & Serve
Once baked, carefully remove the pie from the oven and transfer it to a wire cooling rack. Allow it to cool completely at room temperature. This initial cooling period is important for the pie to begin setting. For the best, firmest, and most sliceable texture, we highly recommend refrigerating the pie, uncovered, for at least 3 hours. Ideally, chilling it for up to 24 hours will yield an even firmer, more traditional pumpkin pie texture. When you’re ready to enjoy, simply cut the chilled pie into neat wedges and serve! While it can be enjoyed at room temperature after chilling, the firmer texture from refrigeration is often preferred.
Elevate Your Pie: Delightful Serving Suggestions
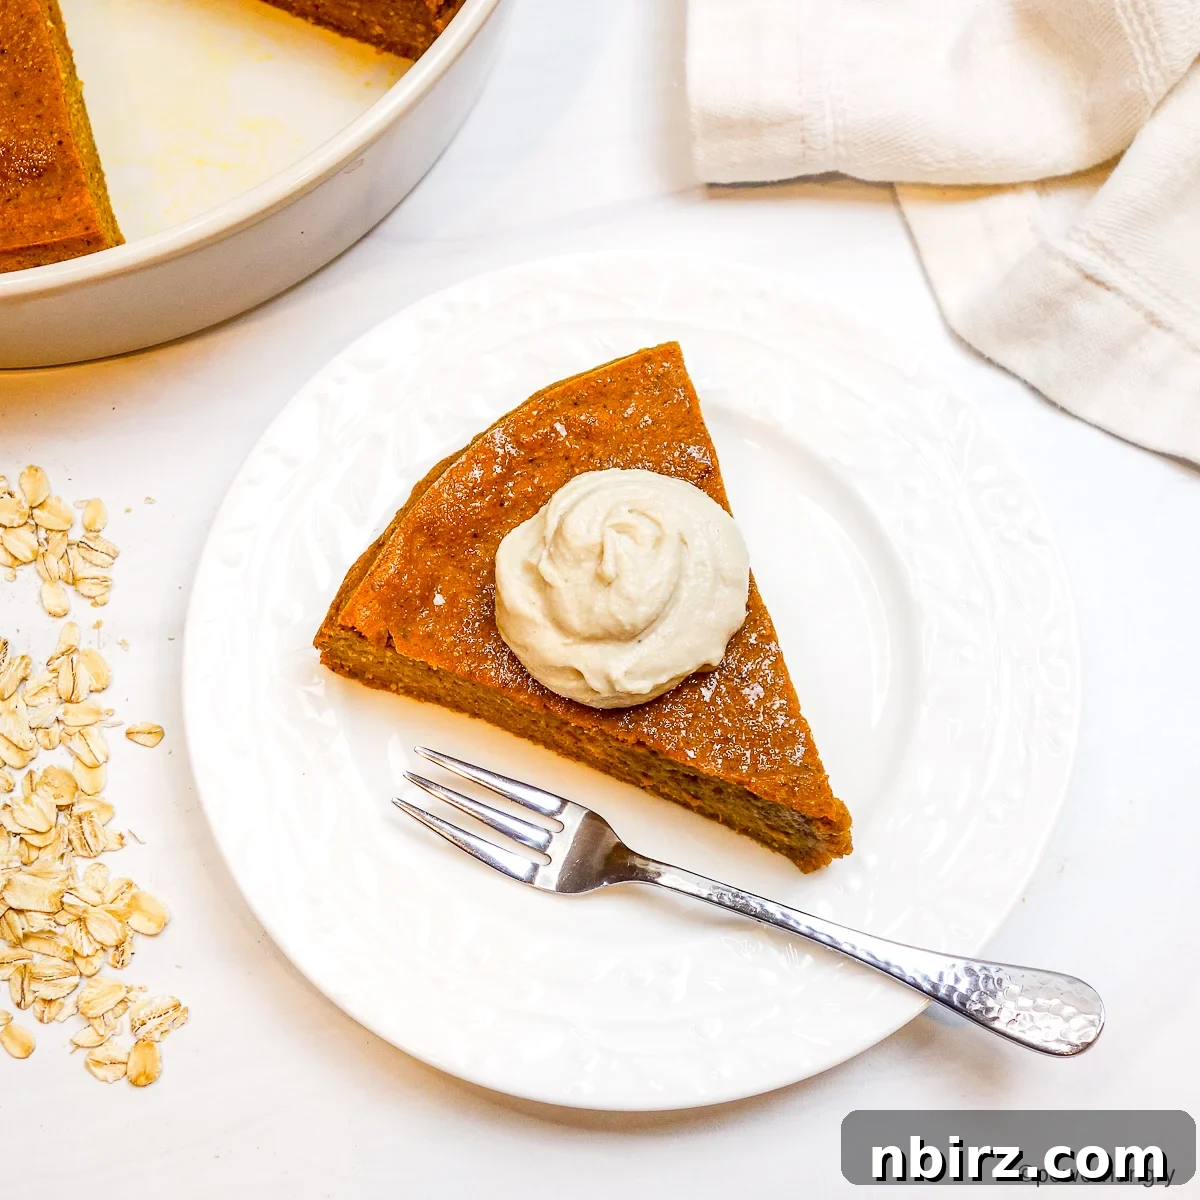
This impossibly easy vegan oat pumpkin pie is delicious on its own, but it also serves as a perfect canvas for various delightful toppings and accompaniments. Here are some ideas to make your pie even more special:
- Classic Simplicity: Enjoy a slice plain to fully appreciate its rich pumpkin and spice flavors and creamy texture.
- Whipped Nondairy Cream: Top generously with a dollop of your favorite nondairy whipped cream. Coconut whipped cream, almond whipped topping, or oat-based whipped cream are excellent choices that add a light, airy contrast.
- Plant-Based Vanilla Ice Cream: A scoop of creamy vegan vanilla ice cream, melting slightly over a warm slice of pie, creates a truly indulgent experience.
- Dusting of Spices: A light dusting of extra pumpkin pie spice, cinnamon, or a sprinkle of nutmeg can enhance the aroma and visual appeal.
- Caramel Drizzle: A drizzle of homemade or store-bought vegan caramel sauce adds an extra layer of sweetness and sophistication.
- Candied Pecans or Walnuts: While the pie is nut-free, if allergies aren’t a concern, a sprinkle of candied pecans or walnuts can add a delightful crunch and nutty flavor.
- Chocolate Shavings: A surprising but delicious pairing, dark chocolate shavings can complement the warming spices beautifully.
Proper Storage for Freshness and Longevity
Ensuring your vegan oat pumpkin pie stays fresh and delicious is simple with these storage tips:
- Refrigeration: Store any leftover pie, either uncovered or loosely covered with plastic wrap or foil, in the refrigerator for up to 3 days. Keeping it loosely covered helps prevent condensation from making the surface soggy.
- Freezing for Longer Storage: For extended preservation, this pie freezes exceptionally well. Tightly wrap individual slices or the entire leftover pie in plastic wrap, then secure it further in aluminum foil. Place the wrapped pie in an airtight container or a freezer-safe zipper-top bag. It will keep beautifully in the freezer for up to six months. When ready to enjoy, thaw overnight in the refrigerator before serving.
Craft Your Own: DIY Pumpkin Pie Spice Blend
Don’t have a pre-made pumpkin pie spice blend? No problem! You can easily create your own aromatic mix with common ground spices you likely already have in your pantry. To make a versatile pumpkin pie spice blend, combine the following:
- 1 and 1/4 teaspoons ground cinnamon
- 1 teaspoon ground ginger
- 1/4 teaspoon ground cloves
This classic combination delivers the quintessential pumpkin pie flavor. Feel free to customize this blend to your taste! You can experiment by swapping a 1/4 teaspoon of cinnamon for ground nutmeg, ground allspice, or ground cardamom to create your own unique and signature spice mix. Adding a pinch of black pepper can also enhance the warmth and complexity.
Frequently Asked Questions About This Vegan Oat Pumpkin Pie
Here are answers to some common questions about making and enjoying this delicious and easy vegan pumpkin pie:
- What is the Taste & Texture of this Oat Pumpkin Pie?
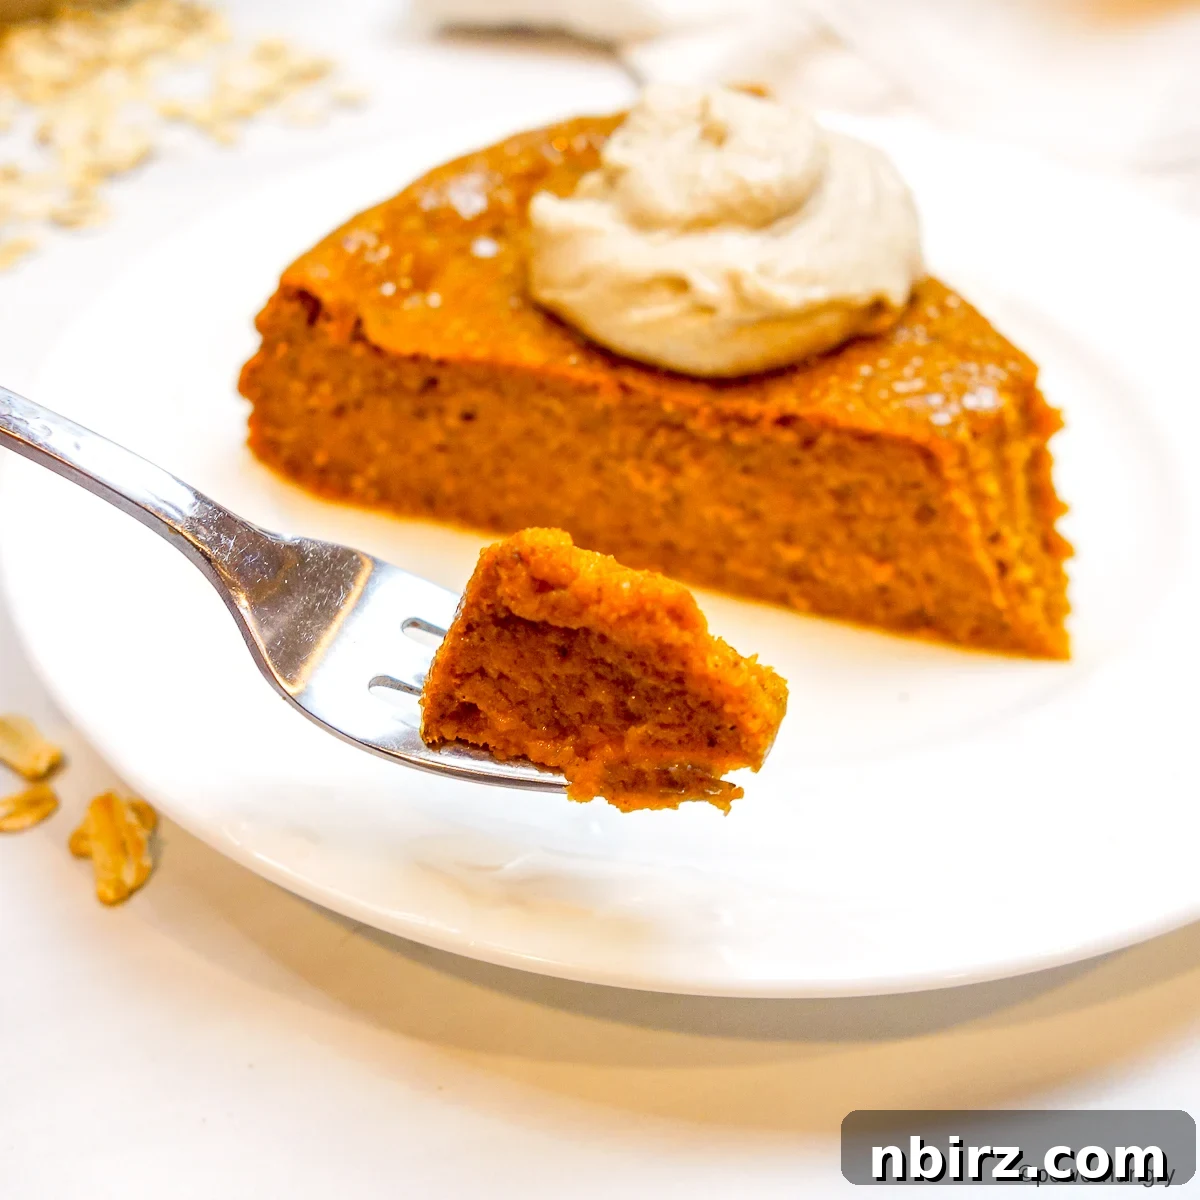
This oat-based vegan pumpkin pie wonderfully replicates the rich flavor and much of the desired texture of a traditional pumpkin pie. It is firm yet silky smooth, with a delightful custard-like consistency that melts in your mouth. The sweetness from the maple syrup is perfectly balanced, and the warming pumpkin pie spices shine through beautifully. Despite its oat base, it does not taste like oatmeal; instead, it’s a creamy, spiced custard. - Is There a Substitute for Maple Syrup?
Yes, you can absolutely substitute the maple syrup with other liquid or granulated sweeteners. For liquid alternatives, an equal amount of agave nectar or brown rice syrup works well. If you do not follow a strict vegan diet, honey can also be used. If you prefer a granulated sweetener, you can use 1/2 cup of coconut sugar or packed brown sugar, but you’ll need to add an extra 2 tablespoons of nondairy milk to maintain the correct liquid balance. Please note that using coconut sugar or brown sugar may result in a slightly darker pie. - Can I Use Less Sweetener?
Certainly! While we found 3/4 cup of maple syrup to be “just right” for a balanced sweetness, you can adjust this to your preference. We tested versions with 1/2 cup and 2/3 cup and found them a bit lacking, but if you prefer a less sweet pie, reduce the maple syrup. To maintain the correct consistency, simply make up the difference in liquid by adding a few more tablespoons of nondairy milk. - Can I Use Oat Flour in Place of Rolled Oats?
Yes, oat flour is a fantastic substitute for rolled oats in this recipe! For the best results, use an equal weight of oat flour to replace the rolled oats. This means you will need 134 grams of oat flour. In terms of volume, this typically translates to about 1 cup plus 2 tablespoons of oat flour. When measuring by volume, lightly spoon the oat flour into your measuring cup and level it off to ensure accuracy. A wonderful bonus of using oat flour is that you won’t need a blender; you can simply whisk all the ingredients together in a large mixing bowl until the mixture is combined and perfectly smooth. - Is There a Substitute for the Oats or Oat Flour?
Unfortunately, no. Oats are integral to the unique texture and “impossible” crust of this pie. Other flours or grains will not yield the same silky, custard-like finish that oats provide, nor will they contribute to the self-forming crust in the same way. The specific protein and fiber structure of oats, once blended, is what creates this desired consistency. - Can I Use a Food Processor to Blend the Pumpkin Pie Filling?
Possibly, but with a caveat. A food processor might work, provided it has a sufficiently strong motor to blend the rolled oats completely smooth. The key is to achieve a velvety batter with absolutely no flecks or discernible pieces of oats. If your food processor isn’t powerful enough to achieve this ultra-smooth consistency, you might end up with a slightly grainier texture. A high-speed blender is generally recommended for optimal results. - Can I Make This Pie Ahead of Time?
Absolutely! This pie is an excellent make-ahead dessert. In fact, it often tastes even better the next day after the flavors have had more time to meld and the pie has fully chilled and firmed up. Prepare it 1-2 days in advance and store it in the refrigerator as directed. - How Do I Prevent Cracking on the Pie Surface?
Cracking sometimes occurs when a pie is overbaked or cools too rapidly. To minimize cracking, ensure you don’t overbake (look for that slight jiggle in the center). Also, allow the pie to cool gradually on a wire rack at room temperature before transferring it to the refrigerator. Avoid moving it directly from a hot oven to a cold fridge.
Explore More Plant-Based Delights
If you loved this easy vegan oat pumpkin pie, you might enjoy these other wholesome and delicious plant-based recipes:
- Vegan Pumpkin Pie Protein Bars (No-Bake)
- Vegan Chickpea Flour Pumpkin Cookies (Oil-Free)
- Vegan Coconut Flour Pumpkin Pie Bars (Grain-Free, Oil-Free)
- No-Roll Chickpea Flour Pie Crust (Grain-Free, V)
- Crustless Vegan Gluten-Free Pumpkin Pie (No Coconut)
Impossibly Easy Vegan Oat Pumpkin Pie (GF, Oil-Free)
Camilla
5 minutes
42 minutes
47 minutes
8
servings
Equipment
-
1 blender
-
1 9-inch (22.5 cm) pie pan (for nonstick, opt for a silicone pie pan)
Ingredients
-
15
ounces
unsweetened pumpkin puree,
(I use canned pumpkin) -
1 1/2
cups
nondairy milk,
(e.g., oat milk, hemp milk, cashew milk, almond milk) -
1 1/3
cups
rolled oats,
(certified GF, as needed; see notes for using oat flour) -
3/4
cup
maple syrup,
(see notes for alternatives) -
2 1/2
teaspoons
pumpkin pie spice,
(see notes for creating your own spice blend) -
2
teaspoons
vanilla extract -
1/2
teaspoon
salt,
(adjust as needed/desired)
Instructions
-
Preheat the oven to 350F (180C). Lightly spray a 9-inch (22.5 cm) pie pan with nonstick cooking spray.
If you need the dish to be 100% oil-free, consider using a silicone pie pan (no oil or spray required for it to be nonstick).
-
Place the pumpkin purée, milk, maple syrup, oats, pumpkin pie spice, vanilla extract and salt in blender container. Cover and blend until completely smooth, stopping once or twice to scrape down the sides of the container.
-
Pour the blended pumpkin pie mixture into the prepared pie pan, smoothing the top.
-
Bake in the preheated oven for 37 to 42 minutes until just set. The surface of the pie will appear dry and the center should only jiggle slightly when the pan is (gently) shaken.
-
Transfer the pie to a cooling rack. Cool completely, then transfer to the refrigerator. Serve at room temperature. For a firmer texture, refrigerate, uncovered, for at least 3 hours, or up to 24 hours.
Cut the pie into wedges and serve!
Notes
Maple Syrup Alternatives: You can use an equal amount of agave nectar, brown rice syrup, or (if you do not follow a vegan diet) honey. You can also use 1/2 cup of coconut sugar or packed brown sugar + 2 tablespoons additional milk. These latter options will lead to a slightly darker pie.
DIY Pumpkin Pie Spice: Combine 1.25 teaspoons ground cinnamon + 1 teaspoon ground ginger + 1/4 teaspoon ground cloves. You can vary this with other spices to make your own unique mix (e.g., swap 1/4 teaspoon cinnamon for ground nutmeg, ground allspice, or ground cardamom).
Oat Flour in Place of Rolled Oats: You will need to use an equal weight (not volume) of oat flour to replace the rolled oats (134 grams). This comes out to 1 cup plus 2 tablespoons oat flour (lightly spoon and level the flour to measure, or weigh it). A bonus: you will not need to use a blender, simply whisk the ingredients in a bowl until combined and smooth.
Nutrition
Serving:
1
slice
|
Calories:
161
kcal
|
Carbohydrates:
35
g
|
Protein:
3
g
|
Fat:
2
g
|
Saturated Fat:
0.3
g
|
Polyunsaturated Fat:
1
g
|
Monounsaturated Fat:
1
g
|
Sodium:
212
mg
|
Potassium:
231
mg
|
Fiber:
3
g
|
Sugar:
20
g
|
Vitamin A:
8274
IU
|
Vitamin C:
2
mg
|
Calcium:
114
mg
|
Iron:
2
mg
Like this recipe? Rate and comment below!