
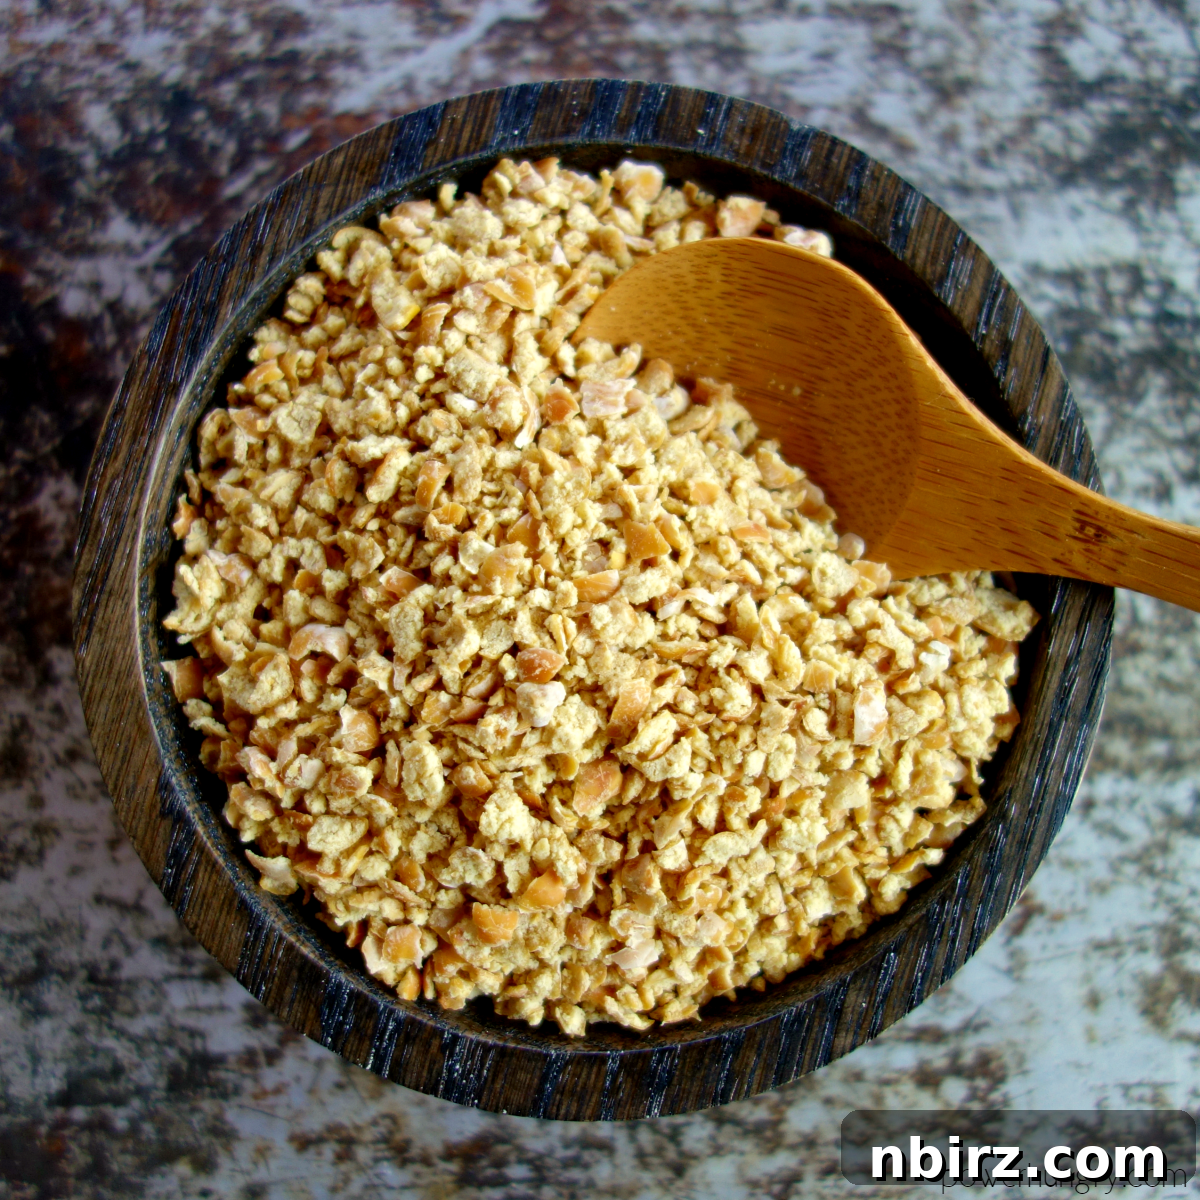
Homemade Chickpea Breadcrumbs: Your Ultimate Grain-Free, High-Protein Alternative
Chickpea breadcrumbs, crafted from simple canned chickpeas, offer a revolutionary grain-free, oil-free, and bread-free alternative for your kitchen. Packed with protein, incredibly economical, and remarkably easy to prepare, they stand as a delicious and versatile substitute for traditional bread crumbs in any recipe.
For many, the satisfying crunch of toasted nuts and seeds, the crispness of crackers, or the delightful texture of crumb-coated dishes is a culinary delight. If you, like me, appreciate foods that offer that irresistible crispy texture, and have a particular fondness for the humble chickpea in all its glorious forms, then you’re in for a treat. Chickpeas are not just for hummus or salads; they are a truly versatile legume that can transform countless dishes with their unique flavor and texture profile.
It was this passion for both crunch and chickpeas that led to an exciting discovery. Browsing the health food store aisle, my eyes landed on something intriguing: “Chickpea Crumbs.” A breadcrumb alternative made entirely from chickpeas – it sounded like a dream come true! Without a second thought, a bag found its way into my shopping basket, promising a new world of grain-free possibilities for my favorite crunchy recipes.
What Exactly Are Chickpea Breadcrumbs?
At their core, chickpea breadcrumbs are precisely what their name implies: a breadcrumb substitute made purely from whole chickpeas, also widely known as garbanzo beans. Unlike traditional breadcrumbs, which are typically made from dried and toasted wheat bread, these innovative crumbs are entirely grain-free, making them an excellent choice for those following gluten-free diets, managing sensitivities, or simply looking for healthier alternatives to processed ingredients. They also naturally fit into vegan and plant-based lifestyles, offering a protein-rich option where traditional breadcrumbs might fall short.
The process of creating these unique crumbs is surprisingly straightforward. Cooked chickpeas – whether conveniently sourced from a can or freshly prepared from dried beans at home – undergo a transformation. They are typically processed to various textures, ranging from an ultra-fine, flour-like powder to chunky, rustic bits, depending on the desired application. Subsequently, these processed chickpeas are baked until they become thoroughly dry and wonderfully crisp. The result is a light, golden, and inherently flavorful crumb that mirrors the versatility of its wheat-based counterpart, but with a significant nutritional upgrade. Rich in fiber and plant-based protein, chickpea breadcrumbs add substantial value to any meal.
The Homemade Advantage: Frugal, Fresh, and Flavorful
My initial purchase of ready-to-use chickpea crumbs was an exciting discovery, opening my eyes to a new pantry staple. However, the accompanying price tag was less than thrilling. At nearly $8 for a mere 7-ounce bag, it quickly became clear that incorporating this delicious innovation regularly into my cooking could become an expensive habit. This realization immediately sparked a familiar urge: if a healthy specialty ingredient is too pricey, the most satisfying solution is often to make it yourself! And so, a mission was born to recreate this healthy, grain-free staple at a fraction of the cost, ensuring a continuous supply for all my culinary needs.
Making your own chickpea breadcrumbs not only offers significant financial savings but also grants you complete control over the ingredients. This means you can confidently avoid any unwanted additives, preservatives, or excessive sodium often found in many commercially produced versions. Furthermore, there’s an inherent freshness and immense satisfaction that comes with creating such a versatile and wholesome ingredient right in your own kitchen. You can tailor the texture and flavor precisely to your liking, ensuring the highest quality for your dishes. I am absolutely thrilled to share this simple, cost-effective, and incredibly rewarding recipe with you, empowering you to enjoy all the benefits of homemade chickpea breadcrumbs.
Ingredients for Your Homemade Chickpea Breadcrumbs
One of the most appealing aspects of this recipe is its sheer simplicity and minimal ingredient list. You only need one core ingredient to create these amazing, versatile chickpea breadcrumbs, making it an accessible project for any home cook.
- Cooked Chickpeas: The star of our show, providing both the structure and the nutritional foundation for our grain-free crumbs.
Specifically, for a generous batch that will last you for several meals, you will need two standard 15-ounce (approximately 425g each) cans of cooked chickpeas. Ensure they are well-drained and rinsed. If you prefer to cook your chickpeas from scratch from dried beans, which can be even more economical, about 3 and 1/4 cups of home-cooked, drained chickpeas will provide a comparable amount. For those mindful of their dietary sodium intake, opting for low-sodium or no-salt-added canned chickpeas is highly recommended. If you’re using home-cooked chickpeas, you have the ultimate control to prepare them with little to no salt, allowing you to season the final breadcrumbs exactly as you wish.
Consider the stark cost difference: making these yourself will typically run you anywhere from $0.75 to $3.00 for a comparable yield (roughly 1.5 cups of finished crumbs). This is a stark contrast to the premium price of store-bought specialty versions, which can easily be $8 or more for a smaller quantity. This makes homemade chickpea breadcrumbs not just a healthier and fresher choice, but a significantly more frugal one too, proving that healthy eating doesn’t have to break the bank.
How to Make Your Own Chickpea Breadcrumbs: A Simple Step-by-Step Guide
Creating these versatile and delicious chickpea breadcrumbs is a surprisingly quick and effortless process, requiring minimal active involvement. The beauty of this recipe lies in its efficiency: the active preparation time is quite minimal, requiring just a few minutes of your attention. The vast majority of the time is hands-off baking, allowing your oven to do most of the work in transforming humble chickpeas into a golden, crispy pantry staple.
Ready to embark on a truly satisfying “crumby” adventure that will enhance your cooking? Let’s get started with these easy-to-follow steps!
Step 1: Rinse, Drain & Thoroughly Blot the Chickpeas
Begin by emptying your canned chickpeas into a colander or a fine-mesh sieve. Rinse them thoroughly under cold running water until any residual liquid or foam, known as aquafaba, is completely gone. This step is crucial for two main reasons: it helps to remove excess sodium from canned varieties and eliminates the starchy aquafaba, which can hinder the chickpeas from crisping up properly during baking. After rinsing, shake off as much excess water as possible, ensuring they are not dripping wet.
Next, transfer the drained chickpeas to a layer of clean paper towels or a fresh, dry kitchen towel. Gently blot, roll, and even rub the chickpeas between the towel layers to remove all surface moisture. The drier the chickpeas are at this initial stage, the crispier and more successful your breadcrumbs will be. As you blot, you might notice some loose skins detaching from the chickpeas; these can simply be discarded. This diligent drying step is paramount for ensuring optimal texture and prevents steaming during the first bake, which could lead to soggy, rather than crispy, crumbs.
Step 2: The First Bake – Drying and Light Toasting
Once your chickpeas are thoroughly dry, spread them out in a single, even layer across a large rimmed baking sheet. It’s important to ensure they are not piled up, as this can lead to uneven baking and steaming. There’s no need to grease the baking sheet, nor to line it with parchment paper, as the baked chickpeas will not stick. Simplicity is truly key here – just spread them out and you’re good to go.
Bake the chickpeas in a preheated 350°F (180°C) oven for approximately 40 minutes. During this initial bake, you’ll observe the chickpeas gradually shrinking as they lose their internal moisture. They will also develop a beautiful, subtle light golden-brown hue. Upon completion, they should feel notably dry and firm to the touch. This crucial first step is essential for creating the ideal internal structure that will allow them to be easily transformed into perfect, crispy crumbs later on.
After the 40-minute baking period, carefully remove the baking sheet from the oven and allow the chickpeas to cool on the sheet for about 10 minutes. This brief cooling period helps them to firm up slightly, making them easier to handle for the next step. Crucially, keep your oven on and at temperature, as it will be needed again very shortly for the final baking stage.
Step 3: Blitzing into Perfect Crumbs
Now comes the truly satisfying part – transforming your perfectly baked chickpeas into delightful, versatile crumbs! Carefully transfer the slightly cooled, baked chickpeas from the baking sheet to the bowl of a large food processor. Before adding the chickpeas, ensure that your food processor bowl is completely dry to prevent any moisture issues.
For optimal control over the crumb size and to prevent over-processing, it’s highly recommended to use the pulse function on your food processor. Short, quick pulses allow you to achieve your desired texture precisely. If you’re aiming for fine crumbs – which are ideal for coating, breading, and as a binder in various recipes – continue pulsing, stopping once or twice to scrape down the sides and bottom of the bowl. Don’t be concerned if the crumbs appear slightly powdery at first; any minimal remaining moisture will help them clump together into distinct crumbs rather than fine dust during the final bake. The goal is a uniform, fine texture akin to traditional breadcrumbs.
If your culinary goal is instead larger, chunkier crumbs – which are perfect for garnishing soups, adding texture to salads, or enhancing pasta dishes – you can achieve a more ragged and uneven texture with fewer pulses. In this case, less frequent scraping is needed, and you can simply pulse until you reach your preferred level of chunky crumbliness. Once processed to your desired consistency, spread the freshly blitzed crumbs evenly back onto the same baking sheet you used for the first bake, preparing them for their final round in the oven.
Step 4: The Second Bake – Achieving Ultimate Crispness and Flavor
Return the baking sheet with the chickpea crumbs to your still-heated 350°F (180°C) oven. This second bake is a critical step, designed to thoroughly dry out the crumbs, ensuring they become perfectly crisp and crunchy. Bake for an additional 10 minutes, allowing the moisture to evaporate and the texture to develop.
After 10 minutes, turn off the oven heat. However, do not remove the crumbs immediately. Instead, leave the chickpea crumbs inside the cooling oven for an additional hour or even longer, until the oven is completely cool. This slow-drying method is highly effective; it gently removes any last traces of moisture without the risk of over-toasting or burning the crumbs. The goal for multipurpose crumbs is to achieve a light golden color – a versatile shade that works beautifully for various applications, such as breading cutlets, creating crispy toppings for baked casseroles, or acting as a wholesome binder for meatless meatloaves, burgers, and stuffings.
If you specifically desire coarser breadcrumbs with a more pronounced crunch and a richer, toastier flavor – perhaps for sprinkling over a creamy soup, a vibrant pasta dish, or a fresh salad where texture is paramount – you can extend the second baking time slightly. Allow them to bake for a total of 15 to 18 minutes, always keeping a watchful eye to prevent any burning. Once the entire baking and drying process is complete, remove the crumbs from the oven and let them cool completely to room temperature on the baking sheet before transferring them to an airtight container for storage. And just like that, your perfectly homemade chickpea breadcrumbs are ready to elevate your cooking!
How to Store Your Homemade Chickpea Breadcrumbs
Proper storage is absolutely key to maintaining the exceptional crispness and fresh flavor of your homemade chickpea breadcrumbs. Once they have completely cooled to room temperature – this is a critical step to prevent condensation – transfer them to a clean, airtight storage container. A glass jar or a sealed plastic container works perfectly. They will keep beautifully at a cool room temperature, away from direct sunlight and humidity, for up to one month, ensuring they’re always on hand for your spontaneous culinary adventures.
For extended freshness, especially if you’ve made a larger batch or want to ensure peak flavor and texture for longer periods, you have an excellent option: store them in the freezer. When stored in an airtight freezer-safe bag or container, your chickpea breadcrumbs will maintain their quality for up to six months. When ready to use, simply scoop out the desired amount directly from the freezer; they thaw very quickly or can even be used frozen in cooked dishes.
Endless Culinary Uses for Chickpea Breadcrumbs
The versatility of these homemade chickpea breadcrumbs is truly remarkable, making them an indispensable ingredient in a healthy kitchen. They can seamlessly replace traditional breadcrumbs in almost any application, offering a healthier, gluten-free, high-protein, and naturally oil-free alternative that not only meets dietary needs but also elevates the flavor and texture of your dishes. Here are just a few ideas to inspire you:
- For Crispy Breading: Use them to create a perfectly crisp and golden coating for pan-fried or baked chicken cutlets, fish fillets, eggplant parmesan, zucchini fries, or even plant-based options like vegan schnitzel. Their fine texture adheres beautifully to moist surfaces.
- As a Flavorful Topping: Sprinkle them generously over casseroles, creamy mac and cheese, baked pasta dishes, roasted vegetables, or gratins for an irresistible golden-brown crunch. They also make a fantastic savory garnish for creamy soups, stews, or a textural contrast in fresh green salads and grain bowls.
- As a Wholesome Binding Agent: Incorporate them into homemade veggie burgers, lentil loaves, meatballs (both meat-based and plant-based), or classic stuffings. They provide excellent structure and help retain moisture, ensuring your creations hold together beautifully without adding gluten or excess fat.
- Adding a Crunch Factor: Beyond main dishes, add them to savory yogurt bowls for a unique twist, or use them as a component in homemade savory granola bars for an unexpected protein boost and satisfying texture. They can also be mixed into savory dips for extra texture.
These chickpea crumbs truly open up a world of possibilities for delicious and nutritious meals, proving that healthy eating doesn’t mean sacrificing on flavor, texture, or culinary creativity. Experiment freely and discover your favorite ways to use them!
Can I Season My Chickpea Breadcrumbs? Absolutely!
One of the great advantages of taking the time to make your own breadcrumbs is the unparalleled ability to customize them with an array of flavors. Yes, you can absolutely season your homemade chickpea crumbs to perfectly complement the dishes you’re preparing, transforming them from a simple textural element into a powerhouse of flavor! Seasoning is particularly impactful for chunkier crumbs, enhancing their flavor profile when sprinkled generously over dishes like soups, salads, and pasta.
For the best adhesion and optimal flavor integration, I highly recommend adding your chosen seasonings to the blitzed crumbs *before* their second bake. This allows the spices and herbs to meld, toast, and become deeply infused with the chickpeas, creating a more cohesive, aromatic, and delicious crumb. Consider experimenting with some of these delightful options to match various cuisines and personal preferences:
- Classic Herb Blends: Think traditional combinations like Herbes de Provence for a Mediterranean touch, Italian seasoning for classic pasta dishes, or a simple mix of dried parsley, oregano, and basil for all-purpose use.
- Aromatics: Enhance savory dishes with a generous amount of garlic powder and onion powder.
- Peppery Notes: Add a dash of freshly ground black pepper for a subtle warmth, or a pinch of cayenne pepper for a bolder, spicier kick.
- Smoked Paprika: This spice is a game-changer, imparting a wonderful smoky flavor and a beautiful reddish hue, perfect for dishes needing depth.
- Chili Flavors: For those who enjoy a bit of heat and a robust, earthy taste, consider adding ground dried chiles or a good quality chili powder.
- Umami Boost: Nutritional yeast can add a cheesy, savory, umami flavor, making these crumbs an excellent topping for vegan dishes.
- Fresh & Bright: A touch of dried lemon zest can provide a bright, fresh, and citrusy note, particularly good with fish or vegetable dishes.
Feel free to get creative and tailor your seasoning blend to suit your specific recipe or personal preference. The possibilities for flavor customization are truly endless, allowing you to make these chickpea breadcrumbs uniquely yours!
Tips for Success and Troubleshooting Your Chickpea Breadcrumbs
While making homemade chickpea breadcrumbs is a straightforward process, a few key tips can ensure you achieve perfect, crispy results every single time:
- Absolute Dryness is Paramount: The single most crucial factor for crispy crumbs is removing as much moisture as possible from the chickpeas before they even hit the oven. Blot them meticulously after rinsing. If they still feel even slightly damp, let them air dry for an additional 15-30 minutes before the first bake. Excess moisture is the enemy of crispness.
- Avoid Overcrowding the Pan: During both the initial chickpea baking and the second crumb-toasting stages, ensure the chickpeas/crumbs are spread in a single, even layer on the baking sheet. Overcrowding will cause them to steam rather than dry out and crisp up, leading to soggy or chewy results. Use two baking sheets if necessary.
- Monitor Baking Times Closely: Ovens can vary significantly in temperature and performance. Always keep a watchful eye on your chickpeas, especially during the second bake. You want them to be beautifully golden and dry, not burnt or overly darkened. If you notice them browning too quickly, consider slightly reducing the oven temperature or shortening the baking time.
- Achieving Your Desired Texture: For fine, uniform crumbs perfect for breading, ensure consistent pulsing in the food processor and remember to scrape down the sides and bottom of the bowl frequently. For larger, chunkier crumbs that add rustic appeal, use fewer pulses and embrace the natural uneven texture.
- Cool Completely Before Storing: This tip cannot be stressed enough. Never, under any circumstances, store warm or even slightly warm crumbs in an airtight container. Any residual heat will create condensation, making your perfectly crispy crumbs turn soggy. Allow them to cool completely to room temperature before transferring them for storage.
- Re-crisping Stale Crumbs: If, over time, your stored crumbs happen to lose some of their initial crispness (perhaps due to humidity), don’t fret! Simply spread them back on a baking sheet and toast them in a preheated 300°F (150°C) oven for 5-10 minutes. This will usually refresh them and bring back their delightful crunch.
Following these simple yet effective guidelines will help you consistently create perfect batches of homemade chickpea breadcrumbs, making them a reliable and delicious staple in your kitchen.
Nutritional Benefits of Chickpea Breadcrumbs
Beyond being a fantastic gluten-free, grain-free, and often vegan-friendly alternative, homemade chickpea breadcrumbs come with an impressive and robust nutritional profile. Chickpeas themselves are highly celebrated for being an excellent source of plant-based protein, which is essential for muscle repair and growth, and dietary fiber, crucial for digestive health, maintaining satiety, and stabilizing blood sugar levels. This combination helps keep you fuller for longer and supports overall well-being.
Furthermore, chickpeas are packed with a wealth of essential minerals and vitamins, including iron, magnesium, folate, zinc, and B vitamins. By opting for chickpea breadcrumbs over traditional wheat-based varieties, you’re not just choosing a delicious texture and a versatile ingredient, but you’re also adding a significant nutritional boost to your meals. They are naturally oil-free (unless you add oil during processing or baking) and typically very low in saturated fat, contributing to a heart-healthy diet. This makes them an intelligent choice for enhancing the nutritional value of countless dishes without compromising on taste or texture.
Concluding Thoughts
Making your own chickpea breadcrumbs is more than just a recipe; it’s a culinary revelation that can truly be a game-changer for anyone seeking a healthier, more economical, and incredibly versatile alternative to traditional breadcrumbs. With just one simple, readily available ingredient – the humble chickpea – and a few easy, hands-off steps, you can create a pantry staple that is robust in flavor and texture. These golden crumbs will effortlessly elevate countless dishes, transforming them with their delightful crispness and savory appeal, from creating perfectly breaded coatings to sprinkling as flavorful toppings and serving as wholesome binders in your favorite recipes.
Embrace the satisfying crunch, enjoy the multitude of health benefits, and savor the profound satisfaction that comes with crafting such a useful and delicious ingredient right in your own kitchen. This simple preparation method opens up a world of possibilities for gluten-free, high-protein, and utterly delicious cooking.
I hope you enjoy creating and incorporating these fantastic homemade chickpea breadcrumbs into a wide range of delicious and nutritious recipes. Happy baking and happy cooking!
Homemade Chickpea Breadcrumbs Recipe
Grain-free, oil-free, high-protein, and easy-to-make chickpea breadcrumbs. A perfect substitute for traditional breadcrumbs.
Prep Time: 5 minutes
Cook Time: 40 minutes (first bake) + 10 minutes (second bake)
Total Time: 55 minutes
Yields: Approximately 1.5 cups (6.4 oz / 181 g)
Ingredients
- 2 cans (15-ounce / 425g each) cooked chickpeas (garbanzo beans), drained and rinsed.
- Note: For home-cooked chickpeas, you will need about 3 1/4 cups of drained chickpeas. Consider low-sodium options for canned chickpeas.
Instructions
- Preheat your oven to 350°F (180°C).
- Rinse and thoroughly drain the chickpeas in a colander or mesh sieve, shaking off as much excess water as possible. Transfer the drained chickpeas to a clean, dry dishtowel or several layers of paper towels. Blot vigorously until they are as dry as possible. Discard any loosened skins.
- Spread the dried chickpeas in a single, even layer on a large rimmed baking sheet. There is no need to grease or line the sheet.
- Bake in the preheated oven for 40 minutes, or until the chickpeas are light golden brown and feel dry to the touch.
- Remove the baking sheet from the oven and let the chickpeas cool on the sheet for 10 minutes. Keep the oven on.
- Transfer the baked chickpeas to the bowl of a food processor. Pulse into fine crumbs, stopping once or twice to scrape down the sides and bottom of the bowl for even processing. (For chunkier crumbs, pulse less and do not scrape as frequently.)
- Spread the chickpea crumbs in an even layer back onto the same baking sheet.
- Return the baking sheet to the 350°F (180°C) oven and bake for another 10 minutes.
- After 10 minutes, turn off the oven heat. Leave the chickpea crumbs inside the cooling oven for an additional hour to ensure they dry out completely and become perfectly crisp.
- Remove the crumbs from the oven and allow them to cool completely to room temperature.
- Transfer the cooled chickpea breadcrumbs to an airtight storage container.
Notes
- Storage: Store the crumbs in an airtight container at cool room temperature for up to 1 month. For longer storage, freeze for up to 6 months.
- Home-Cooked Chickpeas: If using home-cooked chickpeas, ensure they are well-drained. Approximately 3 1/4 cups are needed.
- Sodium Note: To minimize sodium, use canned chickpeas labeled “low sodium” or “no salt added.” If cooking from dried, use minimal or no salt during preparation.
- Seasoning: For flavored crumbs, add dried herbs and spices (e.g., garlic powder, Italian seasoning, smoked paprika) to the blitzed crumbs before the second bake (Step 7).
Nutrition (Approximate per 2 tablespoons serving)
Calories: 73kcal | Carbohydrates: 12.2g | Protein: 3.9g | Fat: 1.2g | Saturated Fat: 0.1g | Sodium: 102mg | Fiber: 3.4g | Sugar: 2.1g