
Easy Millet Flax Tortillas: Your Go-To Vegan, Gluten-Free, and Oil-Free Wraps
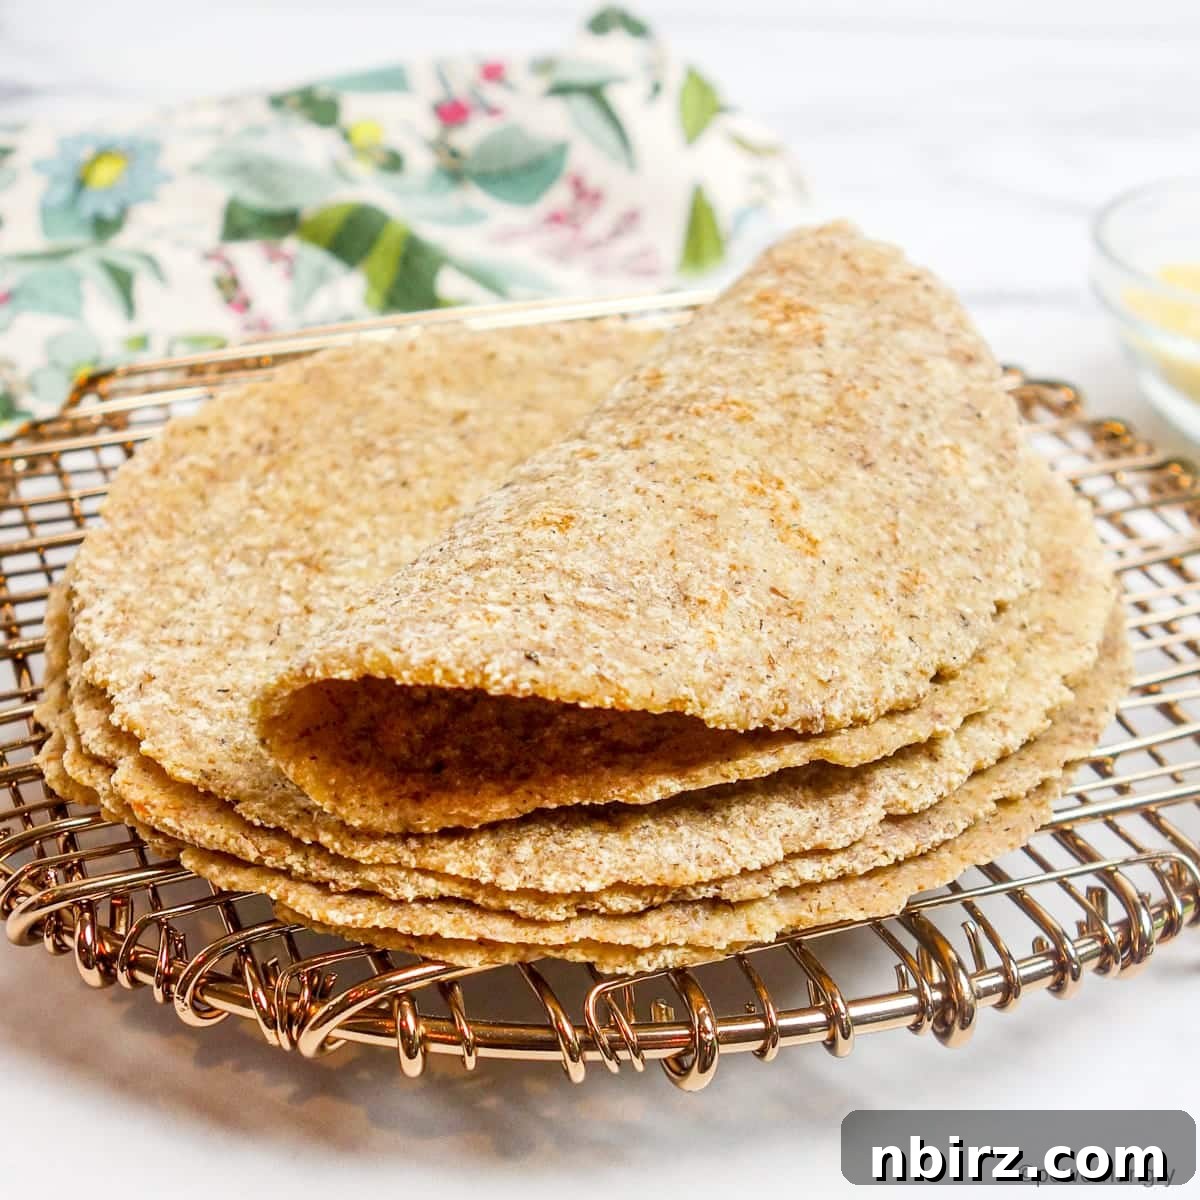
Crafting delicious and wholesome tortillas at home has never been easier, especially when you discover the magic of millet and flax. These **Easy Millet Flax Tortillas** offer a fantastic alternative to traditional corn or wheat tortillas, perfect for those seeking vegan, oil-free, and gluten-free options. Made with just two core ingredients – millet flour and flaxseed meal – plus water and a pinch of salt, they deliver a subtly nutty, wholesome texture and a delicate, almost corn-like flavor that makes them incredibly versatile for all your culinary needs.
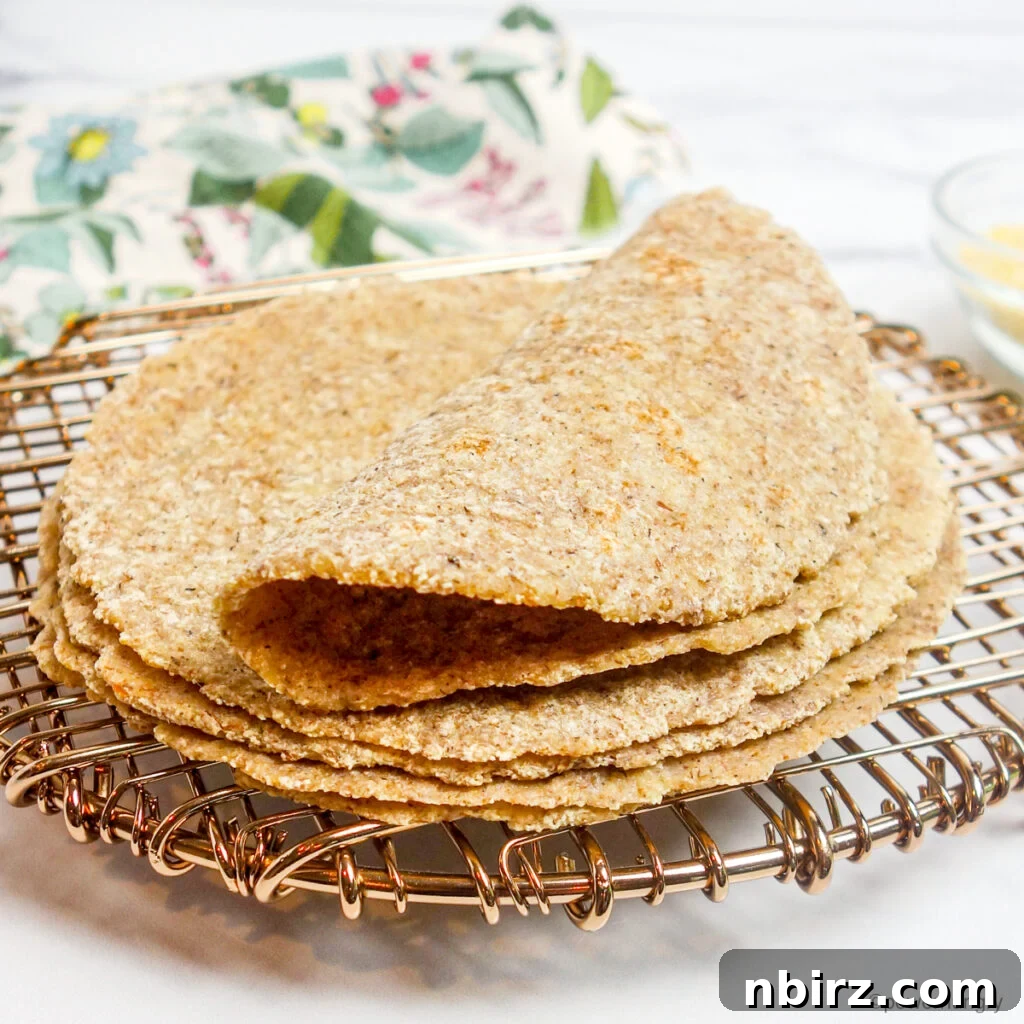
My culinary journey with millet continues to evolve with each new recipe, and these flexible, flavorful Millet Flax Tortillas stand as a testament to this amazing grain. They are not only inherently delicious but also remarkably pliable, a significant improvement over all-millet flatbreads which often tend to be brittle. This enhanced flexibility comes courtesy of a generous addition of flaxseed meal, which acts as a natural binder, ensuring your tortillas hold together beautifully without cracking.
I genuinely hope to inspire you to explore the myriad wonders of millet. Often overlooked, millet is an incredibly versatile, affordable, and mild-flavored grain that shines in a vast array of recipes. Beyond its culinary adaptability, millet is a nutritional powerhouse. It’s a low-glycemic food, meaning it helps maintain stable blood sugar levels after consumption, making it an excellent choice for consistent energy. Furthermore, it’s exceptionally rich in dietary fiber, boasting both soluble and insoluble types, which are vital for promoting optimal digestive health. Truly, a hero ingredient in every sense!
Prepare to fall in love with millet as you transform it into these effortlessly delicious, homemade tortillas. They are a game-changer for healthy, plant-based eating.
Unlock the Health Benefits of These Wholesome Tortillas
These nourishing and satisfying millet flax tortillas are packed with advantages, making them a superb addition to any diet:
- Vegan: Completely free from animal products, including eggs and dairy, making them perfect for plant-based lifestyles and those with related allergies.
- Oil-Free: Prepared without any added oils, these tortillas are lighter and a great choice for oil-free cooking.
- Gluten-Free: Naturally free of gluten, they are a safe and delicious option for individuals with celiac disease or gluten sensitivity.
- Minimal Ingredients: Requires only two main ingredients (millet flour and flaxseed meal), plus water and optional salt, simplifying your shopping list and preparation.
- Budget-Friendly: Made with inexpensive pantry staples, these tortillas are a frugal choice that doesn’t compromise on flavor or nutrition.
- Sugar-Free: Contains no added sugars, aligning with healthier eating habits.
- No Special Equipment: You don’t need fancy gadgets to make these; basic kitchen tools are all you require.
- Beginner-Friendly: No prior tortilla-making experience? No problem! This recipe is straightforward and forgiving.
- Nutrient-Rich: Millet is known for its high fiber content and being low-glycemic, while flaxseed adds beneficial Omega-3 fatty acids and further fiber.
Essential Ingredients for Your Millet Flax Tortillas
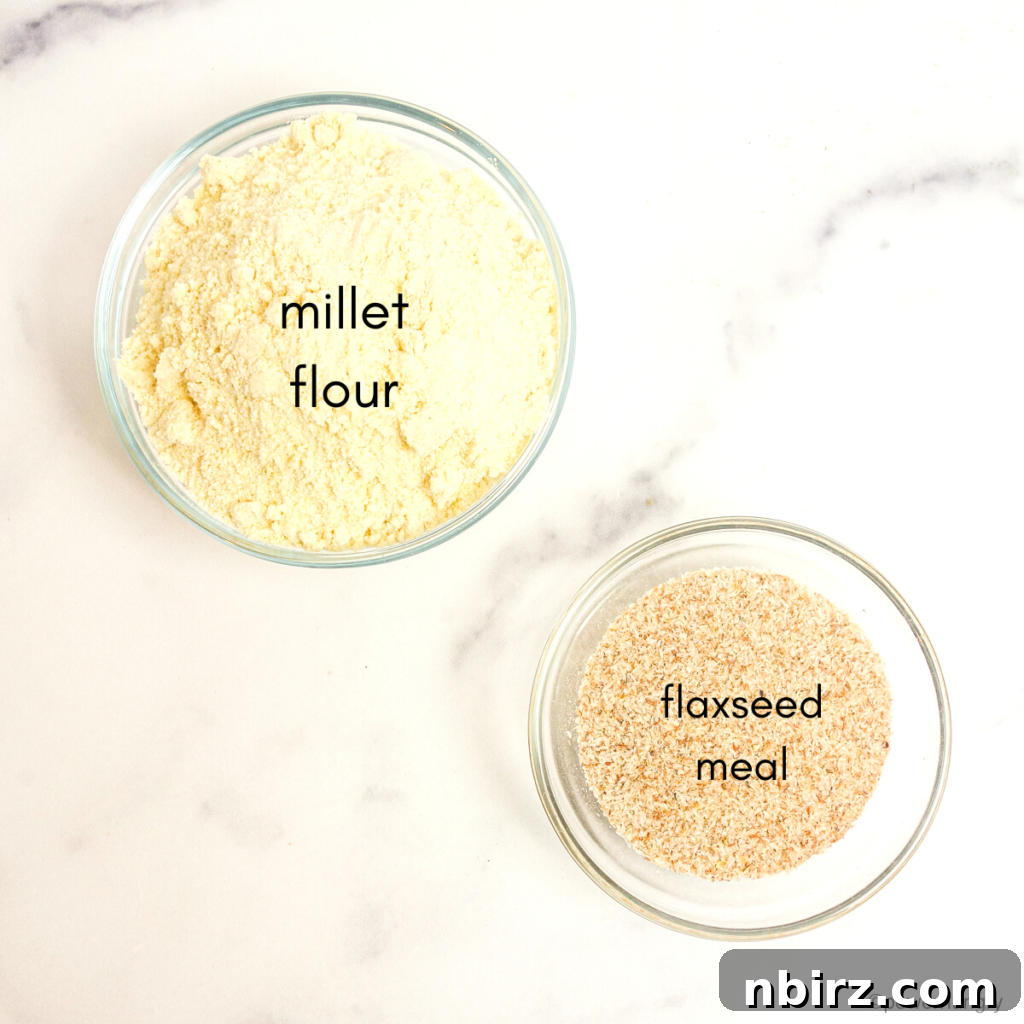
The beauty of this recipe lies in its simplicity. You only need two primary ingredients: **millet flour** and **flaxseed meal**, along with ordinary tap water. While a small amount of salt can be added to enhance the flavor, it is entirely optional and not essential for the structural integrity of the tortillas. This minimalist approach ensures that the natural goodness of millet and flax truly shines through.
- Millet Flour: This forms the bulk of our tortillas, providing a unique wholesome taste and texture. Ensure you’re using finely ground millet flour for the best results.
- Flaxseed Meal: The true hero for flexibility, flaxseed meal (ground flaxseeds) absorbs water to create a gel-like consistency, binding the dough and preventing brittleness.
- Water: The binder that brings everything together, creating a pliable dough. The amount may vary slightly depending on your flour and climate.
- Salt (Optional): A pinch of fine sea salt can elevate the flavors, but feel free to omit for a salt-free diet.
Expert Tip: Grind Your Own Millet Flour for Peak Freshness
For the freshest flavor and optimal texture, consider grinding your own millet flour at home. If you own a high-speed blender or a small electric coffee grinder, transforming whole millet grains into fine flour is a quick and simple process.
A high-speed blender can mill whole millet into a silky flour in approximately one minute, making it incredibly efficient. If you’re using a coffee grinder, process about 1/4 cup of millet at a time; it’s surprisingly fast. Grinding your own flour not only ensures maximum freshness but can also be more economical in the long run. Any excess flour can be stored in an airtight bag or container and frozen, preserving its quality for your next batch of healthy millet tortillas.
However, it’s important to note that standard food processors are generally not suitable for grinding whole millet into a fine flour. I’ve personally experimented with various food processors, repeatedly trying to achieve a fine consistency, but the tiny millet grains are exceptionally hard and tenacious. After even 10 minutes of continuous grinding, you’re likely to end up with nothing finer than a coarse meal, which won’t yield the delicate texture required for these tortillas.
Exploring Substitutions for Millet Flour or Flaxseed Meal
While this recipe has been specifically developed and tested with millet flour and flaxseed meal for optimal results, you might be curious about potential substitutions. It’s challenging to predict the exact outcome with other flours without direct experimentation, as different grains have unique binding and absorption properties. The given proportions are finely tuned for millet flour, but feel free to explore if you’re an adventurous baker!
The **flaxseed meal** plays a critical role in this recipe: it acts as the primary binder, imparting the necessary flexibility that prevents these tortillas from cracking. Without it, tortillas made solely with millet flour tend to be brittle and difficult to work with. For a viable substitute, an equal amount of **chia seed meal** (ground chia seeds) should work effectively. Like flaxseed, chia seeds form a gelatinous mixture when combined with liquid, providing excellent binding properties.
Alternatively, **whole psyllium husks** can also serve as an excellent binder. If you choose to use psyllium husks, I recommend using three tablespoons of whole psyllium husks as a direct replacement for the 1/4 cup of flaxseed meal. Psyllium husk is an incredibly potent binder and can significantly improve the pliability and strength of gluten-free doughs, offering a different but equally effective texture.
Step-by-Step Directions to Perfect Millet Flax Tortillas
Step 1: Prepare and Mix the Dough
Begin by combining the dry ingredients. In a small mixing bowl, thoroughly whisk together the millet flour, flaxseed meal, and the optional salt until they are well blended. This ensures an even distribution of ingredients, especially the flaxseed meal, which is crucial for binding.
Next, gradually add the water to the bowl of dry ingredients. Stir continuously until everything is completely combined and a rough dough begins to form. Once the ingredients are mixed, let the dough stand for about 5 minutes. This resting period is vital, as it allows the flaxseed meal and millet flour ample time to fully absorb the water, creating a more cohesive and pliable dough. You’ll notice the mixture quickly transforming into a thick, firm dough. Finally, use your hands to gather the dough into a single ball in the center of the bowl.
Note: If you use regular brown flaxseed meal instead of golden flaxseed meal (as seen in some of the photos), your tortillas will naturally have a darker hue, but the flavor and texture will remain equally delightful.
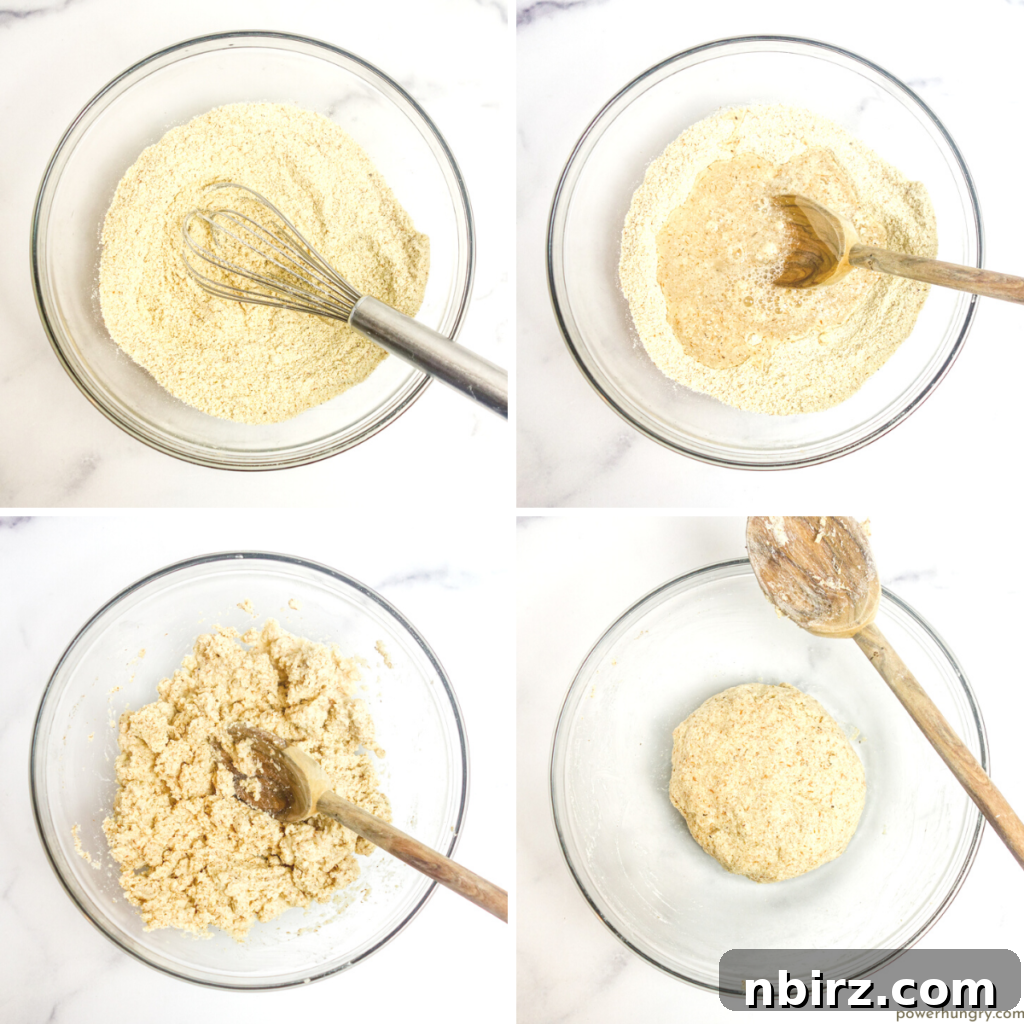
Step 2: Divide the Dough Evenly
Once your dough has rested and is cohesive, gently shape it into an even disk or ball. Don’t worry about overworking the dough or being too delicate with it – this is a remarkably durable dough and can be reshaped as many times as necessary without compromising its final texture. Its robust nature makes it very forgiving for beginners.
Transfer the dough disk onto a clean cutting board. Using a knife or a dough scraper, cut the dough into 5 equal pieces. Alternatively, for a more hands-on approach, you can simply break off 5 equal pieces of dough by hand. Whichever method you find easier, the goal is to have uniform portions to ensure consistent tortilla size and cooking time.
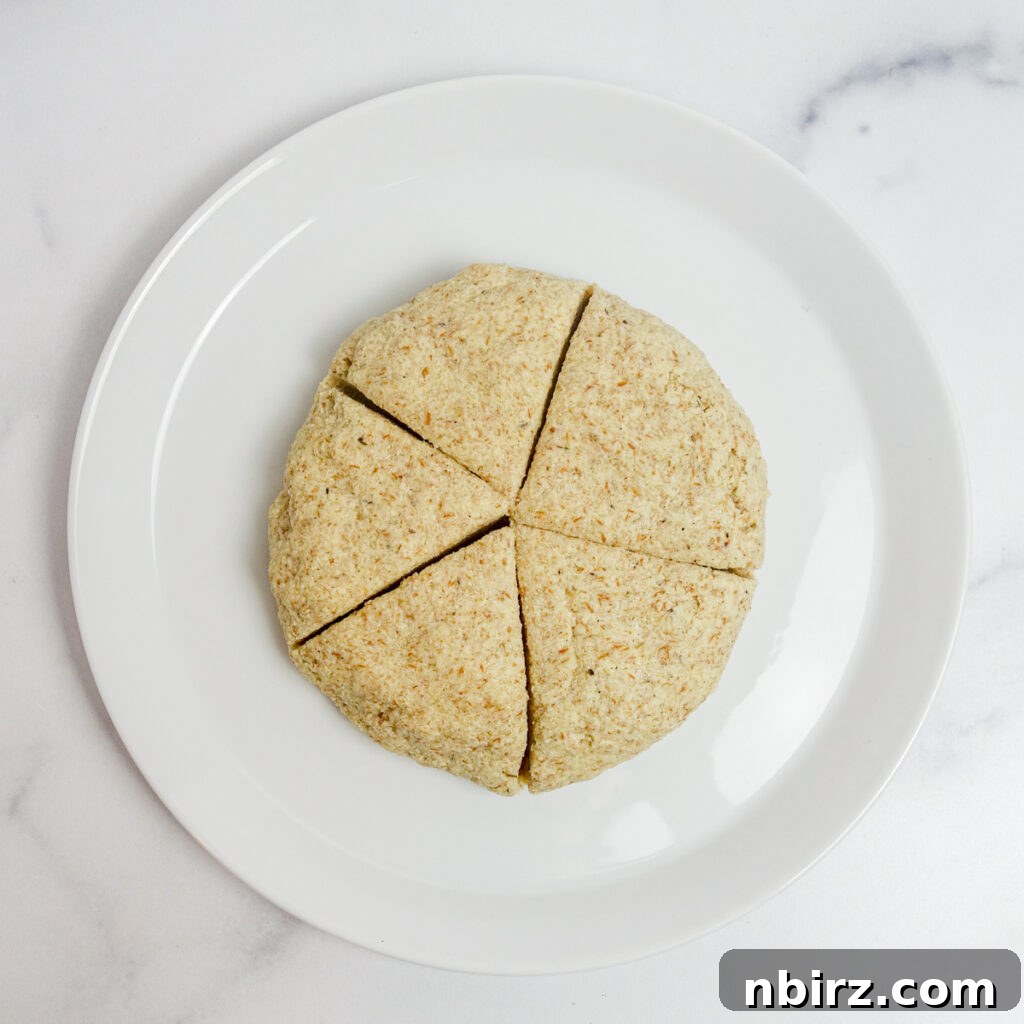
Step 3: Shape Your Tortillas
Take each individual piece of dough and roll it into a smooth ball. Now, for the shaping: place one of these dough balls between two sheets of plastic wrap, parchment paper, or wax paper. I highly recommend **plastic wrap** as it is, by far, the best choice for easily removing the delicate dough after it has been rolled or pressed, preventing sticking and tearing.
Using a rolling pin, gently roll the dough into a circular shape, aiming for a diameter of approximately 6 inches (15 cm). Don’t strive for absolute perfection, especially during your initial attempts. If the circle isn’t perfectly round, simply pinch off small pieces of dough from thicker areas and press them into thinner spots to even it out. The beauty of homemade tortillas lies in their rustic charm.
It’s important not to roll this portion (1/5 of the total dough) any larger than 6 inches. Rolling it thinner will make the tortilla too delicate to remove from the paper without tearing and can lead to difficulties during the cooking process. If you desire larger tortillas, please refer to my notes at the end of the recipe for adjusting the dough portions accordingly.
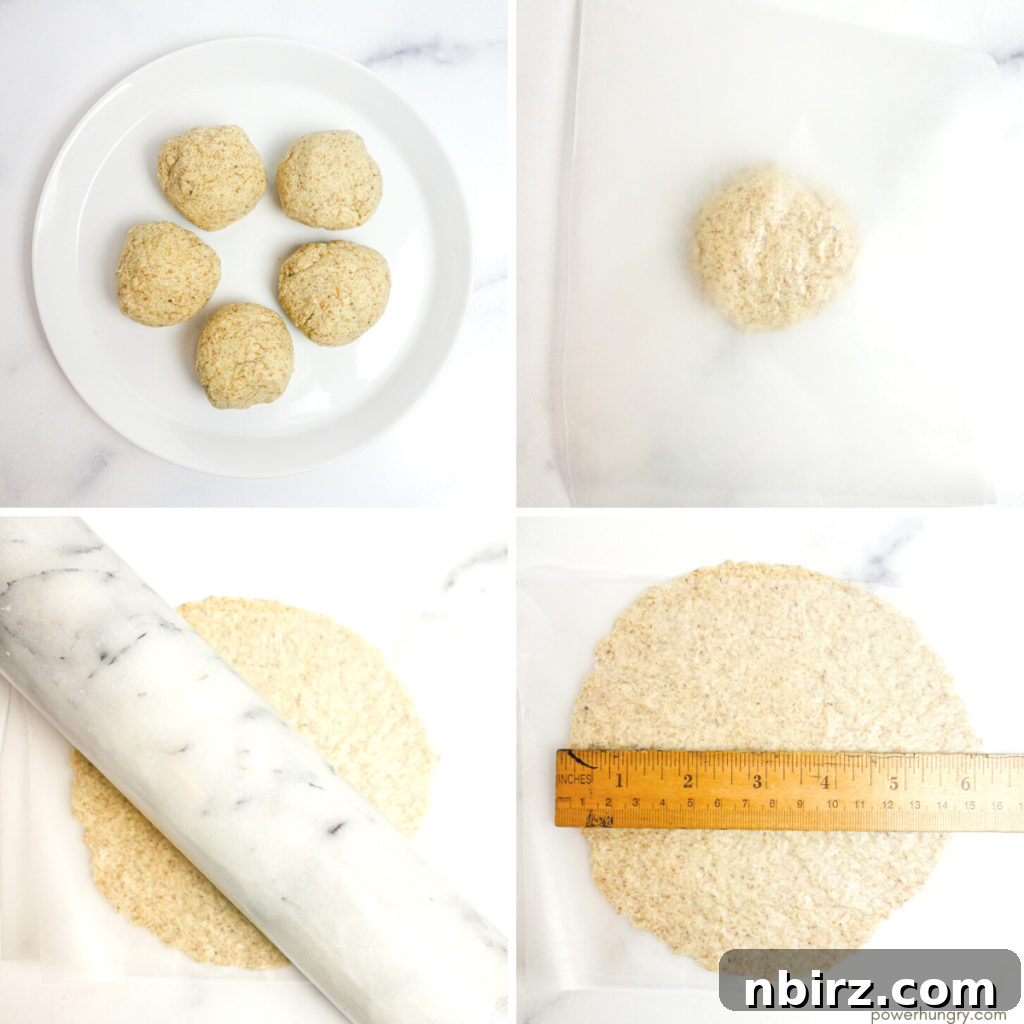
Alternative Methods for Flattening Tortilla Dough
No rolling pin? No problem at all! You can easily improvise with common kitchen items. A large, still-filled can (like a tomato can) or a sturdy wine bottle can serve as excellent substitutes for a rolling pin, allowing you to achieve the desired thinness for your tortillas.
If you are fortunate enough to own a tortilla press, this is the ideal tool for the job! A tortilla press will efficiently and evenly flatten your dough into perfect circles with minimal effort. Even with a press, remember to use plastic wrap, wax paper, or parchment paper to prevent the dough from sticking to the press plates, ensuring easy removal.
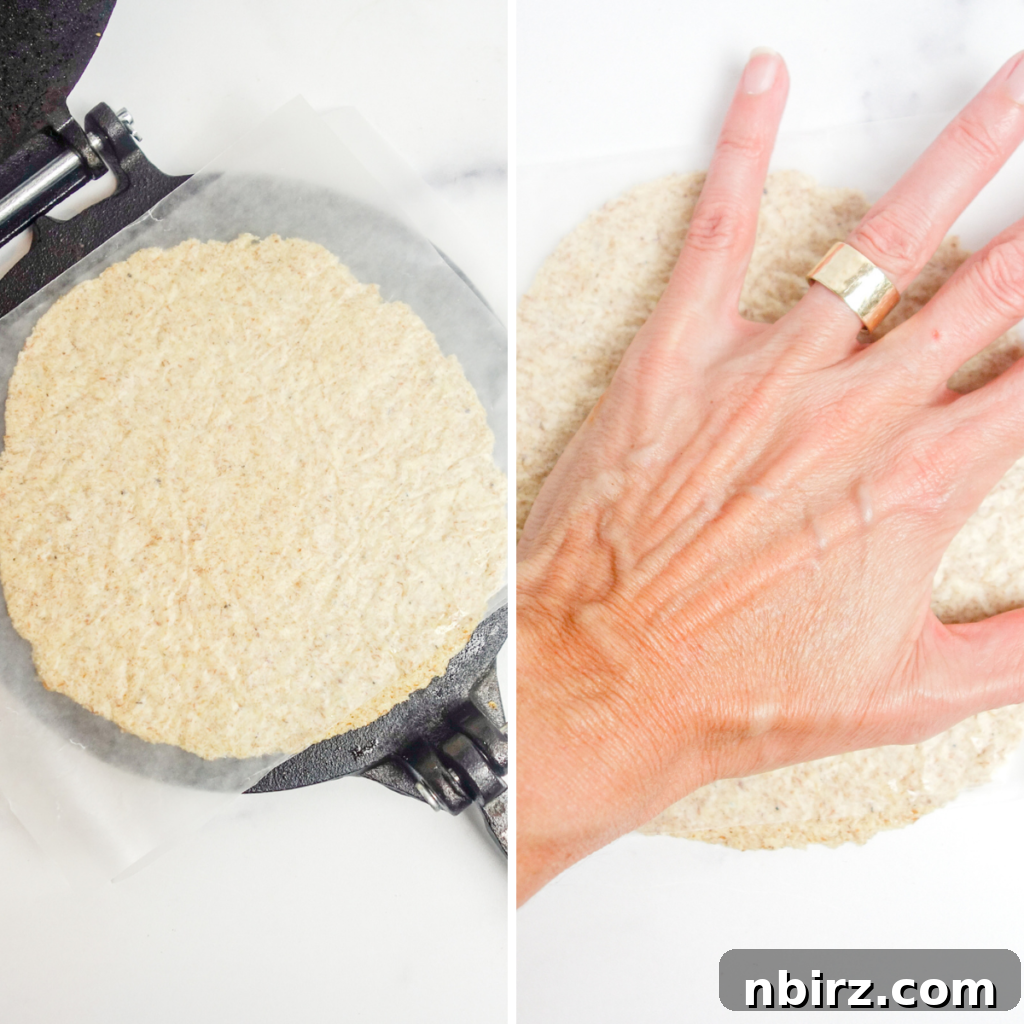
For a truly hands-on approach, you can also use your fingers and the palm of your hand to press and flatten the dough. Place the dough ball between sheets of wax paper or parchment paper, then gently press outwards from the center, working your way to the edges to form a rough circle. The key is to achieve a relatively thin tortilla, regardless of its exact shape. As long as it’s thin enough, you are guaranteed to end up with delicious, pliable tortillas.
Pro Tips for Removing Plastic Wrap or Paper from Tortillas
Once your tortilla is rolled out to the desired thinness, carefully peel off the top layer of plastic wrap or paper. If you notice any small pieces of dough sticking to the wrap, don’t worry – simply press them back into the main tortilla with your fingers. The dough is forgiving and will easily re-adhere.
A common observation is that the dough becomes stickier as it warms up, especially in a warmer kitchen environment. If you find that the plastic wrap or paper is proving particularly stubborn and difficult to remove, here’s a neat trick: place the tortilla (still nestled between its sheets of paper or plastic) into the freezer for a brief 3 or 4 minutes. Be careful not to leave it in for much longer. This slight chill will firm up the dough just enough, allowing the wrap or paper to peel away with remarkable ease, ensuring your perfectly shaped tortilla remains intact.
Step 4: Cook Your Millet Flax Tortillas to Perfection
For best results, I highly recommend using a nonstick skillet for cooking these tortillas. Alternatively, a very well-seasoned cast iron pan that you know performs reliably as a nonstick surface can also work wonderfully. The goal is to prevent any sticking, which can be a common challenge with gluten-free doughs.
Preheat your chosen skillet over medium-high heat. Once hot, carefully place the tortilla into the skillet, dough-side down. As soon as it’s in the pan, gently peel off the remaining piece of plastic wrap or paper. Reduce the heat to medium. Cook the tortilla for approximately 2 to 4 minutes on the first side. You’ll observe small bubbles forming in a few places across the surface, though it won’t puff up dramatically like some traditional tortillas.
To check for readiness, gently slide a spatula underneath the tortilla and lift it slightly. It should release easily without sticking to the pan, indicating that the bottom side is cooked through. Once it releases, carefully flip the tortilla over. Cook the second side for another 1 to 2 minutes, until it appears dry and slightly darker in color. Keep in mind that these millet tortillas don’t typically brown intensely, so look for a subtle change in shade.
As each tortilla finishes cooking, transfer it to a wire cooling rack to cool slightly. This prevents them from becoming soggy. Repeat the process with the remaining pieces of dough until all your delicious millet tortillas are ready to enjoy!
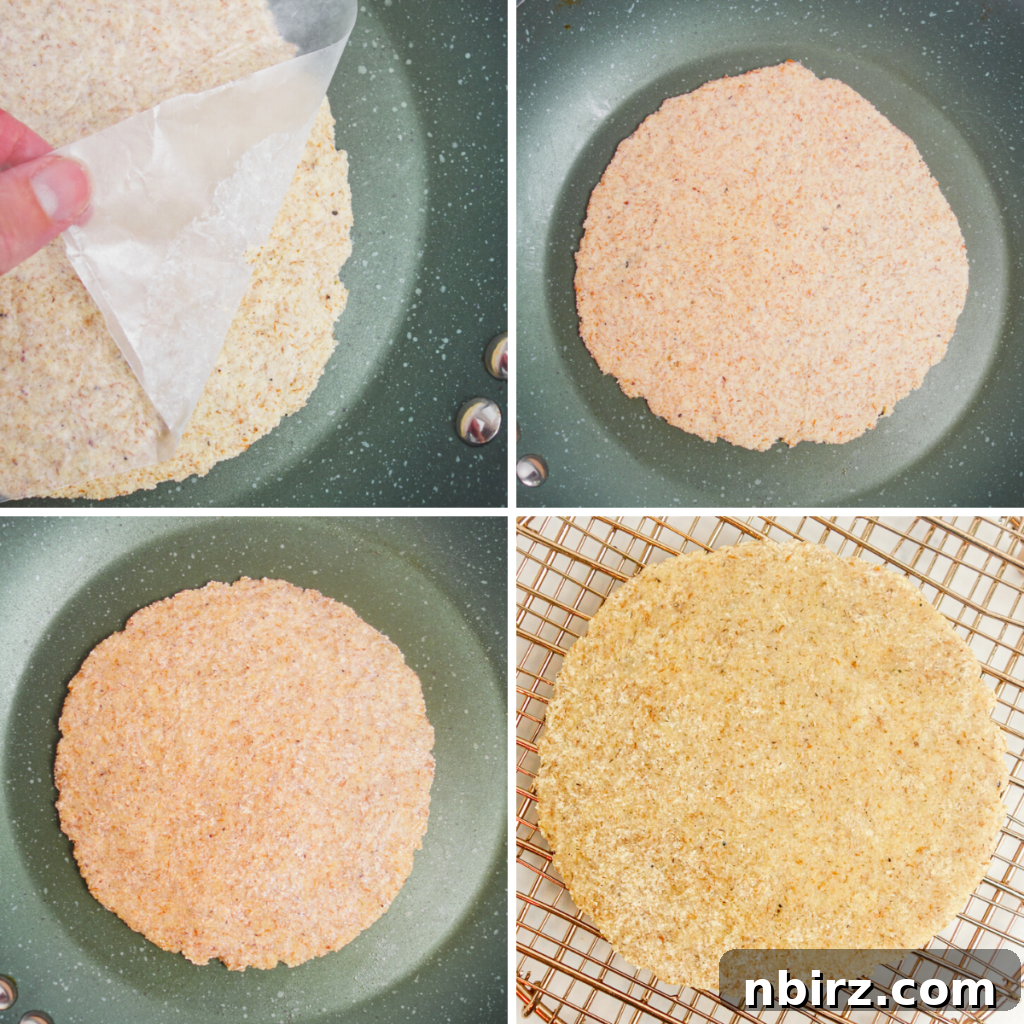
Congratulations, your homemade millet flax tortillas are now complete and ready for endless culinary possibilities!
Versatile Culinary Uses for Your Millet Flax Tortillas
These incredibly versatile millet flax tortillas can be enjoyed in countless ways, just like any traditional tortilla or flatbread. Their wholesome texture and mild flavor make them a perfect foundation for a wide array of dishes, from savory meals to unexpected sweet treats.
Embrace them as the base for classic Mexican-inspired dishes such as vibrant **tacos** filled with your favorite proteins and fresh toppings, hearty **burritos** stuffed with beans and rice, or cheesy (or dairy-free) **quesadillas**. Beyond that, they excel at scooping up rich **beans**, zesty **salsa**, creamy **guacamole**, robust **stews**, aromatic **curries**, and a medley of roasted or fresh **vegetables**.
But the versatility doesn’t stop there. These tortillas are also excellent for crafting everyday meals like **sandwiches** and **wraps**, offering a gluten-free and oil-free alternative to bread. Their somewhat rustic and hearty character might seem unconventional for dessert applications, unlike delicate crepes. However, that hasn’t stopped me (and I encourage you!) from experimenting. I’ve found them surprisingly delightful when smeared with rich chocolate hazelnut spread for a quick, wholesome indulgence. Don’t be afraid to get creative and explore new pairings!
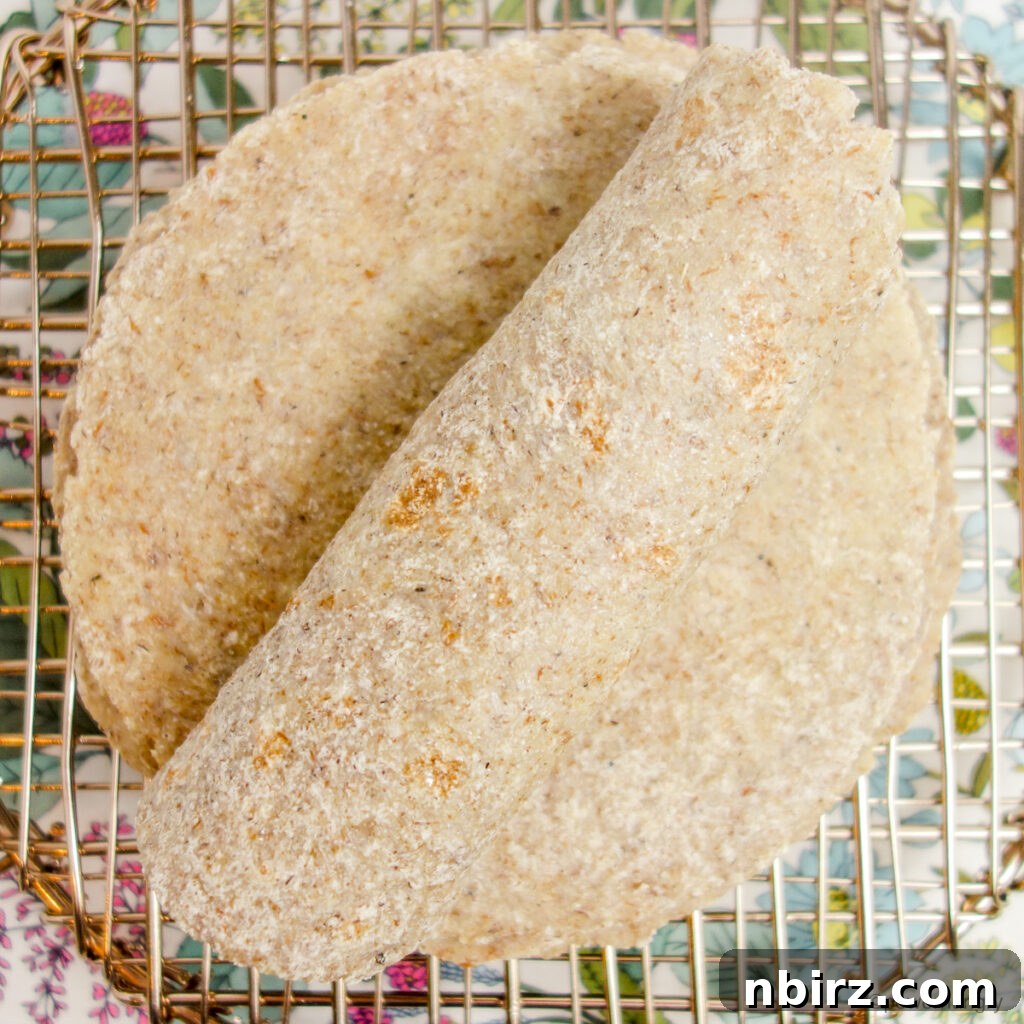
As mentioned earlier, the flaxseed meal ensures these tortillas are wonderfully flexible. You can:
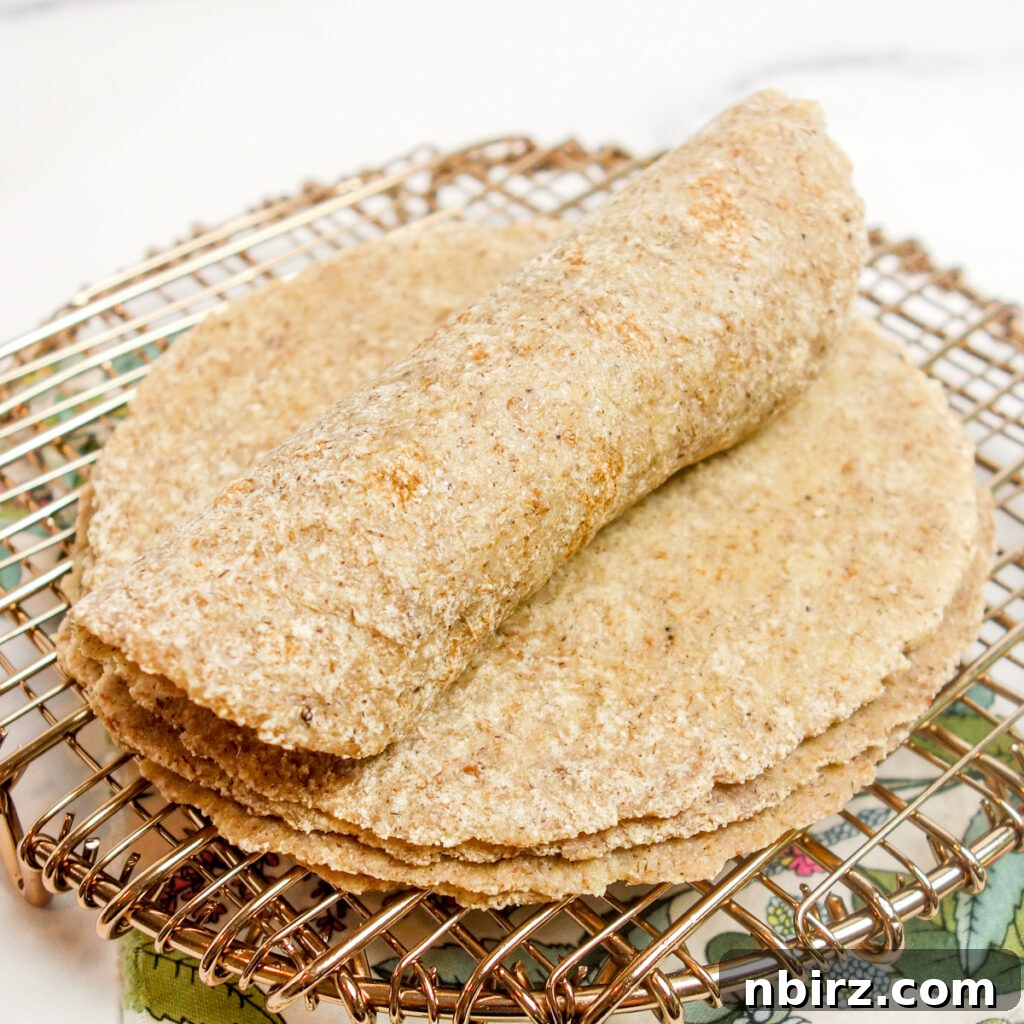
Roll them up: Ideal for wraps, burritos, or simply dipping.
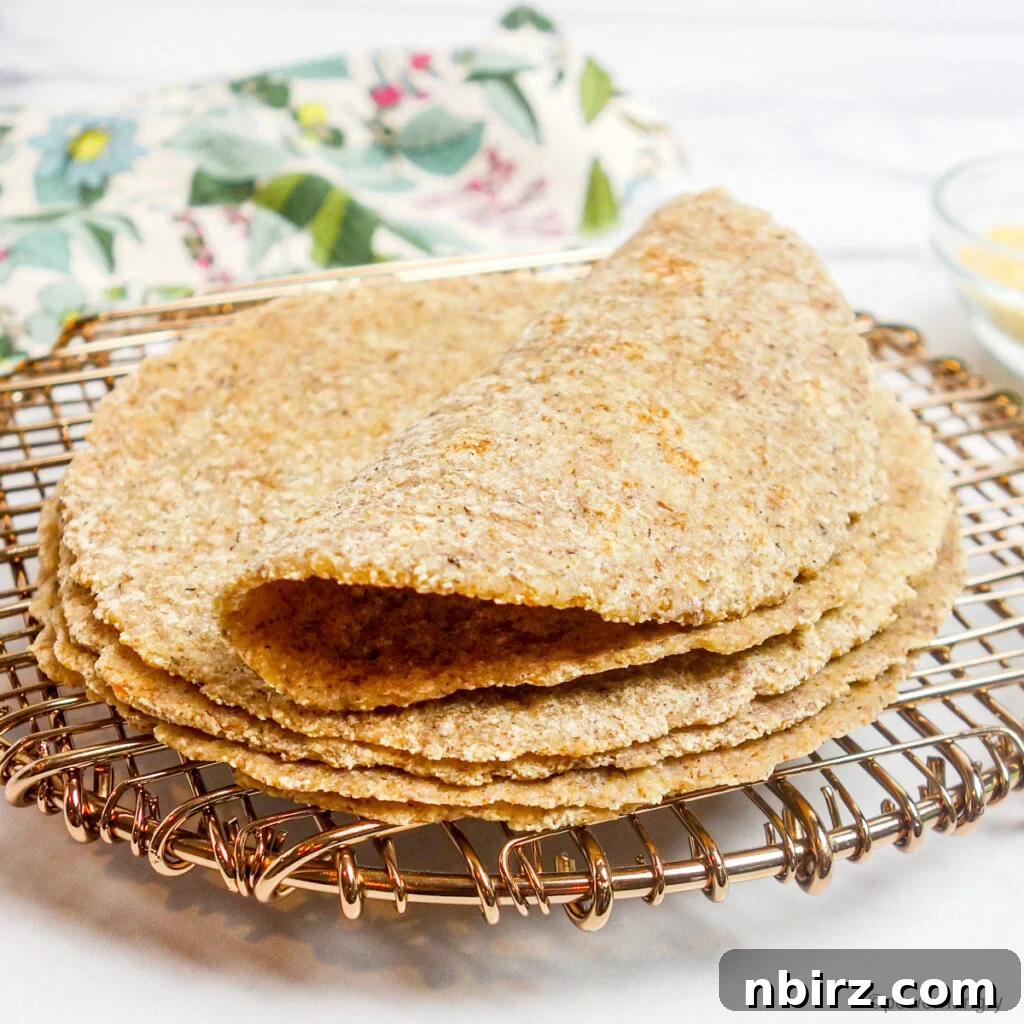
Fold them in half: Perfect for soft tacos or holding fillings securely.
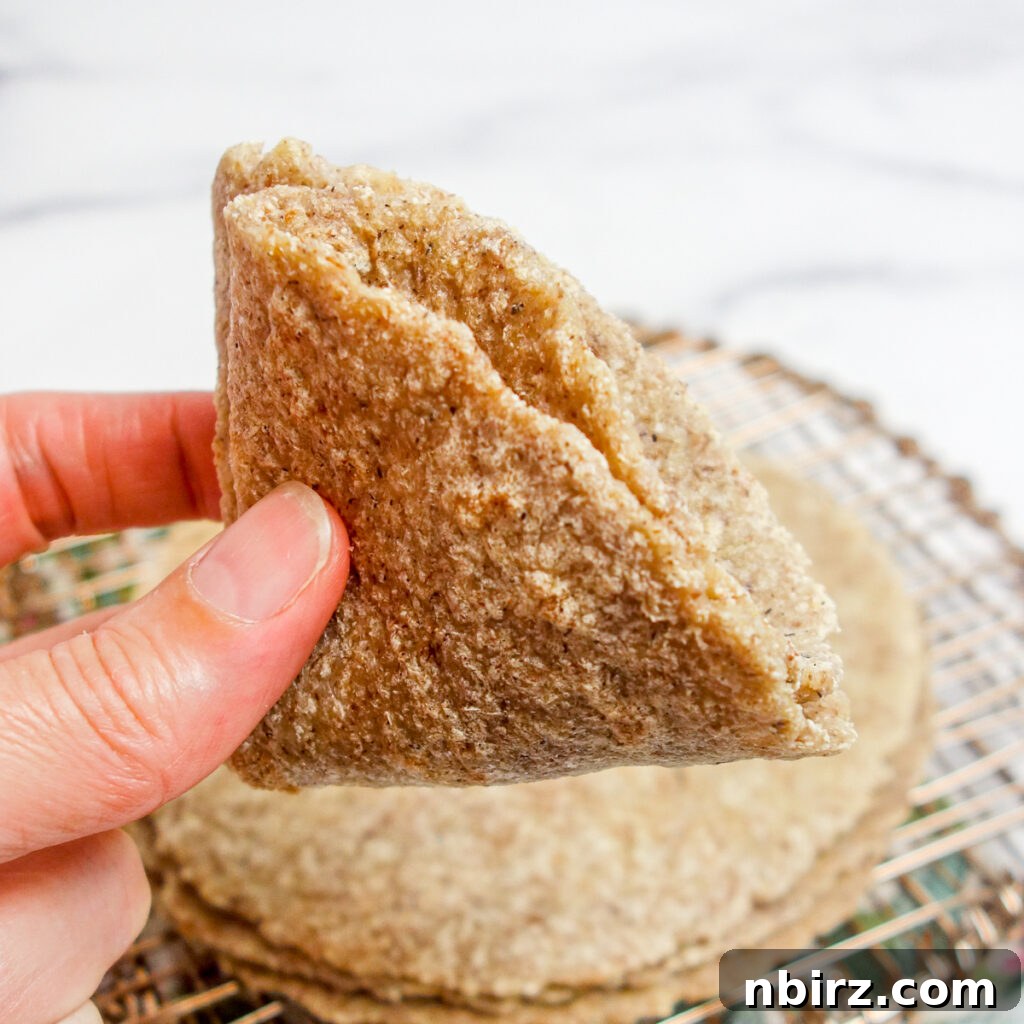
Or quarter them: Great for dipping into hummus, salsa, or serving alongside stews.
Happy eating and enjoy the endless possibilities!
Frequently Asked Questions About Millet Flax Tortillas
How Should I Store My Homemade Millet Flax Tortillas?
Proper storage ensures your delicious tortillas remain fresh and ready for use. Once the tortillas have completely cooled, transfer them to an airtight container. They will keep well at cool room temperature for up to 2 days. For longer storage, refrigerate them for up to 2 weeks, or freeze them for an impressive duration of up to 6 months. When ready to use from the freezer, simply thaw at room temperature or gently warm in a skillet until pliable.
My Dough Is Too Dry/Moist. What Should I Do?
This recipe is wonderfully flexible, allowing for minor adjustments to achieve the perfect dough consistency. If your dough feels too dry and crumbly, simply add a tiny bit more water, one teaspoon at a time, kneading until it reaches the desired texture. Conversely, if the dough is too wet or sticky, incorporate a small amount of extra flaxseed meal (this is generally preferred over millet flour, as the flaxseed helps with binding and texture), perhaps a pinch at a time, until the dough is moist and pliable but not overly wet. The ideal dough should be soft, firm, and easy to handle without sticking excessively to your hands.
Can I Make Large Millet Flax Tortillas?
Absolutely! If you prefer larger tortillas, this recipe can be easily adjusted. You can divide the entire quantity of dough into fewer, larger portions. For instance, to make 10-inch tortillas, divide the dough in half. For 8-inch tortillas, divide it into thirds. When working with larger tortillas, remember to use a spacious nonstick skillet to accommodate them. Also, exercise extra care and gentle handling when turning or flipping the tortillas, as their larger size makes them more prone to tearing during the cooking process.
Can I Make the Dough Ahead of Time?
Yes, you certainly can! Preparing the dough in advance is a great time-saver. Once mixed, the dough can be stored in an airtight container and kept in the refrigerator for up to 1 week. This allows you to prepare a batch of dough on a weekend and have fresh tortillas throughout the week with minimal effort. Simply take the dough out of the refrigerator a little before you plan to use it to allow it to come closer to room temperature for easier handling.
Millet Flax Tortillas (V, GF, Oil-Free) Recipe
Discover how simple it is to make your own wholesome, versatile Millet Flax Tortillas. Perfect for wraps, tacos, or dipping!
Prep Time: 15 minutes
Cook Time: 6 minutes
Servings: 5 tortillas
Ingredients
- 3/4 cup millet flour
- 1/3 cup flaxseed meal
- 2/3 cup water (more, if needed)
- Optional: 1/4 teaspoon salt
Instructions
- In a small mixing bowl, whisk the millet flour, flaxseed meal, and (optional) salt until well blended.
- Add the water to the bowl, stirring until combined. Let the dough stand for 5 minutes to thicken. Then, shape the dough into a ball. It should feel firm and moist, but not wet. If too wet, add a bit more flaxseed meal; if too dry, add a little more water.
- Cut, or otherwise divide, the dough into 5 equal pieces. Shape each piece of dough into a smooth ball.
- Place one dough ball between two large pieces of plastic wrap, wax paper, or parchment paper. Using a rolling pin or a tortilla press, roll or press the dough into a 6-inch (15 cm) circle. Carefully peel off the top layer of plastic wrap or paper.
- Place the tortilla, dough side down, into a preheated nonstick skillet. Carefully peel off the second piece of wrap/paper.
- Cook the tortilla for 2 to 4 minutes, until it bubbles up slightly in a few places and releases easily when lifted with a spatula. Flip the tortilla and cook the other side for 1 to 2 minutes longer, until dry and slightly darker.
- Transfer the cooked tortilla to a metal cooling rack and repeat with the remaining pieces of dough.
- The tortillas are delicious warm, at room temperature, or cold.
Notes
- Storage: Store the cooled tortillas in an airtight container. They will last for 2 days at cool room temperature, 2 weeks in the refrigerator, or up to 6 months in the freezer.
- Grind Your Own Millet Flour: A high-speed blender can transform whole millet into fine millet flour in about a minute. If using a coffee grinder, grind about 1/4 cup at a time. Store any extra flour in an airtight bag or container and freeze. Food processors are not recommended for grinding whole millet into fine flour.
Nutrition (per serving)
Serving: 1 tortilla | Calories: 105kcal | Carbohydrates: 15g | Protein: 3g | Fat: 4g | Polyunsaturated Fat: 3g | Sodium: 4mg | Fiber: 2g
Explore More Grain-Free & Vegan Tortillas You’ll Love:
If you enjoyed making these millet flax tortillas, you’ll be delighted to discover other fantastic grain-free and vegan tortilla recipes:
- 2-Ingredient Coconut Flour Tortillas: Simple, subtly sweet, and wonderfully pliable.
- 1-Ingredient Red Lentil Tortillas: An ingenious recipe requiring only one humble ingredient for a protein-packed wrap.
- 2-Ingredient Chickpea Flour Tortillas: Earthy and robust, perfect for savory fillings.
- 3-Ingredient Sweet Potato Tortillas: A hint of sweetness and beautiful color, packed with nutrients.
- 1-Ingredient Black Bean Tortillas: Rich in flavor and fiber, these are incredibly easy to make.
- Grain-Free Spinach Tortillas {2 ingredients}: A vibrant green option that adds a nutritious boost to any meal.
- 1-Ingredient Split Pea Tortillas: Another incredibly simple, protein-rich tortilla option.
Each of these recipes offers a unique flavor and texture profile, proving that healthy, homemade tortillas are both accessible and delicious. Happy cooking!