
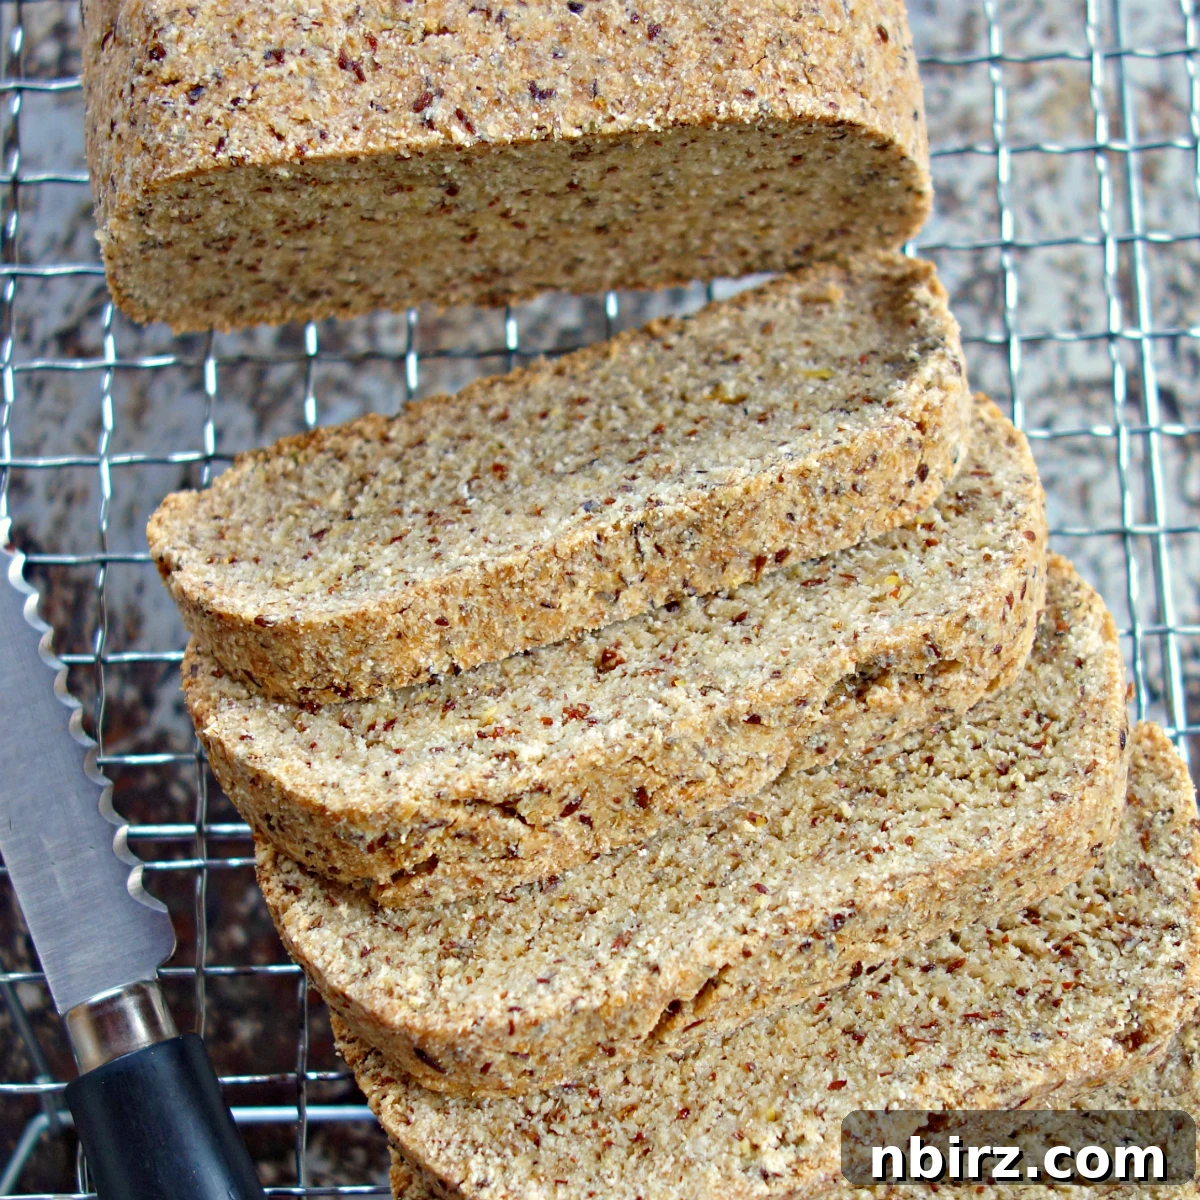
Are you searching for a delicious, satisfying bread that fits seamlessly into your keto and vegan lifestyle? Your quest ends here! This remarkable keto vegan coconut flour bread is everything you’ve been craving and more: wonderfully firm yet tender, bursting with subtle flavor, incredibly easy-to-make, and completely oil-free. It’s not just a bread; it’s a versatile culinary companion, perfect as the foundation for your favorite sandwiches, a delightful base for toast, or a sturdy canvas for both sweet and savory toppings. Prepare to dive into the world of guilt-free indulgence with this truly revolutionary recipe.
Bake the Best Keto Vegan Coconut Flour Bread: Your Ultimate Guide to Oil-Free, Egg-Free Loaves
For individuals navigating the delicious yet often challenging complexities of a ketogenic, vegan, or gluten-free diet, finding truly satisfying bread can frequently feel like an impossible quest. Many low-carb or gluten-free bread recipes rely heavily on eggs for their crucial structure, thereby immediately disqualifying them for a vegan diet. However, with a blend of culinary ingenuity, extensive experimentation, and the precise combination of powerful, plant-based ingredients, we have finally cracked the code to a bread that not only meets these stringent dietary requirements but also excels magnificently in both taste and texture. This exceptional recipe stands as a testament to the boundless versatility of plant-based baking, delivering a loaf that is both deeply nourishing and incredibly palatable.
Mastering Egg-Free Keto Coconut Flour Bread: The Vegan Secret
My culinary journey has long been centered around experimenting with unique and healthful ingredients, and coconut flour has consistently remained a cherished favorite. It is truly a remarkably versatile ingredient, offering a faint, natural sweetness that beautifully enhances the flavor profiles of both sweet and savory dishes. Beyond its delightful taste, coconut flour boasts an impressive nutritional resume. It is exceptionally high in dietary fiber, notably low in net carbohydrates, naturally gluten-free, a good source of essential minerals like iron, and relatively low in calories. These outstanding attributes collectively make it a star ingredient for anyone focusing on health-conscious eating and restrictive diets.
However, successfully working with coconut flour in bread requires a specific and nuanced understanding of its unique properties. Unlike traditional wheat flours, coconut flour completely lacks gluten, which is the protein network responsible for giving conventional bread its characteristic elasticity and robust structure. Without adequate structural support, coconut flour breads can indeed suffer the infamous fate often compared to the rise and fall of the Roman Empire – rising dramatically in the oven only to collapse and crumble into a dense mess upon cooling. This inherent challenge is precisely why most conventional coconut flour bread recipes depend almost exclusively and heavily on eggs, leveraging their protein-rich composition to provide the necessary binding and essential lift.
But what if eggs are simply not an option, whether due to allergies, dietary choices, or availability? Through countless hours of dedicated experimentation and a meticulously selected blend of powerful plant-based binders, I am absolutely thrilled to share that an egg-free coconut bread is not only achievable but also surprisingly simple to prepare and, most importantly, incredibly delicious. This innovative recipe conclusively proves that you absolutely do not need any animal products to create a robust, flavorful, and perfectly structured loaf of bread that holds its shape beautifully, slices cleanly, and satisfies every craving for hearty, wholesome bread.
The Nutritional Powerhouse: Key Benefits of This Keto Vegan Coconut Flour Bread
This bread offers far more than just exceptional taste; it is a true nutritional champion, packed with a multitude of boast-worthy qualities that actively support various health goals and stringent dietary preferences. This isn’t just a delicious treat; it’s a conscious choice for a healthier lifestyle. For starters, it proudly stands as:
- Egg-Free: This makes it an ideal choice for individuals with egg allergies, sensitivities, or those steadfastly adhering to a vegan dietary regimen. It ensures inclusivity without compromise on quality.
- Dairy-Free: Perfectly suited for individuals with lactose intolerance, dairy allergies, or those committed to a dairy-free lifestyle, offering a delicious alternative to conventional breads.
- Ketogenic: Meticulously formulated to be significantly low in net carbohydrates, this bread seamlessly integrates into a ketogenic diet, helping to maintain ketosis and support metabolic health.
- Low-Carb: By keeping carbohydrate content minimal, it effectively aids in maintaining stable blood sugar levels, preventing spikes and crashes, and actively supports sustained weight management efforts.
- High in Fiber: Abundant in dietary fiber, this bread profoundly promotes excellent digestive health, enhances feelings of satiety to curb overeating, and contributes significantly to overall gastrointestinal well-being.
- Sugar-Free: Containing absolutely no added sugars, this bread stands as a healthier, guilt-free choice for everyone, especially for those diligently monitoring or reducing their sugar intake for health reasons.
- Gluten-Free: It is entirely safe and beneficial for individuals diagnosed with celiac disease or those who experience gluten sensitivity, offering a delicious and worry-free bread option.
- Oil-Free: By completely eliminating added oils, this recipe reduces the fat content, making it a lighter and even healthier bread option without compromising its rich flavor, satisfying texture, or structural integrity.
Beyond these impressive and tangible physical health benefits, the profound satisfaction derived from preparing such an easy, wholesome, compliant, and flavorful food is immeasurable. The sheer joy of creating and enjoying this bread will undoubtedly do wonders for your mental well-being too, providing a sense of accomplishment and culinary delight.
Key Ingredients for Crafting Your Egg-Free Coconut Flour Bread
The culinary magic of this truly exceptional egg-free bread lies in a carefully selected combination of readily available ingredients. While many components are standard pantry staples found in most kitchens, two ingredients are absolutely crucial and indispensable for achieving the perfect texture and robust structure without the inclusion of eggs:
- Whole Psyllium Husks: This is the undisputed superstar binder in our recipe, acting as the primary and most effective egg replacement. Its unique and powerful gelling properties are unparalleled, creating the necessary structure.
- Flaxseed Meal: Serving as a vital secondary binder, flaxseed meal works in perfect synergy with psyllium husks to further enhance the dough’s stability and contributes a subtle, wholesome flavor.
The remaining ingredients are familiar and straightforward, each playing a specific role in contributing to the bread’s delightful flavor, optimal rise, and overall appealing texture:
- Coconut Flour: The primary low-carb, high-fiber flour base, delivering a delicate sweetness and unique texture.
- Almond Flour: This complements the coconut flour, adding to the bread’s delicate crumb and nutty flavor while balancing the potential density of coconut flour alone.
- Baking Soda: An essential leavening agent that reacts with acidic ingredients to aid significantly in the bread’s lift and airy texture.
- Fine Sea Salt: Crucial for enhancing and balancing all the flavors within the bread, bringing out their best characteristics.
- Water: The liquid base that hydrates the flours and binders, allowing the psyllium and flaxseed to form their essential gels.
- Cider Vinegar: This acidic component reacts dynamically with the baking soda to create carbon dioxide, contributing to the bread’s rise and imparting a subtle, pleasant tang.
Always using high-quality ingredients will inherently yield the best results, so choose your flours and binders carefully from reputable sources. Especially for low-carb and gluten-free baking, precision in measuring – ideally by weight using a reliable kitchen scale – is an absolutely critical factor for consistent success and optimal texture!
Psyllium: The Unsung Hero and Secret Weapon in Vegan, Gluten-Free Baking
Let’s delve deeper into the wonders of psyllium (correctly pronounced “silly + yum”). This incredible, all-natural ingredient is a form of soluble plant fiber meticulously derived from the seeds of a plant known as *Plantago ovata*. While psyllium is widely recognized and utilized for its profound digestive wellness benefits, acting as a gentle laxative and promoting gut health, it is an absolute powerhouse and an unsung hero when it comes to the specialized art of egg-free, gluten-free, and especially grain-free baking. Its unique properties make it indispensable for achieving desirable results in these challenging baking categories.
The magic truly happens when whole psyllium husks are combined with liquid. They possess an extraordinary ability to absorb a significant amount of water, swelling considerably and forming a thick, highly viscous, and gelatinous gel. This psyllium gel is remarkably strong – far more robust and cohesive than the gels typically created by flaxseed or chia seeds when used alone. This immense binding power and structural integrity allow psyllium to effectively and efficiently “fill in” for the crucial structural role of eggs, preventing egg-free baked goods from collapsing, crumbling, or deflating dramatically during the baking process and after cooling. It provides the essential elasticity and firm stability that gluten naturally offers in traditional wheat-based bread, mimicking its properties in a plant-based form.
However, it is critically important to note that baking with psyllium requires a precise touch and, at times, a bit of experimentation to get the proportions just right. Unlike some more forgiving vegan egg replacements, the exact ratio of psyllium to liquid and flour is absolutely critical for success. Too much psyllium, and your bread can unfortunately become gummy, rubbery, or overly dense; too little, and you risk a crumbly texture and a loaf that struggles to hold its shape. My own extensive journey in developing this recipe involved numerous trials and errors, and yes, some experiments went *terribly wrong*, often at the very last minute, leading to deflated, gelatinous rejects that dashed hopes of success. But when you finally hit that perfect balance, the result is a beautifully structured, delightfully flavorful bread that makes all the previous efforts and countless trials absolutely worthwhile. This particular recipe has been meticulously tested and refined to ensure optimal results, so you can bake with confidence and achieve consistent success every single time!
Your Step-by-Step Guide: How to Bake This Incredible Vegan Coconut Flour Bread
Despite its impressive and extensive list of dietary credentials – being grain-free, completely vegan, gluten-free, and oil-free – this bread is surprisingly simple and remarkably quick to prepare. You will undoubtedly be amazed at how easily you can create such a wholesome, delicious, and compliant loaf in your own kitchen. Follow these detailed steps for a perfect bake every single time, transforming simple ingredients into a culinary masterpiece:
Step One: Prepare Your Equipment and Preheat the Oven
Begin your baking process by preheating your oven to a precise 350°F (175°C). As the oven steadily heats up, take a 9×5-inch (22.5×12.5 cm) loaf pan and lightly but thoroughly spray its interior sides with a high-quality non-stick cooking spray. This crucial preparatory step is absolutely essential for ensuring that your beautifully baked bread releases effortlessly and cleanly from the pan after baking, thereby preserving its perfect shape and crust.
Step Two: Carefully Combine the Dry Ingredients
In a spacious medium or large mixing bowl, meticulously whisk together all of your dry ingredients until they are thoroughly blended and evenly distributed. This includes the coconut flour, almond flour, whole psyllium husks, flaxseed meal, baking soda, and fine sea salt. This uniformity in mixing is incredibly important for ensuring the bread’s consistent texture, preventing any pockets of unmixed ingredients, and facilitating an even rise throughout the loaf.
Step Three: Precisely Incorporate the Liquid Elements
In a separate small bowl or a measuring cup, carefully combine the measured cider vinegar with the specified amount of water. Once these two liquid components are gently mixed, pour this complete liquid mixture into the bowl containing your thoroughly whisked dry ingredients. This methodical approach helps ensure that the cider vinegar is evenly dispersed throughout the dough, which is vital for its interaction with the baking soda and the overall structure.
Step Four: Thoroughly Mix to Form the Dough
Using a sturdy spoon or a durable rubber spatula, vigorously stir the wet and dry ingredients together until they are fully combined and a cohesive, thick dough firmly forms. It is imperative to meticulously scrape down the sides and bottom of the bowl to ensure that every last dry bit is incorporated into the dough. The resulting dough will be notably thick and should feel distinctly moist to the touch, but crucially, it should not be wet or overly sticky. If, after thorough mixing, the dough still feels excessively dry and crumbly, add a very small amount of water (approximately one teaspoon at a time), mixing vigorously after each addition, until the dough just comes together and is uniformly moistened. Exercise caution and avoid adding too much liquid, as this can adversely affect the final texture and density of your bread.
Step Five: Meticulously Shape the Bread Dough into a Loaf
One particularly unique aspect of this grain-free, psyllium-based bread is that its initial shape will largely remain consistent and unaltered throughout the entire baking process. Unlike traditional yeast breads that undergo significant rising and expansion, or conventional quick bread batters that tend to spread, this unique dough remarkably retains the precise form you give it prior to baking. Therefore, it is absolutely crucial to meticulously shape it into the desired loaf before carefully placing it into the baking pan.
Using your clean hands, gently gather the prepared dough into a cohesive ball. Then, firmly press and knead it ever so slightly to smooth out any major cracks or irregularities on its surface. Next, carefully shape this dough ball into an oblong loaf. I have found this process to be significantly easier and more efficient by placing the dough ball between two large pieces of parchment paper, wax paper, or even plastic wrap. With these protective layers, you can then effortlessly roll and press the dough into a uniform loaf shape, ensuring that the ends are gracefully rounded to comfortably and snugly fit within your 9×5-inch loaf pan. Aim for a shape that closely resembles a traditional bread loaf, as this is precisely how it will appear once baked and cooled, demonstrating your precise craftsmanship.
Step Six: Carefully Place the Dough into the Loaf Pan
Once your dough is perfectly shaped, carefully and gently transfer it into the prepared 9×5-inch loaf pan. It is important to remember not to press or flatten the dough aggressively to fill the entire pan. Instead, allow it to retain its beautifully pre-baked loaf shape. While this bread will not result in a massive, oversized loaf, it is incredibly mighty and substantial in terms of its rich, satisfying taste, its unique dense yet wonderfully tender texture, and its overall deliciousness. A medium-sized loaf is just the right proportion for this richly flavored, nutrient-dense, and immensely satisfying bread.
Step Seven: Bake the Bread to Golden Brown Perfection
With your shaped loaf securely in the pan, gently place it into your preheated 350°F (175°C) oven. Allow it to bake for an extended period, approximately 1 hour and 10 minutes to 1 hour and 15 minutes. This slightly longer baking time is quite characteristic and necessary for vegan breads crafted with psyllium, as it provides ample opportunity for the internal structure to fully set and for the bread to dry out properly, preventing any potential gumminess. The extended baking period is crucial to ensure the bread is thoroughly cooked through and develops a beautiful, firm, and golden-brown crust. Once fully baked, the loaf will emerge with an appealing golden-brown hue, and its surface will look and feel distinctly dry to the touch, which are sure indicators that it is perfectly done.
Step Eight: Allow the Bread to Cool Completely
Once baked to perfection, carefully remove the loaf from the oven and, with utmost care, immediately transfer it out of the loaf pan onto a wire cooling rack. This particular step is absolutely critical for the final texture of your bread! While the intoxicating aroma of freshly baked bread will undoubtedly be incredibly tempting and beckon you to slice into it right away, it is paramount to resist this urge. Allowing the bread to cool completely and undisturbed on the wire rack helps it to firm up properly, prevents the development of a gummy or overly moist texture, and allows the internal structure to fully stabilize. This patience will be immensely rewarded with perfectly sliceable, delightfully textured, and utterly delicious bread.
Congratulations, you have successfully baked a superb, wholesome loaf of keto vegan coconut flour bread! Now, the delightful moment arrives when you can finally enjoy the fruits of your labor.
The Exquisite Texture & Neutral Taste of This Keto Vegan Coconut Flour Bread
Prepare to be utterly impressed! This bread slices like an absolute dream, whether your preference leans towards thin, delicate cuts perfect for elegant appetizers or thick, hearty slabs ideal for robust, filling sandwiches. Its exceptional and carefully engineered structure ensures that it holds together beautifully, steadfastly resisting the frustrating crumbling that can often plague many gluten-free alternatives. Each and every slice offers a wonderfully consistent, satisfying bite. The interior is delightfully solid, yet surprisingly tender and moist, completely free from any undesirable gooey, wet, or overly dense spots that can sometimes occur in alternative breads. This impeccable and consistent texture makes every single mouthful a true pleasure, and its substantial, wholesome nature makes it incredibly filling and deeply satisfying.
Flavor-wise, this bread is a true master of versatility. It presents a lovely, subtle nutty flavor with an impressively neutral overall taste profile, making it equally superb and enjoyable on its own, lightly toasted to bring out its delicate nuances, or generously adorned with your favorite sweet or savory spreads. Imagine it topped with a creamy avocado mash, a rich, homemade nut butter, or even layered into a vibrant, fresh vegetable sandwich. The culinary possibilities are genuinely endless, making this bread a true culinary “win, win, win, and win!” for any meal, snack, or occasion. It’s truly a testament to healthy and delicious eating without compromise.
Pro Tips: Storage and Troubleshooting for Your Keto Vegan Coconut Flour Bread
To ensure your homemade bread remains as fresh and delicious as possible, and to help you navigate any potential baking hiccups, here are some essential tips and troubleshooting advice:
Optimal Storage: Keeping Your Bread Fresh
Proper storage is absolutely essential to maintain the maximum freshness, exquisite taste, and high quality of your delicious homemade bread. Once your keto vegan coconut flour bread has completely cooled down to room temperature, you have several excellent options for preservation:
- At Room Temperature: Store the fully cooled bread in an airtight container in a cool, dry place away from direct sunlight or heat sources for up to 2 days. This is ideal for short-term enjoyment.
- In the Refrigerator: For slightly longer preservation, transfer the bread to an airtight container and store it in the refrigerator for up to 1 week. This method is perfect if you plan to enjoy slices throughout the week.
- Freezing for Long-Term: For extended preservation, which is highly recommended for individual servings, first slice the bread to your desired thickness. Then, arrange the slices in a single layer on a baking sheet and freeze until firm. Once frozen, transfer the individual slices to a freezer-safe bag or an airtight container, separating layers with parchment paper if needed, for up to 6 months. Thaw individual slices as needed, making it incredibly convenient for quick breakfasts, snacks, or meal prep. You can even toast frozen slices directly from the freezer for a wonderfully warm and crispy treat!
Troubleshooting Common Baking Issues:
Even experienced bakers can encounter minor challenges. Here’s how to address common issues:
- “My bread turned out crumbly”: This is a very common issue and often indicates that the dough was too dry during the mixing stage. To prevent this, ensure you are measuring your flours with utmost accuracy, preferably by weight using a reliable kitchen scale. The dough should have a distinctly moist, but not wet, feel. If it feels too stiff or dry after initial mixing, add a small amount of water, approximately one teaspoon at a time, mixing thoroughly after each addition until the correct consistency is achieved. Additionally, always confirm you are using *whole psyllium husks*, not psyllium powder, as detailed below.
- “My bread is gummy or overly dense”: This issue can arise if too much liquid was inadvertently added to the dough, or if the psyllium husks were not correctly incorporated and allowed to absorb sufficiently. Overmixing the dough can also sometimes lead to a denser, chewier texture. To avoid this, carefully follow the liquid measurements and mix just until the ingredients are fully combined, scraping down the bowl to ensure even hydration.
- “The bread didn’t rise adequately”: While this bread is not designed to “rise” dramatically like traditional yeast bread, it should still have a noticeable lift and an appealing texture. To ensure optimal leavening, always verify that your baking soda is fresh and active. Also, confirm that you have added the cider vinegar, which is crucial for reacting with the baking soda to create the necessary carbon dioxide for aeration.
Critical Tips for Consistent Baking Success:
- Precision in Measuring: The Golden Rule: For the most consistent and optimal results, particularly when working with highly absorbent flours like coconut and almond flour, I cannot stress enough the importance of weighing your ingredients using a reliable kitchen scale. Volume measurements (cups) can vary significantly depending on how compactly flours are packed, leading to inconsistent outcomes.
- Whole Psyllium Husks Are Non-Negotiable: This specific recipe is meticulously formulated for use exclusively with whole psyllium husks. Using psyllium powder (which is essentially ground husks) of any kind will drastically alter the liquid absorption rate and consequently yield a very different, and often unsatisfactory, texture. Please double-check that you purchase and use only *whole psyllium husks* for this recipe.
- Flaxseed Meal Alternative: If, for any reason, you do not have flaxseed meal readily available, an equal amount of finely ground chia seeds can be used as a perfectly suitable and effective substitute. Both act as excellent plant-based binders and contribute positively to the bread’s overall nutritional value.
Happy baking, and may you thoroughly enjoy your incredibly versatile, wholesome, and truly delicious homemade bread!
Explore More Irresistible Grain-Free & Vegan Breads to Love:
If you’ve thoroughly enjoyed baking and savoring this delightful keto vegan coconut flour bread, we invite you to further expand your baking horizons and explore other fantastic grain-free and vegan bread recipes from our extensive collection. Diversify your baking repertoire with these equally delicious, healthy, and satisfying options, each offering a unique flavor and texture profile:
- Mushroom Almond Flour Bread
- Keto Almond Flour Bread Rolls
- Coconut Almond Flour Banana Bread
- 3-Ingredient Keto Vegan Almond Bread
- 4-Ingredient Coconut Flour Bread with Nuts & Seeds
- 2-Ingredient Coconut Flour Tortillas (vegan, keto)
- Vegan Keto Sunflower Seed Bread
Keto Vegan Coconut Flour Bread (Oil-Free & Egg-Free)
By: Camilla
This keto vegan coconut flour bread is a game-changer for healthy eating! It’s delightfully firm, tender, packed with natural flavor, and incredibly easy to make without any added oil or eggs. Perfect for anyone following a healthy, low-carb, and gluten-free diet, this versatile bread makes excellent sandwiches, provides a satisfying base for toast, or serves as a delicious foundation for your favorite sweet or savory toppings.
Prep Time: 5 minutes
Cook Time: 1 hour 15 minutes
Total Time: 1 hour 20 minutes
Yields: 1 medium loaf (approx. 14 slices)
Ingredients
- 1 cup (121 g) coconut flour
- 3/4 cup (84 g) almond flour
- 1/3 cup (27 g) whole psyllium husks
- 1/4 cup (26 g) flaxseed meal
- 1 teaspoon baking soda
- 1/4 teaspoon fine sea salt
- 1 and 3/4 cups (425 mL) water
- 2 teaspoons cider vinegar
Instructions
- Preheat Oven & Prepare Pan: Preheat your oven to 350°F (175°C). Lightly spray the interior sides of a 9×5-inch (22.5×12.5 cm) loaf pan with cooking spray to ensure easy release.
- Whisk Dry Ingredients: In a medium mixing bowl, thoroughly whisk together the coconut flour, almond flour, psyllium husks, flaxseed meal, baking soda, and salt until they are uniformly combined.
- Add Liquid Ingredients: In a separate bowl, stir the cider vinegar into the water. Pour this complete liquid mixture into the bowl containing the dry ingredients.
- Form Dough: Mix thoroughly using a sturdy spoon or spatula until all ingredients are completely combined and a stiff but distinctly moist dough forms. Ensure you scrape down the sides and bottom of the bowl to incorporate any dry bits. If the dough feels too dry, add water one teaspoon at a time until the ideal consistency is achieved.
- Shape the Loaf: Gather the dough into a ball, then firmly press and shape it into an oblong loaf. For easier handling, you can place the dough between two sheets of parchment paper or plastic wrap and roll it to fit the dimensions of your 9×5-inch loaf pan.
- Place in Pan: Carefully unwrap the shaped loaf and gently place it into the prepared loaf pan. Avoid pressing it down or attempting to flatten it to fill the entire pan, as it will retain its shape.
- Bake: Bake in the preheated oven for approximately 1 hour and 10 minutes to 1 hour and 15 minutes, or until the loaf achieves a beautiful golden-brown color and its surface appears and feels dry to the touch.
- Cool Completely: Immediately after baking, remove the bread from the pan and transfer it onto a cooling rack. It is crucial to allow the bread to cool completely before attempting to slice it.
- Enjoy: Once fully cooled, slice and serve your delicious and healthy keto vegan coconut flour bread with your favorite toppings!
Notes for Optimal Results:
- Storage: Store the completely cooled bread in an airtight container at cool room temperature for up to 2 days, in the refrigerator for up to 1 week, or freeze for up to 6 months for longer preservation.
- Measuring Tip: For the most consistent and accurate results, especially when dealing with absorbent flours like coconut and almond flour, I highly recommend weighing all ingredients using a reliable kitchen scale.
- Psyllium Specificity: This recipe is specifically formulated for whole psyllium husks. Using psyllium powder (ground husks) will lead to significantly different liquid absorption rates and will result in a very different and likely unsatisfactory texture.
- Flaxseed Option: If flaxseed meal is unavailable, an equal amount of finely ground chia seeds can be used as a suitable and effective substitute.
Nutrition Information (per serving, 1 slice – 1/14 of loaf)
- Calories: 85 kcal
- Carbohydrates: 8.1g
- Protein: 2.9g
- Fat: 4.5g
- Saturated Fat: 0.6g
- Sodium: 148.6mg
- Fiber: 5.6g
- Sugar: 0.8g