
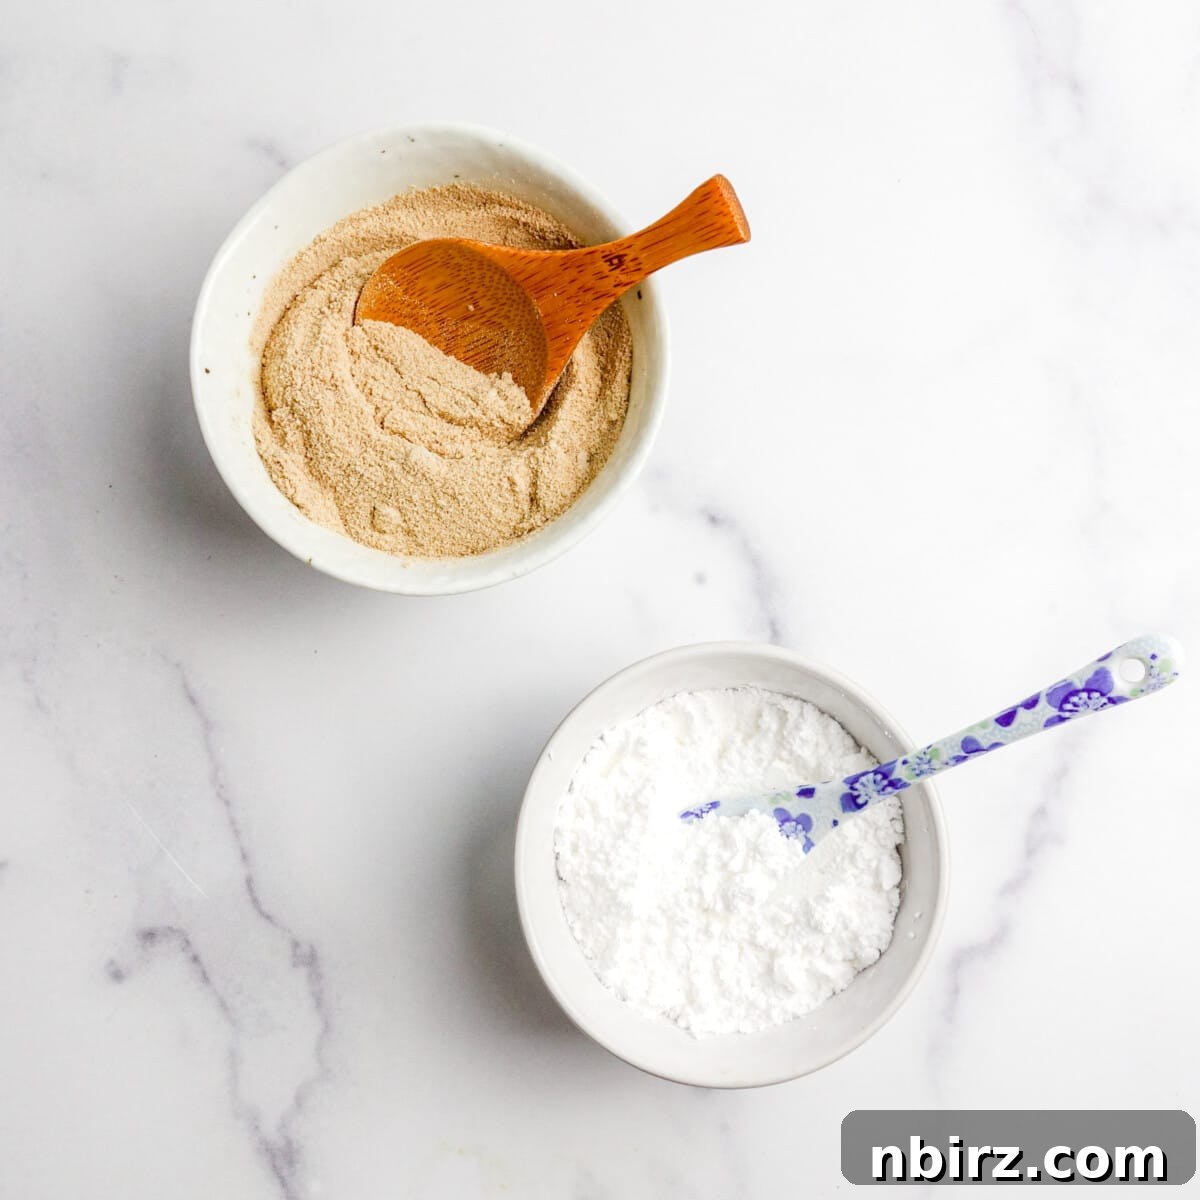
Unlock the secret to effortlessly creating your own grain-free powdered sugar at home. Forget the hassle of searching for niche products or paying premium prices. With just a high-speed blender or coffee grinder, you can whip up this essential ingredient in mere seconds. This homemade version is not only free from grains, gluten, and corn, but it also allows you the freedom to choose your preferred natural sugar, offering a customizable and healthier alternative for all your baking and dessert needs.
Homemade Grain-Free Powdered Sugar: Gluten-Free & Corn-Free Perfection
Powdered sugar, often recognized by its aliases confectioners’ sugar or icing sugar, is a staple in many kitchens. It’s essentially granulated sugar that has been finely pulverized into a fluffy powder, typically with a small amount of cornstarch added to prevent caking and absorb moisture. This finely textured sugar is indispensable for crafting smooth glazes, delicate icings, and beautifully dusted desserts. Its unique properties ensure a silky finish that granulated sugar simply cannot achieve.
However, for those navigating specific dietary requirements or seeking more natural options, conventional powdered sugar can present several challenges. This leads many to ask: what’s the optimal solution when your needs include:
- Avoiding grains, particularly corn, due to allergies, sensitivities, or dietary preferences (e.g., Paleo, Whole30, or simply a desire for less processed foods)?
- Ensuring that every ingredient, including your powdered sugar, is 100% certified gluten-free to prevent cross-contamination for those with celiac disease or severe gluten intolerance?
- Preferring to steer clear of highly refined white sugars, opting instead for more natural, unrefined, or lower-glycemic alternatives?
Traditionally, addressing these concerns might involve an extensive and often frustrating search for specialized brands of gluten-free or corn-free powdered sugar, usually at a significantly higher cost. Such products can be hard to find and may still contain other undesirable additives. Fortunately, there’s a far simpler, more economical, and entirely customizable solution right at your fingertips: making your own powdered sugar at home. This method not only solves all three dilemmas with remarkable ease but also offers unparalleled control over your ingredients, delivering convenience, affordability, and speed in one fell swoop!
Why Choose Homemade: The Advantages of DIY
Embracing the DIY approach for powdered sugar goes beyond mere convenience; it’s a conscious choice that offers numerous benefits for your health, wallet, and peace of mind. Let’s delve deeper into why making your own is the superior option.
Tailored to Your Dietary Needs
One of the most compelling reasons to make your own powdered sugar is the ability to perfectly align it with specific dietary needs. Commercial powdered sugars almost universally contain cornstarch as an anti-caking agent. While cornstarch is generally benign, it’s a deal-breaker for those with corn allergies or sensitivities, or individuals following grain-free diets like the Paleo or Whole30 protocols. By making it yourself, you completely eliminate corn, ensuring your powdered sugar is genuinely corn-free and safe for consumption.
Similarly, for individuals managing celiac disease or gluten sensitivity, the risk of cross-contamination with gluten-containing grains can be a constant worry, even in products that don’t directly list gluten. While powdered sugar itself is not derived from gluten, manufacturing processes can sometimes introduce unwanted traces. Crafting your own allows you to select ingredients (like tapioca starch or arrowroot powder) that are inherently gluten-free, providing absolute assurance for a truly gluten-free product.
Control Over Sugar Type and Quality
Beyond allergens, homemade powdered sugar empowers you to choose the very foundation of your sweetener: the granulated sugar itself. Many conventional white sugars undergo extensive processing and bleaching. If you prefer to minimize refined ingredients, homemade powdered sugar is your answer. You can opt for:
- Natural Cane Sugar: A less refined alternative to white sugar, often retaining more of its natural molasses flavor and slightly tan color. It provides a clean, sweet taste.
- Coconut Sugar: Derived from the sap of coconut palm flowers, this natural sweetener offers a distinctive caramel-like flavor and a beautiful golden-brown hue. It’s often praised for its lower glycemic index compared to white sugar, making it a favorite for those seeking healthier sugar alternatives. The unique flavor of powdered coconut sugar can elevate your desserts, adding a gourmet touch to simple glazes and frostings.
- Alternative Sweeteners: For those on ketogenic or low-carb diets, certain granulated sugar alcohols like erythritol or xylitol (ensure xylitol is pet-safe if you have animals in the home) can also be pulverized into a fine, sugar-free “powdered sugar.” This opens up a world of possibilities for guilt-free indulgence.
This level of customization means you’re no longer limited to the stark white, often bland, flavor profile of conventional powdered sugar.
Significant Cost Savings
Specialty grain-free or natural powdered sugars can be notoriously expensive. The price tag often reflects their niche market and the additional processing involved in sourcing specific anti-caking agents. By contrast, making your own powdered sugar from readily available, often cheaper, granulated sugar and starch significantly cuts down on expenses. You’re leveraging bulk ingredients that you might already have in your pantry, transforming them into a premium product at a fraction of the retail cost.
Unmatched Freshness and Availability
Imagine never running out of powdered sugar again, or having to make a last-minute trip to the store when a baking craving strikes. With homemade powdered sugar, you’re always prepared. You can make small batches as needed, ensuring maximum freshness for every recipe. This eliminates the need for pantry hoarding and guarantees you always have the perfect ingredient on hand, whenever inspiration hits.
Essential Ingredients for DIY Grain-Free Powdered Sugar
Creating your own premium grain-free powdered sugar requires just two simple ingredients, putting you in complete command of quality and flavor:
- Granulated Sugar of Your Choice: This is where your personal preference truly shines.
- Natural Cane Sugar: For a whiter powdered sugar with a subtly rich flavor profile, natural cane sugar is an excellent choice. It’s less processed than standard white sugar and works beautifully in most recipes.
- Coconut Sugar: If you’re looking to infuse a unique, caramel-like sweetness and don’t mind a light tan color, powdered coconut sugar is an absolute game-changer. Imagine a warm, caramel-infused icing made simply by mixing it with a splash of non-dairy milk – a truly delightful treat! While its color might not suit every recipe requiring stark white frosting, its flavor often makes it a preferred alternative.
- Regular White Granulated Sugar: If avoiding highly processed sugars isn’t a primary concern, or if you simply need a pure white powdered sugar for specific aesthetic reasons, standard white granulated sugar will also work perfectly.
- Sugar Alternatives (e.g., Erythritol, Xylitol): For low-carb or keto applications, granulated erythritol or xylitol can be transformed into a sugar-free powdered sweetener. Always check specific brand recommendations and be mindful of pet safety with xylitol.
- Starch (Anti-Caking Agent): This crucial component prevents your powdered sugar from clumping and absorbing moisture, ensuring it remains light and fluffy.
- Tapioca Flour (or Tapioca Starch): Derived from the cassava root, tapioca flour is an excellent grain-free and gluten-free choice. It’s neutral in flavor and provides the necessary anti-caking properties.
- Arrowroot Powder: Another fantastic grain-free and gluten-free alternative, arrowroot powder performs similarly to tapioca starch, offering a smooth texture without altering the taste.
- Potato Starch: A reliable and widely available option, potato starch is also gluten-free and grain-free, making it a perfect substitute for cornstarch in this recipe.
The beauty of this DIY method lies in this ultimate control. You dictate the sugar type, allowing you to tailor the flavor, color, and nutritional profile to your exact specifications. This freedom ensures that your homemade powdered sugar is not just an ingredient, but a perfectly customized component for your culinary creations.
Essential Equipment for Homemade Powdered Sugar
Transforming granulated sugar into fine powder is simpler than you might think, provided you have the right tools. You’ll need one of two common kitchen appliances:
- Blender:
- High-Speed Blender: This is the champion for speed and efficiency. A high-speed blender (like a Vitamix or Blendtec) can pulverize sugar into a super-fine powder in as little as 30 seconds, yielding the best, silkiest results.
- Traditional Blender: A standard blender will also work effectively, though it may take a bit longer (around 1-2 minutes) and might require a few pauses to scrape down the sides. The key is consistent processing until the desired powdery texture is achieved.
OR
- Electric Coffee Grinder:
- An electric coffee grinder is an excellent option for smaller batches and for those who don’t own a high-speed blender. It’s particularly good for achieving a very fine powder. Ensure the grinder is thoroughly wiped clean of any coffee residue to prevent flavor contamination in your sugar.
- While a coffee grinder is effective, its smaller capacity means you’ll need to process the sugar in multiple, smaller batches, which can extend the overall preparation time. However, for precision and fineness, it often delivers impressive results.
The primary objective is to pulverize the sugar granules into an extremely fine powder. Generally, the more powerful the equipment and the longer you process (within reason), the finer and more consistent your powdered sugar will be. No matter which tool you choose, ensure it’s completely dry before use, as moisture can cause the sugar to clump or stick.
Simple Steps to Make Grain-Free Powdered Sugar
Making your own powdered sugar is a straightforward process. Here’s how to do it with both a blender and a coffee grinder:
Method 1: Using a Blender (Recommended for larger batches)
This method is ideal if you need a significant amount of powdered sugar quickly.
- Combine Ingredients: Pour your chosen granulated sugar and the starch (tapioca flour, arrowroot powder, or potato starch) into your blender container. For optimal results, ensure the blender container is completely dry.
- Process Until Powdery: Securely cover the blender. Start processing on a low setting and gradually increase to the highest speed. Allow the blender to run until the sugar is transformed into a fine, uniform powder.
- In a high-speed blender, this typically takes about 30 seconds to 1 minute.
- In a standard blender, it might take 1 to 2 minutes, possibly requiring you to pause and scrape down the sides once or twice to ensure even pulverization.
- Check Consistency: Turn off the blender and carefully remove the lid (beware of the sugar dust!). Pinch a small amount of the sugar between your fingers. It should feel incredibly fine and smooth, with no discernible granules. If it still feels gritty, process for another 15-30 seconds.
- Transfer and Cool: Once perfectly powdered, carefully transfer your homemade grain-free powdered sugar to an airtight container. The friction from blending can generate a little heat, so allow it to cool completely before sealing the container. This prevents any condensation from forming and creating clumps.
Method 2: Using an Electric Coffee Grinder (Ideal for smaller batches)
A coffee grinder is excellent for small quantities or when absolute fineness is desired.
- Prepare Batch: For best results with a coffee grinder, process about 1/4 cup of granulated sugar at a time. Add the entire amount of your chosen starch to the very first batch. This ensures the starch is evenly distributed throughout the final product.
- Grind and Shake: Secure the lid on the coffee grinder. Begin processing. While grinding, gently shake the grinder occasionally to help distribute the sugar and starch evenly, ensuring all granules come into contact with the blades.
- Process Until Fine: Continue grinding until the mixture reaches a fine, powdery consistency. This usually takes about 1-2 minutes per batch.
- Transfer and Repeat: Once a batch is finely powdered, transfer it to a separate bowl or airtight container. Repeat the process with the remaining granulated sugar, continuing to add 1/4 cup at a time.
- Combine and Stir: After all batches are processed, gently stir all of the powdered sugar together in your container to ensure the starch is fully and evenly incorporated throughout the entire batch. This final stir is important for preventing clumps down the line.
And just like that, you’ve successfully created your very own grain-free, cornstarch-free, gluten-free powdered sugar! It’s ready to elevate your culinary creations immediately or be stored for future baking adventures.
How to Use Your Homemade Grain-Free Powdered Sugar
Your freshly made grain-free powdered sugar is a versatile ingredient that can be used as a direct, measure-for-measure replacement for traditional powdered sugar in virtually any recipe. Its fine texture and sweet profile make it perfect for a wide array of culinary applications:
- Icing and Glazes: This is arguably its most common use. Mix it with a liquid like milk (dairy or non-dairy), lemon juice, or water, along with a flavoring extract, to create smooth, pourable glazes for cakes, cookies, and pastries. For richer icings, cream it with butter or shortening.
- Dusting Desserts: A light dusting of powdered sugar adds an elegant finish and a touch of sweetness to freshly baked goods like brownies, muffins, crêpes, or fruit tarts. Use a fine-mesh sieve for the best results.
- Sweetening Whipped Creams: Incorporate it into homemade whipped cream for a stable, sweet, and silky topping that won’t get gritty.
- Thickening Sauces and Custards: In some recipes, powdered sugar can contribute to both sweetness and a slight thickening, thanks to its starch content.
- Homemade Confections: Use it in recipes for homemade candies, truffles, or fudge where a fine, dissolvable sugar is essential for texture.
- Cocktail Rims: Create beautifully sugared rims for cocktails or mocktails.
A note on color: As mentioned earlier, if you opt for coconut sugar, your powdered sugar will have a light brown, caramel hue. This is fantastic for adding depth of flavor and a rustic appearance to desserts like carrot cake, pumpkin bread, or anything autumnal. However, if a bright white finish is crucial for your recipe (e.g., a pure white wedding cake frosting), choose natural cane sugar or regular white granulated sugar as your base.
Experiment with different types of granulated sugars to discover how they can subtly alter the flavor and appearance of your finished dishes. This customization is one of the greatest joys of making your own ingredients!
Storing Your Homemade Grain-Free Powdered Sugar
Proper storage is key to maintaining the freshness and texture of your homemade powdered sugar. Just like its store-bought counterpart, it’s susceptible to moisture.
- Airtight Container is Essential: Always store your powdered sugar in a completely airtight container. This prevents moisture from the air from being absorbed by the starch and sugar, which is the primary cause of clumping.
- Cool, Dry Place: Keep the container in a cool, dry pantry or cabinet, away from direct sunlight or sources of heat and humidity (like above the stove).
- Shelf Life: Stored correctly, your grain-free powdered sugar can last for up to 6 months, or even longer, maintaining its quality.
- Dealing with Clumps: It’s common for powdered sugar to clump slightly over time, even in an airtight container, especially if exposed to fluctuating humidity. This is due to the natural properties of the starch absorbing ambient moisture. For best results and a perfectly smooth application, simply sift the powdered sugar through a fine-mesh sieve before using. If the clumps are hard, a quick re-blend for a few seconds can break them up.
Enjoy the convenience and quality of having this versatile, homemade staple always ready in your pantry!
More Essential DIY Pantry Basics to Make & Love
Mastering homemade grain-free powdered sugar is just the beginning of a rewarding journey into a more self-sufficient and health-conscious kitchen. Building a pantry stocked with homemade staples empowers you to control ingredients, save money, and enjoy superior flavor. Explore these other fantastic DIY recipes to further enhance your cooking and baking:
- 4-Ingredient Chickpea Flour Mayonnaise (vegan, soy-free)
- 1-Ingredient Pepita Butter (vegan, keto)
- DIY Sunflower Seed Flour (nut-free, keto, versatile)
- Vegan Parmesan Cheese (made with cashews or hemp hearts)
- Easy Cashew Mayonnaise (4 ingredients, vegan, Paleo, oil-free)
- DIY Sunflower Seed Butter (oil-free, easy, keto option)
Grain-Free Powdered Sugar (Gluten-Free, Easy)
Camilla
2
2
1 ¾
cups (212 g)
Ingredients
-
1
cup
(192 g) natural cane sugar OR 1 ⅓ cups (190 g) coconut sugar -
1
tablespoon
(22 grams) tapioca starch (see notes for alternatives)
Instructions
For Blender:
-
Place the granulated sugar and the starch into a clean, dry blender.
-
Cover the container securely and process on the highest setting until a fine, powdery consistency is achieved. This will take approximately 30 seconds in a high-speed blender or about 2 minutes in a standard blender.
-
Transfer the finished powdered sugar to an airtight container.
For Coffee Grinder:
-
Place 1/4 cup of granulated sugar into the coffee grinder. Add the entire quantity of tapioca starch to this first batch.
-
Cover and process, gently shaking the grinder to ensure even distribution of ingredients, until a fine powder forms. This typically takes around 2 minutes per batch.
-
Transfer the powdered sugar from the grinder to an airtight container. Repeat the process with the remaining granulated sugar in 1/4 cup increments. Once all batches are ground, stir them together thoroughly in the container to ensure the starch is fully combined.
Notes
Tapioca Starch Alternatives: An equal amount of arrowroot powder or potato starch can be used in place of tapioca starch for similar results.
Nutrition
Serving:
1
tablespoon (7.6 g)
|
Calories:
27
kcal
|
Carbohydrates:
7
g
|
Sugar:
6.8
g