
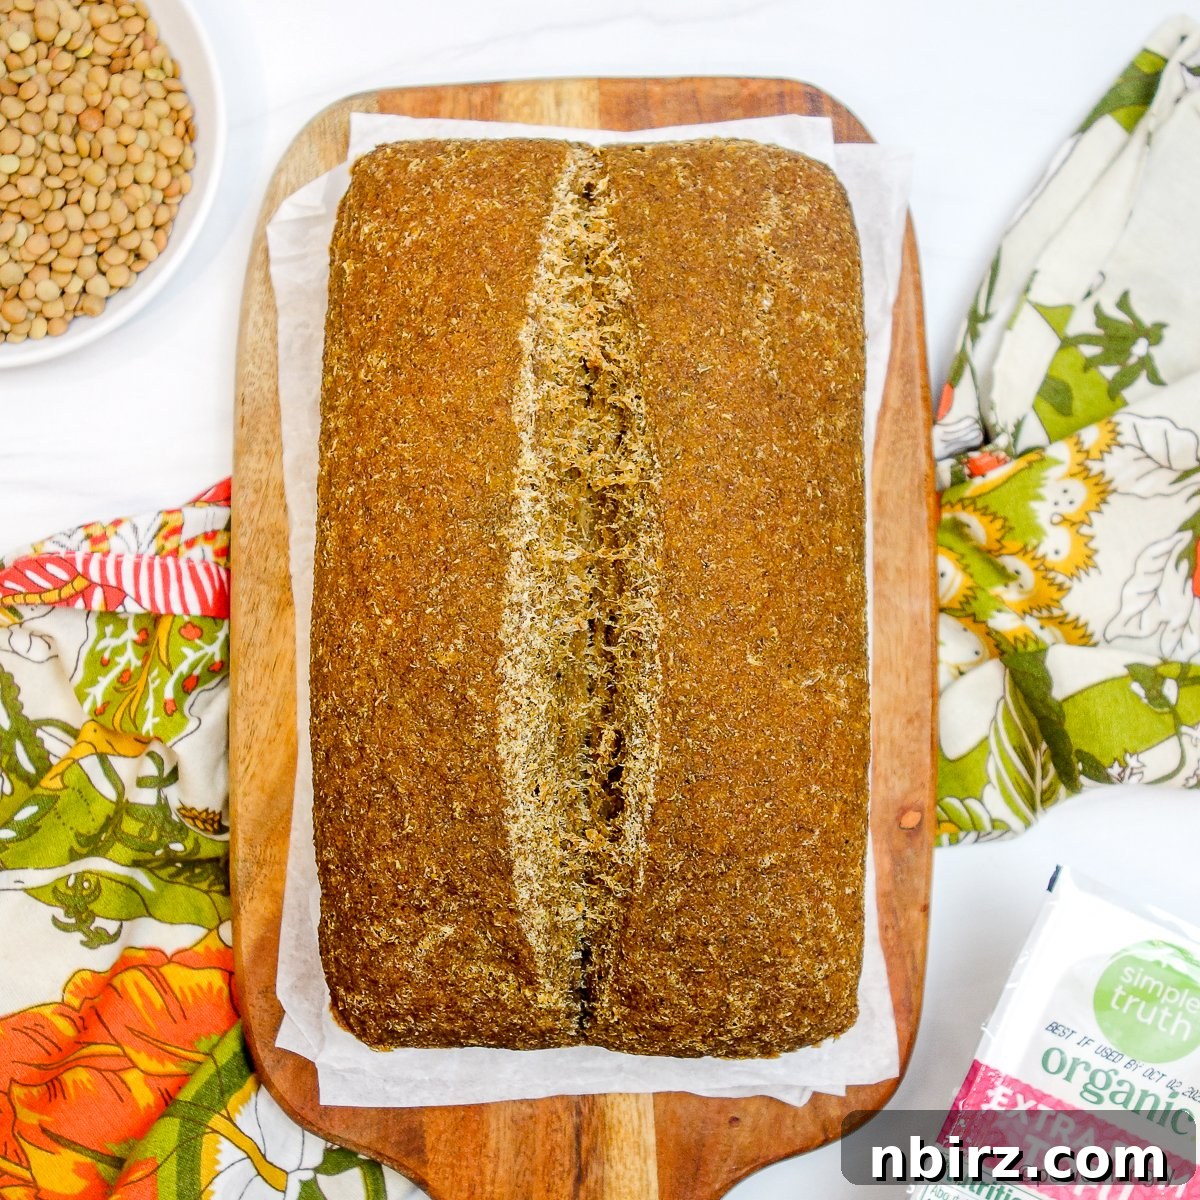
Prepare to revolutionize your baking with a loaf of **high-protein tofu lentil bread** that defies convention. This remarkable recipe eliminates flour, oil, gluten, and grains, yet delivers a deeply satisfying, hearty loaf. Crafted with ease in a blender, this bread is a testament to simple, wholesome ingredients transforming into something truly extraordinary. Enjoy it plain, toasted with your favorite spreads, or as a robust companion to your meals. It’s not just bread; it’s a game-changer for healthy eating.
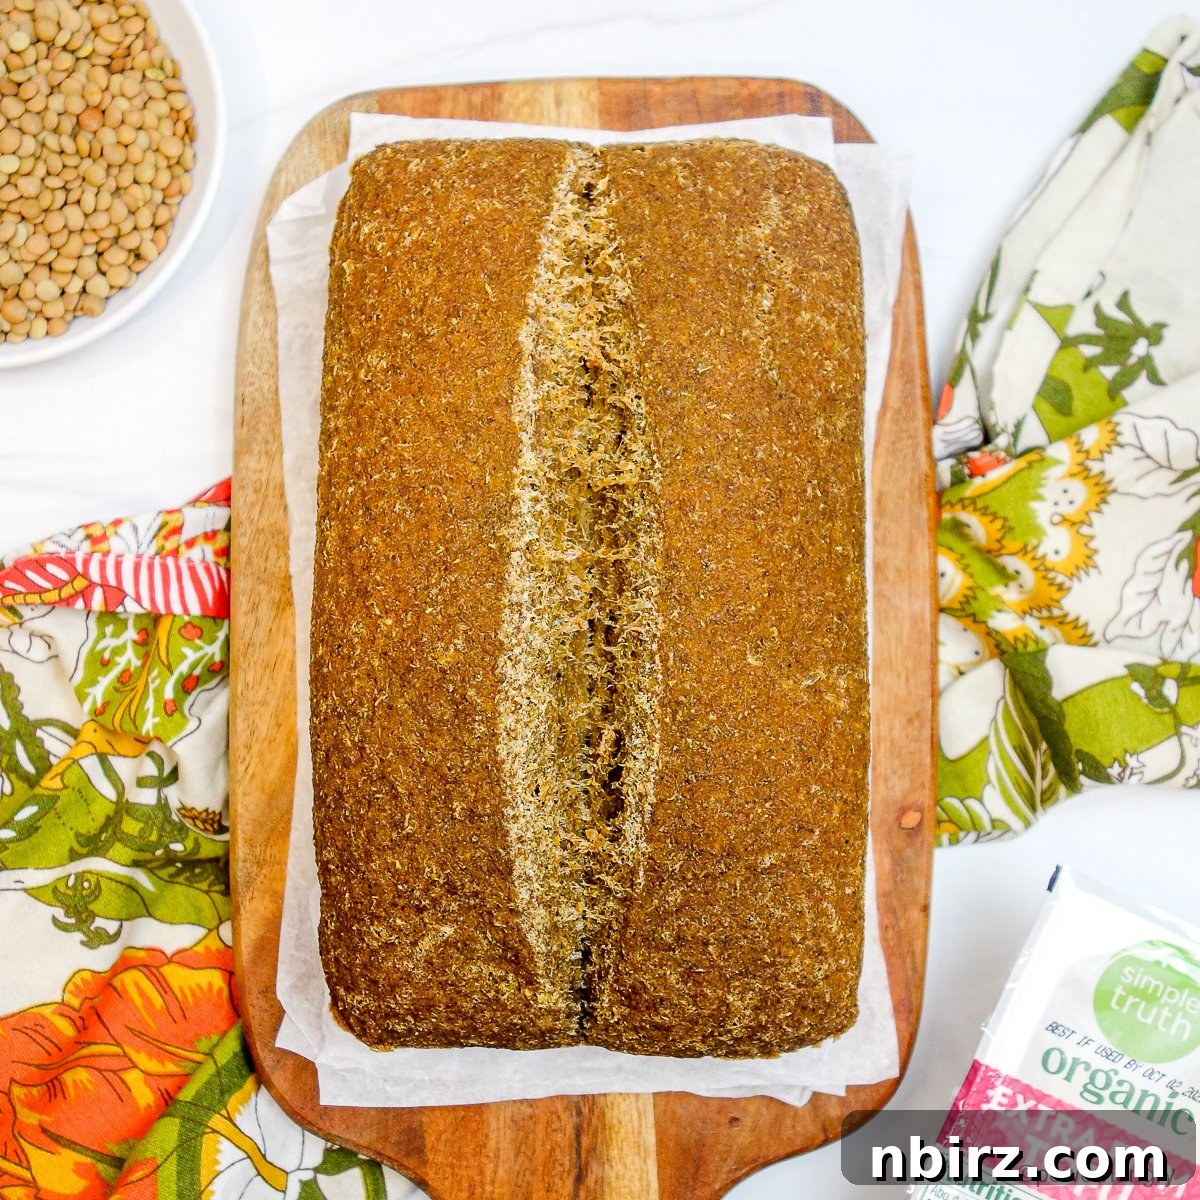
Introducing the Revolutionary Grain-Free Vegan Protein Bread
This innovative bread draws inspiration from a viral cottage cheese lentil bread recipe, which, despite its intriguing concept, presented a dairy dilemma for plant-based eaters. My mission was clear: adapt this promising idea into a completely vegan and equally delicious alternative. The initial attempts using firm tofu in place of cottage cheese yielded a decent loaf, but a persistent issue emerged – a dense, overly moist, almost raw bottom layer. This wasn’t unique to my vegan adaptation; photos of the original cottage cheese version often showed similar compaction.
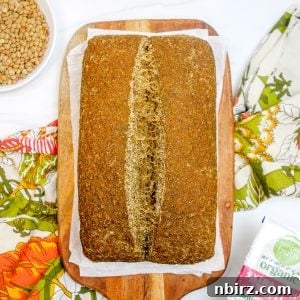
The solution proved to be surprisingly simple yet profoundly effective: **whole psyllium husks**. Just two tablespoons of this incredible ingredient made all the difference, providing the essential lift and structural integrity needed for a uniformly baked loaf. Not only did it ensure the bread held its shape beautifully, but it also contributed to a delightful, crispy crust – a true highlight for any bread lover! The result is a substantial, flavorful loaf with a texture reminiscent of traditional German-style whole grain bread. It toasts magnificently, slices perfectly thin for sandwiches, and serves as an excellent partner for warming soups and crisp salads.
Beyond its culinary appeal, this protein-packed bread offers a significant advantage for your wallet. Premium protein breads found in supermarkets can easily cost upwards of nine dollars, making homemade options like this an incredibly economical choice. By baking your own, you’re not only creating a healthier, more delicious product but also enjoying substantial savings. This frugal approach makes indulging in wholesome, high-protein bread a guilt-free pleasure in every sense.
Unbeatable Benefits of This Tofu Lentil Loaf
This isn’t just another bread recipe; it’s a powerhouse of nutritional and practical benefits designed to fit a modern, health-conscious lifestyle:
- **Minimal Ingredients:** Made with just 4 core ingredients, simplifying your grocery list and preparation.
- **Exceptional Nutritional Profile:**
- **High Protein:** Lentils and tofu combine to provide a substantial protein boost, supporting muscle health and satiety.
- **High Fiber:** Rich in dietary fiber, promoting digestive health and keeping you feeling fuller for longer.
- **Allergy-Friendly & Dietary Inclusive:**
- **Grain-Free & Gluten-Free:** Perfect for those with gluten sensitivities or following grain-free diets.
- **Flourless:** No wheat or alternative flours are used, making it uniquely pure.
- **Vegan:** Completely free from eggs and dairy, suitable for plant-based lifestyles.
- **Oil-Free:** Prepared without any added oils (e.g., olive oil, coconut oil, or other vegetable oils) for a lighter profile.
- **Nut-Free:** A safe option for individuals with nut allergies.
- **No Added Starches:** Free from common thickeners like tapioca starch or potato starch.
- **Time-Saving & Convenient:**
- **Fast & Easy to Prepare:** The blender-based method drastically cuts down on prep time.
- **No Yeast:** Eliminates the need for proofing, making the baking process quicker and more predictable.
- **Economical:** Significantly more cost-effective than specialty store-bought protein breads.
This bread truly caters to a wide array of dietary needs and preferences without compromising on taste or texture, offering a truly versatile and healthy option for your table.
Key Ingredients for Your High Protein Tofu Lentil Bread
The magic of this bread lies in its simplicity and the synergy of its few, potent ingredients. You’ll be amazed at what these humble components can achieve together. The exact quantities for each ingredient are thoughtfully provided in the comprehensive recipe card located at the conclusion of this article.
- **Uncooked Lentils:** The foundational ingredient, supplying the bulk, texture, and a significant portion of the protein. Any variety will work beautifully, whether it’s brown, split red, green, or black lentils. Each type contributes a slightly different nuance, but all will result in a delicious loaf.
- **Extra-Firm Tofu:** This plant-based hero acts as a binder and adds to the bread’s protein content. Unlike many tofu recipes, there’s no need for pressing here; simply drain it well. Its firm texture is crucial for the final consistency of the batter.
- **Whole Psyllium Husks:** This is the non-negotiable secret ingredient for success! It’s vital to use *whole psyllium husks*, not psyllium husk powder. The whole husks absorb liquid, create the necessary structure, and contribute to the bread’s crusty exterior and satisfying chew. Without it, the bread risks being dense and wet.
- **Baking Powder:** The primary leavening agent responsible for the bread’s rise and light texture. If you have gluten sensitivities or allergies, ensure you choose a certified gluten-free baking powder to maintain the integrity of the recipe.
- **Optional: Salt:** While not strictly necessary for the bread’s structure or baking process, a touch of salt significantly enhances the overall flavor, bringing out the earthy notes of the lentils and balancing the profile. Adjust the amount to your personal preference or omit it entirely if you’re managing sodium intake.
Beyond these, you’ll simply need plain water – filtered tap water works perfectly – to achieve the ideal batter consistency. Each ingredient plays a crucial role in creating this uniquely nutritious and delicious bread.
Step-by-Step Guide to Baking Your Perfect Loaf
Baking this high-protein tofu lentil bread is a straightforward process, primarily relying on your blender for ease. Follow these detailed steps to achieve a perfectly risen and delicious loaf. Remember, the full, complete directions are also conveniently listed in the recipe card below.
Step One: The Essential Lentil Soak
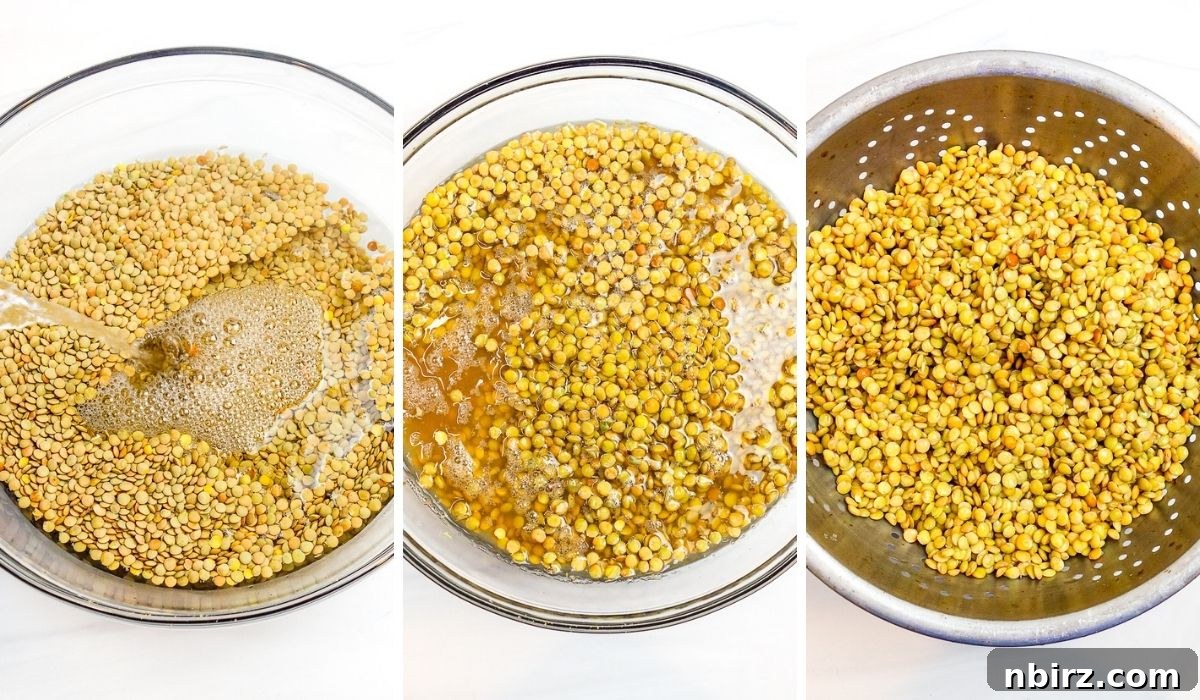
Begin by placing your chosen variety of uncooked lentils into a generously sized mixing bowl. Pour enough boiling water over the lentils to ensure they are submerged by about 1 to 2 inches of liquid. This crucial soaking step softens the lentils, making them easier to blend into a smooth batter and potentially aiding in digestibility. Allow the lentils to soak undisturbed for precisely 20 minutes. Once soaked, carefully drain them thoroughly using a fine-mesh sieve or a colander, ensuring all excess hot water is removed. Finally, rinse the drained lentils under cool running water, then shake off and drain any remaining moisture before proceeding.
Step Two: Preheat & Prepare Your Pan with Precision
Before you begin blending, preheat your oven to 350°F (180°C). This ensures the oven is at the correct temperature when your batter is ready to bake, which is critical for a proper rise. A word of caution regarding oven settings: if your oven features a convection setting, it is strongly advised to **avoid using it for this particular bread**. This recipe thrives on the consistent, radiant heat of a regular (conventional) oven. Further explanation on why convection is unsuitable for this bread can be found in the FAQ section at the end of this post, providing crucial insights for a perfect bake.
Next, prepare your loaf pan. Line a standard 9×5 inch (22.5×12.5 cm) loaf pan with nonstick parchment paper. This step is highly recommended as it guarantees easy release of the baked loaf and simplifies cleanup. If you prefer, and are comfortable with adding a small amount of oil to your recipe, you can opt to lightly spray the pan with a nonstick cooking spray or gently grease it with a minimal amount of oil instead of using parchment paper. However, for an oil-free bake and effortless removal, parchment paper remains the best choice.
Step Three: Blending for the Ideal Batter Consistency
With your soaked lentils ready, it’s time to create the smooth batter. First, drain your extra-firm tofu – there’s no need to press it for this recipe, as its natural moisture content contributes to the batter. Transfer the drained, soaked lentils, the drained tofu (you can crumble it, cut it into cubes, or simply break it into pieces), along with 1/2 cup of fresh water and your optional salt, into your blender. Whether you use a high-speed blender or a standard model, ensure it’s capable of processing ingredients into a very smooth consistency.
Blend the mixture on high speed. You may need to pause once or twice to scrape down the sides of the blender container, ensuring all ingredients are incorporated evenly. Continue blending until the lentils are completely broken down, and the batter achieves a perfectly smooth, uniform texture, free from any visible lentil pieces. Once smooth, add the baking powder and the essential whole psyllium husks to the lentil mixture. Pulse the blender just 2 to 3 times, or until these final ingredients are just combined. Over-blending at this stage can affect the leavening. The batter will thicken noticeably due to the psyllium husks.
Step Four: Transferring and Scoring for an Even Rise
Carefully scrape the thick, smooth batter from the blender into your prepared loaf pan. Use a rubber spatula or the back of a spoon to gently spread the batter evenly across the pan and smooth out the top surface. Achieving an even top will contribute to a beautifully uniform loaf.
For an optional but highly recommended touch, you can draw a shallow line (approximately 1/2 inch deep) lengthwise down the middle of the batter. While not strictly necessary for baking, this scoring technique provides an intentional “release point” for steam during baking. This helps to prevent uncontrolled cracks and can result in a more visually appealing, evenly risen final loaf.
Step Five: Baking to Golden Perfection
Place the pan containing your lentil tofu batter into the preheated 350°F (180°C) oven. Allow the bread to bake for approximately 50 to 55 minutes. During this time, the bread will rise significantly, and its surface will transform into a rich, deep golden-brown color, indicating a well-baked crust. To confirm doneness, insert a wooden skewer or a thin knife near the center of the loaf. It should emerge with only a few moist crumbs clinging to it, signaling that the interior is cooked through without being wet or gummy. If it comes out completely clean, it’s perfect. If it’s still very wet, bake for a few more minutes.
Step Six: The Crucial Cooling Process
Once baked to perfection, carefully remove the loaf pan from the oven and transfer it to a wire cooling rack. Allow the bread to cool undisturbed within the pan for an initial 15 minutes. This cooling period in the pan is important as it allows the loaf to set its structure further and makes it easier to handle. After 15 minutes, gently run a thin butter knife around the sides of the pan if necessary, to help loosen the edges. Then, carefully remove the entire loaf from the pan and place it directly onto the cooling rack. It is crucial to let the loaf cool completely on the rack before attempting to slice it. Slicing too early can result in a gummy texture and crumbly slices, as the internal structure needs time to fully stabilize.
Slicing Your Versatile Tofu Lentil Bread
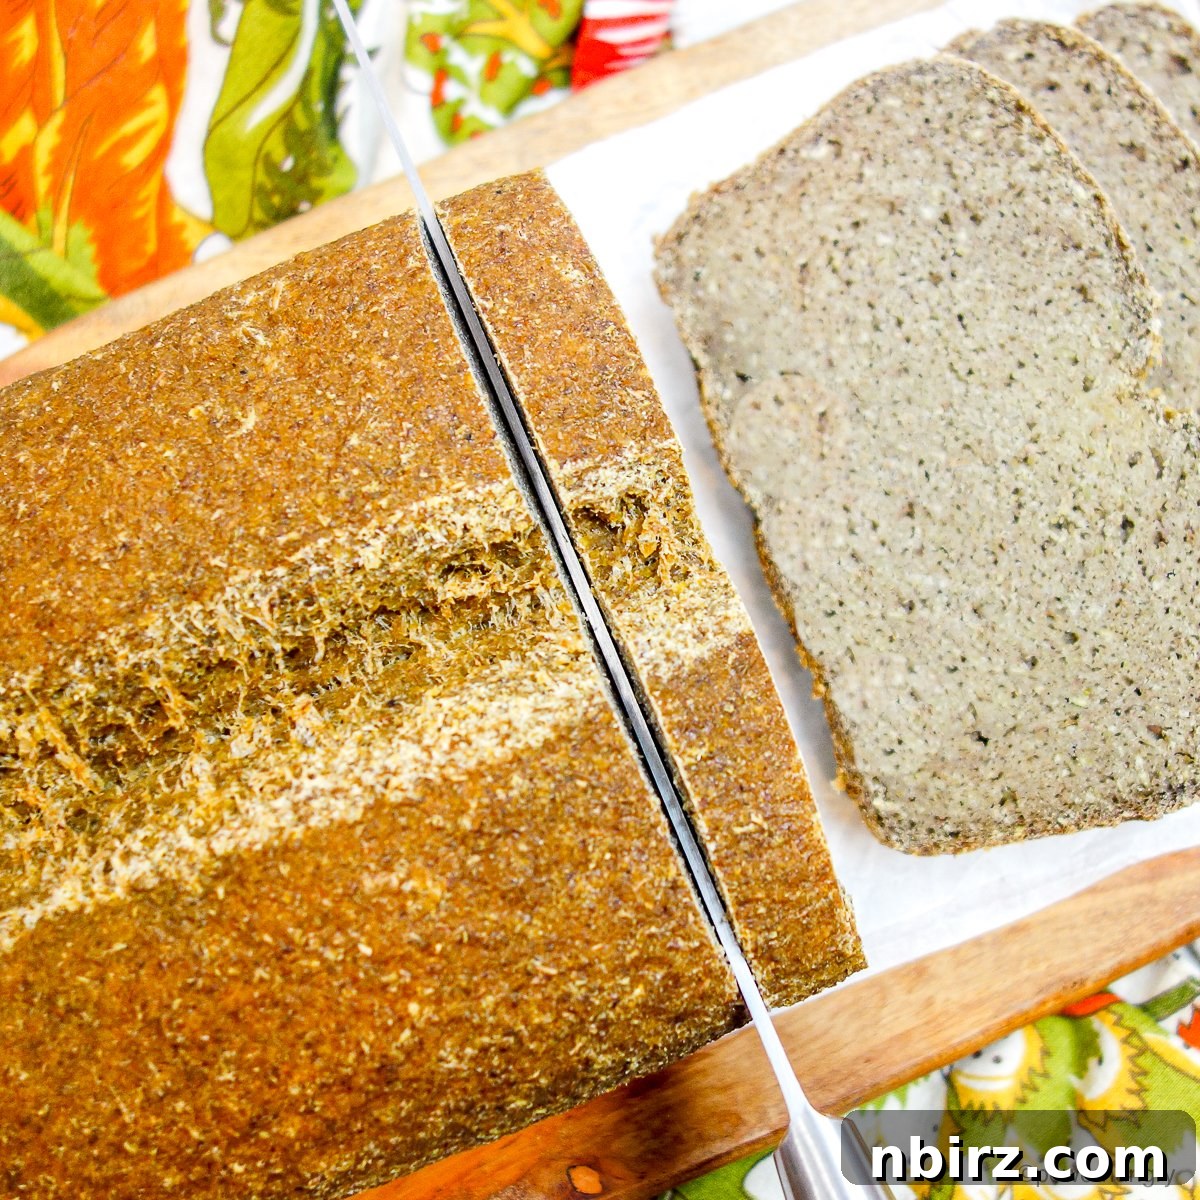
One of the many charms of this protein-packed loaf is its robust and sturdy nature. This means you have complete freedom when it comes to slicing! Whether you prefer thick, satisfying slabs perfect for hearty toast, or delicate, thin slices ideal for elegant sandwiches and canapés, this bread handles it all with grace. Its firm yet tender crumb holds up beautifully, ensuring every slice maintains its integrity and delicious texture, no matter how you cut it.
A Delightful Texture and Flavor Profile
This high-protein tofu lentil bread offers a unique and gratifying sensory experience that sets it apart from conventional loaves.
Texture: Expect a truly hefty and firm bread. This is not a light and airy loaf, but rather a substantial one that offers a satisfying chew. Its robust nature makes it incredibly versatile; you can confidently slice it super thin to create sturdy bases for open-faced sandwiches or cut thicker pieces for exceptional toast that stands up to any topping. The inclusion of psyllium husks contributes to both its firm structure and a pleasant crustiness that enhances every bite.
Taste: The flavor profile of this bread is delightfully neutral, making it an excellent canvas for both sweet and savory accompaniments. It carries subtle, earthy notes reminiscent of traditional whole wheat or a dense German-style whole grain bread, but without any actual grains or gluten. This mild, wholesome taste ensures it complements a wide range of ingredients without overpowering them, allowing its natural goodness to shine through.
Creative Serving Suggestions
This versatile high-protein bread is remarkably delicious on its own, offering a wholesome bite. However, it truly shines when paired with your favorite toppings and alongside various meals. A light spread of oil-free hummus or a creamy vegan butter enhances its neutral flavor beautifully.
On the day it’s baked, I love to serve fresh slices alongside dinner, whether it’s a comforting bowl of soup, a vibrant salad, or a hearty pasta dish. Its substantial texture makes it an excellent accompaniment. While the bread keeps well in the refrigerator for a few days, my preferred method for longer storage and ultimate convenience is to slice the entire loaf and freeze the individual slices. This way, when a craving strikes, I can simply pop a frozen slice directly into the toaster. It makes an incredible breakfast, especially with a dollop of creamy cashew cream cheese and a sweet fruit jam. For a savory snack or quick lunch, I often top it with my vibrant Green Pea Guacamole or any other savory spread that catches my fancy. Its robust structure ensures it holds up perfectly to any topping, hot or cold.

Exciting Flavor Variations to Try
While delicious in its plain form, this tofu lentil bread is an excellent canvas for a myriad of flavor enhancements. Don’t hesitate to experiment with different additions to customize it to your taste preferences. For an aromatic twist, consider incorporating fresh or dried herbs directly into the batter; a tablespoon of finely chopped fresh rosemary, some dried thyme, or a blend of both would be wonderful. Garlic powder and onion powder are fantastic for adding a savory depth without overpowering. For those who enjoy a bit of warmth, a pinch of sweet spices like smoked paprika or savory spices like cumin can transform the loaf. A generous grind of black pepper also adds a delightful kick. Before baking, you can also sprinkle the top of the batter with various seeds, such as sesame seeds, poppyseeds, or hemp hearts, to add an appealing visual texture and an extra layer of nutty flavor and crunch. These simple variations can turn your basic loaf into a gourmet experience tailored to any meal.
Frequently Asked Questions (FAQ) – Your Guide to Success
Here are answers to some common questions that arise when baking this unique high-protein tofu lentil bread, ensuring you achieve perfect results every time.
- **How should I store the high-protein lentil tofu bread?**
Proper storage is key to maintaining freshness. Once completely cooled, you can store the bread in an airtight container at a cool room temperature for up to 2 days. For slightly longer preservation, transfer it to the refrigerator, where it will remain fresh for about 3 days. For optimal long-term storage, and my personal preferred method, slice the entire loaf before freezing. Store the slices in a freezer-safe bag or container for up to 6 months. This way, you can easily retrieve one or a few slices at a time, ready to be toasted directly from frozen.
- **Can I use other legumes in place of the lentils?**
While I haven’t extensively tested this recipe with other legumes, the principle should theoretically work. If you wish to experiment, aim to use the same weight (12 ounces) of dried beans as you would lentils. However, be mindful that different legumes may require varying soaking times and could subtly alter the flavor and texture of the final bread. Lentils are particularly well-suited due to their relatively quick cooking time and smooth blending capabilities.
- **Can I use a food processor instead of a blender?**
I strongly advise against using a food processor for this recipe. A food processor, even a powerful one, is designed to chop and mince, but it typically cannot achieve the perfectly smooth, liquified batter consistency that a high-speed or even a regular blender can. For the bread to rise correctly and have a uniform, non-gritty texture, the lentils must be entirely broken down into a silky-smooth mixture. A food processor will likely leave you with a coarse, chunky batter that won’t yield the desired results.
- **My oven has a convection setting. Should I use it for this bread?**
No, please do not use the convection setting for this bread. While convection ovens are excellent for many recipes, promoting quicker and crispier cooking, they are not suitable for all baking projects, especially this unconventional loaf. This bread requires a more moderate, consistent radiant heat to rise evenly and bake through properly. Convection heat can aggressively force the outer layer of this bread to cook and set too quickly, causing it to rise unevenly and potentially separate from the still-uncooked interior. This often leads to issues such as a large air bubble forming under the crust, a gummy or raw middle, and an overly hard outer crust. For best results, stick to your oven’s conventional (non-convection) bake setting.
- **My bread came out gooey in the middle. Why?**
A gooey middle is an indication that the bread did not bake through completely. Several factors could contribute to this:
- **Using a convection oven:** As explained above, convection heat can lead to an undercooked interior despite a seemingly browned exterior. Always use a conventional oven setting.
- **Inaccurate measurements:** Even experienced bakers can make measurement errors. This recipe is quite precise, especially regarding the psyllium husks and water. If you used measuring cups, I highly recommend using a kitchen scale for more accurate ingredient proportions next time. Scales provide a much more reliable measurement for consistent baking success.
- **Inaccurate oven temperature:** Oven thermostats can sometimes be inaccurate. I regularly use an inexpensive oven thermometer to ensure my oven is heating to the correct temperature. If your oven runs too cool, the bread won’t bake properly. Conversely, an oven that is too hot can cause a rapid, uneven rise, leading to a bubble under the top crust and an undercooked center. Verify your oven’s accuracy before baking to eliminate this variable.
- **Can I use one of your soy-free tofu recipes in place of the soy tofu?**
Yes, while I haven’t specifically tested it, using a homemade soy-free tofu should work well as an alternative. Ensure you use an equal amount of any of my extra-firm soy-free tofu varieties. Excellent options include my red lentil tofu, pumpkin seed tofu, hemp tofu, any legume tofu, chickpea flour tofu, or split pea tofu, all prepared to an extra-firm consistency to match the original recipe’s requirements.
- **Can I use something other than whole psyllium husks?**
For this specific recipe, it is critical to use **whole psyllium husks**. Other gelling agents and binders, such as ground flax seeds (flaxseed meal) or chia seeds, are not direct substitutes and will not yield the same structural results. While these may work in other recipes, they absorb liquid and bind differently, and substituting them here would likely require extensive experimentation to determine their efficacy and correct quantities.
- It’s also important to note that I have not tested this recipe with *psyllium husk powder*. Feedback from readers on many of my other bread recipes that call for whole psyllium husks consistently indicates that psyllium powder does not perform the same way. For the most reliable and best results, stick with whole psyllium husks to achieve the proper lift, texture, and stability.
Happy baking, and enjoy your delicious, wholesome homemade bread!
Explore More Easy High Protein Bread Recipes
If you’ve enjoyed this high-protein tofu lentil bread, you’ll love exploring these other simple and healthy bread options from my collection:
- Easy Oat Protein Bread
- Bean Millet Protein Bread
- Buckwheat Flour Protein Bread (3 Ingredients)
- High Protein Oat Bread Bites
- High Protein Lentil Bread
- High Protein Split Pea Bread
High Protein Tofu Lentil Bread (Vegan, Oil-Free, GF)
By: Camilla
Prep Time: 5 minutes
Cook Time: 55 minutes
Soak Time: 20 minutes
Total Time: 1 hour 20 minutes
Servings: 12 slices (1 loaf)
Equipment
- 1 9×5 inch loaf pan
- Blender (high-speed or regular)
- Large mixing bowl
- Mesh sieve or colander
- Rubber spatula
- Cooling rack
Ingredients
- 12 ounces dried lentils (uncooked, any variety, such as tan, green, or split red lentils)
- 7 ounces extra-firm tofu, drained (not pressed), about 1 cup when crumbled
- 1/2 cup water
- 1 tablespoon baking powder (certified GF, as needed)
- Optional: 1 teaspoon salt
- 2 tablespoons whole psyllium husks (not psyllium powder)
Instructions
- **Soak the Lentils:** Place the lentils in a large mixing bowl. Cover with 1 to 2 inches of boiling water. Soak for 20 minutes, then drain through a mesh sieve or colander. Rinse under cool water and drain excess water.
- **Preheat Oven & Prepare Pan:** Preheat oven to 350°F (180°C). **Do not use convection setting.** Line a 9×5 inch (22.5×12.5 cm) loaf pan with nonstick parchment paper. (Optional: spray with nonstick cooking spray if not oil-free).
- **Blend Batter:** Drain tofu (no pressing needed). Place drained lentils, drained tofu (crumbled), 1/2 cup water, and optional salt in a blender. Blend on high speed, scraping sides, until completely smooth. Add baking powder and psyllium husks; pulse 2-3 times to combine.
- **Spread in Pan:** Scrape batter into the prepared pan and smooth the top with a spatula. Optional: draw a 1/2-inch deep line lengthwise down the middle for even steam release.
- **Bake:** Bake in the preheated 350°F (180°C) oven for 50-55 minutes, until risen, golden brown, and a tester inserted in the middle comes out with only moist crumbs attached.
- **Cool:** Transfer pan to a cooling rack; cool in pan for 15 minutes. Remove loaf (slide butter knife around sides if needed) and place on the cooling rack to cool completely before slicing.
Notes
Storage: Store the cooled bread in an airtight container at cool room temperature for 2 days, in the refrigerator for 3 days, or in the freezer for up to 6 months. For convenience, slice the bread before freezing.
Using Soy-Free Tofu: Using an equal amount of extra-firm homemade soy-free tofu (such as red lentil tofu, pumpkin seed tofu, hemp tofu, any legume tofu, chickpea flour tofu, or split pea tofu) should work fine.
Nutrition Information (per serving, 1 slice)
- Calories: 115 kcal
- Carbohydrates: 19g
- Protein: 9g
- Fat: 1g
- Saturated Fat: 0.1g
- Polyunsaturated Fat: 0.3g
- Monounsaturated Fat: 0.1g
- Sodium: 118mg
- Potassium: 293mg
- Fiber: 10g
- Sugar: 1g
- Vitamin A: 11 IU
- Vitamin C: 1mg
- Calcium: 85mg
- Iron: 2mg
Like this recipe? We’d love for you to rate and comment below!