
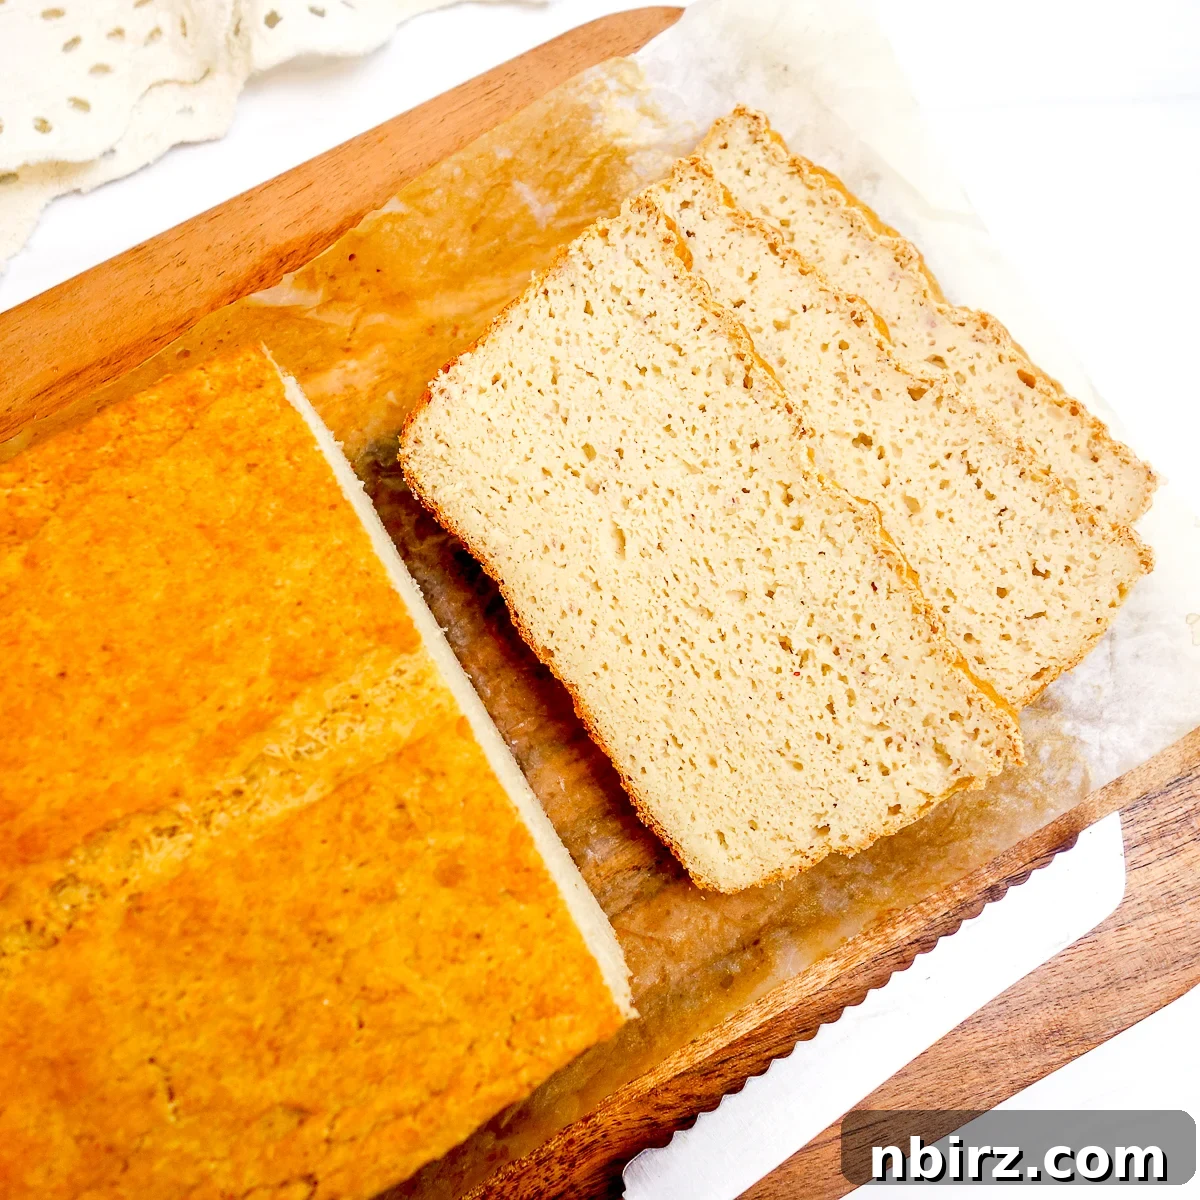
Discover the ultimate **high-protein, flourless bread** that revolutionizes healthy eating. This **bean millet protein bread** offers an incredible 7 grams of protein and 8 grams of fiber per slice, making it a nutritional powerhouse. Crafted with simplicity and affordability in mind, this **oil-free, vegan, and gluten-free bread** recipe delivers the satisfying taste and texture of traditional wheat bread, without any of the common allergens or unnecessary additives. Prepare to transform your breakfast, lunch, and snack routines with this versatile and delicious homemade loaf.
Elevate Your Diet with Easy High-Protein Bread
Finding a staple recipe that checks all the boxes for nutrition, taste, and ease can feel like a culinary quest. But with this groundbreaking **bean millet protein bread**, your search is over. This incredibly simple, yet profoundly satisfying, bread has become an absolute game-changer in countless kitchens, proving its versatility from dawn till dusk. Whether you’re craving a hearty slice for breakfast, a robust base for your lunch sandwich, a wholesome accompaniment to dinner, or a nourishing snack, this bread excels.
Its dense, rustic texture holds up beautifully to all types of fillings, from lavishly layered creations to elegant open-faced toasts. You can slice it as thinly as you like for delicate canapés or cut thick, satisfying slabs for the ultimate comfort food experience. And perhaps the most astonishing revelation? Despite being entirely **flourless**, it boasts the authentic, comforting flavor of a artisanal wheat bread, defying all expectations. This is not just any bread; it’s a testament to how simple, natural ingredients can create something extraordinary.
Unmatched Nutritional and Lifestyle Benefits of This Bread
This **bean millet protein bread** isn’t just delicious; it’s a nutritional marvel designed to fit seamlessly into a healthy, conscious lifestyle. Here’s a breakdown of the incredible benefits each slice offers:
- High Protein (7 grams per slice): Fuel your body and stay fuller for longer. Ideal for athletes, busy individuals, and anyone looking to increase their protein intake through plant-based sources.
- High Fiber (8 grams per slice): Supports digestive health, promotes satiety, and helps regulate blood sugar levels. A fantastic way to boost your daily fiber without even trying.
- Flourless: Completely free from traditional flours, including wheat, buckwheat, millet flour, quinoa flour, or any gluten-free flour blends. This makes it incredibly easy on the digestive system and suitable for many dietary restrictions.
- Gluten-Free: Naturally gluten-free, this bread is a safe and delicious option for those with celiac disease or gluten sensitivity, ensuring no compromise on taste or texture.
- No Added Starches: Unlike many commercial gluten-free breads, this recipe avoids cornstarch, tapioca starch, arrowroot, or potato starch, relying instead on whole ingredients for its structure and texture.
- No Added Gums: Free from xanthan gum or other thickening agents, guaranteeing a clean ingredient list and a more natural product.
- Vegan (Egg-Free & Dairy-Free): Made entirely from plant-based ingredients, this bread is perfect for vegans and those avoiding animal products, offering a rich and satisfying bread experience.
- Oil-Free: Prepared without any added oils or fats like vegetable oil, butter, olive oil, or safflower oil. This makes it a heart-healthy choice, lower in calories and fats.
- Minimal Ingredients: Simple, wholesome ingredients mean you know exactly what you’re eating, without any mysterious additives.
- Easy to Make: With straightforward steps, even novice bakers can achieve a perfect loaf.
- Frugal (Economical): Made from inexpensive staples like millet and white beans, this bread is incredibly budget-friendly, allowing you to enjoy healthy, homemade bread without breaking the bank.
You’ll find comprehensive nutritional information, detailing calories, carbohydrates, protein, fiber, and more, conveniently located in the recipe card at the end of this post.
Essential Ingredients for Your Bean Millet Protein Bread
For precise measurements of each ingredient, please refer to the detailed recipe card at the conclusion of this article. You can easily switch between US Customary (volume) and Metric (weights) for your preferred measurement system.
Crafting this exceptional **flourless bread** requires just a few key components. Each ingredient plays a vital role in achieving the perfect texture, rise, and flavor:
- Uncooked Millet: In the U.S., it’s simply labeled “millet.” For international readers, it is specifically proso millet. This grain is the foundation of our bread, providing structure and a neutral, slightly nutty flavor. Ensure it’s uncooked, as this recipe relies on the soaking and blending of raw grains.
- Uncooked White Beans: I typically use white navy beans due to their creamy texture and mild taste. However, other varieties like cannellini, Great Northern, or baby lima beans also work beautifully. The key is to use *uncooked* dried beans; canned or pre-cooked beans will not yield the same results. These beans contribute significantly to the protein and fiber content, as well as the bread’s satisfying density.
- Coconut Sugar: A touch of sweetness is essential not just for flavor, but primarily to activate and feed the yeast, enabling the bread to rise. While coconut sugar offers a subtle caramel note, other options like maple syrup, agave nectar, molasses, or granulated sugar can be used. It’s crucial not to omit sugar or substitute with artificial sweeteners, as this will prevent the yeast from doing its job effectively.
- Whole Psyllium Husks: This is a non-negotiable ingredient, acting as a binding agent and providing crucial fiber. It absorbs liquid and creates a gel-like consistency, mimicking the gluten structure found in traditional bread. It’s important to use *whole psyllium husks*, not psyllium husk powder, as their absorption rates differ significantly, which could alter the bread’s texture.
- Instant Yeast: Also known as rapid-rising yeast or quick yeast, this type of yeast is designed to work quickly and efficiently, making the rising process much faster than with active dry yeast. Please note that not all instant yeasts are gluten-free; avoid Red Star brand platinum yeast, as it contains wheat-derived enzymes. Always double-check the label for certified gluten-free options.
In addition to these core ingredients, you will also need water – both for soaking the millet and beans, and for blending the batter. I use filtered tap water for the best results. A single teaspoon of salt is recommended to enhance the flavors, though this is always adjustable to your personal taste and dietary requirements.
It is absolutely essential to use instant yeast for this recipe, not regular active dry yeast. The rapid action of instant yeast is critical for the success of this unique bread.
Millet: A Wholesome, Ancient Grain for Modern Baking
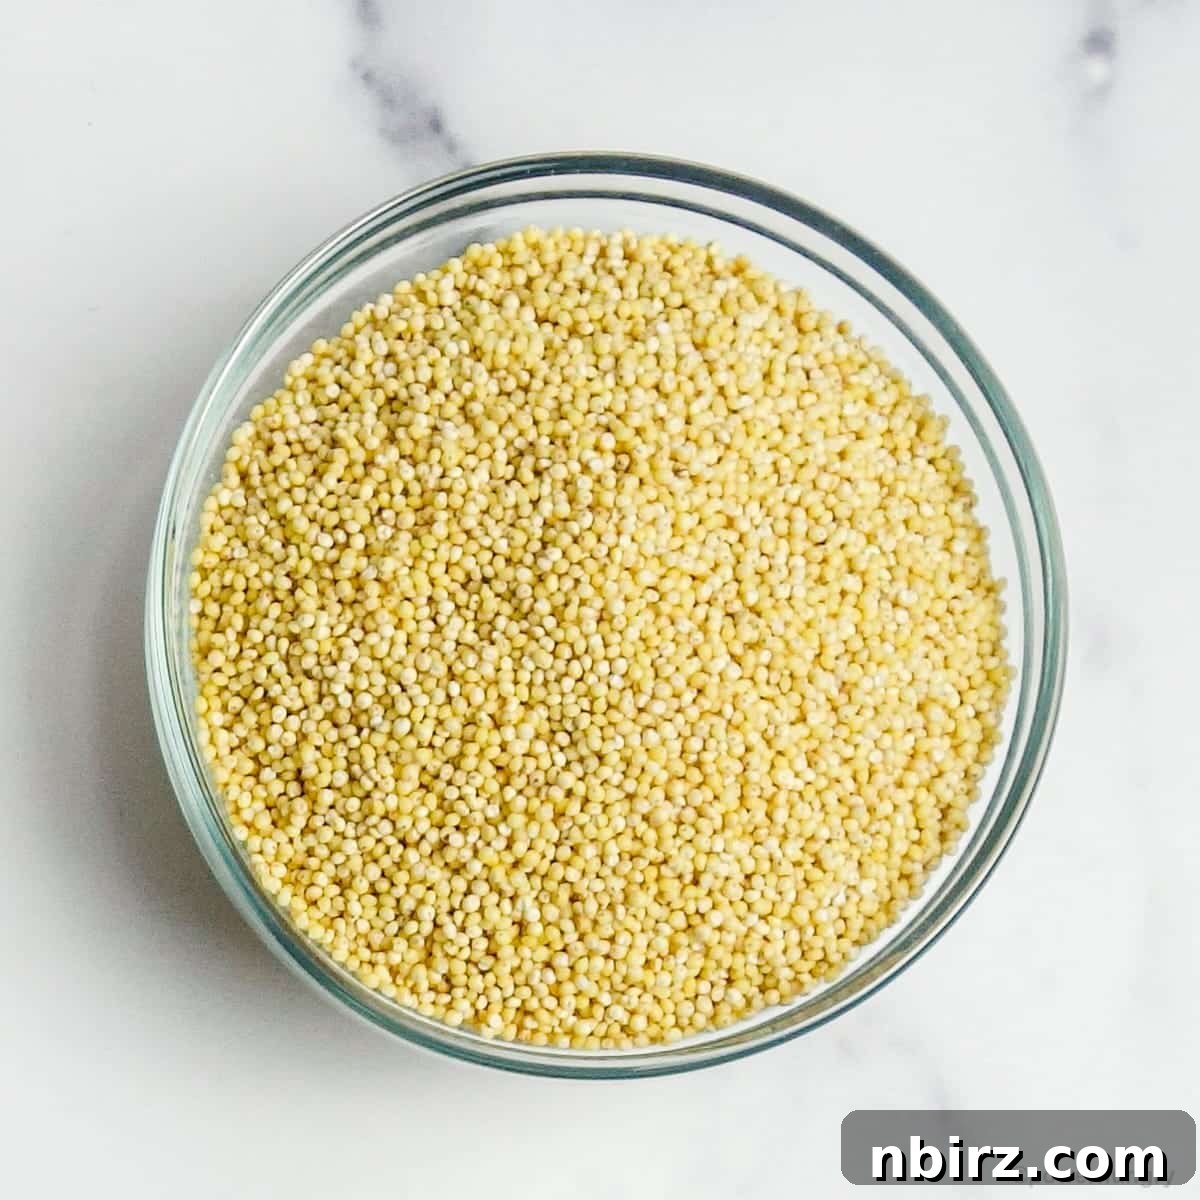
Millet, an ancient grain with a rich history, is regaining popularity for its remarkable nutritional profile and versatility. Often overlooked in Western diets, this tiny seed is a powerhouse of goodness, making it an ideal candidate for healthy, **flourless bread** recipes like ours. It boasts a mild, neutral flavor, often described as subtly reminiscent of dried corn, allowing it to adapt beautifully to various culinary applications.
Here’s why millet is such a prized ingredient:
- Naturally Gluten-Free: A safe and beneficial grain for individuals with gluten sensitivities or celiac disease.
- Lectin-Free: For those concerned about lectin intake, millet is a great alternative to other grains.
- Alkalizing to the Body: Unique among grains, millet is one of the few that helps maintain the body’s alkaline balance.
- Excellent Source of Protein: Contributes significantly to the **high protein** content of our bread, supporting muscle health and satiety.
- Rich in Fiber: Promotes healthy digestion and contributes to a feeling of fullness.
- Abundant in B Vitamins: Essential for energy metabolism and overall well-being.
- Easy to Digest: Generally considered gentle on the stomach, making it a good choice for many.
- Cost-Effective: Compared to other gluten-free grains like quinoa, teff, or amaranth, millet is often significantly more affordable, contributing to the **frugal** nature of this recipe.
In the United States and Canada, the majority of millet available for human consumption is proso millet, typically labeled simply as “millet” on packages. If you reside in a region where multiple millet varieties are sold, always opt for proso millet to ensure consistency with this recipe’s intended outcome. Its specific properties are key to the bread’s success.
Crafting Your Flourless Masterpiece: Step-by-Step Directions
For a complete, printable guide to these instructions, please refer to the comprehensive recipe card located below.
Making this **flourless, high-protein bread** is an enjoyable and straightforward process. Follow these detailed steps to bake your perfect loaf.
Step One: The Crucial Soaking of Beans & Millet
Begin by placing your raw (uncooked) millet and white beans into a large mixing bowl. The soaking process is fundamental to softening the grains and legumes, making them easier to blend into a smooth batter and enhancing their digestibility. Add freshly **boiling water** to the bowl, ensuring it covers the millet and beans by approximately 1 inch (or 2.5 cm). Let this mixture soak for 45 minutes. This quick hot soak method effectively jumpstarts the softening process, preparing them for blending.
Overnight Soaking Option for Enhanced Digestibility
If you prefer, or if you have sensitive digestion, you can opt for an overnight soak. Place the millet and beans in the bowl as described above, but instead, cover them with room temperature water. Allow them to soak for an extended period, anywhere from eight to twenty-four hours. This longer soak can further break down anti-nutrients and make the grains even more gentle on your system.
Step Two: Preparing Your Baking Pan for Success
Proper pan preparation is key to ensuring your **millet bread** loaf releases cleanly after baking. Take a standard 9×5-inch (22.5×12.5 cm) loaf pan. If you’re using a high-quality nonstick pan, such as one with a ceramic coating or made of silicone, no additional preparation is typically needed. However, for metal pans or those with less reliable nonstick properties, it’s advisable to line the pan with nonstick parchment paper. This creates a barrier that guarantees easy removal. If you don’t mind a small amount of fat, you can also lightly spray the pan with nonstick cooking spray or brush it with a thin layer of oil or melted fat. Since this is an **oil-free bread** recipe, parchment paper is the preferred method.
Step Three: Thorough Rinsing and Draining
Once the soaking period is complete, carefully drain the millet and beans through a fine-mesh sieve. It’s important to rinse them thoroughly under cold running water. This step helps remove any residual phytic acid or enzyme inhibitors that may have leached out during soaking, further enhancing digestibility and ensuring the cleanest possible flavor. After rinsing, shake the sieve well to remove any excess water, as too much moisture can affect the batter’s consistency.
Step Four: Blending into a Silky Smooth Batter
This step is where the magic happens, transforming raw ingredients into a cohesive **bread batter**. Scrape all the soaked and drained millet and beans into the container of a high-speed blender. While a regular blender can work, a high-speed blender is highly recommended to achieve the perfectly silky-smooth consistency essential for this **flourless bread**.
Add the warm water, coconut sugar, instant yeast, and salt to the blender. Secure the lid and blend on high speed until the mixture is completely smooth and warm to the touch. The warmth generated by blending helps activate the yeast. The batter should have no discernible lumps or graininess from the millet and beans. Finally, add the whole psyllium husks to this smooth bean and millet mixture. Blend again for just a few seconds, or stir them in with a spatula, until they are fully incorporated. The psyllium husks will immediately begin to absorb liquid, thickening the mixture into a thick batter-like consistency – not a traditional bread dough.
Step Five: Spreading the Batter and Preheating the Oven
Time is of the essence in this step. As soon as your batter is ready, immediately spread it evenly into your prepared baking pan, using a spatula to smooth the top surface. Then, using a sharp knife, make a lengthwise slash across the top of the batter. This score allows the bread to expand predictably during baking and creates that signature rustic look.
Next, place the pan in a warm, draft-free location in your kitchen. Simultaneously, and with no hesitation, **immediately preheat your oven to 350°F (180°C)**. This immediacy is crucial because this **bean millet bread** rises quite rapidly. Your oven needs to be at the correct temperature and ready to receive the loaf as soon as it reaches its optimal rise point. A delay in preheating could lead to over-proofing, impacting the bread’s final texture and structure.
Step Six: Monitoring the Rapid Rise of Your Bread Batter
This is a critical phase that requires close attention. Allow the bread batter to rise for approximately 20 to 25 minutes. However, the exact timing can vary depending on the ambient temperature of your kitchen; a colder environment may extend the rising time. Because this bread rises quickly, it’s important to stay near the kitchen and monitor its progress continuously.
The bread is ready to bake when the batter has risen to within a short distance of the pan’s top edge – ideally, no closer than 1/4 inch (about 0.6 cm) from the rim. If the batter rises all the way to the top or overflows, it risks spilling over the edges once it hits the heat of the oven. A perfectly risen batter will result in a beautifully shaped and textured loaf.
Step Seven: Baking Your High-Protein Bread to Golden Perfection
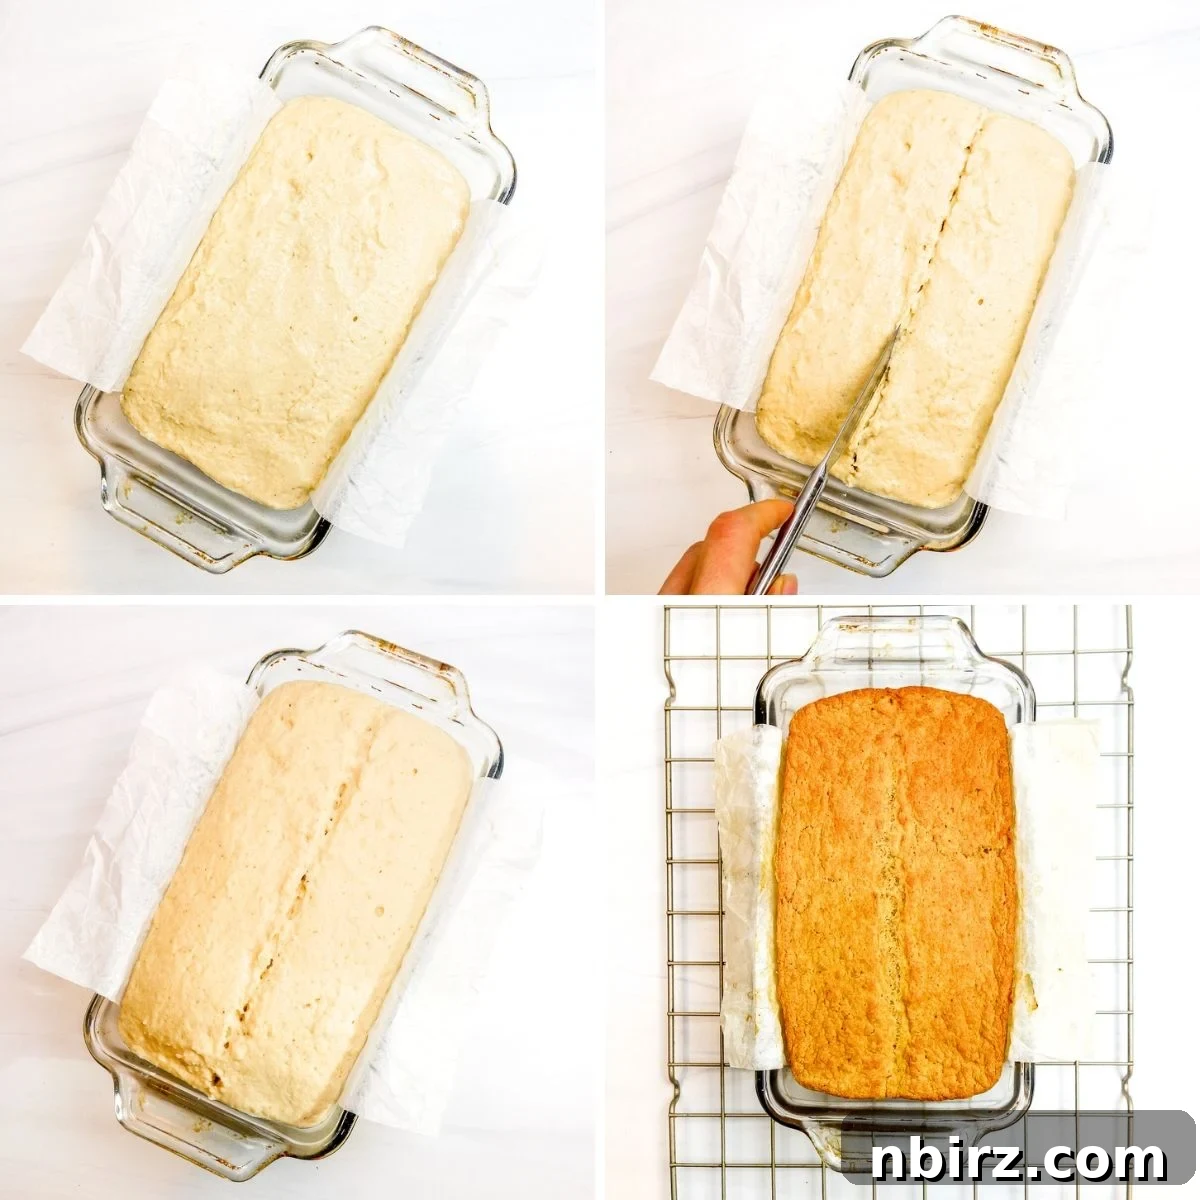
Once the batter has risen sufficiently, carefully transfer the loaf pan to your preheated oven. Bake the **bean millet protein bread** for 45 to 50 minutes. The bread is done when it develops a deep golden-brown crust and sounds hollow when tapped on the bottom. Do not be alarmed if the top of the loaf appears relatively flat; this is characteristic of this particular **flourless bread** and does not indicate an issue with the bake. The internal structure will be perfectly cooked and firm.
Step Eight: The Art of Cooling and Slicing Your Homemade Loaf
Patience is a virtue, especially when it comes to baking bread. After removing the loaf from the oven, resist the urge to slice it immediately. Allow the bread to cool in its pan, placed on a wire cooling rack, for at least 15 minutes. This initial cooling period allows the internal structure of the bread to set and prevents it from becoming gummy.
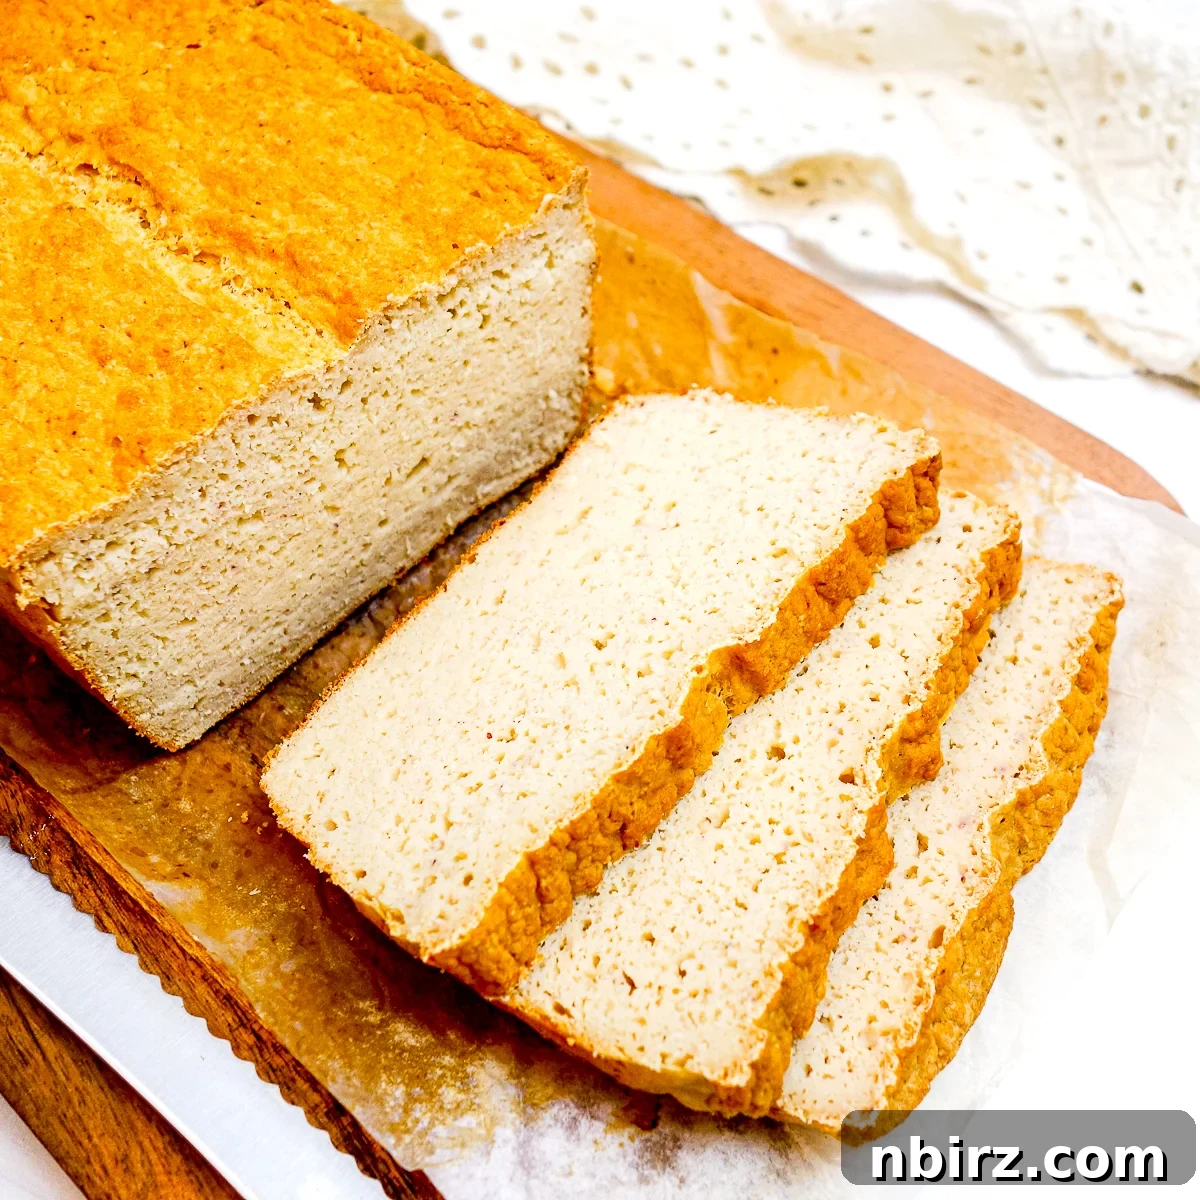
After 15 minutes, carefully remove the loaf from the pan and transfer it directly onto a wire cooling rack or any other suitable cooling surface. It is absolutely crucial to let the loaf cool completely to room temperature before slicing. Attempting to slice warm bread, especially a **flourless** variety like this, can result in a sticky texture and an uneven crumb. Once fully cooled, you’ll be greeted by a truly gorgeous, perfectly baked loaf of **high-protein bread**!
This is a remarkably sturdy bread, characterized by minimal crumbs, which makes for effortless slicing. You have the flexibility to slice it as thick or as exceptionally thin as your culinary desires dictate. Each slice holds its form, ready for whatever culinary adventure you embark upon.
The Unique Texture & Versatile Taste of This Bread
This **bean millet protein bread** distinguishes itself with a firm, satisfying texture that provides a substantial bite, reminiscent of a dense, rustic wheat loaf. Its flavor profile is wonderfully neutral, allowing it to serve as a perfect canvas for a myriad of toppings and accompaniments, much like traditional all-purpose flour breads. This adaptability makes it an invaluable addition to any meal plan.
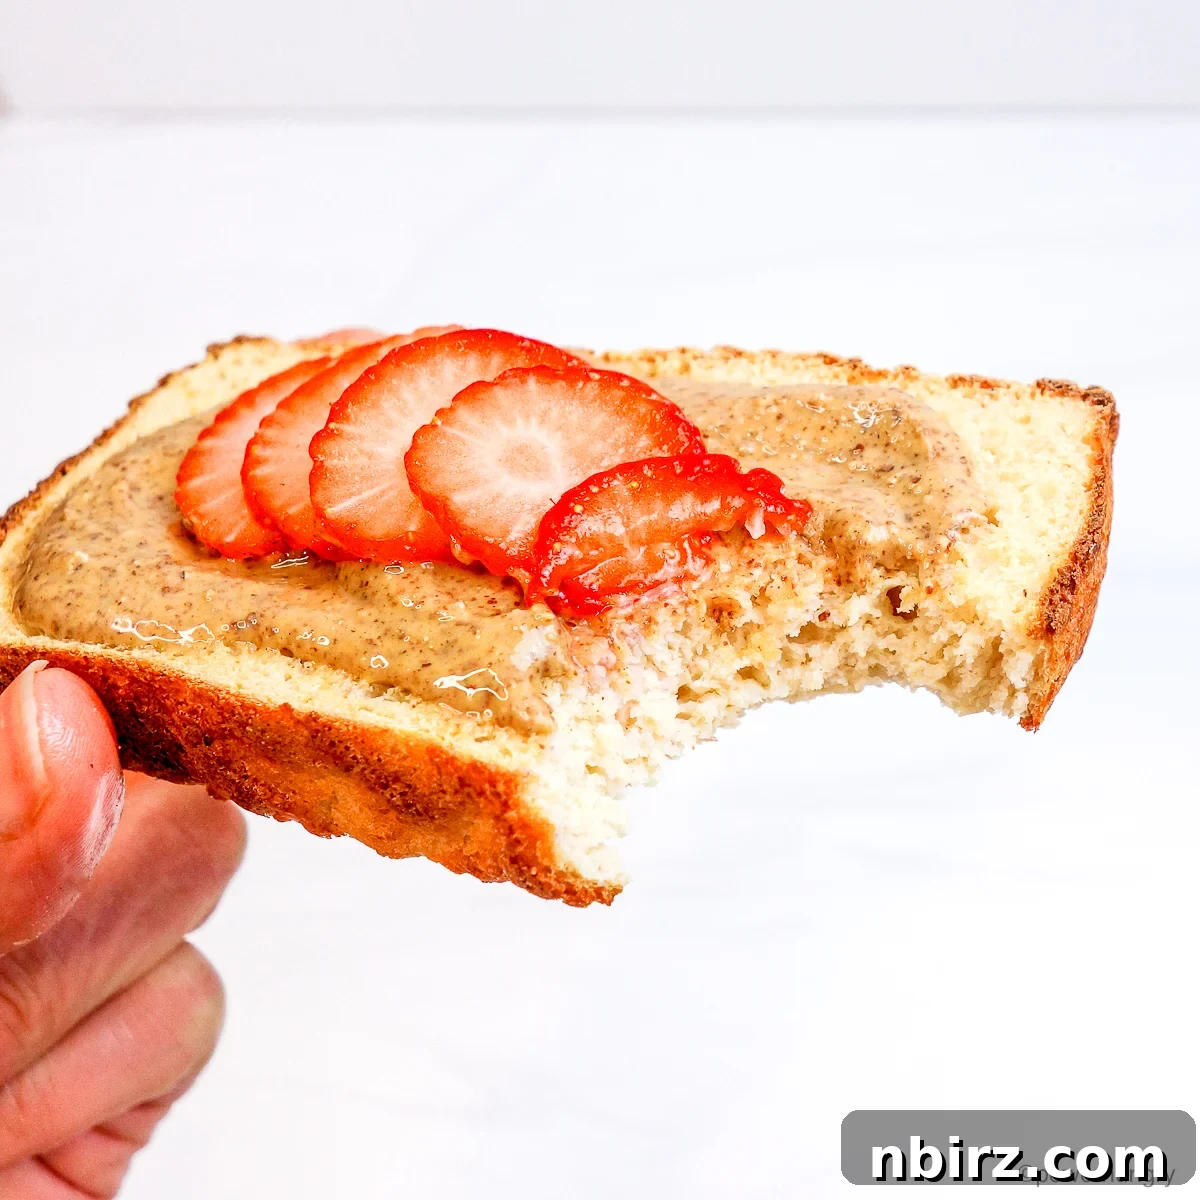
Use slices to create wholesome sandwiches, whether you prefer classic two-slice constructions or elegant open-faced presentations, brimming with your favorite sweet or savory fillings. Imagine it toasted and topped with creamy avocado and a sprinkle of everything bagel seasoning for a vibrant breakfast, or slathered with homemade nut butter or seed butter and fresh fruit for a protein-packed snack. It also pairs beautifully with savory spreads like hummus or a rich vegan cream cheese, and is excellent with sweet fruit preserves.
Beyond breakfast and casual snacks, this **gluten-free, high-protein bread** is a fantastic complement to more substantial meals. It shines alongside hearty soups and stews, providing a wholesome vehicle for soaking up delicious broths, and offers a satisfying contrast to crisp, fresh salads. Its robust character ensures it won’t fall apart, making it a reliable and delightful component of any dinner or lunch spread.
Unleash Your Creativity: Flavor Variations for Your Millet Bread
While the classic **bean millet protein bread** is delightful on its own, it also serves as an excellent foundation for a variety of flavor customizations. Don’t hesitate to experiment and make this recipe truly your own!
Consider incorporating any of the following to infuse your loaf with unique tastes:
- Herbs: For a savory twist, mix in dried herbs such as rosemary, thyme, or oregano directly into the batter before baking. If using fresh chopped herbs like basil, parsley, or chives, add them to the batter *after* the blending stage to preserve their vibrant color and prevent them from turning the bread green.
- Savory Spices: Elevate the savory profile with ground spices like cumin, curry powder, garlic powder, or onion powder. These can add depth and warmth, perfect for accompanying hearty meals.
- Sweet Spices: For a touch of comforting sweetness, incorporate spices such as cinnamon, cardamom, or ground ginger. This transforms the bread into an excellent companion for coffee or tea, especially when toasted.
Beyond mixing ingredients into the batter, you can also enhance the bread’s visual appeal and texture by sprinkling seeds on top of the loaf before it goes into the oven. Pumpkin seeds, sunflower seeds, and/or chia seeds add a delightful crunch and extra nutrients, creating a bakery-quality finish.
Optimal Storage for Your Homemade Protein Bread
Proper storage is key to maintaining the freshness and quality of your **bean millet protein bread**. Once the loaf has completely cooled to room temperature, transfer it to an airtight container or a bread bag.
- Room Temperature: For immediate consumption, the bread can be stored at a cool room temperature for up to one day.
- Refrigerator: To extend its freshness, store the bread in the refrigerator for up to one week. This is ideal for ensuring it stays moist and prevents spoilage.
- Freezer: For longer-term storage, this bread freezes exceptionally well. Wrap individual slices or the entire loaf tightly in plastic wrap, then place it in a freezer-safe bag or container. It will keep beautifully in the freezer for up to six months. When ready to enjoy, simply thaw at room temperature or toast directly from frozen.
Ingredient Insights & Smart Substitutions for Your Flourless Bread
While this recipe is carefully formulated for optimal results, some questions regarding substitutions are common. Here’s a guide to common ingredient queries:
- Other Uncooked Grains: I have exclusively tested this specific recipe using millet. The unique starch and protein structure of millet are critical for the bread’s rise and texture. Therefore, I cannot guarantee success with other uncooked grains, as they may behave differently during soaking, blending, and baking.
- Cooked or Canned Beans: No, this recipe explicitly requires uncooked (raw) dried beans. Cooked beans, whether canned or freshly prepared, will not yield the correct batter consistency or the desired final bread texture. The hydration and starch profile of uncooked beans are essential to the recipe’s success.
- Coconut Sugar Alternatives: You can substitute coconut sugar with an equal amount of other liquid or granulated sugars. Good alternatives include maple syrup, agave nectar, molasses, or any granulated sugar of your choice. However, it is crucial that sugar is present. Sugar substitutes will not work because the sugar is a vital food source for the instant yeast, enabling it to activate and produce the gas bubbles necessary for the bread to rise.
- Psyllium Husk Powder vs. Whole Psyllium Husks: Potentially, you might be able to use psyllium husk powder, but I have not thoroughly tested this recipe with powder. If you decide to experiment with psyllium powder, use the same *weight* (approximately 20 grams). Keep in mind that 20 grams of powder is roughly 4 teaspoons, whereas 20 grams of whole psyllium husks is about 1/4 cup, due to differences in density. Psyllium powder absorbs liquid much faster and more intensely, so adjustments to liquid content might be necessary.
- Omitting Sugar: No, sugar cannot be left out of this recipe. As mentioned, it’s essential for activating and feeding the instant yeast. Without sugar, the yeast will not be able to perform its leavening function, resulting in a very dense loaf that will not rise as expected.
- Adding Oil or Other Fats: While this recipe is designed to be **oil-free**, you can certainly add fat if you desire a softer bread texture. To do so, replace 1 to 4 tablespoons of the warm water during the blending phase with the oil or melted fat of your choice (e.g., olive oil, melted coconut oil, vegan butter). This will contribute to a slightly richer and more tender crumb.
- Making Without Yeast: No, this is specifically a yeast-leavened bread. The millet and beans require yeast for their unique rise and texture in this context. If you are looking for yeast-free bread options, my website features a wide array of recipes, including those made with rice flour, sorghum flour, chickpea flour, teff flour, and other **flourless** alternatives. Simply use the search box on the site to find “bread” recipes, and you will discover many fantastic yeast-free choices.
- Substituting Other Dried Legumes for White Beans: Yes, you can substitute the white beans with an equal weight of other dried legumes. Dried pinto beans or dried chickpeas are excellent alternatives and will provide a similar structure and protein content. You could also experiment with an equal weight of dried lentils for a slightly different flavor profile.
Troubleshooting: Tips for a Perfectly Risen Loaf
Achieving a beautifully risen loaf of **bean millet protein bread** is usually straightforward, but sometimes issues can arise. If your bread did not rise as expected, here are the most likely culprits and how to avoid them:
- Incorrect Yeast Type: This is the most common reason for failed rising. Regular active dry yeast was used instead of instant yeast. This recipe is specifically formulated for the rapid action of instant yeast (also known as rapid-rising, fast, or quick yeast). Regular active dry yeast requires different activation steps and longer rising times, which this recipe does not account for. You *must* use instant yeast.
- Sugar Reduction or Elimination: The sugar content was reduced, entirely left out, or replaced with artificial sweeteners. Remember, the sugar acts as essential “food” for the yeast. Without sufficient sugar, the yeast cannot properly ferment and produce the carbon dioxide gas bubbles necessary to make the bread rise. Always include the specified amount of sugar for optimal yeast activity.
- Inaccurate Oven Temperature: An oven that is not calibrated correctly can significantly impact baking results. If your oven temperature is off, it can lead to various issues. If the oven is too hot, it might force the bread to rise too quickly, which can cause large air pockets or bubbles to form under the crust, or even cause the bread to collapse. Conversely, an oven that is too cool will result in a poor rise and a dense, underbaked loaf. I highly recommend using an inexpensive oven thermometer to regularly check and ensure your oven’s internal temperature matches its setting. This simple tool can prevent many baking disappointments.
Frequently Asked Questions About This Millet Bread
- Can I make this high-protein gluten-free bread in a bread machine? I have not tested this particular recipe in a bread machine. The unique method of soaking and blending whole grains and beans, along with the specific rising times, may not translate directly to a bread machine’s programming. Therefore, I cannot provide recommendations for bread machine adaptations or guarantee its success using that method.
- My oven has a convection setting. Should I use it for this bread? This **flourless bread** recipe was developed and tested exclusively in a conventional oven, utilizing radiant heat. For the most consistent and best results, I recommend baking with radiant heat if your oven offers that option. However, if you are accustomed to baking bread in a convection oven and understand how to adjust temperatures and times for its fan-forced heat, you are welcome to experiment. Be mindful that convection ovens often bake faster and can dry out goods more quickly.
- Can I blend the batter in a food processor? No, a food processor is not suitable for blending this batter. Its blades and mechanism are designed for chopping and pulsing, not for creating the exceptionally smooth, silky consistency required from the millet and beans. A food processor will leave the ingredients grainy, which will negatively impact the final texture of the bread. A high-speed blender (or a powerful regular blender) is essential for achieving the necessary smoothness.
- Can I bake the white bean millet bread in a toaster oven? I do not recommend baking this bread in a toaster oven. Even if your loaf pan fits, the close proximity of the bread batter to the heating elements in a small toaster oven can lead to uneven baking. The outside of the loaf is likely to burn or become excessively hard before the interior is thoroughly baked, resulting in a disappointing outcome. For best results, use a full-sized oven.
Happy baking, and enjoy your wholesome, homemade bread!
Explore More Wholesome Bread Recipes
If you loved this **bean millet protein bread**, you’ll surely enjoy exploring other healthy and delicious bread recipes from my collection. Here are a few related options to inspire your next baking adventure:
- Vegan Almond Flour Bread with Yeast (Oil-free, GF)
- Vegan Blueberry Quinoa Oat Muffins (Oil-free, GF)
- 3-Ingredient Millet Flax Bread
- Flourless Millet Oat Bread (Vegan, Oil-free, GF)
- Vegan Grain-Free Pumpkin Bread (Oil-free)
Bean Millet Protein Bread (Vegan, GF, Oil-Free)
Camilla Saulsbury
Note: Toggle ingredients to Metric for the weights
5 minutes
50 minutes
1 hour
1 hour
55 minutes
14
slices (1 loaf)
Equipment
-
1 9×5 inch loaf pan
-
1 high-speed blender (or regular blender)
Ingredients
- 1.5 cups uncooked (raw) white beans, (see notes for examples)
- 1/2 cup uncooked (raw) millet
- 2 tablespoons coconut sugar, (see notes for options)
- 2.5 teaspoons instant yeast, (it MUST be instant/ fast rising yeast)
- 1 teaspoon salt, (optional/adjustable)
- 1.5 cups warm water
- 1/4 cup whole psyllium husks, (not psyllium powder)
Instructions
-
Place the raw (uncooked) millet and white beans in a large mixing bowl. Add boiling water to the bowl (enough to cover them by about 1 inch / 2.5 cm). Soak for 45 minutes (see notes for overnight soak option).
-
Prepare a 9×5-inch (22.5×12.5 cm) loaf pan. If using a nonstick loaf pan (e.g., ceramic coated, silicone), no preparation is needed. Otherwise, line the pan with nonstick parchment paper. If you do not object to oil, spray the pan with nonstick cooking spray, or lightly oil/grease the pan.
-
Drain the soaked millet and beans through a mesh sieve and rinse under cold water. Shake off the excess water.
-
Scrape the soaked, drained millet and beans into a high-speed blender (or regular blender) container.
Add the warm water, coconut sugar, yeast, and salt. Blend on high speed until the batter is silky smooth and warm.
Add the whole psyllium husks to the bean millet mixture. Blend until just combined (or stir with a spatula). It will resemble a batter, not a dough. -
Immediately spread batter into the prepared baking pan, smoothing the top. Use a knife to make a lengthwise slash through the top of the batter.
Place the pan in a draft-free warm place. Immediately preheat the oven to 350F (180C). Do not hesitate!
The bread rises quickly. The oven needs to be hot and ready to go as soon as the bread hits the needed rising mark (see next step). -
Let the bread batter rise for 20 to 25 minutes (if your kitchen is cold, it may take longer). It happens quickly, so stay close by.
The bread is ready to bake as soon as the batter is a short distance away from the top edge of the pan (the batter should be no closer than 1/4 inch away from the top). If the batter is all the way to the top, it could overflow the top of the pan once it hits the oven. -
Bake the bread in the preheated oven for 45 to 50 minutes until deep golden brown. The loaf will be relatively flat on top.
-
Let the loaf cool, in the pan, on a cooling rack for 15 minutes.
Remove the bread from the pan. Cool the loaf completely on a wire rack or other cooling rack. -
Slice the bread, thick or (relatively) thin, as desired. The bread is wonderful plain, toasted, as part of a sandwich, or any way that you prefer!
Notes
Yeast Note: Instant yeast is gluten-free, with the exception of Red Star Platinum Yeast. It includes enzymes derived from wheat.
White Bean Options: Use any variety of dried white beans, such as cannellini, Great Northern, navy, or baby lima beans.
Note for Psyllium Powder: I have not tested the recipe with psyllium powder. If you decide to substitute psyllium powder, use the same weight (20 grams), which is about 4 teaspoons (compared to 1/4 cup for whole psyllium husks)
Millet Note: For those outside of the US and Canada, where many millet varieties are available, the type of millet used in this recipe is proso millet (it is sold and labeled simply as “millet” in the US and Canada).
Rising Time: The timing for the rise will depend, in part, on the warmth and humidity in your kitchen.
Overnight Soak Option: If you prefer, soak the millet and beans overnight. Place the millet and beans in the bowl, as described above, but cover with room temperature water. Soak for anywhere from eight to twenty four hours.
Bake in a Conventional (radiant heat) Oven: I tested this bread in a conventional oven (radiant heat, not convection). For best results, I recommend using radiant heat, if possible. If you are used to baking bread in a convection oven, you are welcome to experiment with baking the bread in a convection oven. Do not bake the bread in a toaster oven or air fryer (the outside will burn before the bread is baked).
Notes About the Yeast: This particular bread recipe cannot be made without yeast. Also, the bread must be made with instant yeast (also called rapid rise, fast, or quick yeast). It will not work, as written with regular active yeast.
Bread Machines: I have not tested this in a bread machine so I cannot recommend how to make bread machine adaptations to the recipe, or whether it will work.
Coconut Sugar Options: Use an equal amount of maple syrup, agave nectar, molasses, or granulated sugar of your choice to replace the coconut sugar. Do not omit the sugar or use sugar substitutes. Sugar is needed in the recipe to activate (feed) the yeast and make the bread rise.
My bread did not rise as expected. Why?
The most likely reasons are the following.
- Regular yeast was used instead of instant yeast. This recipe will not work with regular yeast. You must use instant yeast.
- Sugar was reduced or eliminated. The sugar was left out, reduced, or replaced with artificial sugar. The sugar is essential for “feeding” the yeast (to produce gas bubbles).
- Oven temperature is off. I regularly check my oven temperature setting using an inexpensive oven thermometer. Check to make sure the oven is accurate before baking. If the oven is too hot, it can force a faster rise to the bread, leading to a bubble under the top of the loaf.
Nutrition
Serving: 1slice
|
Calories: 119kcal
|
Carbohydrates: 24g
|
Protein: 7g
|
Fat: 1g
|
Saturated Fat: 0.1g
|
Polyunsaturated Fat: 0.2g
|
Monounsaturated Fat: 0.2g
|
Sodium: 176mg
|
Potassium: 423mg
|
Fiber: 8g
|
Sugar: 2g
|
Vitamin C: 0.01mg
|
Calcium: 67mg
|
Iron: 3mg
Like this recipe? Rate and comment below!