

Embark on a delightful baking journey with our recipe for vegan oat flour cut-out cookies! These exquisite treats are not only gluten-free and oil-free but also incredibly simple to prepare, requiring neither a stand mixer nor any chilling time. Get ready to create beautiful, delicious cookies perfect for any celebration or a cozy afternoon treat.

Crafting beautifully decorated cookies has never been easier, especially when you start with a fantastic base recipe. This vanilla sugar cut-out cookie recipe is designed to be your go-to for all your cookie decorating endeavors, whether you’re preparing for festive fall and winter holidays, celebrating birthdays, or simply adding a touch of sweetness to any special occasion throughout the year.
What sets these cookies apart is their unique foundation: finely ground oat flour. Unlike traditional wheat-based flours, oat flour imparts a wonderful, subtly toasty flavor and contributes to a delightful crisp-tender texture at the edges of each cookie. This wholesome flour makes these cookies a standout, offering a depth of flavor that complements their sweet vanilla notes beautifully.
While these oat flour sugar cookies are utterly delightful on their own, with just a splash of vanilla extract providing their classic flavor, they also serve as a versatile canvas for endless customization. Imagine transforming them with warming spices like cinnamon or nutmeg for the holidays, a zesty kick from citrus peels (lemon, orange, or lime), or even unique floral or herbal notes from finely chopped rosemary or thyme leaves. The possibilities are truly limitless, allowing you to tailor these cookies to your exact taste and the occasion.

Why You’ll Love These Vegan Oat Flour Cookies
This recipe for vegan oat flour cut-out cookies boasts an impressive list of benefits, making them a favorite for bakers seeking delicious and dietary-friendly options:
- Vegan (Egg-Free, Dairy-Free): Absolutely free from animal products, these cookies are perfect for those following a vegan lifestyle or with egg and dairy allergies. We achieve incredible texture and flavor using plant-based ingredients.
- Gluten-Free: Made entirely with oat flour, these cookies are naturally gluten-free, provided you use certified gluten-free oats or oat flour. This makes them a wonderful option for individuals with celiac disease or gluten sensitivities.
- Oil-Free: We skip the added oils, relying on the richness of cashew butter for moisture and tenderness. This not only makes them a lighter option but also highlights the natural flavors of the ingredients.
- Refined Sugar-Free: Sweetened with coconut sugar, these cookies offer a more natural, less processed sweetness compared to traditional white sugar. Coconut sugar also contributes a subtle caramel-like note.
- Quick & Easy to Make: Designed for convenience, this recipe streamlines the baking process. You’ll be amazed at how quickly you can go from ingredients to freshly baked cookies.
- No Chilling Required: One of the biggest time-savers! The dough is ready to roll out and cut immediately after mixing, eliminating the usual waiting time in the refrigerator.
- No Mixer Required: Forget about dragging out heavy kitchen appliances. All you need are a couple of bowls and a whisk for these cookies, making cleanup a breeze.
Essential Ingredients for Your Oat Flour Cookies
The precise measurements for each ingredient are thoughtfully detailed in the recipe card found at the very end of this article. For your convenience, you can easily toggle between US Customary (volume measurements) and Metric (weight measurements) to suit your preferred cooking style.
The ingredient list for these vegan oat flour cut-out cookies is wonderfully concise, focusing on quality components that deliver maximum flavor and perfect texture:
- Smooth Cashew Butter: This is the star ingredient for richness and binding. Cashew butter offers a neutral, creamy flavor that doesn’t overpower the vanilla, ensuring a tender crumb without the need for traditional butter or oil. (See notes below for alternative nut/seed butter options.)
- Coconut Sugar: Our chosen sweetener, coconut sugar provides a lovely caramel note and is a less refined alternative to white sugar. It contributes to the beautiful golden edges of the cookies. (Alternatives like brown sugar are discussed in the notes.)
- Baking Powder: A crucial leavening agent that helps the cookies rise slightly and maintain a pleasant texture. Ensure it is certified gluten-free if you require a strict gluten-free diet.
- Salt: Just a touch of salt enhances all the other flavors, balancing the sweetness and making the vanilla truly pop.
- Oat Flour (Very Finely Ground): The foundation of these cookies! For the best results and a smooth, tender texture, it’s essential to use very finely ground oat flour. You can purchase this or make your own by blending rolled oats until a fine powder forms.
- Tapioca Flour: Also known as tapioca starch, this ingredient is key for achieving the crisp-tender edges and slight chewiness. It acts as a binder and improves the dough’s workability. (Check notes for suitable alternatives like cornstarch or potato starch, but be aware that cassava flour is NOT a substitute.)
- Vanilla Extract: Essential for that classic, comforting sugar cookie flavor. Use a good quality pure vanilla extract for the best results.
Easy Step-by-Step Instructions for Perfect Cookies
Please remember, the complete, detailed instructions are also conveniently located in the recipe card below, along with precise measurements.
Follow these straightforward steps to create your perfect batch of vegan oat flour cut-out cookies:
- Prepare Your Workspace: Begin by preheating your oven to 350°F (180°C). This ensures the oven is at the correct temperature when your cookies are ready to bake, leading to even cooking. Line a large, light-colored cookie sheet with parchment paper. Parchment paper prevents sticking and makes cleanup incredibly easy.
- Combine Wet Ingredients: In a generously sized mixing bowl, combine the smooth cashew butter, coconut sugar, and boiling water. Whisk these ingredients vigorously until the mixture is completely blended and smooth. The hot water helps melt the cashew butter and dissolve the sugar, creating a creamy base. Once smooth, stir in the vanilla extract until fully incorporated, infusing the wet mixture with its delightful aroma.
- Whisk Dry Ingredients: In a separate, medium-sized mixing bowl, whisk together the oat flour, tapioca flour, baking powder, and salt. Whisking ensures these dry ingredients are thoroughly combined and evenly distributed, which is crucial for uniform texture and leavening in your cookies.
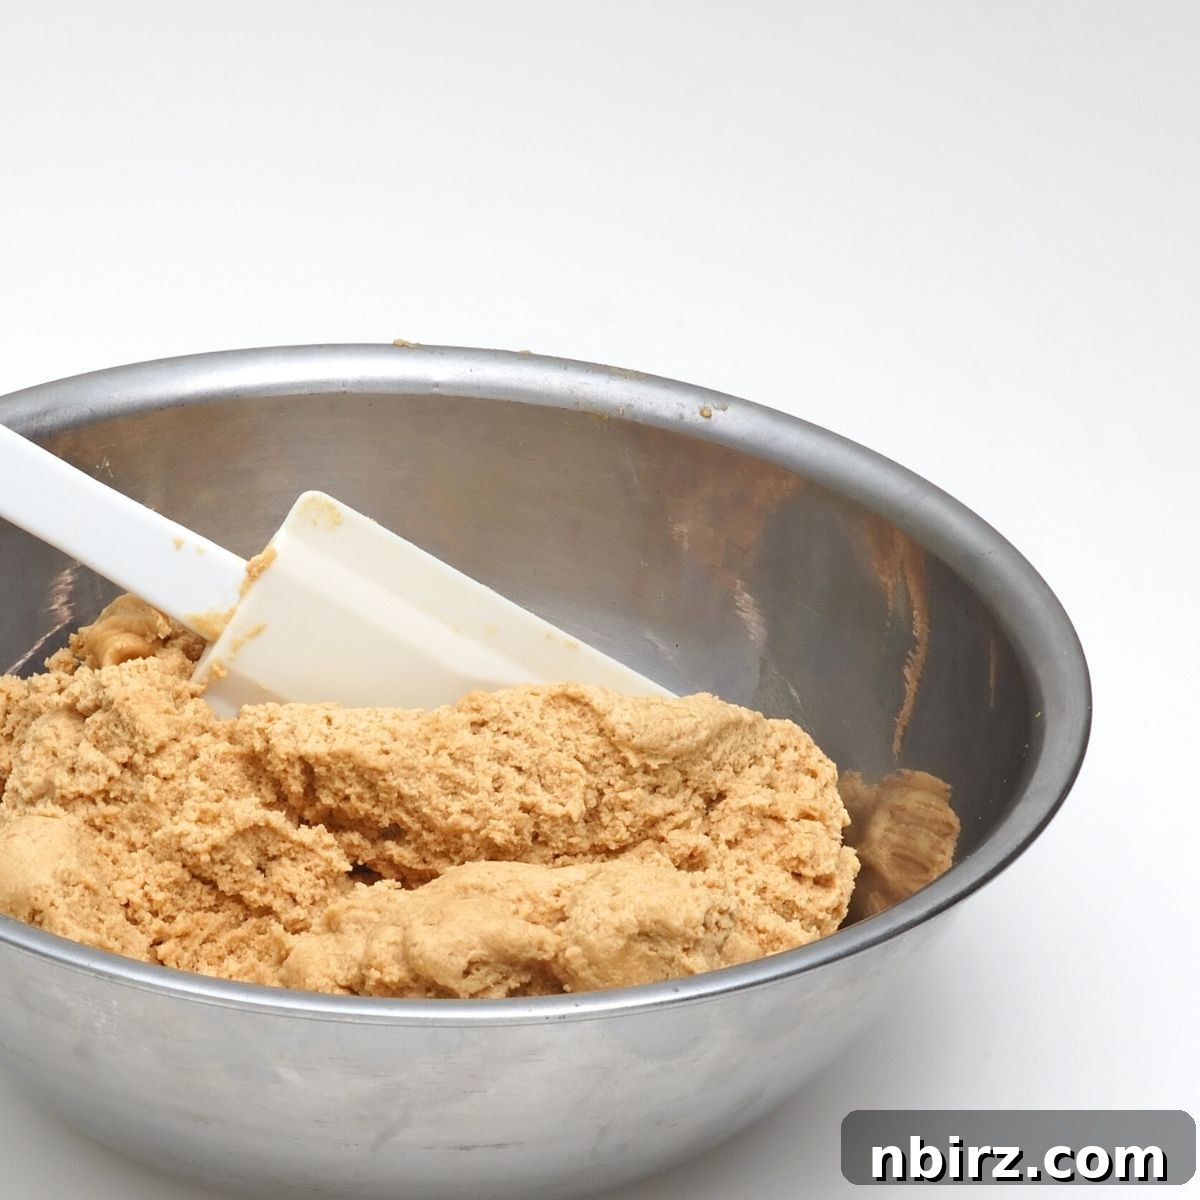
- Form the Dough: Gradually add the whisked dry ingredients to the wet mixture, stirring continuously until everything is combined into a cohesive, workable dough. The dough should come together easily and not be too crumbly or sticky. If the dough appears too dry or stiff, add a few more drops of boiling water, one at a time, until it reaches a soft, pliable consistency. Avoid overmixing once combined.
- Roll Out the Dough: Divide your prepared dough into two equal portions. On a clean silicone mat, a sheet of wax paper, or fresh parchment paper, roll out one portion of the dough using a rolling pin. Aim for an even thickness of approximately 1/4-inch. This consistent thickness is key for ensuring all your cookies bake evenly. If the dough seems a little sticky, lightly dust your rolling pin and surface with a small amount of tapioca flour to prevent sticking.

- Cut Out Shapes: Using your favorite medium-sized cookie cutters, press firmly into the rolled-out dough to create your desired shapes. Carefully slide a thin metal spatula beneath each cut-out cookie to gently lift it and transfer it to your prepared baking sheet. Leave about 1 inch (2.5 cm) of space between each cookie to allow for slight spreading.

- Repeat and Re-roll: Gather the dough scraps, gently press them back together, and re-roll them to cut out more shapes. This dough is incredibly forgiving and can be re-rolled multiple times without compromising its texture or quality, ensuring minimal waste and maximum cookies! Continue until all the dough is used.
- Bake to Perfection: Place one baking sheet at a time into your preheated oven. Bake for approximately 6 to 8 minutes, or until the cookies are set and their edges turn a very light golden brown. Keep a close eye on them, as oat flour cookies can bake quickly. Avoid overbaking, as this can make them dry.
- Cooling Process: Once baked, remove the cookie sheet from the oven and allow the cookies to cool on the sheet for about 3 minutes. They will be somewhat delicate while warm. After 3 minutes, carefully transfer the cookies to a wire rack to cool completely. They will firm up beautifully as they cool, achieving that perfect crisp-tender texture.
- Decorate and Enjoy: Once completely cooled, your vegan oat flour cookies are ready for decorating! Whether you choose a simple glaze or intricate designs, they’ll hold their shape wonderfully.

The beauty of these vegan oat flour cut-out cookies lies in their versatility. You can absolutely enjoy them perfectly plain, savoring their subtle vanilla and oat flavor, or you can transform them into edible works of art with your favorite icing. I personally adore icing these with the super easy Coconut Butter Icing recipe, which you can find detailed in my Maple Almond Flour Cut Out Cookies post. Another fantastic and simple option is a classic powdered sugar and non-dairy milk icing. Simply add just enough non-dairy milk (like almond or oat milk) to powdered sugar to achieve a medium-thick consistency that’s perfect for drizzling or spreading.
Happy baking and happy decorating!

Frequently Asked Questions (FAQ)
Here are answers to some common questions about making and storing these delicious vegan oat flour cookies:
- How Should the Cookies Be Stored?
For optimal freshness and taste, store your completely cooled cookies in an airtight container. They will keep beautifully at cool room temperature for up to 3 days. If you need to extend their shelf life, they can be stored in the refrigerator for up to 1 week or frozen for an impressive duration of up to 6 months. When freezing, layer them with parchment paper to prevent sticking. - What Can Be Used in Place of the Cashew Butter?
This recipe has been thoroughly tested with smooth cashew butter, which provides a lovely neutral flavor and creamy texture. However, you can likely substitute an equal amount of other very smooth nut or seed butters. Excellent alternatives include smooth almond butter, peanut butter (for a distinct flavor), tahini (which offers a unique savory-sweet note), or sunflower seed butter. Be aware that the flavor profile of the cookies will change depending on your choice of butter. - What Can Be Used in Place of the Coconut Sugar?
Coconut sugar is chosen for its less refined nature and subtle caramel notes. If you don’t have coconut sugar on hand, an equal amount of light or dark brown sugar can be used as a direct substitute. Brown sugar will also contribute moisture and a rich flavor profile. - Can I Use Cassava Flour Instead of Tapioca Flour?
No, it is highly recommended not to substitute cassava flour for tapioca flour (or tapioca starch) in this recipe. While both are derived from cassava plants, they have very different properties and behave differently in baking. Cassava flour is much more absorbent and will drastically alter the dough’s consistency and the final cookie texture. Sticking to tapioca flour or its recommended alternatives is crucial for success. - What Can Be Used in Place of the Tapioca Flour?
While tapioca flour has been specifically tested and works best for achieving the desired crisp-tender texture, you do have alternatives. An equal amount of cornstarch or potato starch should provide similar binding and textural properties, making them suitable substitutes in this recipe. - Can I make the dough ahead of time?
Yes, you can prepare the dough in advance. Wrap the dough tightly in plastic wrap and store it in the refrigerator for up to 2-3 days. When ready to bake, let it sit at room temperature for about 10-15 minutes to soften slightly before rolling and cutting. - How can I ensure my oat flour is finely ground?
If you’re making your own oat flour from rolled oats, use a high-speed blender or food processor. Blend until it reaches a fine, powdery consistency, similar to powdered sugar. Sifting it afterward can help remove any larger pieces, ensuring a smoother cookie texture.
Happy baking, and may your kitchen always be filled with the sweet aroma of freshly baked cookies!
Explore More Vegan & Gluten-Free Recipes
If you loved these cookies, be sure to check out these other fantastic recipes from our collection:
- 2-Ingredient Grain-Free Vegan Tortillas (Oil-Free)
- Hearty Lentil Sandwich Bread (Vegan, Gluten-Free, Oil-Free Option)
- Simply Delicious 3-Ingredient Pumpkin Oat Cookies (Vegan, Oil-Free, GF)
- Irresistible Vegan Chocolate Coconut Flour Cookies (Keto Option)
- Keto Vegan Coconut Flour Cookies (Grain-Free, Oil-Free)

Print Recipe
Vegan Oat Flour Cut Out Cookies
Camilla
10 minutes
10 minutes
20 minutes
20
cookies (medium size)
Equipment
-
1 Large Baking Sheet (light in color recommended)
-
1 Large Mixing Bowl
-
1 Medium Mixing Bowl
-
Whisk
-
Rolling Pin
-
Cookie Cutters
-
Metal Spatula
-
Parchment Paper
Ingredients
- 3/4 cup smooth cashew butter (see notes for alternatives)
- 1/2 cup coconut sugar (see notes for alternatives)
- 1/4 cup boiling water
- 1/2 teaspoon baking powder (certified gluten-free, as needed)
- 1/4 teaspoon salt
- 1.25 cups oat flour (very finely ground)
- 1/3 cup tapioca flour (see notes for alternatives)
- 1 teaspoon vanilla extract
- Optional: Easy Coconut Butter Icing (see notes and related recipe link)
Instructions
-
Preheat the oven to 350°F (180°C). Line a cookie sheet with parchment paper.
-
In a large mixing bowl, combine the cashew butter, coconut sugar, and boiling water, whisking until blended and smooth. Stir in the vanilla extract.
-
In a medium mixing bowl, whisk the oat flour, tapioca flour, baking powder, and salt until blended.
-
Add the dry ingredients to the wet ingredients, stirring until combined into a cohesive dough. If the dough seems too dry, add a few more drops of water, one at a time, until the desired consistency is reached.
-
Divide the dough into two portions. On a silicone mat, wax paper, or parchment paper, roll one portion of the dough to approximately 1/4-inch thickness using a rolling pin. Dust lightly with tapioca flour if needed to prevent sticking.
-
Use medium-sized cookie cutters to cut out your desired shapes. Carefully slide a metal spatula under each cut-out dough piece and transfer it to the prepared baking sheet, spacing them about 1 inch (2.5 cm) apart.
-
Repeat the rolling and cutting process with the remaining dough. The dough can be re-rolled many times without compromising its texture, ensuring you make the most of every batch.
-
Bake one sheet at a time in the preheated oven for 6 to 8 minutes. The cookies are ready when they are set and the edges are very light golden brown. Baking time may vary depending on your oven and cookie thickness.
-
Cool the cookies on the cookie sheet for 3 minutes before carefully transferring them to a wire rack to cool completely. The cookies will be somewhat delicate while warm but will firm up perfectly once fully cooled. Ice the cookies as desired once they are completely cool.
Notes
Alternatives to Cashew Butter: While the recipe has been specifically tested with cashew butter for its neutral flavor and creamy texture, an equal amount of very smooth almond butter, peanut butter, tahini, or sunflower seed butter should work as a substitute. Please note that the flavor of your cookies will be influenced by the choice of nut or seed butter.
Alternative Sweeteners: For those looking for different sweetness profiles, an equal amount of brown sugar can be used in place of the coconut sugar. This will provide a slightly different, but equally delicious, caramel-like flavor.
Tapioca Flour Alternatives: The recipe’s success relies on tapioca flour for its unique binding and texture-enhancing properties. If tapioca flour is unavailable, an equal amount of cornstarch or potato starch can be used as alternatives.
Important Tip: It’s crucial to understand that cassava flour and tapioca starch are not interchangeable ingredients. Using cassava flour instead of tapioca flour will likely result in a very different dough consistency and cookie texture, so please avoid this substitution.
Icing Options: Get creative with your cookie decorations! Beyond enjoying them plain, consider icing the cookies with the easy Coconut Butter Icing recipe, which can be found in my Maple Almond Flour Cut Out Cookies post. Alternatively, a simple icing made from powdered sugar and a small amount of non-dairy milk (added incrementally until a medium-thick consistency is achieved) works wonderfully.
Nutrition Information (per serving)
Calories: 107 kcal |
Carbohydrates: 13 g |
Protein: 3 g |
Fat: 5 g |
Saturated Fat: 1 g |
Polyunsaturated Fat: 1 g |
Monounsaturated Fat: 3 g |
Sodium: 50 mg |
Potassium: 81 mg |
Fiber: 1 g |
Sugar: 3 g |
Calcium: 14 mg |
Iron: 1 mg
Did you enjoy this recipe? We’d love to hear from you!
Please consider leaving a review or comment below to share your experience and tips!