

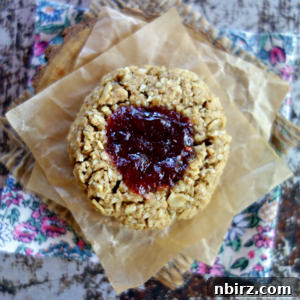
Embrace the delightful simplicity of these jam-filled vegan oat thumbprint cookies. A truly mouth-watering and wholesome treat, they are perfectly suited for any time of day – whether it’s a quick breakfast, a satisfying snack, or a sweet dessert. Best of all, they are naturally gluten-free, flourless, and incredibly easy to prepare!
The Universal Appeal of a Perfect Cookie: My Flexible Standards
In the culinary world, cookie preferences can be quite specific. Many of my friends, family, and even my husband and son, adhere to stringent ideals: a cookie must be crisp at the edges, delightfully chewy in the center, and generously adorned with chocolate, perhaps even stuffed or gilded. A common clause? Absolutely no raisins or nuts.
My own approach to cookies, however, is far more inclusive. I confess, my standards are wonderfully flexible. To be precise, I possess no criteria beyond one singular characteristic: sheer deliciousness. This unreserved love for all cookies might stem from being the youngest child, for whom any unclaimed cookie was a treasured find. Or perhaps it was my mother’s diverse baking repertoire, where classic chocolate chip cookies were surprisingly less common than other unique creations. Yet, I lean towards believing it’s more an innate predisposition than a learned behavior.
Simply put, I was born with an inherent passion for every conceivable kind of cookie.
This expansive love for baked goods is my heartfelt justification for sharing yet another irresistible cookie recipe today. The stars of this post are 100% oat thumbprint cookies. While they absolutely shine as a dessert, their wholesome nature makes them a brilliant choice for healthy breakfasts and nourishing snacks throughout your day.
Why Wholesome Cookies Win My Heart: The Perfect Blend of Health and Indulgence
Even as a dedicated cookie enthusiast with an open mind, I do hold a special place for cookies that are wholesome and not overly sweet. This preference, I admit, grants me greater license to enjoy them at any hour! And while I appreciate a good chocolate cookie, a creation featuring rich, dark sugars like coconut sugar or brown sugar, paired with a vibrant fruit jam, truly speaks to my soul. These “jam cookies” are, quite literally, my jam.
Exceptional Benefits of These Oat Thumbprint Cookies
These oat thumbprint cookies effortlessly embody everything I cherish in a wholesome treat, and then some! The “then some” includes a compelling list of attributes that make them a standout choice for health-conscious bakers and eaters alike:
- Completely Vegan: Made without any eggs or dairy, making them suitable for plant-based diets and those with related allergies.
- Gluten-Free: Crafted entirely from oats, these cookies are naturally free of gluten, perfect for individuals with celiac disease or gluten sensitivities.
- Flourless: Moving beyond traditional wheat flours, these cookies utilize finely ground oats, contributing to their unique texture and nutritional profile.
- Low in Sugar: With only 4.7 grams of sugar per cookie, they offer a satisfying sweetness without being overly indulgent, making them a healthier choice.
- Remarkably Easy-to-Make: Designed for simplicity, this recipe is perfect for novice bakers and seasoned pros looking for a quick and rewarding project.
If these benefits resonate with your taste and health goals, then it’s time to preheat your oven and embark on a delicious baking adventure!
Essential Ingredients for Your Vegan Oat Thumbprints
The precise quantities for each ingredient are conveniently listed in the comprehensive recipe card located at the end of this post. For your preferred measurement system, you can easily toggle between US Customary (volume) and Metric (weights).
You’ll be pleased to find that the ingredient list for these delectable cookies is not only minimal but also remarkably flexible, allowing for easy substitutions based on your pantry staples and dietary needs:
- Rolled Oats: The star of our cookies! Both old-fashioned and quick-cooking rolled oats work wonderfully. Ensure they are certified gluten-free if required for dietary restrictions.
- Smooth Nut or Seed Butter: This acts as a binder and adds rich flavor. Think creamy peanut butter, almond butter, cashew butter, or even a homemade pepita butter for a unique touch.
- Coconut Sugar: A natural sweetener that provides a lovely caramel note. Brown sugar is an excellent alternative if coconut sugar isn’t available.
- Avocado Oil: Chosen for its neutral flavor and healthy fats. Feel free to use any mild-flavored oil you prefer, or for an oil-free option, unsweetened applesauce works perfectly.
- Baking Soda, Salt & A Hint of Spice: These essential components contribute to the cookie’s texture and enhance its flavor. I personally love the warm combination of cardamom and cinnamon, but feel free to choose your favorite warming spices.
- All-Fruit Preserves: The quintessential filling for thumbprint cookies! Any all-fruit jam, marmalade, or preserves you fancy will work beautifully. Consider seasonal fruit options for fresh variations.
Choosing Your Nut or Seed Butter: A Note on Sunflower Seed Butter
If the vibrant green “split pea soup” looking ingredient in the photo above has you puzzled, rest assured, it’s actually my very own homemade pepita butter! This recipe is incredibly versatile when it comes to nut and seed butters. Any smooth variety, such as classic peanut butter, creamy almond butter, or mild cashew butter, will yield fantastic results.
For those considering sunflower seed butter, it’s also a wonderful choice. However, a little heads-up: sunflower seed butter can sometimes cause baked goods to turn a greenish hue. This is a completely natural and safe chemical reaction between the chlorogenic acid in sunflower seeds and baking soda, especially when exposed to heat and alkaline ingredients. If you prefer to avoid this green tint, please consult the recipe notes at the end of the post for a simple adjustment to prevent it.
Effortless Step-by-Step Instructions for Perfect Thumbprint Cookies
Remember, the full, detailed instructions are also provided in the comprehensive recipe card below for easy reference.
These vegan oat thumbprint cookies are designed with simplicity in mind, making them incredibly beginner-friendly. While shaped cookies can sometimes intimidate new bakers, that’s absolutely not the case here. I’ll reveal the secret to their forgiving nature in just a moment – hint: it’s all thanks to the absence of gluten!
But first, let’s get started on the preparation!
Step 1: Prepare Your Oat Flour by Grinding the Oats
Begin by placing your rolled oats (whether old-fashioned or quick-cooking) into a food processor. Pulse and grind them until they achieve a consistency resembling a rough flour or coarse meal. While you can certainly grind the oats to a very fine flour if you prefer, I personally find that a slightly rougher texture adds a delightful chewiness and rustic charm to these particular cookies. This simple step transforms whole oats into the perfect flourless base for our dough.
Step 2: Combine the Dry Ingredients for the Cookie Base
Once your oats are ground, transfer them from the food processor into a large mixing bowl. To this, add the remaining dry ingredients: the coconut sugar, salt, baking soda, and your chosen spices (such as cinnamon and cardamom). Give everything a good stir with a whisk or spoon until all the dry components are thoroughly combined and evenly distributed. This ensures that the leavening and flavor agents are integrated throughout the dough.
Step 3: Incorporate the Wet Ingredients to Form the Dough
Now, it’s time to bring the dough together. Add the wet ingredients to your bowl of dry mixture. This includes your smooth nut or seed butter, 1/4 cup of water, 2 tablespoons of avocado oil (or your preferred oil/applesauce alternative), and the vanilla extract. Stir everything diligently until all ingredients are completely blended and the mixture transforms into a cohesive dough, forming distinct clumps. If, depending on the type and brand of nut/seed butter you use, the dough appears a bit too dry, simply add an additional teaspoon or two of water until the desired consistency is achieved. The dough should be pliable and easy to handle.
Step 4: Expertly Shape Your Thumbprint Cookie Dough
Line a large baking sheet with parchment paper, which will prevent sticking and make cleanup a breeze. Using a small cookie scoop or a measuring spoon (a 2-teaspoon capacity works perfectly), portion out the dough. Roll each portion gently into a neat ball between your palms, then place them about 2 inches apart on your prepared baking sheet to allow for even baking and slight spreading.
Next, lightly flatten each dough ball with the palm of your hand, creating a small, slightly compressed disc. Then, using your thumb or the back of a rounded teaspoon, make a deep indentation right in the center of each cookie. This is where the magic happens!
Here’s the wonderful advantage I mentioned earlier: unlike traditional cookie doughs made with glutinous flours, which require delicate handling to prevent the activation of gluten (leading to tough cookies), this oat-based dough is wonderfully forgiving. Since there’s no gluten to develop, you can press and shape these cookies as much as you like, perfecting their form without any concern for compromising the final texture or outcome. Feel free to craft perfectly round shapes and deep thumbprints with confidence!
Step 5: Fill Each Thumbprint with Your Favorite Preserves
With your cookie dough balls perfectly shaped and indented, it’s time for the star filling. Carefully spoon about 1/2 teaspoon of your chosen preserves into the deep indentation of each cookie. For this recipe, I used a vibrant all-fruit berry preserve, which offers a delightful tart-sweet contrast to the wholesome oat base.
However, the beauty of thumbprint cookies lies in their adaptability. You can truly customize these with any variety of preserves, jam, jelly, or marmalade that captures your fancy. During the autumn months, a rich apple butter makes for another incredibly delicious and comforting option, infusing the cookies with warm, spiced flavors. Don’t hesitate to experiment with different fruit fillings to find your personal favorite!
Step 6: Bake Your Delicious Oat Thumbprint Cookies to Golden Perfection!
Carefully place your baking sheet, adorned with its beautiful, jam-filled cookies, into the preheated 325°F (160°C) oven. Allow them to bake for approximately 12 to 15 minutes. Keep a close eye on them; they are ready when the edges turn a lovely golden brown and the cookies feel firm to the touch. The preserves will also have set and become wonderfully warm and bubbly.
Once baked, remove the cookies from the oven and let them cool on the baking sheet for a few minutes before transferring them to a wire rack to cool completely. This cooling process helps them set properly and develop their final delightful texture.
Congratulations! You’ve just created a batch of incredibly wholesome, delicious, and satisfying vegan oat thumbprint cookies. Get ready to enjoy!
What to Expect: The Exquisite Taste and Texture of These Cookies
Prepare your taste buds for a truly satisfying experience! The texture of these vegan oat thumbprint cookies is a delightful fusion, reminiscent of soft, chewy granola bars, but with a lovely hint of crispness around the edges. Each bite offers pure comfort and satisfaction, making them an ideal pick-me-up. The vibrant, all-fruit preserves nestled in the center provide a burst of natural sweetness, delivering an energizing hit of flavor without any of the subsequent sugar crashes often associated with overly sweet treats. It’s a harmonious blend of wholesome ingredients and delicious indulgence, guaranteeing a smile with every bite!
Frequently Asked Questions About Vegan Oat Thumbprint Cookies
- How should I store these delicious oat thumbprint cookies?
To maintain their freshness and flavor, store the cooled cookies in an airtight container. They will keep beautifully at cool room temperature for up to 2 days. For longer storage, refrigerate them for up to 1 week, or freeze them for an impressive duration of up to 3 months. When ready to enjoy from the freezer, simply thaw them at room temperature or warm them gently for a fresh-baked feel.
- Can I use store-bought oat flour instead of grinding my own?
Absolutely! If you have pre-ground oat flour on hand, you can certainly use it. Just ensure you use the same weight as indicated in the recipe (approximately 200 grams), which translates to about 1 and 2/3 cups of store-bought oat flour. Using ready-made oat flour can save you a step and streamline the baking process even further.
- Is it possible to use sunflower seed butter in this recipe, and what should I know?
Yes, these cookies are wonderfully delicious when made with smooth sunflower seed butter. However, it’s worth noting that sunflower seed butter can sometimes cause baked goods to turn a green color. This is a natural, harmless reaction between the chlorogenic acid in sunflower seeds and the baking soda when exposed to heat. If you prefer to avoid green-hued cookies, you can make two simple adjustments:
- Replace the baking soda with 3/4 teaspoon of baking powder.
- Add 1 and 1/2 teaspoons of lemon juice or vinegar to the dough along with the water. The acid will help neutralize the reaction and keep your cookies their intended color.
- Can I make these cookies without oil for an oil-free option?
Definitely! The oil in this recipe can be easily replaced. Simply substitute it with an equal amount of unsweetened applesauce. This will yield a similarly moist cookie with a slightly different nutritional profile, perfect for those adhering to an oil-free diet.
Happy baking, and may your kitchen be filled with the wonderful aroma of these wholesome treats!
More Easy & Amazing Baked Treats to Try from Our Kitchen:
- Chickpea Thumbprint Cookies {Gluten-Free, Egg-Free, Dairy-Free}
- Cardamom-Cashew Thumbprints with Chocolate-Lime Ganache {Vegan, Gluten-Free}
- Healthy Chocolate Banana Oat Cookies {vegan, oil-free, GF}
- 3-Ingredient Pumpkin Oat Cookies {vegan, oil-free, GF}
- Chocolate Almond Flour Oat Muffins {vegan, oil-free, GF}
Pin
Oat Thumbprint Cookies (Vegan, GF)
Ingredients
- 2 cups rolled oats (certified gluten-free, as needed)
- 1/4 cup coconut sugar (or brown sugar)
- 1 teaspoon ground cinnamon (or spice(s) of choice)
- 1/4 teaspoon baking soda
- 1/4 teaspoon salt
- 1/4 cup smooth nut or seed butter (e.g., peanut butter, almond butter, pepita butter)
- 1/4 cup water
- 2 tablespoons avocado oil (or oil of choice; see note for going oil-free)
- 1 teaspoon vanilla extract
- 3 tablespoons all-fruit preserves (or jam or preserves of choice)
Instructions
- Preheat oven to 325°F (160°C). Line a large baking sheet with parchment paper.
- In a food processor, pulse the oats until they resemble a coarse flour or meal. Transfer the oats to a large bowl.
- Add the coconut sugar, cinnamon, baking soda and salt to bowl of oat meal; stir to combine.
- Add the remaining ingredients (except the jam), stirring until completely blended.
- Using a small cookie scoop or spoon, scoop dough in 2 teaspoon portions. Roll each portion into a ball and place 2 inches apart on the prepared baking sheet.
- Flatten (slightly) each dough ball, and then press a deep thumbprint size impression in the center. Fill each impression with 1/2 teaspoon preserves.
- Bake in the preheated oven for 12 to 15 minutes until golden brown.
- Remove from oven and transfer cookies to a cooling rack to cool completely.
Notes
Storage: Store the cooled cookies in an airtight container at cool room temperature for 2 days, the refrigerator for 1 week, or the freezer for up to 3 months.
Ready to Use Oat Flour: You can use pre-ground oat flour if you have it on hand! Use the same weight (200 g), which is about 1 and 2/3 cups.
Sunflower Seed Butter: The cookies are great made with smooth sunflower seed butter. However, sunflower seed butter can turned baked goods green (it’s a natural reaction and perfectly safe). If you do not want green cookies, do the following when using sunflower seed butter: (1) replace the baking soda with 3/4 teaspoon baking powder, and (2) add 1 and 1/2 teaspoons lemon juice or vinegar to the dough along with the water.
Oil-Free Option: The oil can be replaced by an equal amount of unsweetened applesauce.
Nutrition
Like this recipe? Rate and comment below!