
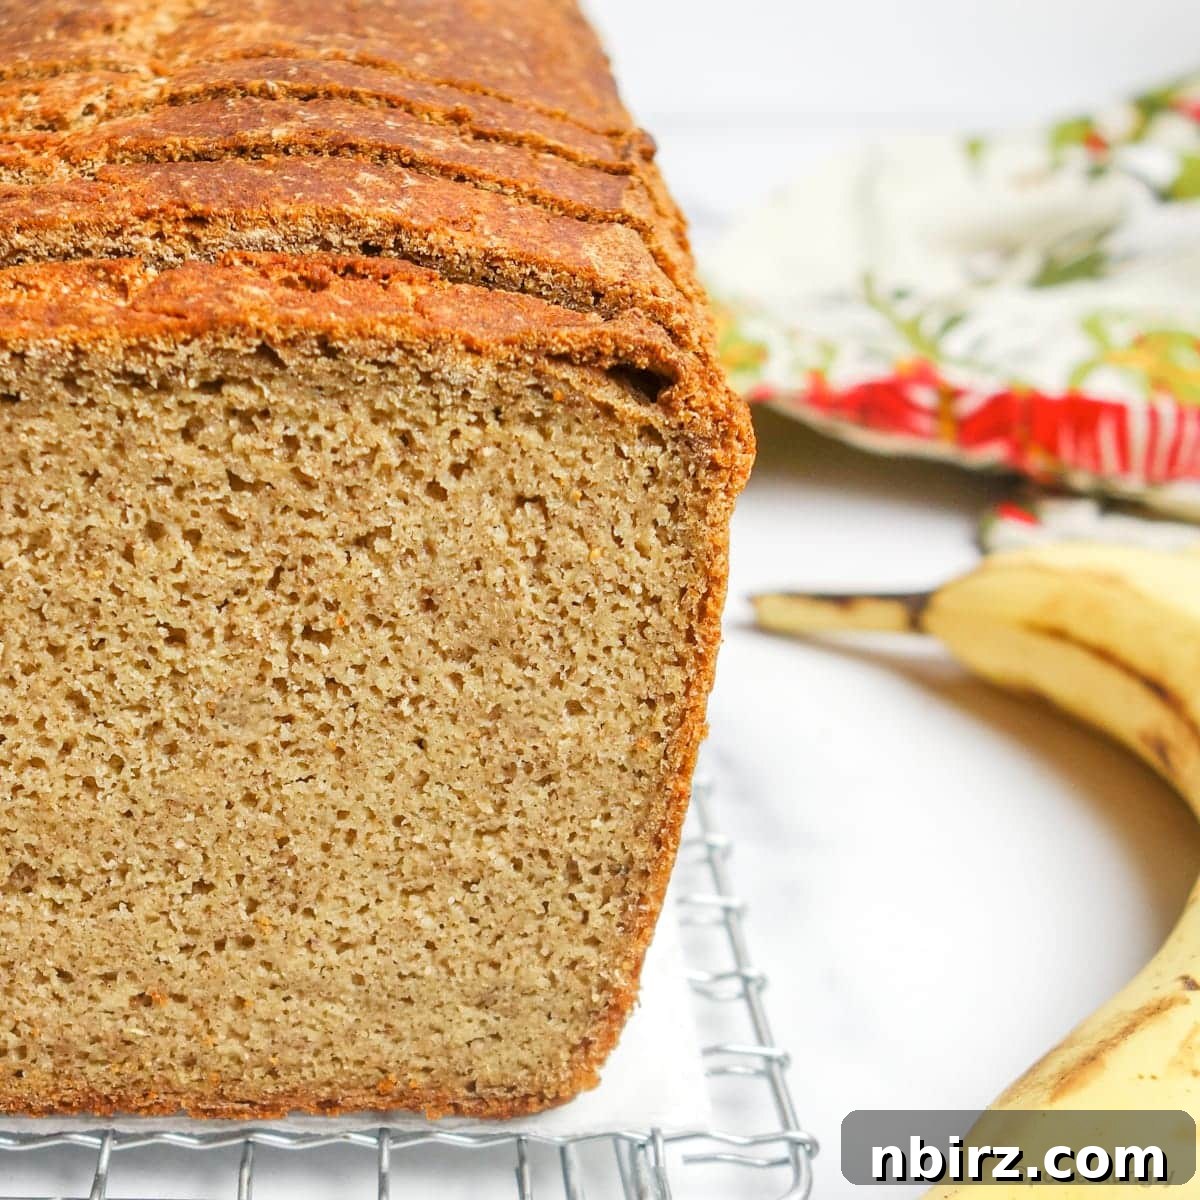
Ultimate Millet Banana Bread: Your New Go-To Flourless, Vegan & Gluten-Free Loaf
Craving a delicious, wholesome banana bread that’s incredibly easy to make? Look no further! This recipe delivers a fast and simple 100% millet banana bread that is completely flourless, vegan, gluten-free, and oil-free. Crafted in mere minutes using just a blender, this sturdy loaf boasts a wonderfully fine texture, making it absolutely perfect for toasting, slathering with your favorite spreads, or even turning into satisfying sandwiches. Prepare to transform your healthy baking routine!
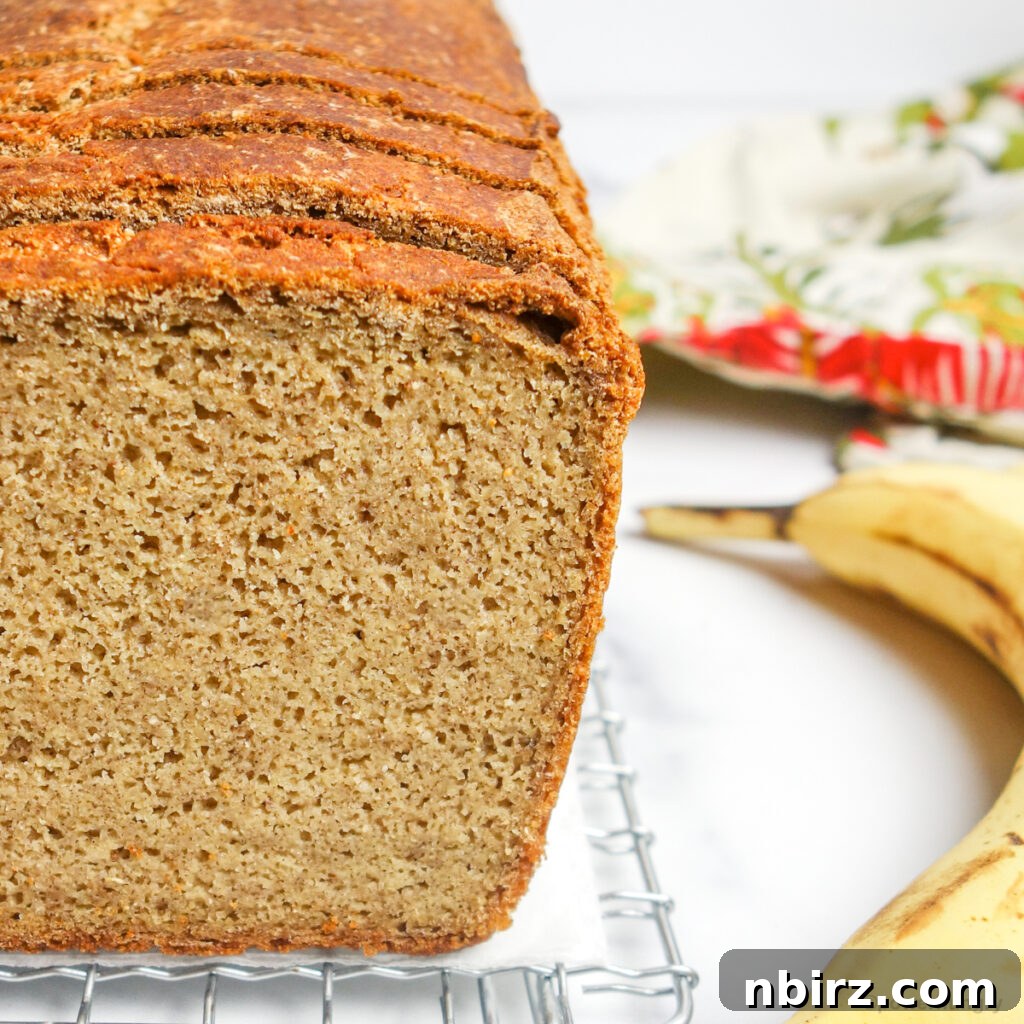
Why This Gluten-Free Vegan Banana Bread Stands Out
You might be thinking, “Does the world really need another banana bread recipe?” And to that, we confidently say, “Yes, absolutely!” This particular banana bread isn’t just another variation; it’s a revelation, offering unique benefits that set it apart from traditional recipes:
-
Pure Whole Grain Goodness: 100% Millet
Unlike most banana bread recipes that rely on various flours, this recipe is crafted entirely from whole millet grain. Millet is an ancient, naturally gluten-free grain, celebrated for its impressive nutritional profile. It’s an excellent source of fiber, plant-based protein, and powerful antioxidants. What makes millet truly special for baking is its neutral flavor profile, making it incredibly versatile, and its affordability, especially when purchased in bulk. This recipe harnesses the full potential of millet, delivering a distinct texture and nourishing qualities.
-
Effortless Preparation: Blender-Made Baking
Forget the endless mixing and multiple bowls. This millet banana bread is a dream for busy bakers. The whole millet and ripe bananas are processed into a smooth batter in a blender in a matter of seconds. It’s truly “push-button baking” at its finest, streamlining your time in the kitchen without compromising on taste or quality.
-
Robust Texture: More Bread, Less Cake
While many banana breads lean towards a cake-like, “squidgy” consistency, this millet version is intentionally sturdy and bread-like. There’s a time and place for fluffy cake, but when you need a resilient loaf for a hearty breakfast or a wholesome snack, this recipe shines. Its robust structure makes it ideal for toasting to golden perfection, spreading with your favorite nut butter, jams, fresh fruit, or even chocolate hazelnut spreads. It holds up beautifully, making banana bread sandwiches a delicious reality.
If you’re like us, you’ll soon discover that millet banana bread sandwiches are an absolute must-have in your daily life!
Outstanding Recipe Benefits for Every Lifestyle
This millet banana bread is designed to accommodate a wide range of dietary needs and preferences without sacrificing flavor or enjoyment. Here’s a detailed look at its impressive benefits:
- Naturally Gluten-Free: Made entirely with whole millet, this bread is perfect for those avoiding gluten, offering a safe and delicious alternative to wheat-based loaves.
- 100% Vegan: Completely free from eggs and dairy, it’s an ideal choice for plant-based diets and those with animal product sensitivities.
- Xanthan Gum-Free: We avoid common gluten-free binders like xanthan gum, relying instead on natural ingredients for structure and texture.
- Oil-Free & Healthy: Prepared without any added oils, making it a lighter option while still maintaining moisture and richness from the bananas.
- Refined Sugar-Free: Sweetened naturally with coconut sugar (or your preferred alternative), it avoids processed sugars for a more wholesome treat.
- Nut-Free: Perfect for individuals with nut allergies, this recipe ensures everyone can enjoy a slice without worry.
- Completely Flourless: By using whole millet grain directly, this recipe bypasses the need for any pre-ground flours, simplifying the ingredient list and harnessing millet’s full nutritional value. (See our notes on substituting millet flour if desired).
- Rich in Fiber: Millet and psyllium husks contribute significantly to the fiber content, promoting digestive health and sustained energy.
- Minimal Ingredients: Simple, wholesome ingredients mean less fuss and a cleaner label, focusing on natural goodness.
- Quick & Easy Preparation: The blender method makes this one of the fastest and easiest homemade bread recipes you’ll find, ideal for busy schedules.
Essential Ingredients for Your Easy Millet Banana Bread
This recipe prides itself on its simplicity, featuring a concise list of wholesome ingredients that come together to create an extraordinary loaf. The precise measurements for each ingredient can be found in the comprehensive recipe card at the end of this post.
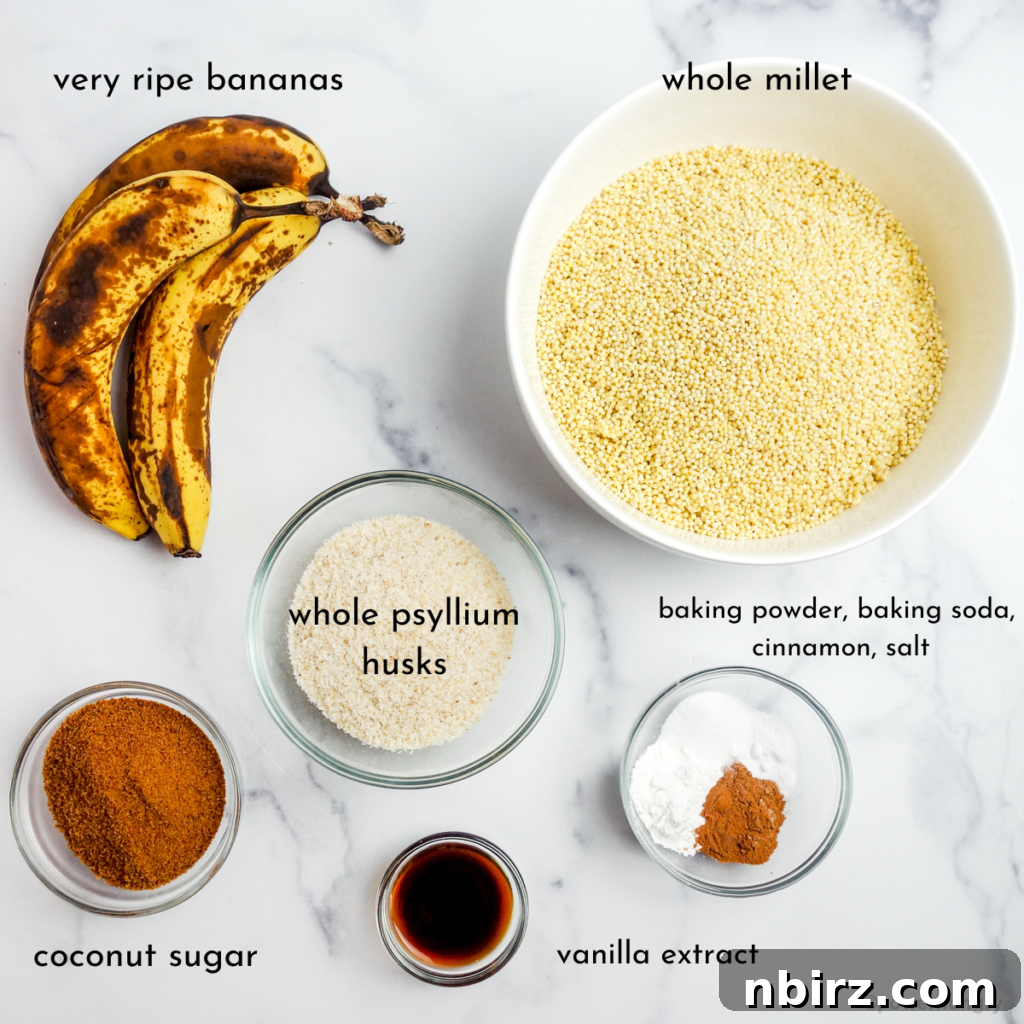
Here’s what you’ll need to gather:
- Very Ripe Bananas: The star of the show! You’ll need a generous amount of mashed, very ripe bananas. Their natural sweetness and moisture are crucial for the bread’s flavor and texture.
- Whole Millet: The foundation of our flourless bread. Use raw, hulled millet grain, which will be finely processed in your blender.
- Whole Psyllium Husks: This is a key binding agent, essential for structure in gluten-free, flourless baking. Make sure to use *whole* husks, not psyllium powder.
- Coconut Sugar: Our chosen natural sweetener, providing a caramel-like note. You can explore other sweetener options as detailed below.
- Vanilla Extract: Adds a warm, aromatic depth to the banana bread.
- Cider Vinegar: Or any light-colored vinegar. This acidic component reacts with baking soda to create lift and tenderness.
- Ground Cinnamon: A classic spice that complements the banana flavor beautifully.
- Baking Powder, Baking Soda, and Salt: These leavening agents and flavor enhancers are vital for a perfect bake. Ensure your baking powder is certified gluten-free if needed.
- Plain Water: We recommend using filtered tap water to ensure purity in your bake.
Exploring Sweetener Options
While coconut sugar is our recommendation for its subtle caramel notes and unrefined quality, this recipe is highly adaptable to your preferred sweetener. You can easily substitute an equal amount of brown sugar or any other granulated sweetener of your choice. If you opt for a liquid sweetener, such as maple syrup or agave nectar, be sure to reduce the total amount of water in the recipe by 2 tablespoons (30 mL) to maintain the correct batter consistency.
Step-by-Step Guide: How to Make 100% Millet Banana Bread
Making this unique banana bread is a straightforward process, largely thanks to the power of your blender. Follow these steps for a perfect loaf every time:
Step One: Prepare Your Oven and Loaf Pan
Begin by preheating your oven to 350°F (180°C). It’s crucial to note that for this specific bread, we strongly advise against using the convection setting on your oven. This loaf requires consistent, radiant heat to bake properly. More detailed explanations regarding oven settings can be found in our FAQ section towards the end of this article.
Next, prepare a standard 9×5-inch (22.5×12.5 cm) loaf pan. You can spray it thoroughly with a nonstick cooking spray, or if you prefer, lightly oil or grease the pan to ensure easy release of the baked bread.
Step Two: Blend the Core Ingredients
Combine the whole millet, ripe bananas, water, coconut sugar, cider vinegar, and vanilla extract into your blender. Whether you use a high-speed blender or a regular model, the process remains the same. Blend on high speed, pausing once or twice to scrape down the sides of the blender container. Continue blending until the millet is completely broken down and the batter achieves a perfectly smooth, uniform consistency. Once blended, pour this batter into a large mixing bowl.
Step Three: Incorporate the Remaining Dry Ingredients
With the blended batter in your large bowl, it’s time to add the remaining ingredients. Stir in the whole psyllium husks, baking powder, ground cinnamon, baking soda, and salt. It’s best to use a spatula or a large spoon for this step, as the batter will thicken very quickly once the psyllium husks are added, and a whisk might become clumpy and difficult to work with.
Why Transfer the Batter to a Separate Bowl Before Adding Psyllium?
This is a critical tip for ease and cleanup! When whole psyllium husks are introduced, the batter undergoes a rapid transformation, becoming exceptionally thick and sticky almost instantly. Attempting to scrape this dense batter out of a blender can be a challenging and messy task, often making cleanup a chore. By transferring the liquid batter to a separate mixing bowl *before* adding the psyllium, you’ll find it much quicker and easier to incorporate the final ingredients and then neatly scrape the thickened batter into your prepared loaf pan. The same efficiency applies to cleaning your mixing bowl compared to a sticky blender jar.
Step Four: Transfer Batter to the Loaf Pan
Once your batter is thick and well-combined, carefully scrape it into the prepared loaf pan. Use a rubber spatula or the back of a spoon to gently smooth out the top surface, ensuring an even bake and a neat appearance for your finished bread.
Step Five: Bake Your Millet Banana Bread
Place the loaf pan in your preheated 350°F (180°C) oven. Bake for approximately 90 minutes. The bread is ready when it has risen beautifully, the surface has transformed into a deep, golden-brown hue, and a wooden skewer or tester inserted into the center comes out with only a few moist crumbs attached. You should also notice the edges of the bread just beginning to pull away slightly from the sides of the pan.
Once baked, carefully remove the pan from the oven and transfer it to a wire cooling rack. Allow the bread to cool in the pan for 15 minutes. This resting period helps the bread to set and makes it easier to remove.
Step Six: Release and Cool Completely
After the initial cooling period in the pan, gently remove the loaf. If needed, you can carefully run a butter knife around the edges of the pan to help loosen the bread. Transfer the warm loaf directly onto the cooling rack and allow it to cool completely before attempting to slice it. Patience is key here; slicing too early can lead to a crumbly texture.
Slice It Thick or Thin: Versatility in Every Piece
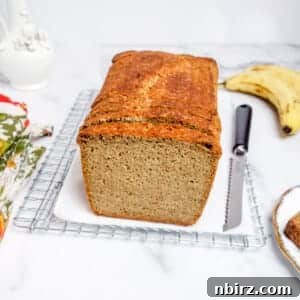
Behold, a truly magnificent loaf of millet banana bread!
As we emphasized earlier, this isn’t your average “squishy” or “cake-y” banana bread. Its inherent heartiness and sturdy composition make it incredibly versatile. Whether you prefer a thick, substantial slice for a filling breakfast or a delicate, thin piece for a light snack, this bread accommodates all preferences with ease. Its robust nature means it holds together beautifully, no matter how you slice it.
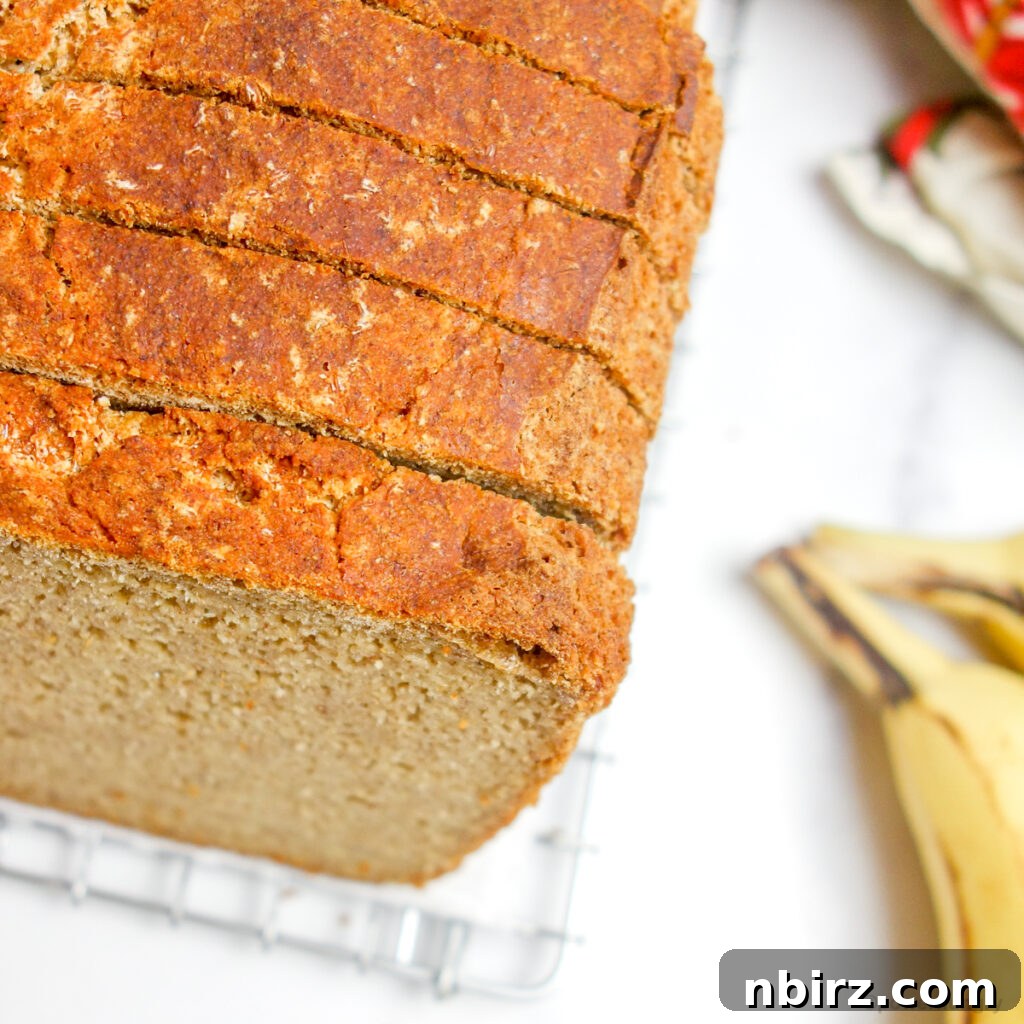
The Unique Texture & Flavor Profile
Experience the distinct characteristics that make this millet banana bread truly special:
- Texture: This is a substantial, “brawny” banana bread in the best possible way. It’s solid, boasts a remarkably fine grain, and carries a satisfying weight. Each slice is incredibly filling, making it an excellent choice for a hearty breakfast that keeps you energized or a satisfying snack that holds you over until your next meal.
- Taste: The star flavor is undoubtedly the sweet, comforting essence of ripe bananas, which takes center stage. This is beautifully complemented by subtle, nutty undertones derived from the whole millet grain, adding complexity without being overwhelming. We’ve meticulously balanced the sweetness to be just right, ensuring it’s not overly sweet but rather a wholesome indulgence. However, feel free to adjust the amount of sweetener to perfectly match your personal preference.
Frequently Asked Questions (FAQ) About Millet Banana Bread
How Should I Store My 100% Millet Banana Bread?
To keep your millet banana bread fresh and delicious, allow it to cool completely before storing. Place the cooled loaf in an airtight container. It will stay fresh at cool room temperature for up to 2 days. For longer storage, refrigerate it for up to 1 week or freeze it for an impressive 6 months. When freezing, you can slice the loaf first for easy portioning and thawing.
Can I Use Millet Flour Instead of Whole Millet Grain?
Yes, absolutely! While this recipe is optimized for whole millet, you can certainly use millet flour as a substitute. Here’s how to make the adjustment for successful results:
- Weight-Based Substitution: It is crucial to use the same *weight*, not volume (cups), of millet flour as you would for whole millet grain. Specifically, use 400 grams (approximately 2.5 cups) of millet flour to replace the 400 grams of whole millet. For the most accurate and consistent results, we highly recommend using a kitchen scale for precise weight measurement.
- Adjusted Mixing Method: Do *not* add the millet flour to the blender with the wet ingredients. Instead, in your large mixing bowl, whisk together the millet flour, psyllium husks, cinnamon, baking powder, baking soda, and salt. Then, separately blend the bananas, water, vinegar, and vanilla in your blender until smooth. Finally, add the banana mixture to the dry flour mixture in the bowl, stirring until everything is just combined.
Can I Substitute Other Grains for Millet in This Recipe?
We do not recommend substituting other grains for millet in this recipe. The specific proportions of wet and dry ingredients, along with the precise quantity of psyllium husks, have been carefully calibrated for whole millet. Using a different grain would likely alter the texture, moisture content, and overall success of the bread, requiring extensive experimentation to achieve comparable results. For the best outcome, please adhere to the ingredients and proportions listed.
Is the 500 Grams of Bananas Measured Peeled or Unpeeled?
The recipe calls for 500 grams of *peeled*, very ripe bananas. If you have a kitchen scale, simply weigh your peeled bananas directly – there’s no need to mash them beforehand if you’re adding them whole to the blender. If you’re measuring by volume, 500 grams of peeled bananas is roughly equivalent to 2 cups of finely mashed bananas.
What Type of Millet Should I Use?
This is an excellent question, especially for our international readers! In the United States and Canada, typically only one variety of millet is readily available, simply labeled as “millet.” It’s characterized by its small, pale yellow grains. While it might resemble birdseed (and indeed, millet is often used in birdseed mixes – but please, only use millet designated for human consumption in your recipes!), the variety for human consumption is always hulled. North American manufacturers usually don’t specify the exact type on the packaging. However, various sources indicate that *proso millet* is the most common variety cultivated for human consumption in the U.S. If you have a selection of millets available in your region, opt for proso millet for the best results in this recipe.
My Oven Has a Convection Setting. Should I Use It for This Bread?
No, we strongly advise against using the convection setting for this particular bread. While convection ovens are fantastic for many recipes, excelling at quick and crisp cooking, they are not the ideal choice for a long, slow bake, which is precisely what this unique millet bread requires. Convection heat can cause the outer layer of this bread to bake and rise too rapidly, potentially separating from the interior. This can lead to undesirable results such as a large air bubble beneath the crust, a gooey or underbaked middle and bottom, and an overly hard outer crust. This bread thrives on the moderate, even, radiant heat of a conventional oven.
My Bread Came Out Gooey in the Middle. What Went Wrong?
A perfectly baked millet banana bread should not be gooey at all. If you encounter a gooey center, several factors might be at play:
- Using a Convection Oven: As explained in the previous section, baking in a convection oven instead of a conventional oven can drastically affect the bread’s internal structure and lead to an undercooked center.
- Inaccurate Measurements: Even experienced bakers can occasionally mismeasure ingredients due to distractions. If you measured using cups, we highly recommend using a kitchen scale for your next attempt. Weighing ingredients provides far greater accuracy and consistency, and many find it simpler once they start.
- Inaccurate Oven Temperature: An oven that runs too hot or too cold can lead to baking issues. We suggest regularly checking your oven’s accuracy with an inexpensive oven thermometer. If your oven is too hot, it can force the bread to rise too quickly, potentially creating a bubble under the top crust and leaving the inside undercooked.
Can I Use Something Other Than Whole Psyllium Husks?
For this specific recipe, using *whole psyllium husks* is essential. Other gelling agents like ground flaxseed meal or chia seeds do not function as direct substitutes in the same way. While they might work in some recipes, they would require significant experimentation to determine their efficacy and the correct proportions for this bread. We also do not recommend psyllium powder. Although it can substitute for whole husks in certain applications, it tends not to perform well in breads of this nature, often leading to a different, less desirable texture.
Happy baking!
Related Recipes You Might Enjoy:
- Vegan Grain-Free Pumpkin Bread (Oil-Free)
- 100% Millet Sandwich Bread (Vegan, Gluten-Free, No Yeast)
- Flourless Millet Oat Bread (Vegan, GF, 5 Ingredients)
- Carrot Cake Millet Breakfast Bars (Vegan, GF, Low Fodmap)
- Flourless Apple Millet Muffins (Vegan, Gluten-Free)
★★★★★ 4.97 from 53 votes
100% Millet Banana Bread (Oil-Free, Vegan, GF)
By: Camilla
Fast & easy 100% millet banana bread! Flourless, vegan, gluten-free, and oil-free, it is made in a flash in a blender.
Prep Time: 10 minutes
Cook Time: 1 hour 30 minutes
Total Time: 1 hour 40 minutes
Servings: 1 large loaf (14 slices)
Pin |
Ingredients
- 2 cups uncooked millet
- 500 g mashed peeled very ripe bananas (about 2 cups)
- 1.25 cups water
- 1/2 cup coconut sugar (see notes for options)
- 1 tablespoon cider vinegar or other light-colored vinegar (see notes for options)
- 2 teaspoons vanilla extract
- 1/3 cup whole psyllium husks (not powder)
- 2 teaspoons baking powder (certified GF, as needed)
- 1.5 teaspoons ground cinnamon
- 3/4 teaspoon salt
- 1/2 teaspoon baking soda
Unit System: US Customary | Metric
Instructions
- Preheat the oven to 350°F (180°C). Note: Do not use the convection setting for this bread (see post for explanation). Prepare a 9×5-inch (22.5×12.5 cm) loaf baking pan by spraying it with nonstick spray or lightly greasing the sides.
- Place the millet, bananas, water, coconut sugar, vinegar, and vanilla in a blender container. Blend on high, stopping once or twice to scrape down the container, until smooth.
- Pour the batter into a large bowl. Stir in the psyllium husks, baking powder, cinnamon, baking soda, and salt until blended. The batter will become very thick, very quickly.
- Pour and spread the batter into the prepared loaf pan, smoothing the top with a spatula.
- Bake in the preheated oven for 80 to 90 minutes until a deep golden brown and a tester inserted in the middle of the loaf comes out with only a few moist crumbs attached.
- Cool in the pan, on a cooling rack, for 15 minutes. Remove the bread from the pan and cool completely on the cooling rack before slicing.
Notes
- Storage: Store the cooled bread in an airtight container at cool room temperature for 2 days, in the refrigerator for 1 week, and in the freezer for up to 6 months.
- Vinegar: Any light-colored vinegar can be used in place of cider vinegar, or you can use an equal amount of lemon juice.
- Sugar Options: An equal amount of brown sugar or cane sugar can be used in place of the coconut sugar.
Nutrition (per 1 serving)
Serving: 1 serving | Calories: 147kcal | Carbohydrates: 32g | Protein: 3g | Fat: 1g | Polyunsaturated Fat: 1g | Sodium: 229mg | Fiber: 3g | Sugar: 10g