
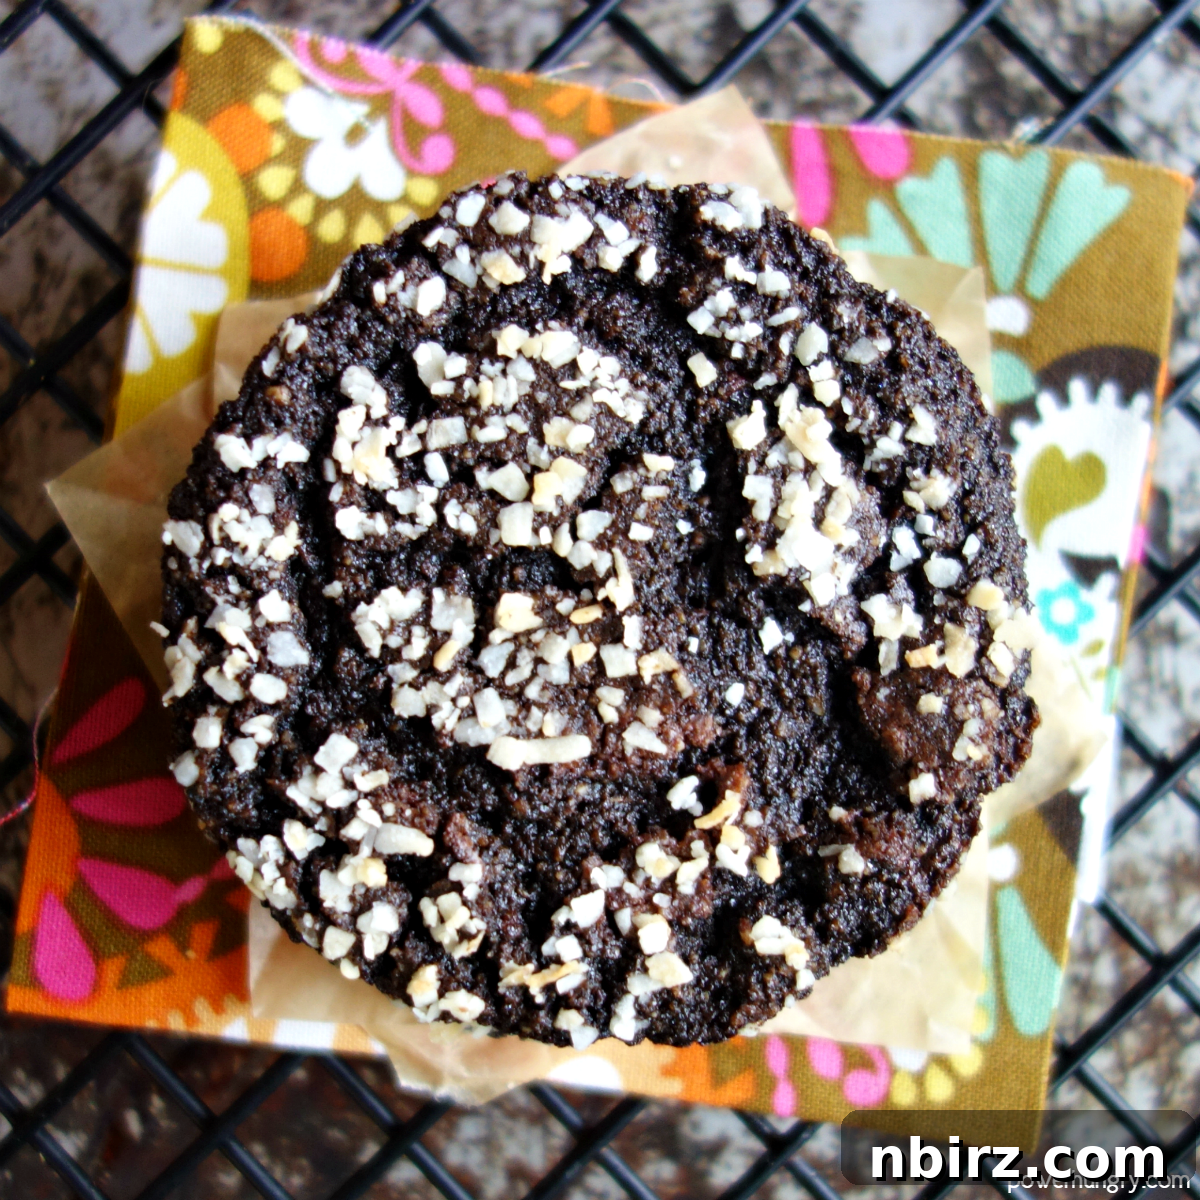
Indulge in pure chocolate bliss with these incredible vegan sunflower chocolate crinkle cookies! Perfectly crafted to be oil-free, grain-free, and nut-free, yet delivering an exceptionally rich and satisfying decadence in every single bite. Whether you choose to make them with homemade DIY sunflower seed flour or prefer the convenience of almond flour, these cookies are a guaranteed hit for any chocolate enthusiast or those with dietary restrictions.
Unveiling the Best Vegan Sunflower Seed Chocolate Crinkle Cookies
Prepare yourselves, cookie lovers, because these irresistible treats are about to become your new obsession! I’ve been eagerly waiting to share this recipe, and the day is finally here. If you dream of cookies that are deeply chocolatey, wonderfully crisp on the outside, and delightfully chewy in the center, then you’ve found your perfect match. What makes this recipe truly special is its thoughtful design to cater to a wide range of dietary needs without compromising on flavor or texture. These cookies are a testament that allergy-friendly baking can be utterly luxurious and undeniably delicious.
I initially developed this recipe for a dear friend whose children navigate multiple food allergies daily. The goal was to create a treat that everyone could enjoy, free from common allergens, but still tasting like a gourmet indulgence. The result exceeded all expectations, creating a cookie that not only meets specific dietary requirements but also captivates anyone who appreciates a stellar chocolate cookie. These delightful crinkles boast an impressive list of benefits:
- Vegan: Absolutely free from eggs and dairy, making them perfect for plant-based diets.
- Grain-Free: Ideal for those avoiding grains, offering a light yet satisfying texture.
- Gluten-Free: Safe for individuals with celiac disease or gluten sensitivities, without sacrificing taste.
- Oil-Free: Achieves rich flavor and texture without any added oils, promoting a healthier profile.
- Nut-Free: A fantastic option for those with nut allergies, utilizing sunflower seed flour as a delicious alternative.
- Paleo-Friendly: Complies with paleo guidelines, focusing on whole, unprocessed ingredients.
The combination of these attributes makes these cookies a versatile and inclusive dessert, proving that wholesome ingredients can indeed create something truly extraordinary. Get ready to bake a batch that will bring joy to everyone at your table!
The Magic of Sunflower Seed Flour (or Almond Flour!)
The secret to the unique texture and allergen-friendly nature of these cookies lies in the flour. I primarily use DIY sunflower seed flour, which is incredibly easy and economical to make right in your own food processor. Simply grind regular sunflower seeds into a fine flour, and you’re all set! This humble flour is not only completely nut-free and budget-friendly but also imparts a rich, subtly nutty flavor and a wonderfully chewy consistency to the cookies, all without the need for any added oil. It’s a remarkable ingredient that truly shines in this recipe.
However, if sunflower seed flour isn’t readily available, or if you simply prefer, you can confidently substitute it with almond flour. I’ve personally tested this recipe with both types of flour, and I can assure you that the results are equally divine. Each flour brings its own subtle nuance, but both yield a batch of truly exceptional chocolate crinkle cookies that are hard to resist. The versatility of this recipe ensures that everyone can enjoy these fantastic treats, regardless of their flour preference or dietary needs.
Crafting Your Vegan Sunflower Chocolate Crinkle Cookies: A Step-by-Step Guide
Ready to embark on the journey of making these delectable cookies? You’ll be delighted to know that the dough comes together in mere minutes, and best of all, everything can be mixed in a single bowl, minimizing cleanup and maximizing enjoyment!
Step One: Perfectly Melting the Chocolate Base
Begin by placing 1 cup (approximately 170 grams or 6 ounces) of high-quality semisweet chocolate chips into a medium-sized, microwave-safe bowl. For those adhering to strict allergen-free diets, as my friend does, ensure you select dairy-free chocolate chips. Many supermarkets now stock a variety of excellent allergen-free brands right alongside conventional baking supplies, making it easier than ever to find suitable options. Otherwise, feel free to use your preferred brand of chocolate chips.
Now, let’s melt that chocolate. My preferred method involves the microwave: Heat the chocolate chips on HIGH power for 1 minute. Stop, and stir them vigorously with a spatula. The chips will likely still retain some of their original shape, but with continued stirring, the residual heat will help them melt completely into a smooth, glossy mixture. If needed, microwave for an additional 30 seconds, then stir again until perfectly smooth. Be careful not to overheat the chocolate, as this can cause it to burn or seize.
If you don’t have a microwave, a double boiler method works just as well. Place the chocolate chips in a heat-safe bowl set over a saucepan containing a few inches of simmering water. Ensure the bottom of the bowl does not touch the water. Stir continuously until the chocolate is completely melted and smooth, then carefully remove the bowl from the heat.
Step Two: Incorporating the Remaining Ingredients
Once your chocolate is perfectly melted, it’s time to introduce the rest of the stars of the show! With the exception of the finely chopped coconut coating (which comes later), you’ll add all the remaining ingredients directly into the bowl of melted chocolate. This one-bowl method truly simplifies the baking process.
More specifically, carefully add the following to your melted chocolate:
- 1 cup (112 g) of sunflower seed flour (or almond flour)
- 1/2 cup unsweetened cocoa powder, for that deep chocolate flavor
- 1/4 cup coconut sugar (or your preferred granulated sweetener; see notes for alternatives)
- 1 tablespoon flaxseed meal, acting as an excellent vegan binder
- 1 teaspoon pure vanilla extract, to enhance the chocolate notes
- 1 teaspoon baking soda, for lift and texture
- 1/4 teaspoon fine sea salt, to balance and intensify flavors
- 1/4 cup hot water, crucial for achieving the right dough consistency
A very important tip: ensure you add the hot water LAST. If hot water is poured directly onto melted chocolate, it can cause the chocolate to seize and become stiff and clumpy. By adding it last, after all the dry ingredients have been partially mixed in, you allow the other ingredients to buffer the chocolate, preventing this undesirable reaction and ensuring a smooth, pliable dough.
Step Three: Achieving a Perfectly Blended Dough
Now, with all the ingredients in the bowl (except the coconut coating), it’s time to stir. Using a sturdy spatula or a wooden spoon, mix all the components together until they are completely blended. Continue stirring until you achieve a homogeneous, rich, and brownie-like cookie dough. The consistency should be uniform with no streaks of unmixed ingredients.
Should some of the chocolate happen to stiffen or seize during this process (it can sometimes occur, even with careful technique, as it did in one of my test batches), there’s no need to panic! The solution is wonderfully simple. Just place the bowl back into the microwave for a brief 10 to 20 seconds. This quick burst of heat will gently re-melt any seized chocolate, allowing you to stir again until the dough is perfectly smooth and cohesive. Patience is key here, and you’ll be rewarded with a beautiful, pliable dough.
Step Four: Preparing the Coconut Coating
While the dough is now ready, it benefits from a quick chill to make it easier to handle and scoop. While your dough is chilling in the freezer, let’s prepare the signature crinkle coating. Classic chocolate crinkle cookies are traditionally rolled in a thick coat of confectioners’ sugar before baking. This sugar creates a striking contrast against the dark chocolate, highlighting the beautiful cracks and crevices that form during baking. You can certainly use confectioners’ sugar for this version if you prefer a more traditional look and taste (more on alternative coatings below).
However, for this particular recipe, I’ve chosen a delightful coating of finely chopped coconut. To prepare it, simply place 1/2 cup of unsweetened flaked or shredded coconut into a small food processor or a blender. Pulse and process until the coconut is very finely chopped, almost resembling a coarse flour. This fine texture allows the coconut to adhere beautifully to the cookie dough, creating a lovely toasted coconut flavor and texture on the finished cookies.
Step Five: Preheating Your Oven and Preparing the Baking Sheet
Before you begin scooping and rolling, it’s essential to ensure your oven is at the correct temperature and your baking surface is ready. Preheat your oven to 350°F (175°C). While the oven heats up, line a large baking sheet with parchment paper. Parchment paper is highly recommended as it prevents sticking and ensures even baking, making cleanup a breeze.
Step Six: Scooping and Rolling the Dough Balls
Retrieve the cookie dough from the freezer. It should now be firm enough to handle easily. To confirm, spoon out a small portion and attempt to roll it into a ball; it should hold its shape without being overly sticky. I rely on my trusty small cookie scoop for consistent portions, ensuring all cookies bake evenly. A standard kitchen teaspoon can also work perfectly if you don’t have a scoop. The key is to make sure your portions are as uniform as possible. Don’t forget to scrape down the sides of the bowl with a rubber spatula to collect every last bit of that delicious dough! From this recipe, you should get exactly 21 perfectly portioned cookies.
Next, take each portion of dough and gently roll it between your palms to form a smooth ball. Once rolled, immerse each dough ball into the finely chopped coconut, ensuring it’s evenly coated on all sides. The coconut will stick beautifully to the slightly chilled dough. Place the coated dough balls on your prepared baking sheet, making sure to space them about 3 inches (7.5 cm) apart. These cookies spread quite a bit during baking (the baked cookies will be approximately 2.5 inches in diameter), so ample space is crucial to prevent them from merging together. You’ll likely be able to fit about half of the cookie dough balls on one standard baking sheet, so you may need to bake them in two batches.
Step Seven: Baking to Crinkled Perfection
With your cookie dough balls perfectly arranged and coated, it’s time for the final magical step: baking! Carefully place the baking sheet into your preheated oven. Bake the cookies for approximately 11 to 13 minutes. You’ll know they are ready when they have spread out, the tops have developed those characteristic large cracks and crinkles, and the edges appear just set. It’s important to note that the centers of the cookies will still look slightly under-done; this is perfectly normal and actually desirable for achieving that perfect crisp-chewy texture. Be vigilant and resist the temptation to overbake, as this can lead to dry cookies.
Once baked, remove the cookies from the oven and let them cool on the baking sheet for about 5 minutes. This crucial cooling period allows the cookies to continue cooking and firming up due to the residual “carryover” heat from the hot baking sheet. After 5 minutes, use a metal spatula to carefully transfer the still-warm cookies to a wire cooling rack to cool completely. Allowing them to cool on the rack ensures air circulation, preventing soggy bottoms and promoting an even cooling process. While it’s tempting, a fully cooled cookie offers the best texture and flavor profile.
For the ultimate experience, cool the cookies completely to appreciate their full flavor and texture. Or, if you simply cannot wait, enjoy these warm vegan sunflower chocolate crinkle cookies immediately with a glass of plant-based milk or your favorite hot beverage!
These cookies offer a delightful chewy texture, complemented by a deep, rich chocolate flavor that is intensely satisfying without being overly sweet. The addition of the toasted coconut coating adds an extra layer of flavor and a subtle textural crunch that elevates the entire experience. Packed with wholesome ingredients such as sunflower seeds, cocoa powder, flaxseed, and dark chocolate, these cookies can easily contend for the title of bonafide energy cookies or even a healthy breakfast treat. Happy baking this season and beyond!
Exploring Alternative Cookie Coatings
While the toasted coconut coating adds a wonderful dimension to these chocolate crinkle cookies, it’s completely fine if coconut isn’t your preference. These cookies are incredibly versatile, and you have a myriad of options to customize their exterior. If you prefer, you can simply leave the coating off entirely – “naked” chocolate crinkles are still utterly perfect and boast the same fantastic flavor and delightful crinkled texture.
However, if you’re looking for other creative ideas to roll your cookie dough in, consider these delicious alternatives:
- Traditional Confectioners’ Sugar: For a classic crinkle cookie look, roll the dough balls generously in powdered sugar before baking. The contrast is beautiful!
- Crushed Candy Canes or Peppermints: Perfect for the holiday season, these add a refreshing minty crunch.
- Finely Chopped Seeds or Nuts: If not strictly nut-free, finely chopped pistachios, pecans, or even extra sunflower seeds (if not concerned about the “nut-free” coating specifically) can add a lovely texture and flavor.
- Raw Sugar: For a slightly coarser, sparkling finish and a pleasant textural crunch.
- Granulated Sugar: A simpler option that still creates a lovely shimmer and subtle crunch.
Feel free to experiment with these options to find your favorite or to suit different occasions! Each coating offers a unique sensory experience, transforming the cookie while maintaining its core deliciousness.
These cookies also boast excellent keeping qualities. You might find yourself needing to hide a few just to test this theory, as they tend to disappear remarkably fast! To enjoy them as if they were freshly baked, simply give them a quick 5 to 7-second zap in the microwave. This gentle reheat revives their warmth and delightful chewiness, making them taste as good as new. Happy baking, and happy indulging!
Frequently Asked Questions (FAQ) About These Crinkle Cookies
How Should I Store the Vegan Sunflower Seed Chocolate Crinkle Cookies?
Proper storage ensures your cookies remain fresh and delicious for as long as possible. Once completely cooled, store your vegan sunflower chocolate crinkle cookies in an airtight container. At a cool room temperature, they will maintain their quality for up to 2 days. For extended freshness, you can refrigerate them for up to five days. For even longer storage, these cookies freeze beautifully for up to six months. When ready to enjoy from the freezer, simply thaw at room temperature or warm briefly in the microwave for that fresh-baked feel.
What Can I Use in Place of Coconut Sugar?
Coconut sugar contributes a subtle caramel note and is a popular unrefined sweetener, but it’s not the only option. You can easily substitute an equal amount of brown sugar for a richer, more molasses-like flavor, or natural cane sugar or regular white granulated sugar if those are what you have on hand. All of these options will yield delicious results, so choose the sweetener that best fits your pantry and dietary preferences.
What Can I Use in Place of Flaxseed Meal?
Flaxseed meal acts as a fantastic egg replacer and binder in vegan baking, helping to hold the cookies together and contributing to their chewy texture. If you don’t have flaxseed meal, an equal amount of ground chia seeds can be used as a direct substitute. Both create a similar gelling effect when mixed with liquid, ensuring your cookies maintain their perfect structure and consistency.
The Full Recipe: Vegan Sunflower Chocolate Crinkle Cookies
This recipe yields approximately 21 delicious cookies. With a prep time of just 10 minutes and a cook time of 11-13 minutes, you’ll have these delightful treats ready in about 21 minutes total (excluding chilling time).
Equipment
- 1 Large Baking Sheet
- Small food processor or blender (for coconut, optional)
- Medium microwave-safe mixing bowl
- Rubber spatula or wooden spoon
- Small cookie scoop or tablespoon
- Wire cooling rack
Ingredients
- 6 ounces (1 cup) semisweet chocolate chips (ensure certified GF and vegan as needed)
- 1 cup sunflower seed flour (or almond flour)
- 1/2 cup unsweetened cocoa powder
- 1/4 cup coconut sugar (see notes for options)
- 1 tablespoon flaxseed meal (see notes for options)
- 1 teaspoon vanilla extract
- 1 teaspoon baking soda
- 1/4 teaspoon fine sea salt
- 1/4 cup hot water
- 1/2 cup finely chopped unsweetened coconut (for coating, optional; see notes for other coating variations)
Instructions
- Place the chocolate chips in a medium, microwave-safe mixing bowl. Microwave on HIGH for 1 minute; stop and stir the chocolate vigorously. Microwave for another 30 seconds if needed, then stir until the chips are completely melted and smooth.
- Add all remaining ingredients to the bowl of melted chocolate, except for the finely chopped coconut. Ensure you add the hot water last to prevent the chocolate from seizing. Stir all ingredients until completely blended into a cohesive, brownie-like dough. Cover the bowl and place it in the freezer for 20 to 30 minutes to thicken the dough sufficiently for easy scooping.
- Preheat your oven to 350°F (175°C). Line a large baking sheet with parchment paper.
- If using coconut for coating, place 1/2 cup of unsweetened flaked or shredded coconut into a small food processor and process until very finely chopped. Transfer the finely chopped coconut to a small, shallow bowl for easy rolling.
- Remove the dough from the freezer. Using a small cookie scoop or tablespoon, portion out 21 equal amounts of dough (you can place them on a piece of wax paper if you wish). Roll each portion into a smooth ball. Then, roll each ball in the prepared coconut (or your chosen alternative coating) to thoroughly coat it. Place the coated dough balls approximately 3 inches (7.5 cm) apart on the prepared baking sheet. You will likely fit about half of the cookies per sheet.
- Bake in the preheated oven for 11 to 13 minutes, or until the cookies have noticeably spread and their tops have developed significant cracks and crinkles. The edges should appear set, while the centers will still look slightly soft or under-done. Avoid overbaking to maintain a moist, chewy interior.
- Remove the cookies from the oven and allow them to cool on the baking sheet for 5 minutes. This step is important for them to firm up. After 5 minutes, use a metal spatula to transfer the cookies to a cooling rack to cool completely.
- Enjoy your perfectly baked, decadent vegan chocolate crinkle cookies!
Recipe Notes
- Storage: Store the cooled cookies in an airtight container at cool room temperature for up to 2 days, in the refrigerator for up to five days, or in the freezer for an impressive six months.
- Sugar Options: In place of coconut sugar, an equal amount of brown sugar, natural cane sugar, or regular white granulated sugar can be used.
- Flaxseed Meal Option: If flaxseed meal is unavailable, an equal amount of ground chia seeds can be used.
- Coating Variations: The coconut coating is optional. You can leave the cookies naked, or replace the coconut with an equal amount of confectioners’ sugar, granulated sugar, crushed candy canes/peppermints, or very finely chopped seeds or nuts.
Nutrition Information (Per Cookie)
- Serving Size: 1 cookie
- Calories: 97 kcal
- Carbohydrates: 9.4g
- Protein: 2.1g
- Fat: 6.7g
- Saturated Fat: 2.9g
- Sodium: 120mg
- Fiber: 1.5g
- Sugar: 7.3g
More Delicious Vegan & Gluten-Free Recipes You’ll Love
- Vegan Keto Sunflower Seed Bread {nut-free, grain-free, oil-free}
- DIY Sunflower Seed Flour (nut-free, keto)
- Oil-Free Chocolate Chip Cookies {vegan, grain-free}
- 4-Ingredient Chocolate Almond Flour Cookies (vegan, grain-free, oil-free)
- Healthy Chocolate Banana Oat Cookies (vegan, gluten-free)
- 100% Flax Chocolate Cookies {grain-free, oil-free, vegan, keto option)
- Chocolate Coconut Flour Cookies {vegan, grain-free, gluten-free, keto option)