
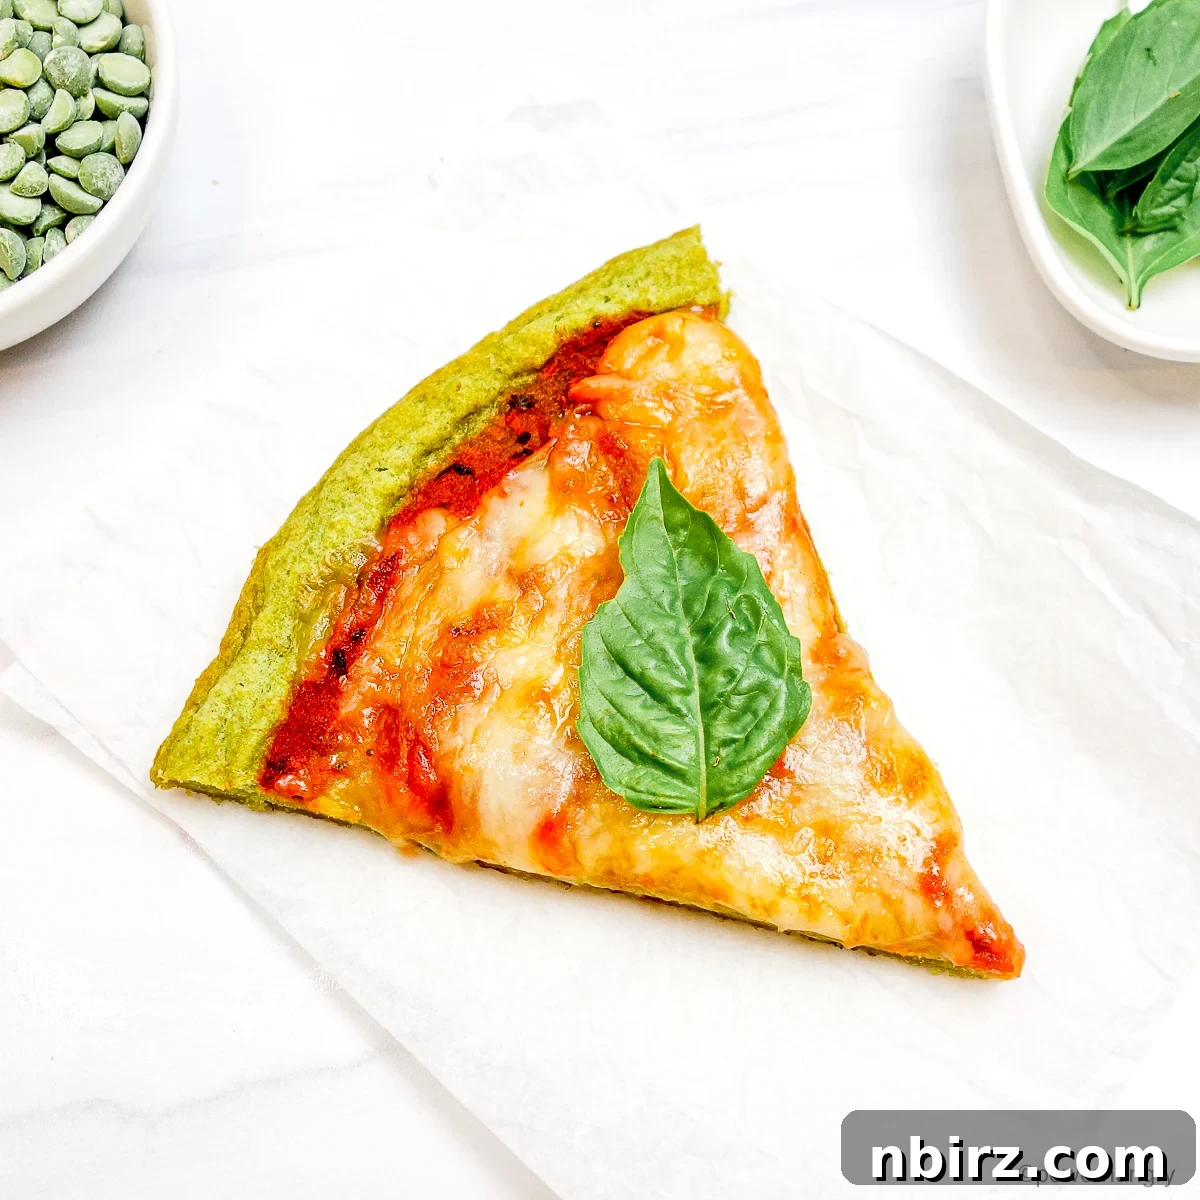
Unleash Your Inner Pizza Chef: The Ultimate 3-Ingredient Split Pea Pizza Crust (High Protein, Gluten-Free & Vegan)
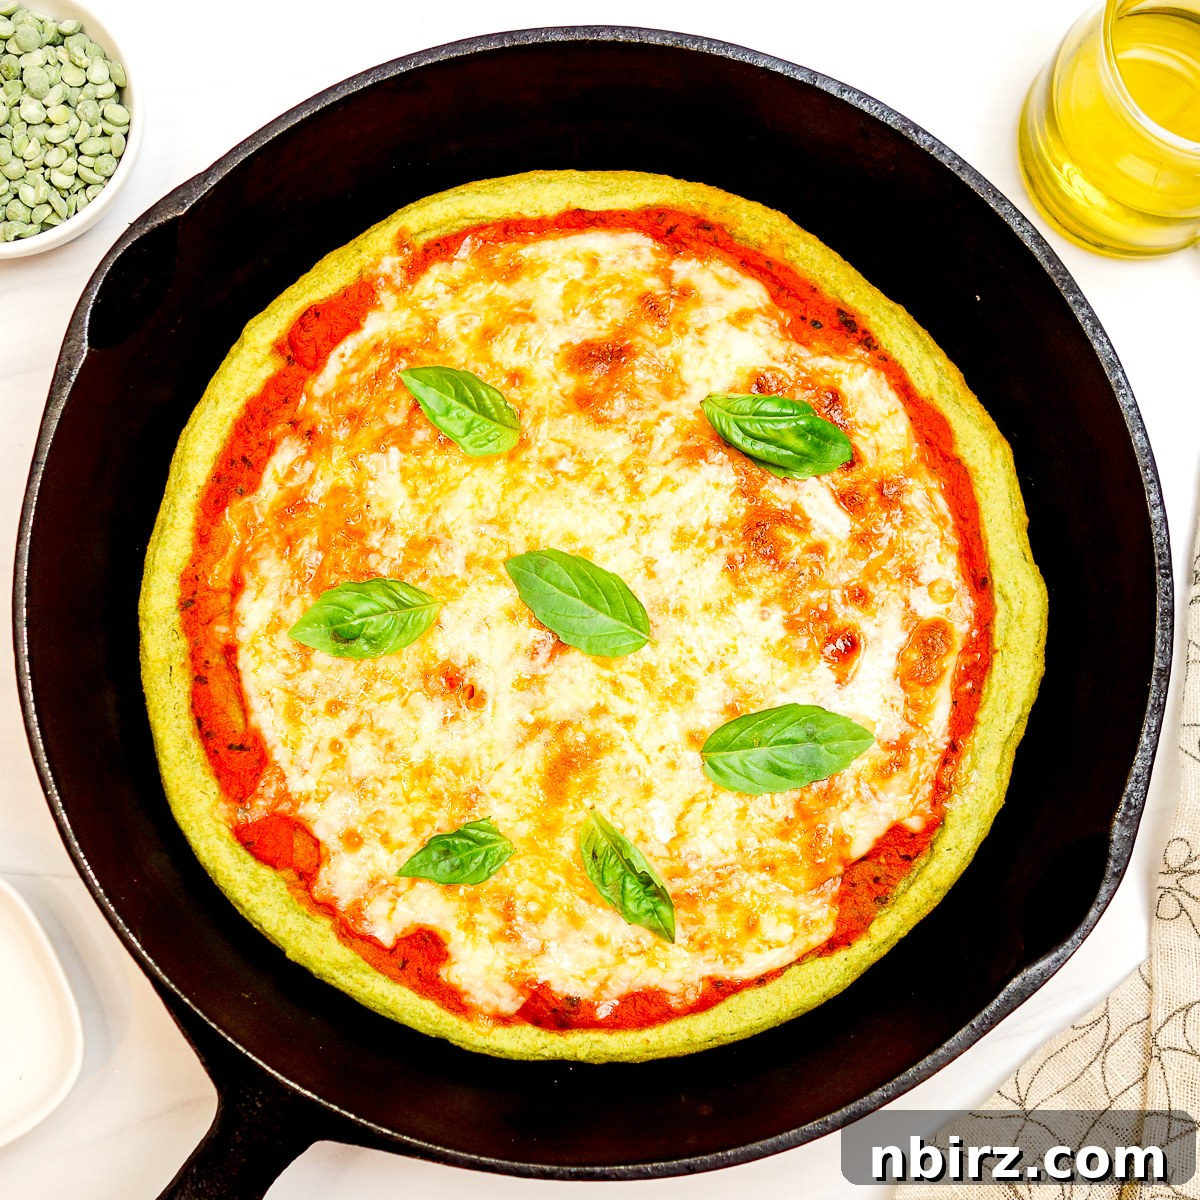
Who doesn’t love pizza? It’s a universal comfort food, but often comes with a hefty dose of refined carbs and less-than-ideal nutritional profiles. What if you could enjoy a pizza that’s not only incredibly delicious and easy to make but also packed with protein, fiber, and essential micronutrients? Introducing the revolutionary Split Pea Pizza Crust – a game-changer for health-conscious foodies and pizza lovers alike!
This sensational crust requires only three core ingredients, making it an accessible and fuss-free option for your next pizza night. It’s naturally gluten-free, grain-free, and completely yeast-free, meaning no long proofing times or complicated kneading. The batter-based recipe eliminates the need for rolling, simplifying the process to mere mixing and spreading. Get ready to transform your pizza experience!
The secret star of this recipe is the humble split pea. These nutritional powerhouses are rich in plant-based protein, dietary fiber, and a generous array of B vitamins, iron, zinc, and magnesium. By harnessing the wholesome goodness of split peas, we create a crust that’s not just a vehicle for toppings, but a nutrient-dense foundation for a truly satisfying meal.
Much like the popular chickpea flour socca, this split pea pizza crust relies on the simple magic of dried legumes and water. This method yields a robust, flavorful crust with a delightful texture – crispy on the outside, tender on the inside. Pour the smooth batter into a hot, olive oil-kissed skillet, bake until set, add your favorite toppings, and within minutes, a healthy, homemade pizza is ready to be devoured.
One of the greatest joys of pizza is the endless customization. This split pea crust serves as the perfect canvas for any culinary creation you can imagine. Whether you’re a fan of classic Margherita, a veggie lover, or an adventurous gourmet, this versatile base will quickly become a staple in your kitchen.
Why You’ll Love This Split Pea Pizza Crust: Key Benefits
This recipe isn’t just another gluten-free alternative; it’s a superior choice offering a wealth of advantages:
- Exceptional Protein Content: Each serving of the crust alone delivers a remarkable 8 grams of plant-based protein, contributing significantly to your daily intake and promoting satiety.
- Minimal Ingredients: Crafted with only three primary ingredients (plus water and optional salt), it’s incredibly straightforward, cutting down on grocery list complexity and prep time.
- Dietary Inclusivity: This recipe is 100% vegan (egg-free, dairy-free), gluten-free, and grain-free, making it suitable for a wide range of dietary needs and preferences.
- No Added Starches: Unlike many gluten-free crusts, this recipe avoids common starches like tapioca flour, cornstarch, or arrowroot, keeping it wholesome and naturally clean.
- Yeast-Free & Chemical Leavener-Free: Forget about instant yeast, baking powder, or baking soda. This crust achieves its perfect texture without any artificial leavening agents, simplifying the process and catering to those with sensitivities.
- Quick & Easy Preparation: From start to finish, this pizza crust is designed for efficiency. There’s no complex dough to knead or roll; simply blend, spread, and bake!
- High Fiber Content: With 9 grams of fiber per crust serving, it supports digestive health and contributes to a feeling of fullness.
- Versatile Pairing: It pairs beautifully with virtually any pizza sauce and toppings you can dream up, adapting to your unique tastes and preferences effortlessly.
- No Mixer Required: Prepare the simple batter directly in a blender, eliminating the need for bulky kitchen equipment and making cleanup a breeze.
- Rich in Micronutrients: Split peas are a good source of B vitamins (folate, thiamine), iron, zinc, potassium, and magnesium, adding valuable nutrients to your meal.
Essential Ingredients for Your Split Pea Pizza Crust
For precise measurements and detailed instructions, refer to the comprehensive recipe card conveniently located at the end of this article. You can easily toggle between US Customary (volume) and Metric (weights) units to suit your preference.
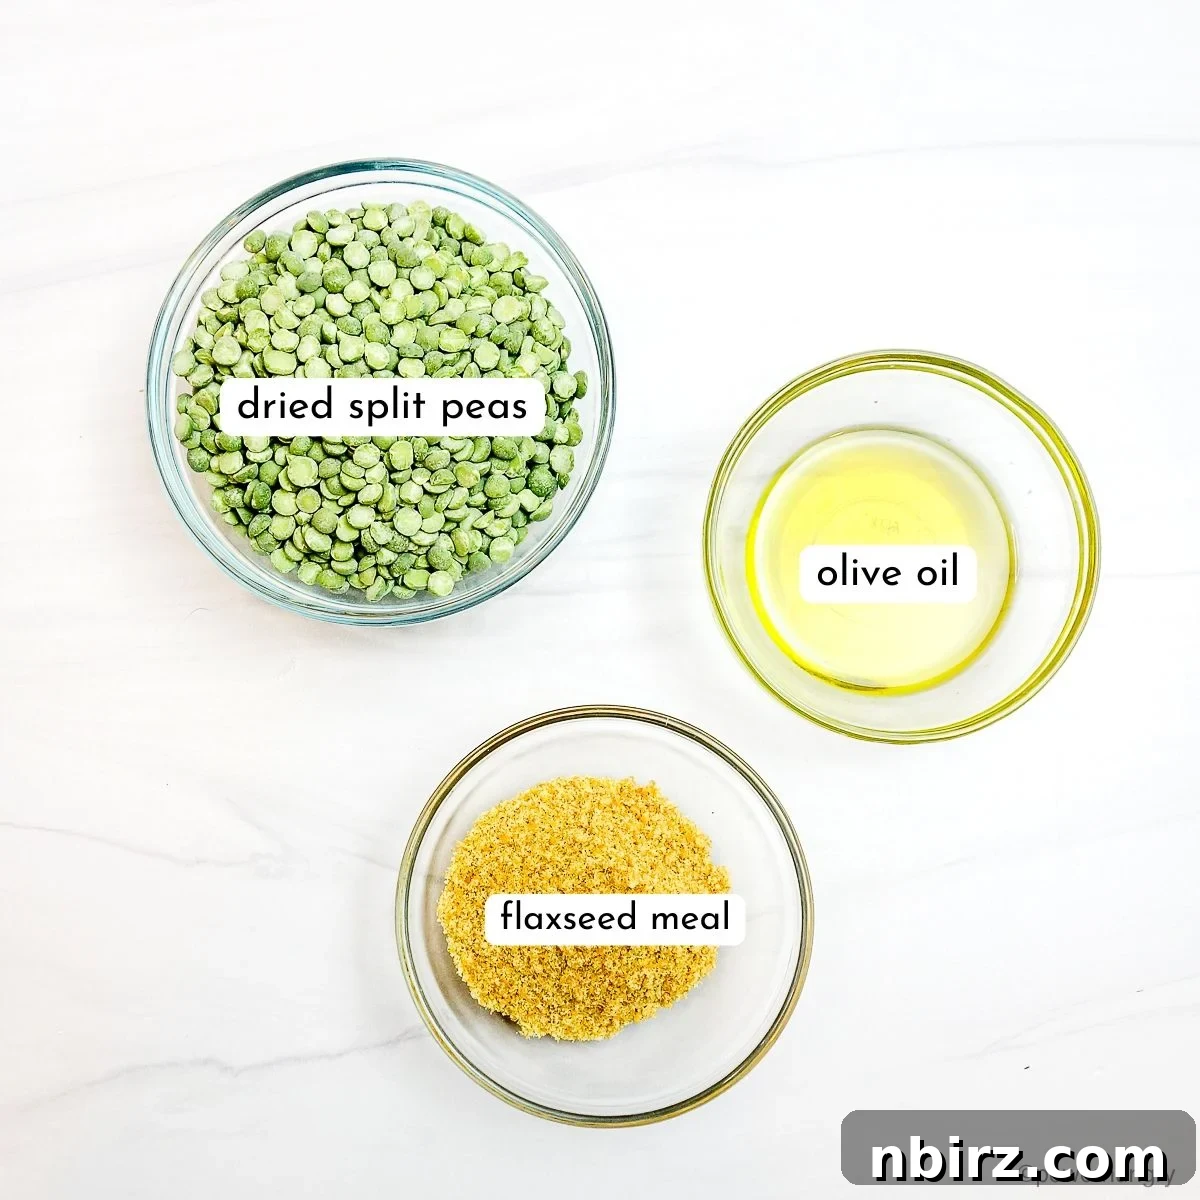
Creating this healthy, robust pizza crust requires minimal ingredients, most of which you likely already have in your pantry. Here’s what you’ll need for the base:
- Dried Split Peas (Green or Yellow): These are the foundation of our crust. They provide the structure, protein, and fiber. Green and yellow split peas are interchangeable for this recipe, offering similar nutritional benefits and flavor profiles. Choose good quality, whole dried split peas for best results.
- Flaxseed Meal (Ground Flaxseeds): This acts as a binding agent, similar to an “egg replacer” in vegan baking, helping to hold the crust together and add a delightful chewiness. It also contributes healthy omega-3 fatty acids and additional fiber. Ensure your flaxseed meal is fresh for optimal binding and nutrition.
- Olive Oil: Essential for pre-heating the skillet, creating a wonderfully crispy base, and adding a subtle depth of flavor to the crust. You can also use other heat-stable oils like avocado oil or safflower oil if you prefer.
Beyond these core three, you’ll naturally need water (filtered tap water works perfectly) to create the smooth batter. A pinch of salt (table salt or sea salt) is highly recommended to enhance the crust’s flavor, but it is entirely optional and adjustable to your dietary needs and taste preferences.
Inspiration for Your Pizza Toppings
The beauty of this split pea pizza crust lies in its versatility. It’s a neutral and sturdy base that can carry a wide array of flavors. Feel free to get creative and pile on your favorite pizza toppings. Here are some ideas to get you started:
- Classic Sauces: Marinara sauce, rich tomato sauce, or even a vibrant basil pesto.
- Creamy Bases: A smooth cashew cream sauce or a dairy-free Alfredo for a richer experience.
- Cheeses (Dairy-Free & Traditional): Elevate your pizza with your choice of shredded vegan mozzarella cheese (like my Easy Oil-Free Mozzarella), a sprinkle of homemade DIY Vegan Parmesan, or traditional dairy cheese if your diet allows.
- Fresh Vegetables: Thinly sliced bell peppers (red, yellow, or orange), cherry tomatoes, zucchini ribbons, delicate artichoke hearts, pungent sliced red onions, or earthy mushrooms.
- Olives: Black or green olives add a briny, savory kick.
- Fresh Herbs: A scattering of fresh basil leaves (add after baking for best aroma), oregano, or chives.
- Protein Boosters: Add cooked lentils, chickpeas, or your favorite plant-based sausage crumbles for an extra protein punch.
Step-by-Step Guide to Your Perfect Split Pea Pizza Crust
A complete, printable version of these directions, along with exact measurements, is available in the detailed recipe card further below.
Step One: Prepare the Split Peas
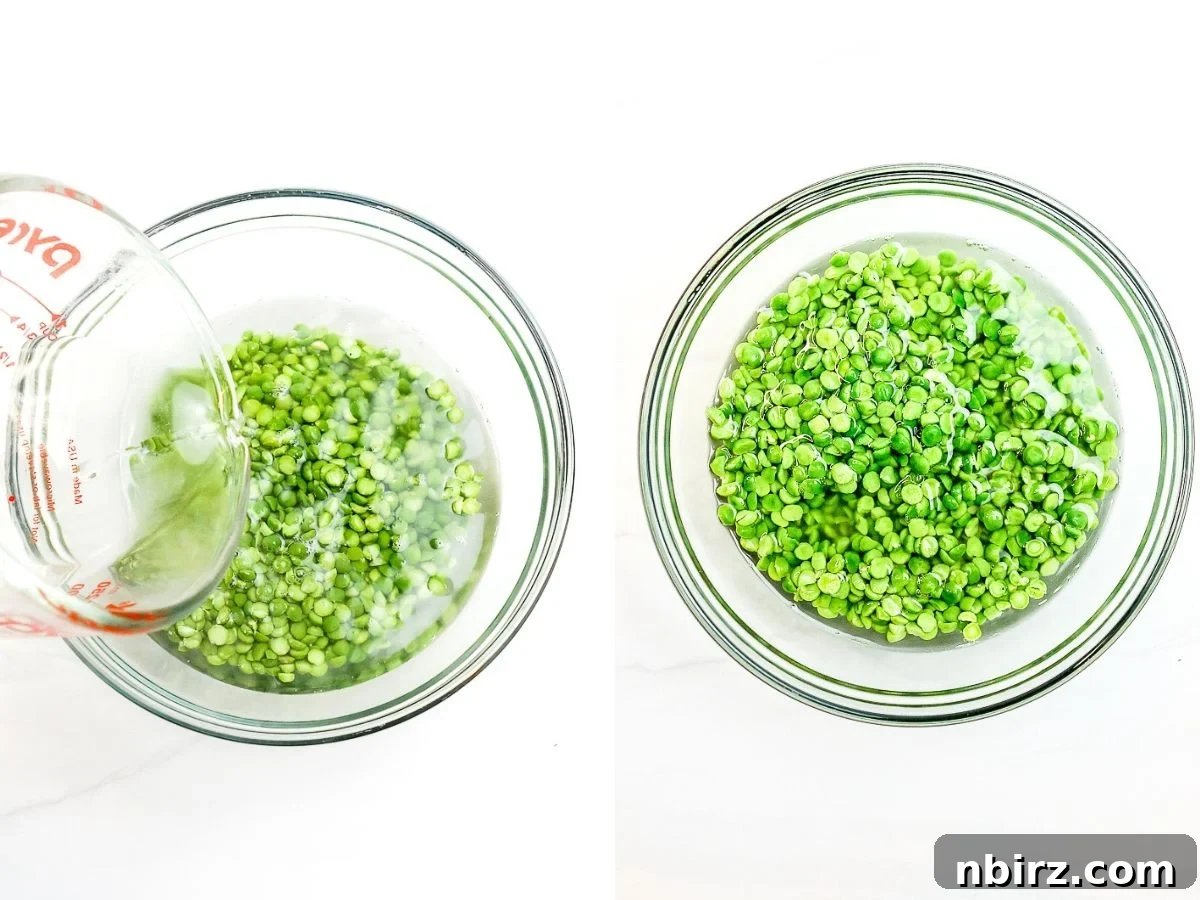
Begin by rinsing your dried split peas thoroughly under cold water using a fine-mesh sieve or colander. This step helps remove any dust, debris, or starches from the peas, ensuring a clean flavor and better texture for your crust.
After rinsing, transfer the drained split peas into a medium-sized mixing bowl. Pour 1 cup of boiling water over them, ensuring they are fully submerged. Let the split peas soak for at least 15 minutes. This quick soak method helps to soften them, making them easier to blend into a smooth batter. It is vital that you do not drain the water after this quick soak, as it will be used in the blending process.
Note: If you prefer, you can opt for a longer, cold water soak. Simply cover the rinsed split peas with cold or room temperature water and let them soak for 6 hours, or even overnight. This extended soak can further aid in digestibility. Regardless of the soaking method chosen, proceed with the recipe as directed, ensuring the soaking liquid is retained for blending.
Step Two: Preheat Your Oven & Skillet
Preheat your oven to 400°F (200°C). While the oven is heating, add 1 tablespoon of olive oil to a 9-inch (22.5 cm) cast iron skillet. Place the skillet, with the oil, into the preheating oven. This is a crucial step! Preheating the skillet along with the oven ensures the pan is piping hot when the batter is added, creating that irresistibly crispy bottom crust.
Step Three: Create the Smooth Batter
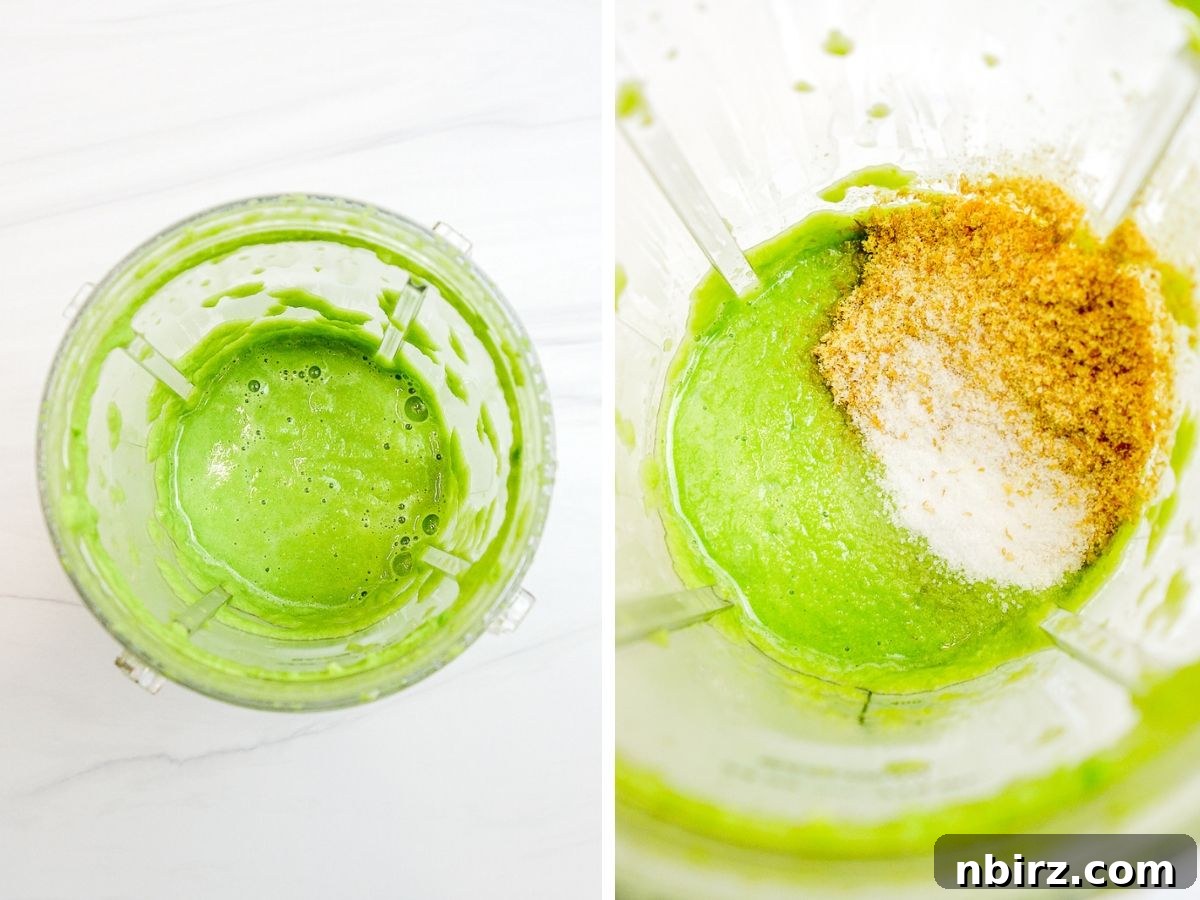
Carefully transfer the soaked split peas and their soaking water into a high-speed blender. Blend the mixture until it is completely smooth and creamy. This may take a few minutes, so be patient and scrape down the sides of the blender as needed to ensure all peas are incorporated. A perfectly smooth batter is key to a cohesive crust.
Once smooth, add the flaxseed meal and the optional salt (typically 1/2 teaspoon works well). Blend again for another 30-60 seconds to fully combine these ingredients, ensuring the flaxseed meal is evenly distributed throughout the batter. The flaxseed meal will help thicken the batter and act as a binder.
Step Four: Spread Batter into the Hot Skillet
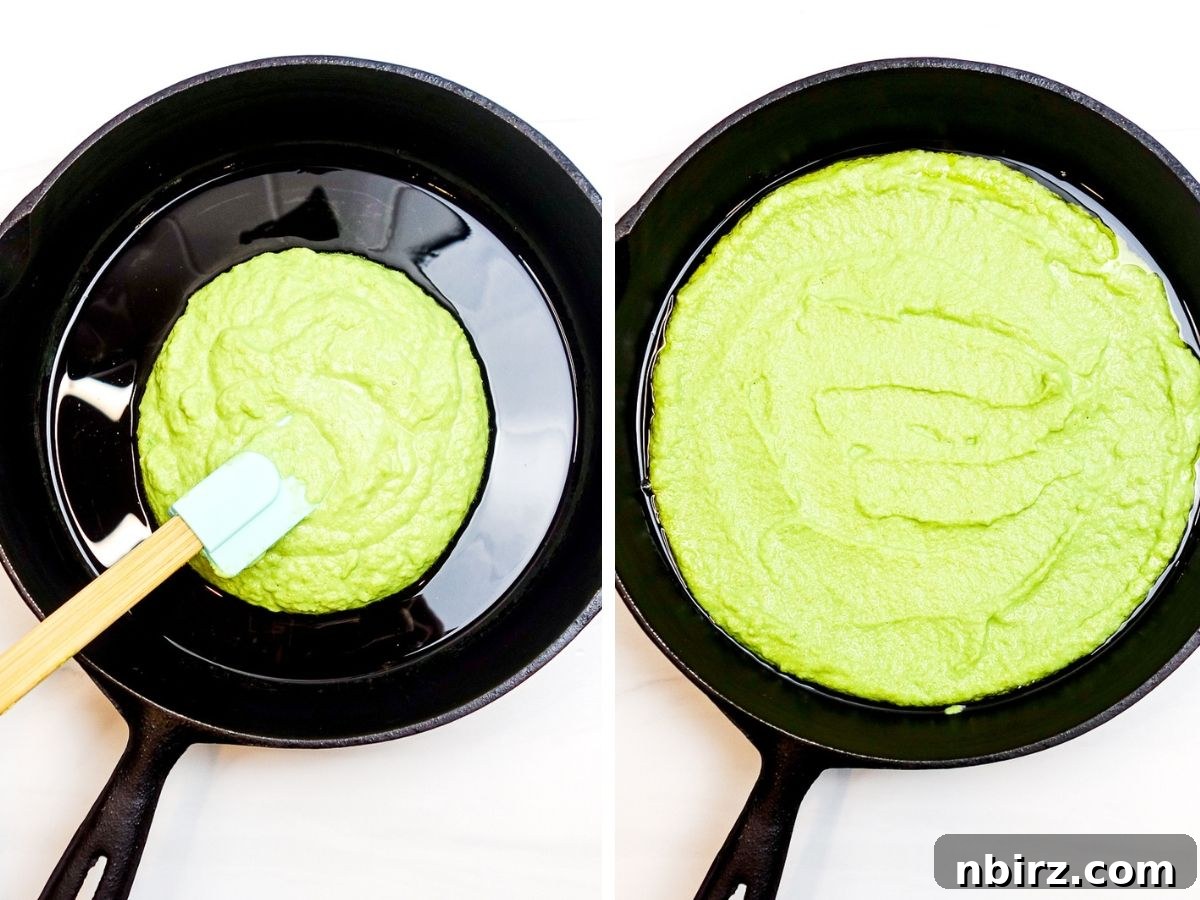
With extreme caution, remove the now very hot cast iron skillet from the preheated oven. Carefully pour the split pea batter into the center of the hot skillet. Be mindful not to splash the hot oil. Using a spatula or the back of a spoon, gently and quickly spread the batter evenly across the bottom of the skillet to form your crust.
Step Five: The Initial Bake
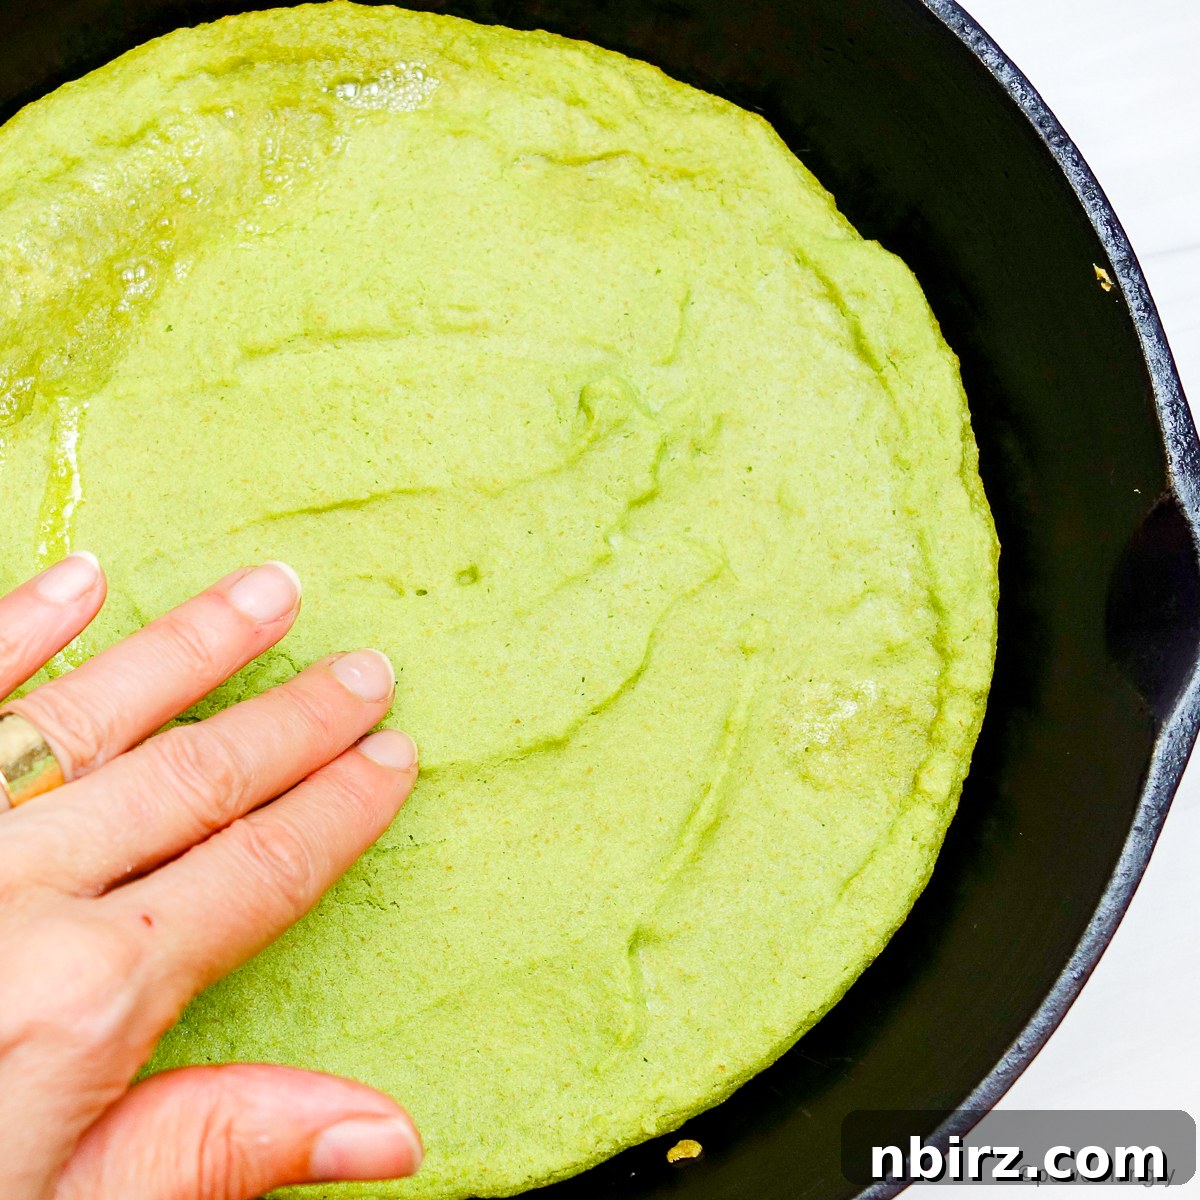
Return the skillet with the batter to the preheated oven. Bake for 7 to 9 minutes, or until the crust appears firm to the touch and the edges begin to set. This initial bake is crucial for forming a solid base that won’t become soggy under your toppings. The crust should be firm enough to support the toppings without them sinking in.
Step Six: Artfully Apply Your Toppings
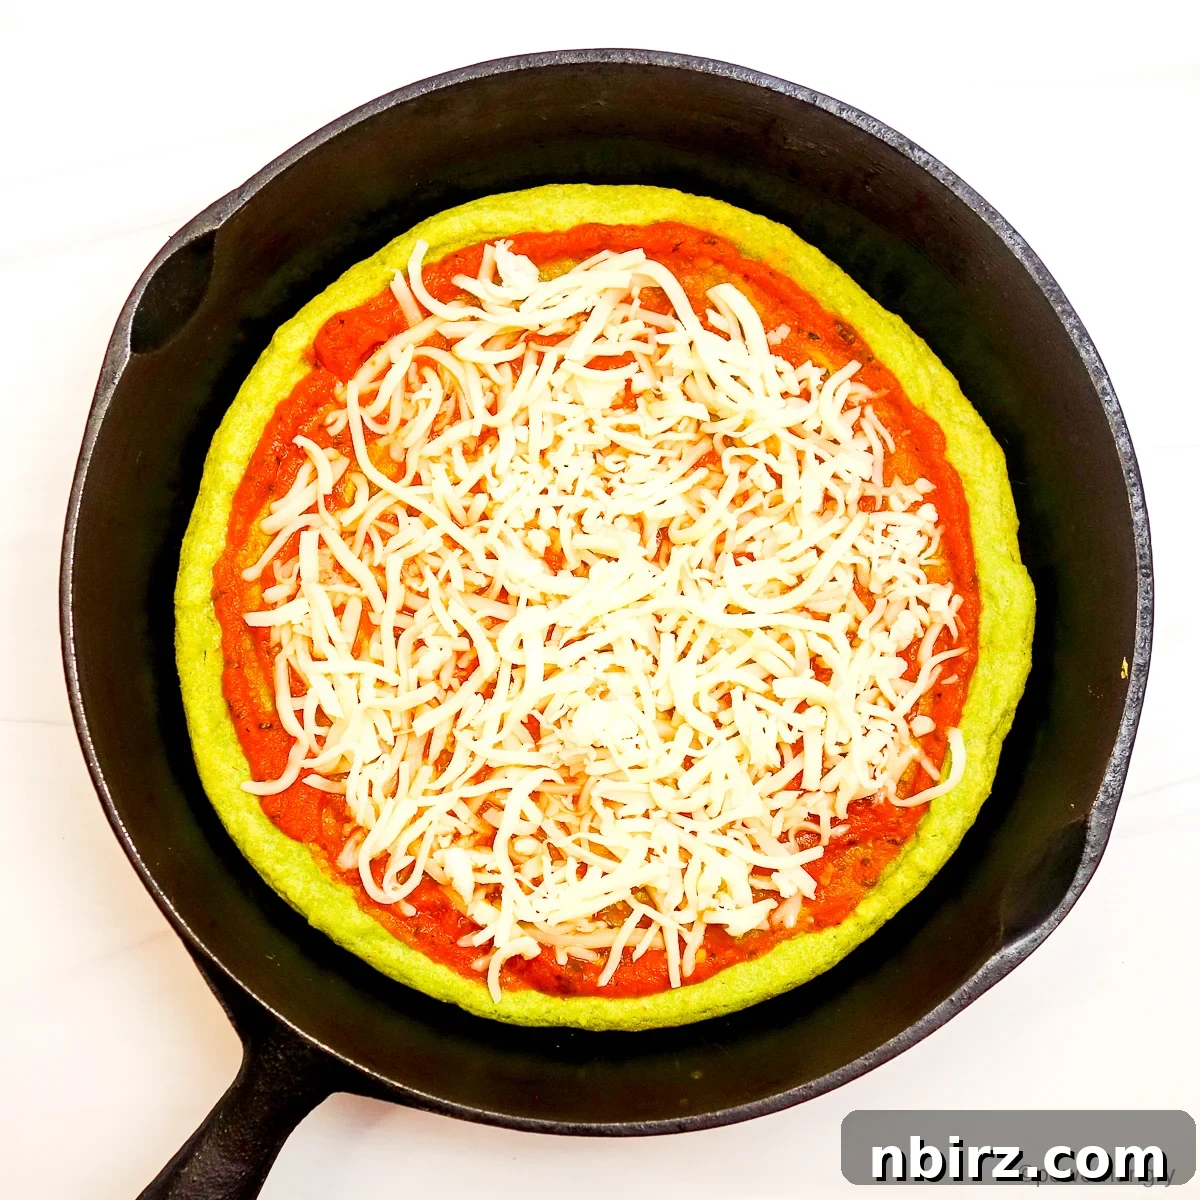
Once the crust has completed its initial bake and is firm, remove it from the oven. Spread a thin, even layer of your chosen pizza sauce (such as marinara) over the crust. Next, generously sprinkle with shredded vegan mozzarella cheese and any other desired toppings like sliced vegetables or plant-based proteins. Remember to add delicate fresh herbs like basil leaves AFTER the final bake to preserve their vibrant color and flavor.
Step Seven: The Grand Finale Bake
Return the topped pizza to the oven for a final bake of 7 to 10 minutes. Bake until the cheese is melted, bubbly, and slightly golden (if using vegan cheese that browns), and all toppings are heated through. Keep an eye on it to prevent over-browning.
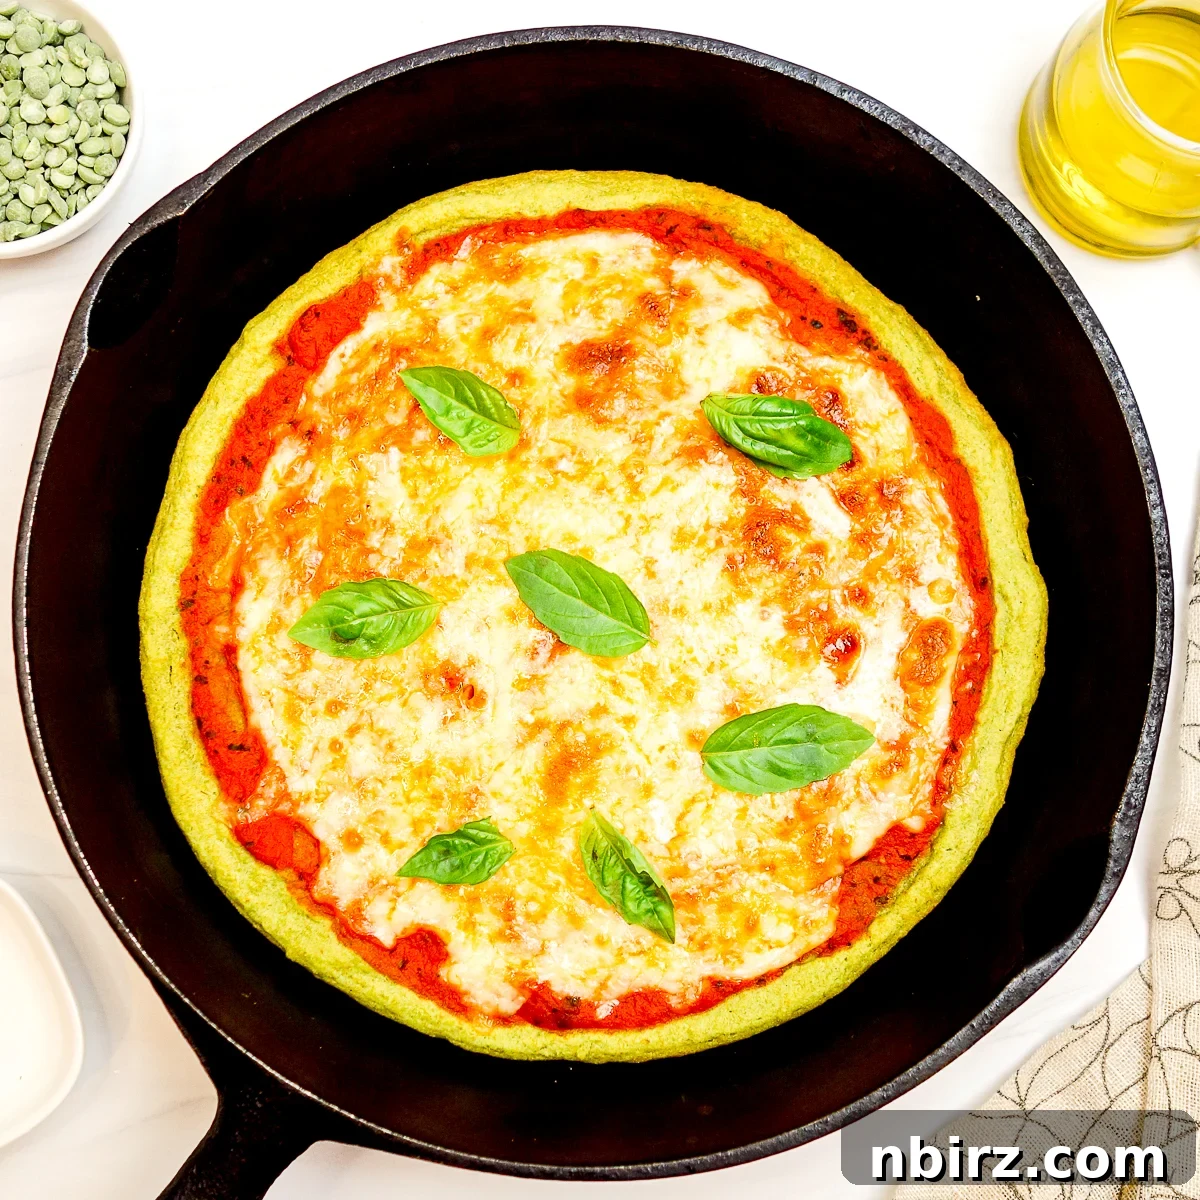
Once baked to perfection, carefully remove the skillet from the oven. If using, top with fresh basil leaves immediately before serving to impart a burst of aromatic freshness. Serve your high-protein, gluten-free split pea pizza hot and enjoy!
Slice & Enjoy Your Masterpiece
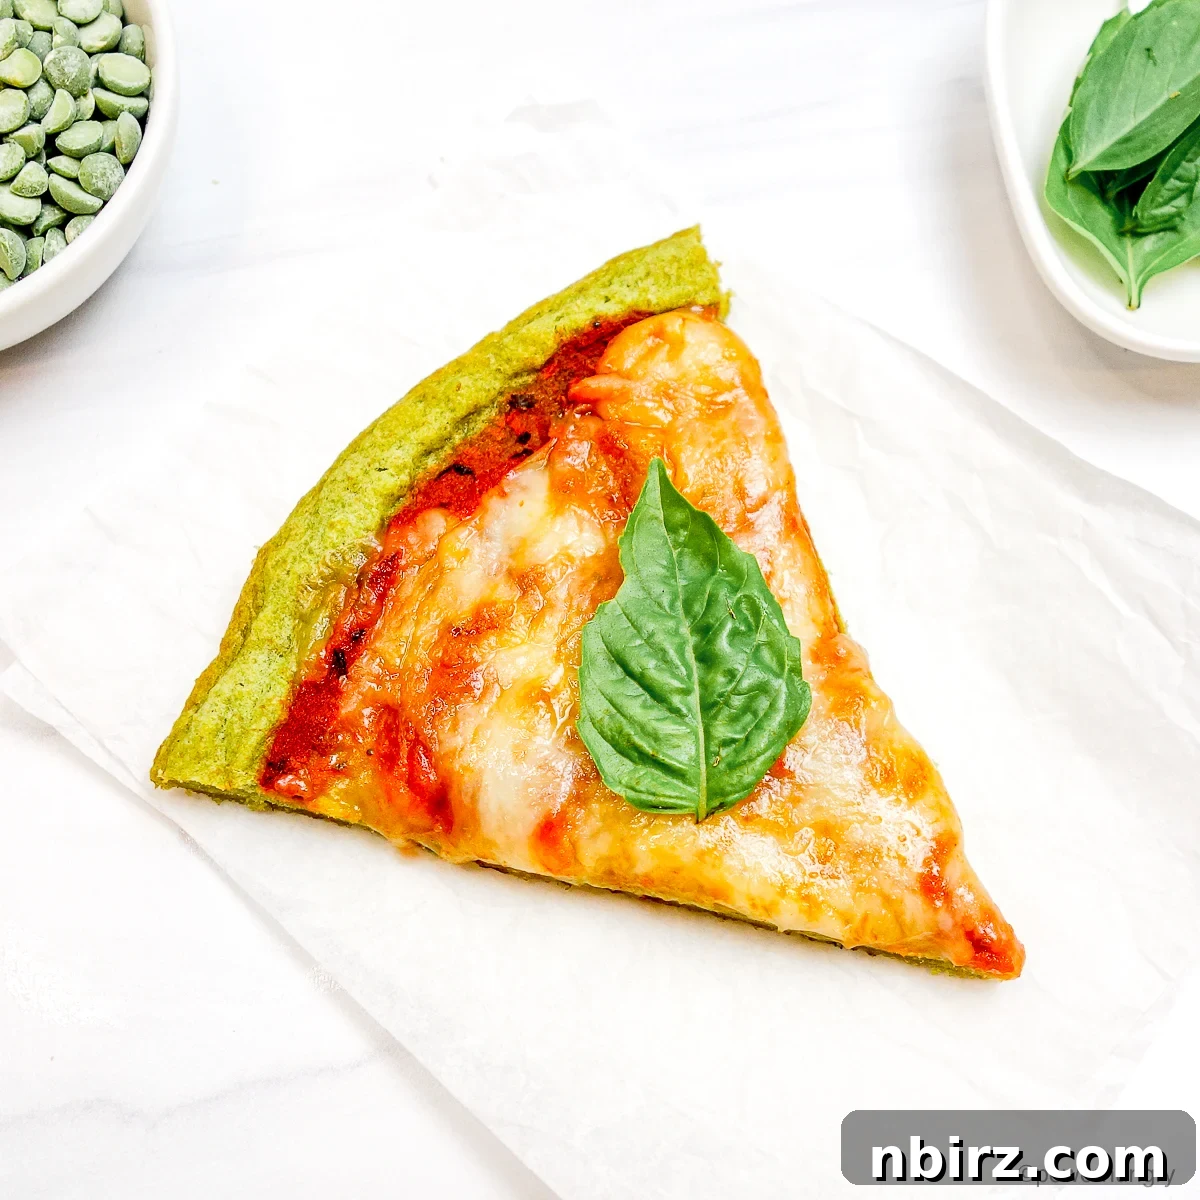
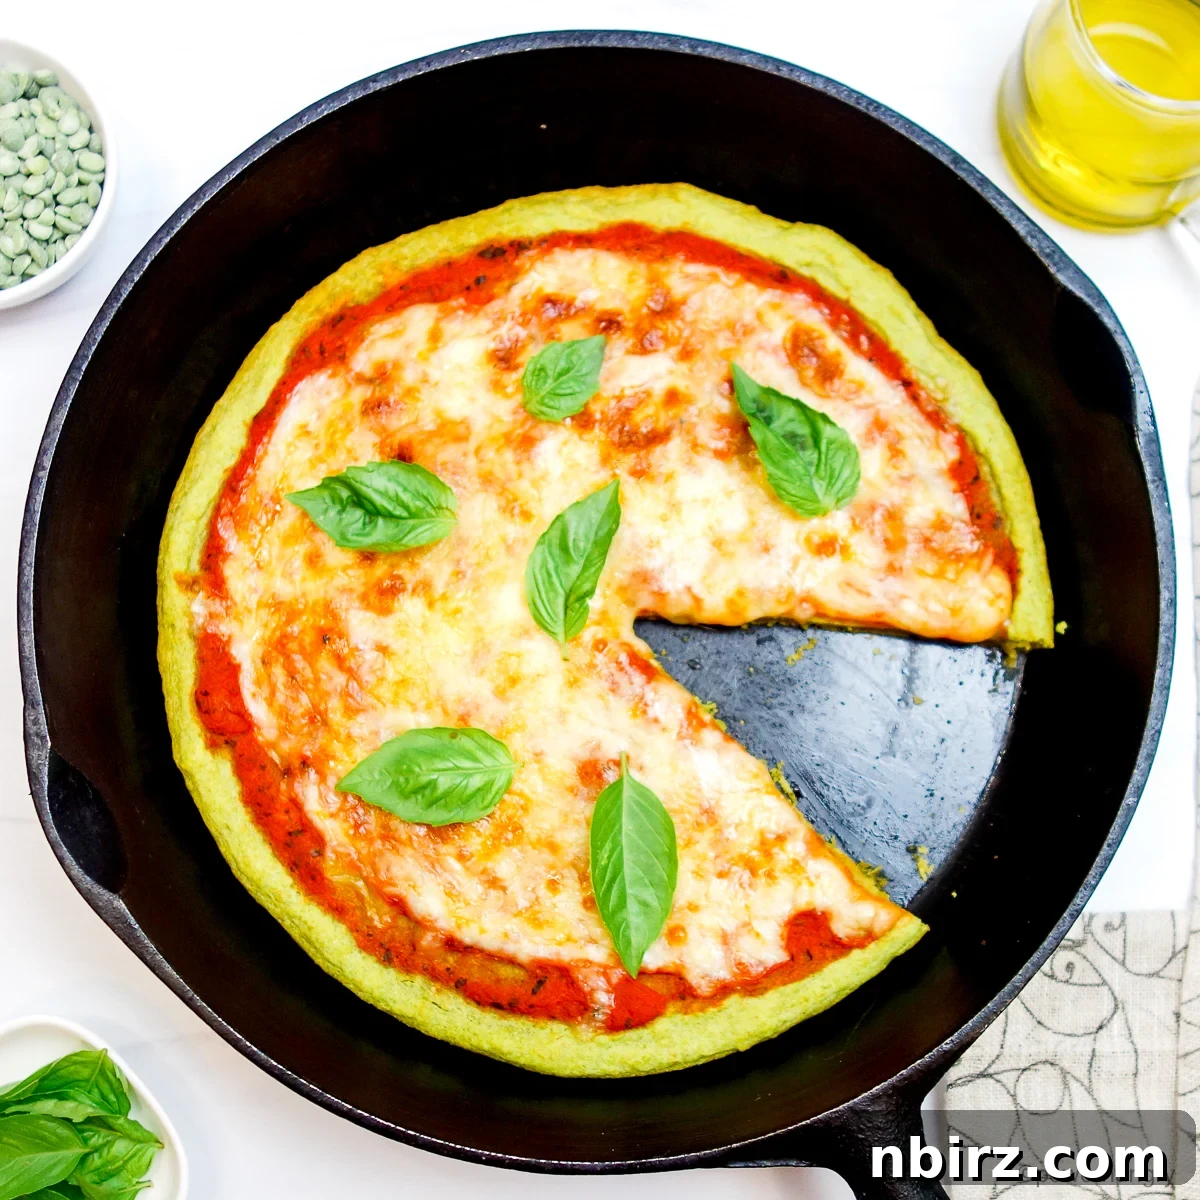
Allow the pizza to cool for just a minute or two in the skillet before carefully transferring it to a cutting board. Using a sharp pizza cutter, slice your delicious 9-inch (22.5 cm) pizza into eight perfectly portioned slices. This recipe typically yields enough for four servings, with two slices per person. Prepare to be amazed by the flavor and texture of this simple, healthy crust!
Expert Tips for the Best Split Pea Pizza Crust
Follow these expert tips to ensure your split pea pizza crust turns out perfect every time:
- Optimal First Bake: It’s crucial to bake the gluten-free split pea pizza crust until it is just firm to the touch before adding any toppings. If the crust is too soft or wet, your toppings will sink into the batter, resulting in a soggy pizza. A firm, set base is key.
- Thorough Skillet Preheat is a Must: Always preheat your oven to 400°F (200°C) with the cast iron skillet and oil inside. A screaming hot pan is essential for achieving that desirable crispy, non-stick crust bottom. Don’t skip this step!
- Accurate Split Pea Measurement: For the most consistent results, weighing the dried split peas using a digital kitchen scale is highly recommended. The recipe card below provides the exact weight in grams. If a scale isn’t available, carefully measure out 2/3 cup using dry measuring cups, ensuring it’s “just shy” of a full 2/3 cup by volume.
- Batter Consistency is Key: The ideal batter consistency is similar to a thin pancake batter – pourable but not watery. Use your judgment: if the batter appears too thick after blending, add a tablespoon of water at a time until it reaches the desired consistency. Conversely, if it seems too wet, add a small amount of additional flaxseed meal (about ½ teaspoon) and blend again to thicken.
- Handle the Hot Skillet Safely: Always use oven mitts when handling the cast iron skillet, especially when removing it from the oven to add the batter. Cast iron retains heat exceptionally well and will be extremely hot.
- Don’t Overload Toppings: While tempting, avoid piling too many heavy or wet toppings onto the crust. This can make the pizza difficult to cook through and result in a less crispy crust. A balanced approach ensures optimal results.
Elevate Your Crust: Flavoring Options
While delicious on its own, you can easily infuse additional flavors into your split pea pizza crust batter. Adding herbs and spices can significantly enhance the overall taste profile of your pizza. Consider stirring in 1/2 to 1 teaspoon of one or a combination of the following into your batter before the final blend:
- Garlic Powder: For a subtle, savory garlic note.
- Onion Powder: Adds a sweet, aromatic depth.
- Dried Herbs: Oregano, thyme, basil, or dill can lend a classic Italian or Mediterranean touch.
- Italian Herb Seasoning: A convenient blend of popular Italian spices.
- Red Pepper Flakes: For those who enjoy a little heat and kick.
- Freshly Ground Black Pepper: A universal flavor enhancer that adds a mild pungency.
- Nutritional Yeast: For a cheesy, umami flavor (great for vegan pizzas!).
Frequently Asked Questions About Split Pea Pizza Crust
- Is there a substitute for split peas?
Possibly, but this recipe has been specifically developed and tested with dried split peas. If you wish to experiment, an equal weight of dried lentils (red, brown, black, or green) might work, but results could vary in texture and flavor. We recommend sticking to split peas for guaranteed success. - Can I use chia seeds instead of flaxseed meal?
Yes, chia seeds can be used as a substitute for flaxseed meal. It is crucial to use an equal weight (not volume) of chia seeds. Blend the chia seeds along with the split peas and water in the blender to ensure they are fully incorporated and help bind the crust effectively. - Can I prepare the pizza crust in advance?
For the best texture and crispness, it is highly recommended to enjoy the split pea pizza crust fresh from the oven. Preparing the crust in advance and reheating it can sometimes compromise its desired texture, making it less crispy. - How should I store leftover pizza?
Allow any leftover pizza to cool completely to room temperature before storing. Place the cooled slices in an airtight container. It can be stored in the refrigerator for up to 2 days. To rewarm, use an oven, toaster oven, or air fryer to help restore some crispness, as microwaving may result in a softer crust. - Can I freeze the pizza crust?
Freezing the fully baked split pea pizza crust (either plain or with toppings) is not recommended. The freezing and thawing process tends to negatively impact the delicate texture of the crust and can make the toppings watery or mushy upon reheating. This crust is truly best enjoyed fresh. - Are yellow split peas interchangeable with green split peas?
Yes, absolutely! Green and yellow split peas have very similar nutritional profiles and cooking characteristics. You can use either in this recipe with equally great results.
Happy Baking and enjoy your healthy, homemade pizza!
Discover More Healthy & Easy Recipes
If you loved this innovative split pea pizza crust, be sure to explore these other fantastic recipes:
- 2-Ingredient Buckwheat Pizza Crust (Vegan, Gluten-Free)
- 3 Ingredient Almond Flour Pizza Crust (Vegan, Gluten-Free, Oil-free)
- Cauliflower Pizza Crust (Grain-Free, Gluten-Free)
- Mini Chickpea Flour Pizzas (High Protein)
- Split Pea Salad (High Protein, Oil-Free)
Print Recipe
High-Protein Split Pea Pizza Crust (Easy & Delicious!)
Equipment
- 1 cast iron skillet (9 inches / 22.5 cm)
- High-speed blender
- Fine mesh sieve or colander
- Medium mixing bowl
- Spatula
Ingredients
- 4.5 ounces (approx. 2/3 cup) dried split peas (green or yellow)
- 1 cup boiling water
- 1 tablespoon olive oil
- 2 tablespoons flaxseed meal
- Optional: 1/2 teaspoon salt (or to taste)
Suggested Toppings
- Marinara sauce (about 1/2 cup)
- Shredded vegan mozzarella cheese (about 3/4 cup)
- Fresh basil leaves (for garnish after baking)
- Other topping ideas: sliced mushrooms, tomatoes, spinach, artichoke hearts, bell peppers, olives.
Instructions
- Rinse the dried split peas thoroughly through a fine mesh sieve or colander to remove any dust or debris. Drain well.
- Place the drained split peas in a medium bowl. Cover with 1 cup of boiling water. Let them stand for at least 15 minutes to soften. Do not drain this water.
- Preheat your oven to 400°F (200°C). Add 1 tablespoon of olive oil to a 9-inch (22.5 cm) cast iron skillet. Place the skillet in the oven as it preheats to ensure it gets very hot.
- In a blender, combine the split pea-water mixture (including the soaking water). Blend until completely smooth. Add the flaxseed meal and optional salt. Blend again until the batter is smooth and well combined.
- Carefully remove the hot cast iron pan from the oven. Pour the split pea batter into the center of the skillet. Using a spatula, quickly spread the batter into an even layer, covering the bottom of the pan.
- Bake in the preheated oven for 7 to 9 minutes, or until the crust is firm to the touch and the edges are set.
- Remove the skillet from the oven. Spread a thin layer of marinara sauce over the pizza crust. Sprinkle with shredded vegan mozzarella cheese and any other desired toppings (add fresh basil leaves AFTER the final bake, if using).
- Return the pizza to the oven and bake for an additional 7 to 10 minutes, or until the cheese is melted and bubbly, and the toppings are heated through.
- Top with fresh basil leaves (if using) before serving. Slice immediately and enjoy your delicious, high-protein pizza!
Notes
- Storage: Allow any leftover pizza to cool completely to room temperature. Store in an airtight container (easier if sliced) in the refrigerator for up to 2 days. Reheat in the oven, toaster oven, or air fryer for best results.
- Split Pea Substitute: This recipe has only been tested with dried split peas. Using an equal weight of dried lentils may work, but results may vary.
- Chia Seeds instead of Flaxseed Meal: Yes, use an equal weight of chia seeds instead of flaxseed meal. Blend the chia seeds along with the split peas and water.
Nutrition
Calories: 158 kcal |
Carbohydrates: 20 g |
Protein: 8 g |
Fat: 5 g |
Saturated Fat: 1 g |
Polyunsaturated Fat: 2 g |
Monounsaturated Fat: 3 g |
Sodium: 6 mg |
Potassium: 341 mg |
Fiber: 9 g |
Sugar: 3 g |
Vitamin A: 48 IU |
Vitamin C: 1 mg |
Calcium: 27 mg |
Iron: 2 mg
Enjoyed this recipe? Please rate and leave a comment below!