
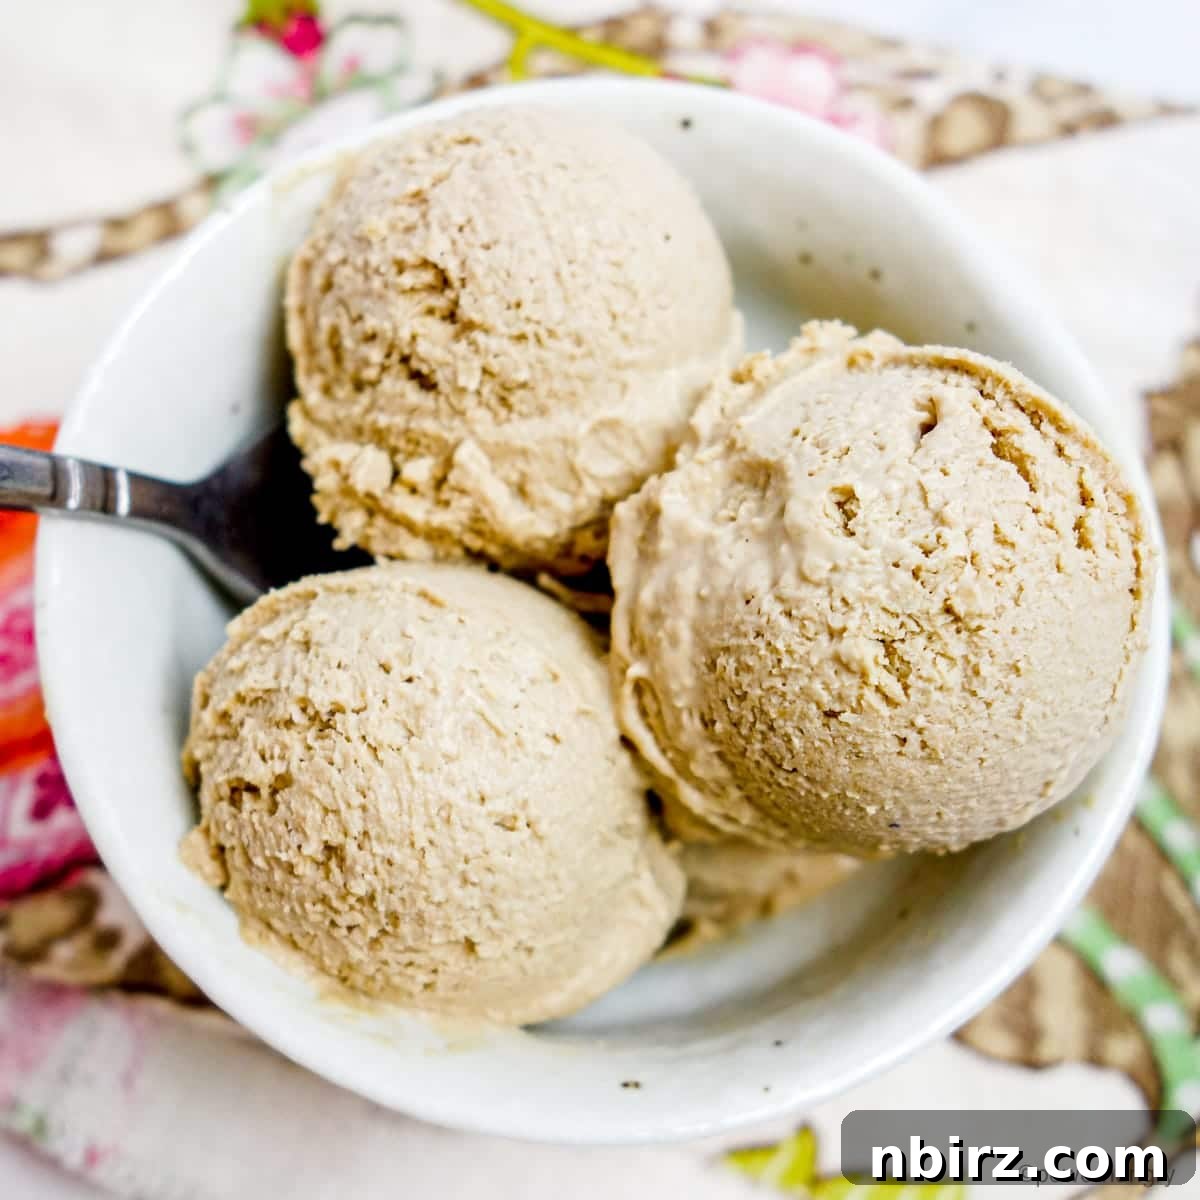
Indulge in the luscious, creamy delight of our 4-ingredient vegan vanilla sunflower seed ice cream! This incredibly easy, no-churn recipe requires absolutely no special equipment and can be effortlessly adapted to be keto-friendly with just one simple ingredient swap. Prepare to be amazed by its rich texture and irresistible flavor, making it the perfect guilt-free treat for any occasion.
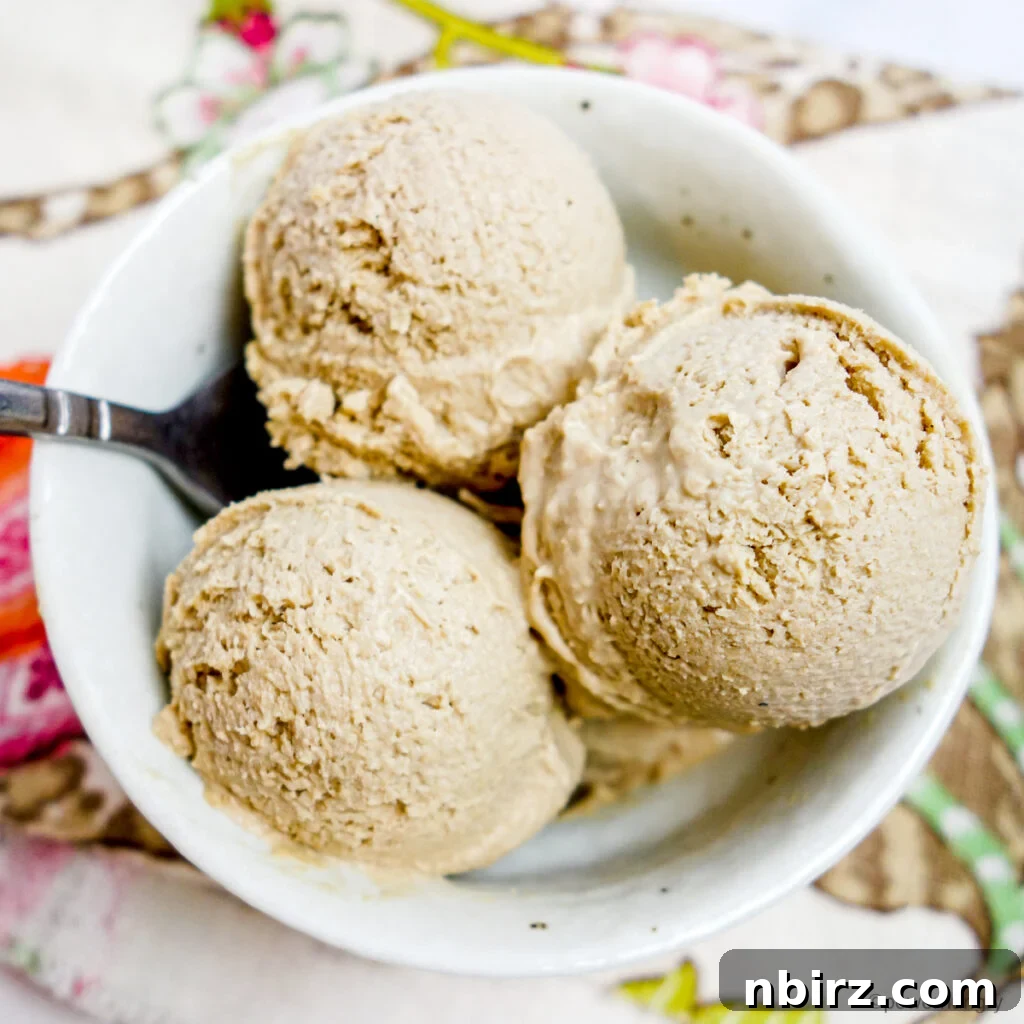
The Ultimate 4-Ingredient Vegan Vanilla Sunflower Seed Ice Cream: Your No-Churn, Nut-Free Dream
Are you searching for a dairy-free dessert that doesn’t compromise on flavor or texture? Look no further! This recipe for vegan vanilla sunflower seed ice cream is a game-changer. It’s remarkably simple, requiring only four core ingredients, and the best part? No ice cream machine is needed! This comprehensive guide will walk you through creating a rich, smooth, and utterly satisfying frozen treat that’s perfect for vegans, those with nut allergies, or anyone looking for a healthier dessert option. Get ready to scoop up pure bliss and impress your taste buds with this surprisingly easy and delicious homemade ice cream.
Experience Richness: Vegan Vanilla Ice Cream without Cashews or Nuts
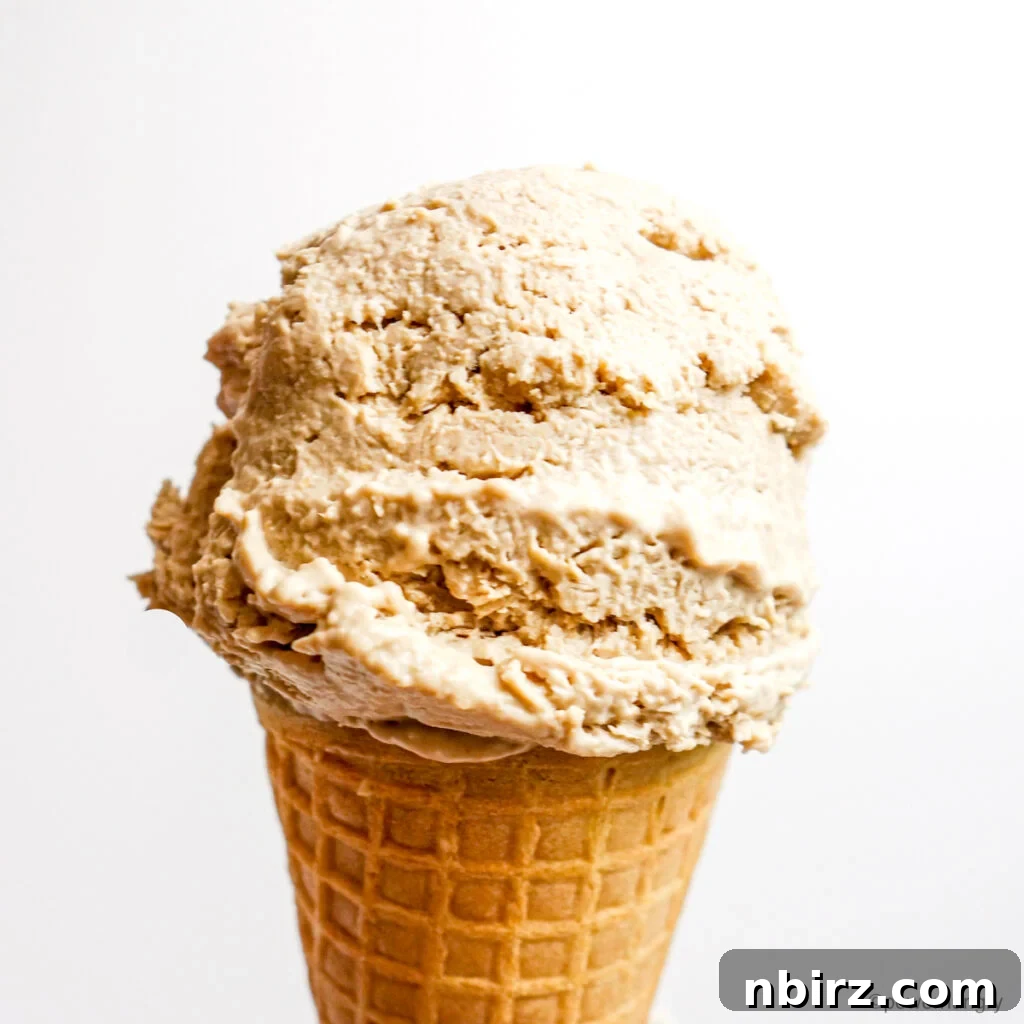
Many vegan ice cream recipes rely heavily on cashews or other nuts to achieve that desirable creamy consistency. While undeniably delicious, nuts can be an allergen concern for a significant portion of the population, making many plant-based desserts off-limits. Our innovative recipe thoughtfully bypasses cashews and all nuts entirely, leveraging the natural richness of full-fat coconut milk and the subtle, earthy, yet neutral flavor of sunflower seeds. This ingenious combination creates a truly luxurious vanilla ice cream that is both deeply satisfying and incredibly safe for those with common nut allergies.
By focusing on sunflower seeds, we open up a world of dairy-free dessert possibilities that are accessible to more people. You won’t believe how decadently smooth and satisfying this nut-free version is, proving that you don’t need traditional ingredients to create extraordinary flavors. It’s not just an alternative; it’s a delicious destination in itself.
Why You’ll Love This Recipe: Unbeatable Benefits & Dietary Inclusivity
This vegan sunflower seed ice cream isn’t just delicious; it’s packed with benefits that make it a standout choice for health-conscious individuals and dessert lovers alike. Crafted with simplicity and dietary needs in mind, here’s why this recipe deserves a permanent spot in your rotation:
- No Ice Cream Machine Required: Embrace the ease of “no-churn” ice cream. Enjoy homemade perfection without needing any specialized, bulky equipment. Just blend, freeze, and savor!
- Fully Vegan & Dairy-Free: Absolutely free from dairy and eggs, this recipe is ideal for anyone following a plant-based diet or those with lactose intolerance.
- Gluten-Free & Grain-Free: Suitable for individuals with gluten sensitivities or those adhering to grain-free lifestyles, ensuring a worry-free indulgence.
- Completely Nut-Free: A fantastic and safe option for individuals with peanut and tree nut allergies, offering peace of mind without sacrificing exquisite flavor or creamy texture.
- Oil-Free & Soy-Free: Made without any added oils or soy products, catering to various dietary preferences and health goals.
- Refined Sugar-Free Option: Using coconut sugar provides a natural, unrefined sweetness. Plus, there’s an effortless swap available for a keto-friendly, entirely refined sugar-free version.
- Fast and Easy to Make: Minimal hands-on prep time means you’re just a few simple steps away from a delightful dessert, perfect for busy schedules.
- Only 4 Core Ingredients: Simplicity at its best! This minimalist ingredient list means less shopping, less fuss, and more enjoyment.
- Keto Option Available: Easily convert this recipe to be suitable for a ketogenic diet, offering a low-carb, low-sugar indulgence that fits your macros.
- Versatile Flavor Base: While vanilla is a timeless classic, this incredibly creamy base serves as a perfect canvas for customizing with your favorite toppings or mix-ins.
From its allergen-friendly profile to its sheer simplicity and health-conscious design, this recipe truly caters to a wide range of needs, proving that healthy, homemade desserts can be both accessible and incredibly satisfying for everyone.
Essential Ingredients for Your Vegan Vanilla Sunflower Seed Ice Cream
For precise measurements of each ingredient, please refer to the comprehensive recipe card located at the conclusion of this article. You can easily switch between US Customary (volume) and Metric (weights) units to suit your preference.
Crafting this remarkable ice cream requires just a handful of straightforward ingredients, each playing a crucial role in achieving its creamy texture and delightful flavor profile. Selecting quality ingredients ensures the best possible outcome:
- Sunflower Seed Kernels: These are the star of our show and the secret to its nut-free richness! You have the option to use either roasted or raw kernels, and we’ll delve into the subtle differences and flavor impacts of each below. Sunflower seeds contribute a unique, mild flavor and essential fat content, which is vital for the ice cream’s luxurious, creamy texture.
- Full-Fat Canned Coconut Milk (13.5-ounce can): This ingredient is the creamy foundation of our dairy-free base. It’s imperative to use full-fat canned coconut milk, not the lighter refrigerated beverage kind, as its high fat content is crucial for achieving that characteristic ice cream mouthfeel. For optimal creaminess, consider chilling the can overnight in the refrigerator. This helps the thick cream separate and solidify at the top, allowing you to scoop out only the rich, fatty portion, leaving any watery liquid behind if desired.
- Coconut Sugar: A wonderful natural sweetener that not only adds a pleasant sweetness but also imparts a subtle caramel note and a greater depth of flavor compared to plain granulated sugar. It’s a fantastic unrefined alternative. (Keep reading for various other sweetener options, including those perfectly suited for a keto diet.)
- Vanilla Extract: Essential for infusing that classic, comforting, and universally loved vanilla ice cream flavor. While any vanilla extract will yield a delicious outcome, opting for a high-quality pure vanilla extract will undoubtedly elevate the overall taste experience.
A Secret Weapon: A Pinch of Salt! I cannot emphasize enough the importance of adding a tiny bit of salt to this recipe. While technically optional, it is highly recommended and truly transformative! A small pinch of salt works wonders, subtly enhancing and balancing all the flavors, making the vanilla brighter and the sweetness more profound and well-rounded. Even when using already salted, roasted sunflower seed kernels, an extra pinch of salt can bring the ice cream to an even higher level of deliciousness. Don’t skip this simple step – it’s the culinary secret that makes all the difference!
Choosing Your Sunflower Seeds: Roasted vs. Raw for Flavor Profiles
The type of sunflower seeds you choose will subtly influence the final flavor and color of your ice cream, offering two distinct and equally delightful experiences. Both raw and roasted sunflower seeds work wonderfully in this recipe, so feel free to experiment with both to discover your personal preference and expand your culinary repertoire.
- Raw Sunflower Seeds: When you opt for raw sunflower seeds, the ice cream will possess a more neutral and delicate flavor profile. This allows the pure vanilla essence to shine through predominantly, creating a taste reminiscent of traditional vanilla ice cream. The color of your ice cream will also be lighter, akin to classic vanilla. If you prefer a straightforward, clean vanilla taste that serves as a versatile base for various toppings or simply enjoy the subtle sweetness of vanilla, raw seeds are an excellent choice.
- Roasted Sunflower Seeds: Choosing roasted, and especially salted, sunflower seeds (which are often more readily available and convenient in mainstream supermarkets) will result in a more deeply flavored, distinctively toasty ice cream. The roasting process intensifies the inherent nutty notes of the seeds, adding a wonderful complexity and a comforting, almost caramelized depth to the overall flavor. This version offers a slightly more gourmet and robust taste that many find irresistible. Visually, the ice cream will also have a slightly darker, warmer, and creamier hue.
I highly recommend trying both versions if you have the opportunity! Not only will it help you discover which one aligns best with your taste preferences, but let’s be honest – having two batches of delectable, homemade vanilla ice cream in your freezer (each with its unique character) is always a fantastic idea! Each type offers a slightly different, yet equally delicious, experience, making both worthy of a taste test.
Simple Steps to Homemade Bliss: How to Make Vegan Sunflower Seed Vanilla Ice Cream (No-Churn Method)
Please note that the complete, detailed instructions, along with ingredient quantities, are also conveniently provided in the recipe card found at the end of this post.
Making this creamy, dreamy vegan ice cream is surprisingly simple and requires minimal effort, especially since it’s a no-churn recipe. You’ll be amazed at the rich, professional-quality results achievable from your own kitchen. Follow these four straightforward steps to create your own homemade frozen delight:
Step One: Blend All Ingredients to Velvety Smoothness
Begin by meticulously combining all your primary ingredients into a high-speed blender. This includes the full-fat canned coconut milk (which ideally has been chilled overnight to solidify the cream, allowing for easier separation from the liquid), your chosen sunflower seed kernels (raw or roasted), the coconut sugar, and the vanilla extract. Remember to add that optional but highly recommended pinch of salt at this stage to truly enhance and balance all the flavors!
Blend these ingredients on high speed for several minutes until the mixture is completely smooth and boasts a luxurious, velvety texture. It is absolutely crucial that there are no grainy bits from the sunflower seeds remaining; a high-powered blender will achieve this best. Periodically stop and scrape down the sides of the blender jar as needed to ensure everything is thoroughly incorporated and blended evenly. Once smooth, take a moment to taste the mixture. This is your chance to adjust the sweetness or add that extra pinch of salt if desired, tailoring the flavor profile perfectly to your palate.
Step Two: Transfer to a Freezer-Safe Container and Secure
Once your ice cream base is impeccably smooth and perfectly flavored, carefully pour the blended mixture into a freezer-safe container. For optimal freezing and ultimately easier scooping later on, consider using a shallow, wide container rather than a deep one. This design allows the ice cream to freeze more evenly throughout and can significantly reduce the overall freezing time, preventing overly hard edges or a soft center.
Ensure the container is tightly covered to prevent any ice crystals from forming on the surface of your ice cream, which can compromise its creamy texture. For an extra layer of protection against freezer burn and to maintain that pristine, smooth consistency, it’s highly recommended to press a sheet of plastic wrap directly onto the surface of the ice cream mixture before securing the lid. This creates an airtight barrier that locks in moisture and keeps your ice cream perfect.
Step Three: Freeze Until Perfectly Firm
Place the tightly covered container into your freezer. Allow the ice cream to freeze for approximately six to eight hours, or until it reaches a very firm, solid consistency. The exact freezing time can vary depending on a few factors: the depth and material of your container (shallower containers will naturally freeze faster, while deeper ones will take a bit longer) and the precise temperature of your freezer. At this stage, the no-churn ice cream will be quite hard, similar to traditional homemade ice cream straight from the freezer. This is completely normal and expected!
Patience is a virtue here! Resist the urge to check it too frequently, as opening the freezer door can cause temperature fluctuations that might affect the texture. A consistently cold freezer will ensure the best, smoothest, and most delicious outcome for your homemade treat.
Step Four: Thaw Slightly & Master the Scoop
When you’re finally ready to enjoy your delicious creation, remember that homemade no-churn ice cream tends to freeze quite solid. To achieve that perfect, effortlessly scoopable consistency that glides onto your cone or into your bowl, you’ll need to allow it to thaw slightly before serving. There are two convenient methods for this:
- Room Temperature Thaw (Recommended): Take the ice cream container out of the freezer and let it sit at room temperature for approximately thirty to sixty minutes. This gradual thawing process allows the ice cream to soften evenly and become perfectly scoopable without melting entirely, preserving its creamy texture.
- Microwave Method (Quick Option): For those moments when you just can’t wait, if your container is microwave-safe, you can carefully microwave the ice cream. Use short bursts of 10 to 15 seconds at a time. After each interval, check the consistency and stir briefly. Continue this process until it reaches your desired softness. Be vigilant not to overheat it, as you want to soften, not melt!
Once softened to your liking, grab a sturdy ice cream scoop. Scrape it firmly across the top of the ice cream, pressing down to pack it into a beautifully creamy, dreamy scoop. The texture will be rich, indulgent, and incredibly satisfying – a true testament to the simplicity and effectiveness of this remarkable recipe. Serve immediately and enjoy the fruits of your effortless labor!
And there you have it! Your own batch of seriously delicious, homemade vegan vanilla sunflower seed ice cream, ready to savor and share with loved ones (or enjoy all by yourself – we completely understand and won’t tell!). This simple process consistently yields exceptional results, proving that healthy, homemade treats can be incredibly easy and utterly delightful.
Frequently Asked Questions About Vegan Sunflower Seed Ice Cream
Here are some common questions and helpful answers to ensure your ice cream-making experience is a complete success and to provide additional insights into this delightful dessert:
What is the Taste & Texture of Vegan Vanilla Sunflower Seed Ice Cream?
This ice cream is notably rich, incredibly creamy, and boasts a wonderfully luxurious, almost super-luxe texture. A small scoop goes a very long way in satisfying your sweet cravings, as its density and flavor are quite profound. The flavor profile offers a delightful balance of classic, comforting vanilla with subtle, earthy, and sometimes slightly nutty undertones contributed by the sunflower seeds. The quality of your vanilla extract will certainly influence the prominence and depth of the vanilla flavor, but even with a more budget-friendly option, the overall taste remains exceptionally good. Please note that ice cream made with roasted sunflower seed kernels (as often depicted in the accompanying photos) will have a slightly deeper, toasted flavor and a slightly darker hue compared to versions made with raw seeds, which will be lighter in color and have a more neutral, pure vanilla taste.
How Should the Ice Cream Be Stored?
For optimal quality, texture, and flavor, it is crucial to store your homemade vegan sunflower seed ice cream in a tightly sealed, freezer-safe container. This helps prevent freezer burn and the formation of ice crystals. When stored properly, it will maintain its deliciousness and creamy texture for up to 2 weeks. Beyond this timeframe, while it will still be safe to eat, the texture might begin to degrade slightly, potentially becoming a bit harder or developing minor ice crystals due to prolonged freezing.
Can I Make This Ice Cream in an Ice Cream Maker?
Absolutely, yes! While this recipe is specifically designed and perfected to be a simple “no-churn” delight, it works beautifully in an ice cream maker if you own one and prefer a fluffier, more aerated texture. To use an ice cream maker, simply prepare the ice cream base as directed: blend all ingredients until they are completely smooth and velvety. Then, pour the prepared mixture into your ice cream maker’s bowl and churn according to your manufacturer’s specific instructions. You can enjoy the ice cream immediately for a delightful soft-serve consistency, or transfer it to a freezer-safe container and freeze for at least 2 hours to achieve a firmer, more scoopable ice cream, similar to store-bought varieties.
What Is a Good Substitute for Coconut Sugar?
If coconut sugar isn’t readily available or if you simply prefer a different sweetener, you have several excellent options that will work well in this recipe:
- Brown Sugar: An equal amount of lightly packed brown sugar can be substituted. It will contribute a similar caramel note and moisture profile to the ice cream.
- Granulated Sugar: Any granulated sugar of your choice (such as organic cane sugar or turbinado sugar) can be used. While it will provide sweetness, it might yield a slightly less complex or deep flavor compared to coconut or brown sugar.
- Maple Syrup: For a liquid sweetener, you can use 1/4 cup (60 mL) of pure maple syrup. This will add a distinct and delicious maple flavor that pairs wonderfully with vanilla and the subtle taste of sunflower seeds. Other liquid sweeteners like brown rice syrup or agave nectar are also viable alternatives.
- Honey (Non-Vegan Option): If you are not strictly adhering to a vegan diet, honey can also be used as a delicious substitute, adding its unique floral sweetness and a lovely rich texture.
When substituting, remember to taste the blended mixture before freezing and adjust the sweetness level as desired, as the perceived sweetness can vary between different types of sugars and sweeteners.
Can I Make This Ice Cream Keto-Friendly?
Yes, absolutely! Transforming this delicious treat into a keto-friendly dessert is incredibly simple, requiring just one core substitution. To make this ice cream suitable for a ketogenic diet, replace the coconut sugar entirely with an equal amount of your preferred keto-friendly granular sweetener (popular choices include erythritol, xylitol, or stevia/monk fruit-based blends) or a keto-friendly liquid sweetener. That’s truly all it takes to adapt this recipe to fit your low-carb lifestyle!
With this easy keto sweetener swap, each serving of the resulting ice cream typically contains approximately 1 gram of sugar and only 2 grams of net carbohydrates. This makes it a perfect, guilt-free indulgence for those diligently following a ketogenic lifestyle, allowing you to enjoy a rich and creamy dessert without compromising on your dietary goals or sacrificing on taste or texture.
What Can I Use in Place of Coconut Milk?
While full-fat canned coconut milk is highly recommended for its exceptional richness and creaminess, which are crucial for achieving that authentic ice cream texture, other non-dairy milks can certainly be used. However, it’s important to proceed with a significant caution: substituting full-fat coconut milk with thinner non-dairy milks (such as almond milk, oat milk, or soy milk typically found in cartons) will result in a considerably less rich and creamy ice cream due to their much lower fat content. The texture will likely be more icy and less decadent, closer to a sorbet or a lighter frozen dessert.
If you prefer a lighter option or simply need to use an alternative due to dietary restrictions or availability, consider making a slight adjustment to the recipe. Decrease the total amount of non-dairy milk to about 1 and 1/2 cups (355 mL) and add an additional 1/4 cup (30 grams) of sunflower seed kernels. This adjustment helps to boost the overall fat and solids content, and can partially compensate for the thinner milk, aiming for a slightly better and less icy texture. However, be prepared for a noticeable difference in the overall richness and mouthfeel compared to the full-fat coconut milk version.
This creamy, dreamy vegan vanilla sunflower seed ice cream truly hits the spot, proving that a handful of simple ingredients and a little patience can create a spectacular dessert that everyone can enjoy, regardless of dietary preferences or allergies. So, go ahead – happy scooping!
Discover More Dairy-Free Delights: Related Frozen Treat Recipes
If you loved this easy and adaptable vegan ice cream, you’re in luck! There’s a whole world of fantastic dairy-free and plant-based frozen treats waiting to be explored. Expand your repertoire of healthy and delicious desserts with these related recipes:
- 1-Ingredient Banana Ice Cream: The ultimate simple “nice cream” – just frozen bananas! A magical transformation into a creamy, healthy soft-serve.
- Mango Banana Coconut Ice Cream: A vibrant tropical fusion that’s bursting with sweet and tangy flavors, perfect for a sunny day.
- 3-Ingredient Chocolate Banana Peanut Butter Ice Cream: A rich, indulgent, and incredibly satisfying combination for all chocolate and peanut butter enthusiasts.
- Strawberry Hemp Ice Cream: A unique and nutritious take on classic strawberry ice cream, offering a creamy texture with added health benefits.
- 2-Ingredient Strawberry Sorbet: Refreshingly light, naturally sweet, and incredibly easy to whip up without the need for an ice cream machine.
Print Recipe
Vegan Vanilla Sunflower Seed Ice Cream (4 Ingredients, No-Churn)
Ingredients
- 1 13.5 ounce can full-fat coconut milk (see notes below)
- 1 cup (120 g) sunflower seed kernels (roasted or raw)
- 1/4 cup (36 g) coconut sugar
- 2 teaspoons (10 mL) vanilla extract
- Optional: salt to taste (highly recommended!)
Instructions
- Blend all of the ingredients (except the optional salt) in a high-speed blender until completely smooth and creamy. Taste; add the optional salt and more sweetener, as desired.
- Pour the blended mixture into a freezer-safe container. Ensure it’s tightly covered to prevent ice crystals.
- Freeze the ice cream for six to eight hours, or until it becomes very firm. (Note: the ice cream will be quite hard at this point).
- To scoop, thaw the ice cream at room temperature for thirty to sixty minutes until softened. Alternatively, microwave in 10-15 second bursts in a microwave-safe container until scoopable.
- Scrape an ice cream scoop across the surface to pack in a creamy, dreamy scoop and serve immediately.
Notes
Keto Option: Replace the coconut sugar with an equal amount of keto-friendly granular sweetener or keto-friendly liquid sweetener. This results in approximately 1 gram sugar and 2 grams net carbs per serving.
Coconut Sugar Options: Substitute with an equal amount of lightly packed brown sugar, granulated sugar of your choice, or 1/4 cup (60 mL) of maple syrup, brown rice syrup, or agave nectar. Honey can also be used if not strictly vegan.
Coconut Milk Measurement: One 13.5-ounce (13.65 fl oz) can of full-fat coconut milk is approximately 1 and 2/3 cups (399 mL).
Coconut Milk Alternatives: Other non-dairy milks can be used, but the ice cream will be significantly less rich and creamy due to lower fat content. To compensate, consider reducing the milk to 1.5 cups (355 mL) and adding an extra 1/4 cup (30 g) of sunflower seed kernels.
How to Freeze Faster: For quicker freezing, pour the mixture into a shallower dish, as depth affects freezing time.
Make it In an Ice Cream Maker: Pour the blended base into an ice cream maker and churn per manufacturer’s directions. Serve immediately for soft-serve or freeze for at least 2 hours for a firmer consistency.
Nutrition Facts (Approximate Per Serving)
Calories: 182 kcal |
Carbohydrates: 9 g |
Protein: 4 g |
Fat: 16 g |
Saturated Fat: 9 g |
Polyunsaturated Fat: 7 g |
Sodium: 860 mg |
Fiber: 1 g |
Sugar: 6 g