
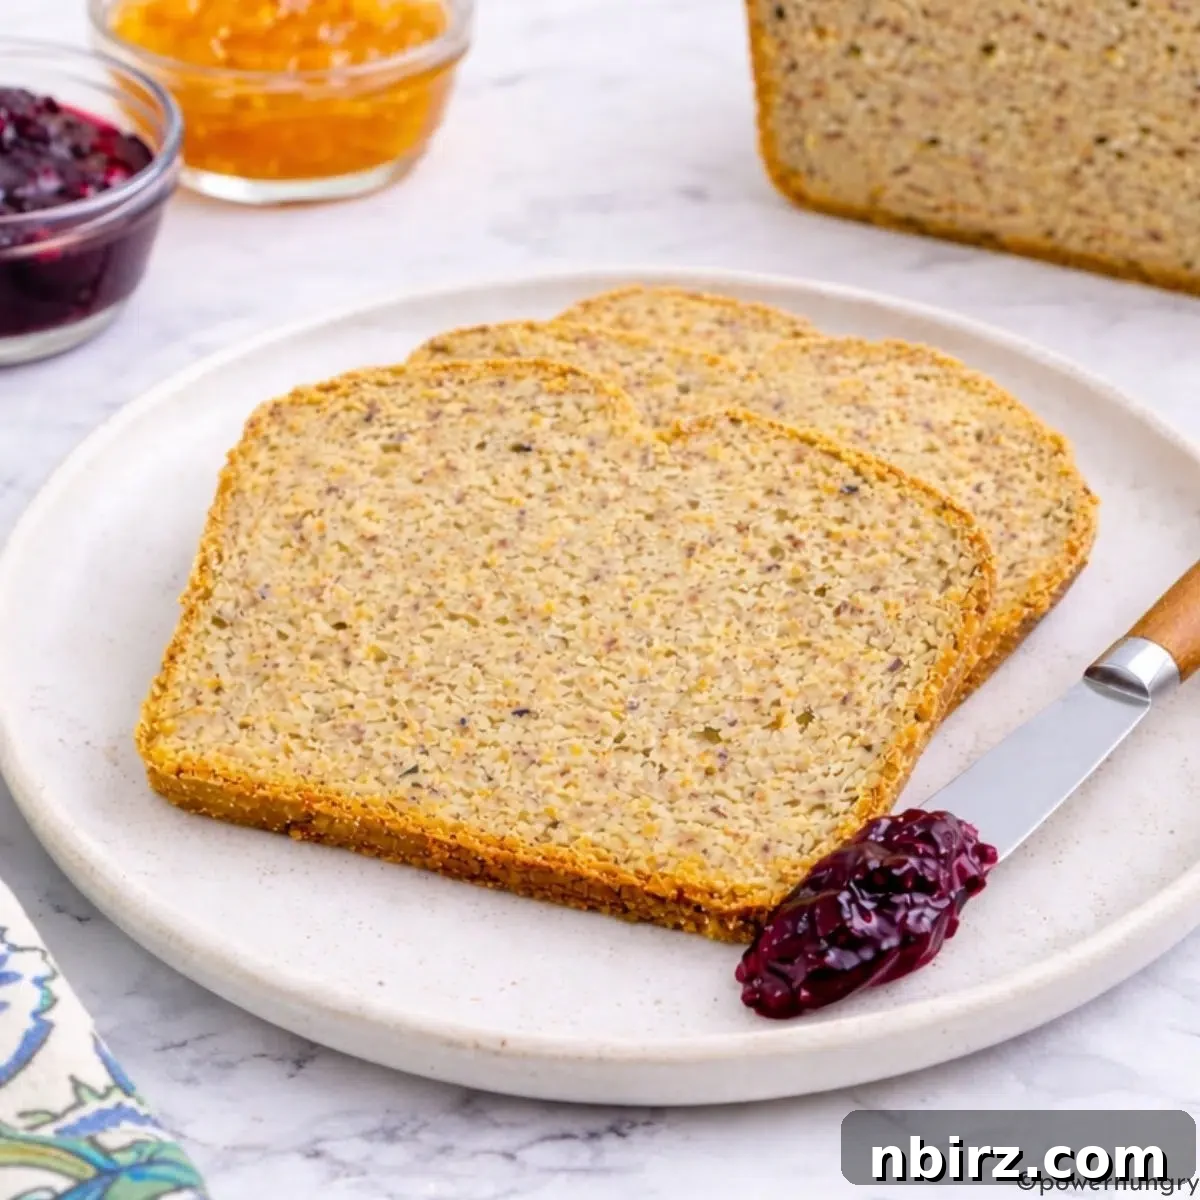
Welcome to the ultimate guide for baking a truly revolutionary bread: our High-Protein Millet Bread. This isn’t just any loaf; it’s a culinary triumph designed for health-conscious food lovers and those with specific dietary needs. Crafted to be entirely vegan, gluten-free, oil-free, and yeast-free, it stands out as a nourishing powerhouse. Each substantial slice boasts an impressive 7 grams of protein and 7 grams of fiber, making it an incredibly satisfying and wholesome addition to any meal.
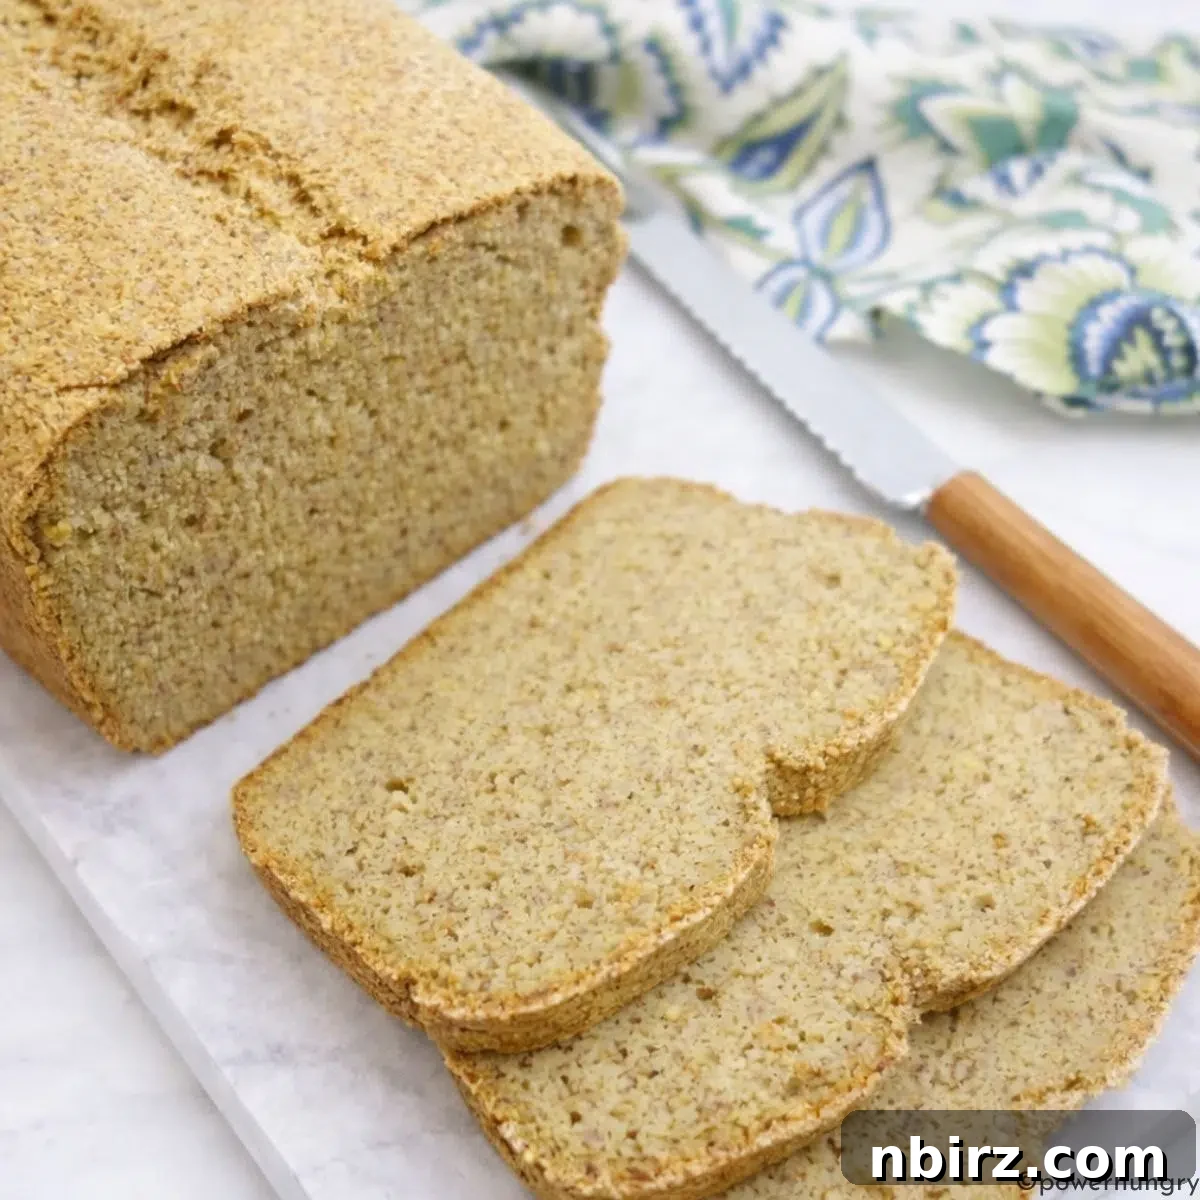
Discover the Power of Yeast-Free Millet & Tofu Sandwich Bread: 7g Protein Per Slice
In a world saturated with gluten-free options that often lack structure or nutritional value, this high-protein millet bread emerges as a game-changer. It’s a wonderfully simple yet incredibly sturdy loaf that consistently delivers a quietly satisfying experience. The bread rises beautifully, forming a crisp, golden-brown crust that encases a firm, yet tender crumb. Its structure is robust, allowing for clean, effortless slicing – a quality often elusive in yeast-free and gluten-free breads.
What makes this bread so special? It’s the harmonious blend of humble, whole-food ingredients. The secret to its impressive protein and fiber content lies in the inclusion of nutrient-dense extra-firm tofu and whole-grain millet flour. Unlike many commercial alternatives, our recipe contains no refined starches, no isolated protein powders, no added oils, and absolutely no artificial sugars. Just five core ingredients, working in synergy to produce a truly nourishing and delicious vegan sandwich bread that you’ll be proud to bake and share.
This versatile loaf toasts to perfection, developing an even deeper flavor and delightful crunch. Its neutral, slightly nutty profile makes it an ideal canvas for both sweet and savory toppings, from creamy avocado and flaky sea salt to rich almond butter and fruit preserves. Once fully cooled, it maintains its integrity beautifully, slicing cleanly and holding up exceptionally well, making it a dependable choice for everyday sandwiches, toast, or alongside your favorite dishes. If your quest has been for a reliable, yeast-free, gluten-free bread offering genuine structure and substance, this recipe is designed to seamlessly integrate into your regular baking routine, proving that healthy can also be incredibly delicious.
Why This High-Protein Millet Bread Will Become Your New Favorite
This bread isn’t just a recipe; it’s a solution for those seeking delicious, nutritious, and allergy-friendly options. Here’s why you’ll quickly fall in love with our High-Protein Millet Bread:
- Exceptional Nutritional Value: Each slice provides a substantial 7 grams of protein and 7 grams of fiber. This makes it incredibly satisfying, helping you feel fuller for longer and supporting digestive health.
- Minimal & Wholesome Ingredients: Made with just 5 simple, core ingredients, you won’t find any obscure additives or hard-to-pronounce components. This commitment to simplicity ensures a cleaner, healthier loaf.
- Dietary Inclusivity: It’s completely vegan (egg-free, dairy-free), gluten-free, and oil-free, catering to a wide range of dietary preferences and restrictions without compromising on taste or texture.
- Yeast-Free Simplicity: Say goodbye to the complexities of working with yeast. This recipe is entirely yeast-free, simplifying the baking process and eliminating waiting times for proofing, making it perfect for novice bakers or those short on time.
- Pure Ingredients, No Fillers: You won’t find any added starches or gums (like xanthan gum) that are common in many gluten-free breads. This reliance on whole ingredients provides a more natural and wholesome experience.
- Protein Powder-Free: The protein boost comes naturally from whole foods like tofu and millet, meaning no protein powder is required. This ensures a clean flavor profile and avoids the sometimes gritty texture of protein-enhanced products.
- Allergy-Friendly: Being nut-free and sugar-free, it’s an excellent choice for individuals with common nut allergies or those monitoring their sugar intake.
- Effortless Preparation: The mixing process is straightforward and quick, making it an accessible recipe even for busy days. Just blend, mix, and bake!
- Remarkable Texture & Flavor: Despite its healthy profile, it bakes up with a crisp crust and a soft, structured interior, offering a neutral, lightly nutty flavor that complements any topping.
- Versatile Use: Sturdy enough for robust sandwiches yet delicate enough for thinly sliced toast, its versatility is unmatched for everyday meals.
Essential Ingredients for Your High-Protein Millet Bread
For precise quantities of each ingredient, please refer to the detailed recipe card at the conclusion of this article. You can easily switch between US Customary (volume) and Metric (weights) measurements for your convenience.
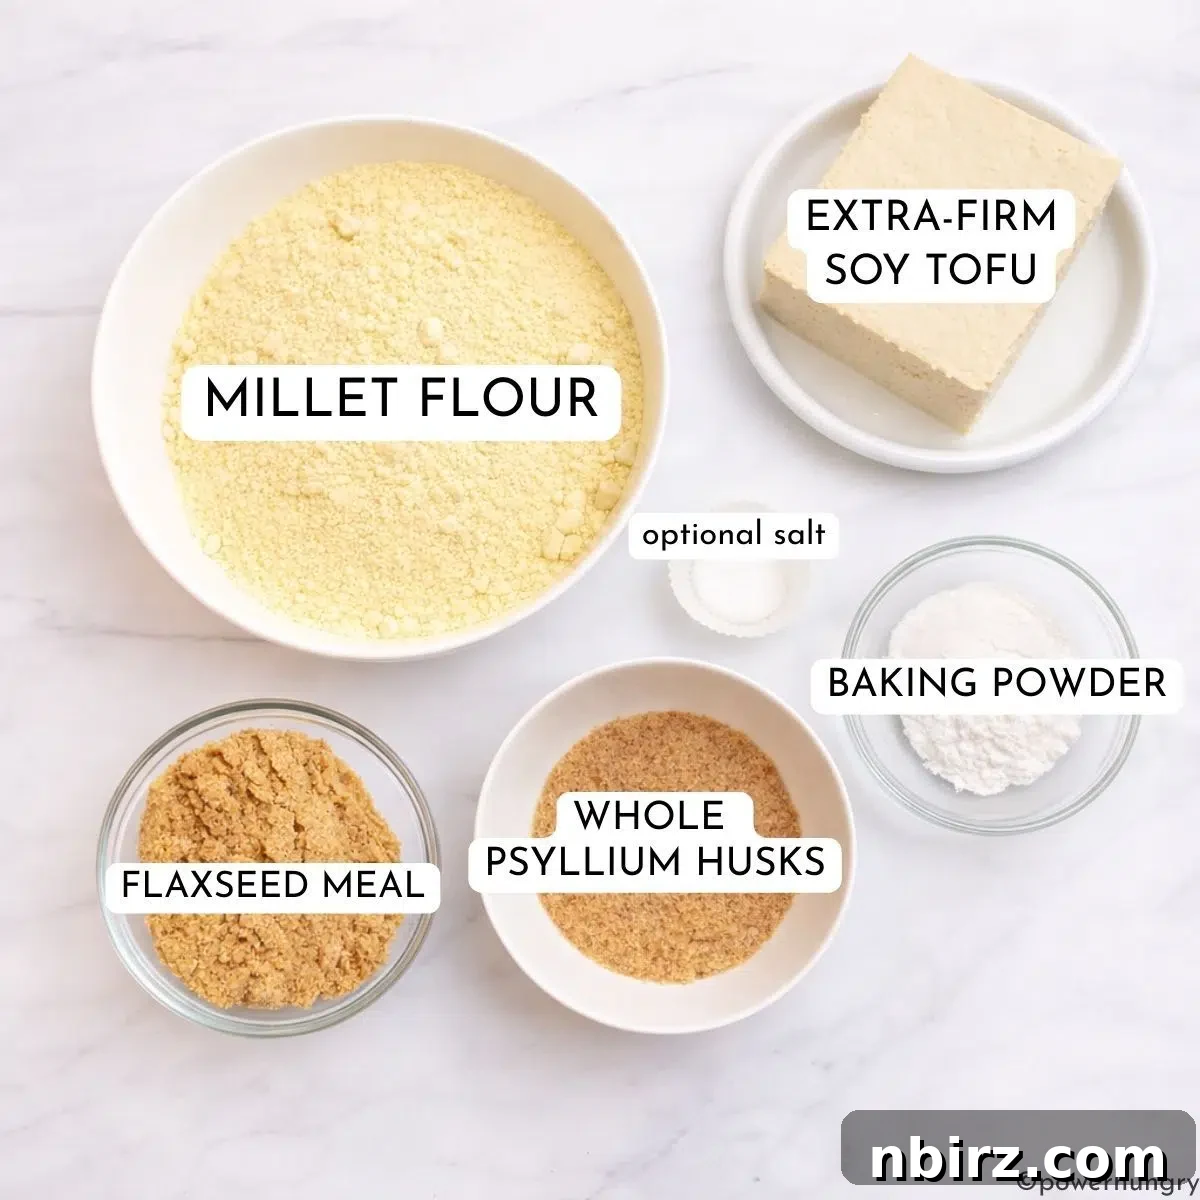
Crafting this exceptional bread relies on a carefully selected blend of wholesome ingredients. Each component plays a crucial role in achieving the desired texture, rise, and nutritional profile:
- Millet Flour: The foundation of our bread. Millet is an ancient, naturally gluten-free grain known for its mild flavor and fine texture. It contributes complex carbohydrates and essential nutrients, forming the bulk of the bread’s structure. Its unique properties are key to the loaf’s density and satisfying chew.
- Extra-Firm Soy Tofu, Drained: The star protein source! Tofu provides a smooth, creamy base when blended, acting as both a binder and a significant source of plant-based protein, crucial for achieving the “high-protein” claim. It also adds moisture and richness, making the bread tender without the need for oils. Ensure it’s extra-firm to maintain the correct moisture balance; avoid silken or soft tofu.
- Whole Psyllium Husks: This fibrous ingredient is non-negotiable for gluten-free baking. Psyllium husks act as a powerful binder and provide structure, mimicking the role of gluten by forming a gel when mixed with liquid. This prevents the bread from crumbling and ensures a stable, sliceable loaf. (Important: Refer to my adjustment notes if you plan to use psyllium powder, as quantities differ).
- Baking Powder: Our leavening agent. As this recipe is yeast-free, baking powder is essential for creating lift and a light, airy texture. Ensure your baking powder is fresh and, if necessary for strict dietary needs, certified gluten-free.
- Flaxseed Meal: Ground flaxseeds contribute healthy omega-3 fatty acids, additional fiber, and act as another binder. When mixed with liquid, flaxseed meal forms a gel, further aiding in the bread’s structure and moisture retention, enhancing its tenderness.
Beyond these core ingredients, you will also need water (filtered tap water works perfectly) to bring the dough together. While optional, a pinch of salt is highly recommended to enhance the overall flavor profile of the bread, balancing the mildness of the millet and tofu.
Expert Tip: Grind Your Own Millet Flour for Optimal Freshness
For the freshest and most economical millet flour, consider grinding your own at home. If you possess a high-speed blender (such as a Vitamix or Blendtec), this process is incredibly simple. Just place dried whole millet seeds into the blender container and blend on high until a very fine, consistent flour is achieved. Grinding your own flour ensures peak freshness, which can subtly improve the flavor and texture of your bread. Please note: standard blenders and food processors are generally not powerful enough to grind millet into the necessary fine flour texture; the hard grains can damage blades or overheat less robust machines.
Step-by-Step Guide: Crafting Your High-Protein Millet Bread
The full, detailed recipe instructions are also available in the convenient recipe card located at the end of this post.
Baking this high-protein millet bread is a rewarding process, made straightforward with these clear steps. Precision and swiftness in certain stages will ensure a perfect loaf every time.
Step One: Preheat Oven & Prepare Baking Pan
Begin by preheating your oven to 375°F (190°C). Proper oven temperature is crucial for a consistent rise. Next, prepare a standard 9×5-inch (22.5 x 12.5 cm) loaf pan. To guarantee a clean release and prevent any sticking, line the pan with parchment paper. This creates a non-stick barrier, especially important for oil-free baking. If you’re not strictly adhering to an oil-free diet, you may lightly spray the exposed sides of the pan with a nonstick cooking spray or grease them with a small amount of oil for added peace of mind.
Step Two: Thoroughly Mix the Dry Ingredients
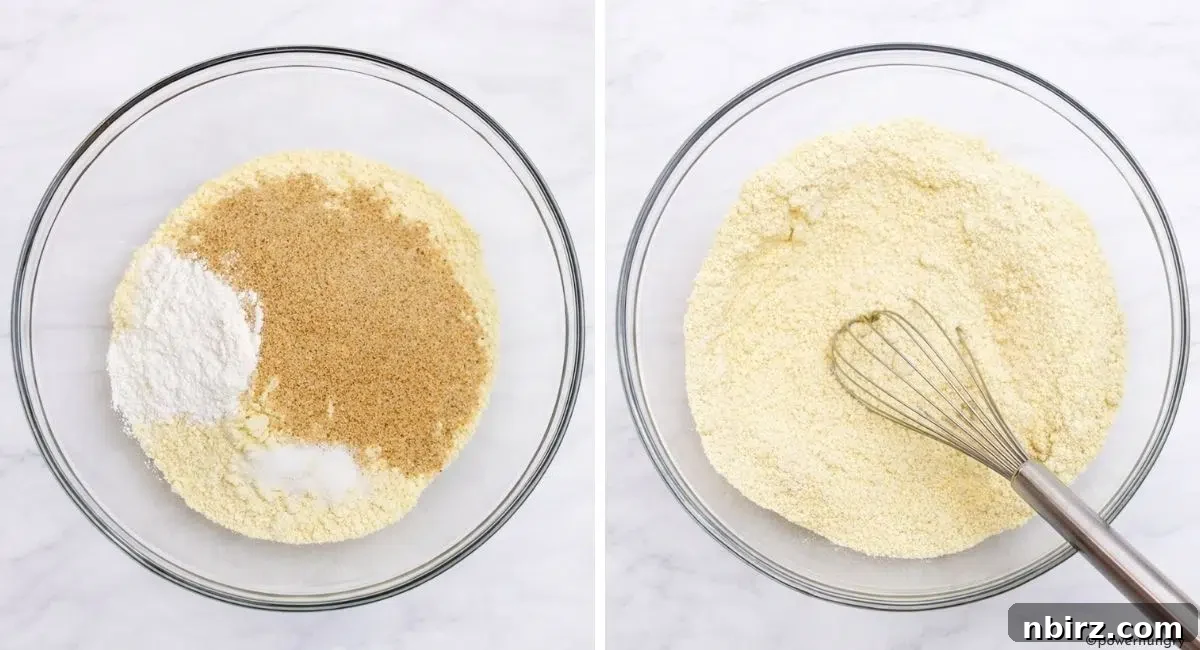
In a spacious mixing bowl, combine the millet flour, flaxseed meal, whole psyllium husks, baking powder, and the optional salt. Using a whisk, thoroughly blend these dry ingredients together. This step is crucial for ensuring that the leavening agents and binders are evenly distributed throughout the flour, which will lead to a consistent texture and rise in your finished bread.
Step Three: Create the Smooth Tofu & Water Mixture
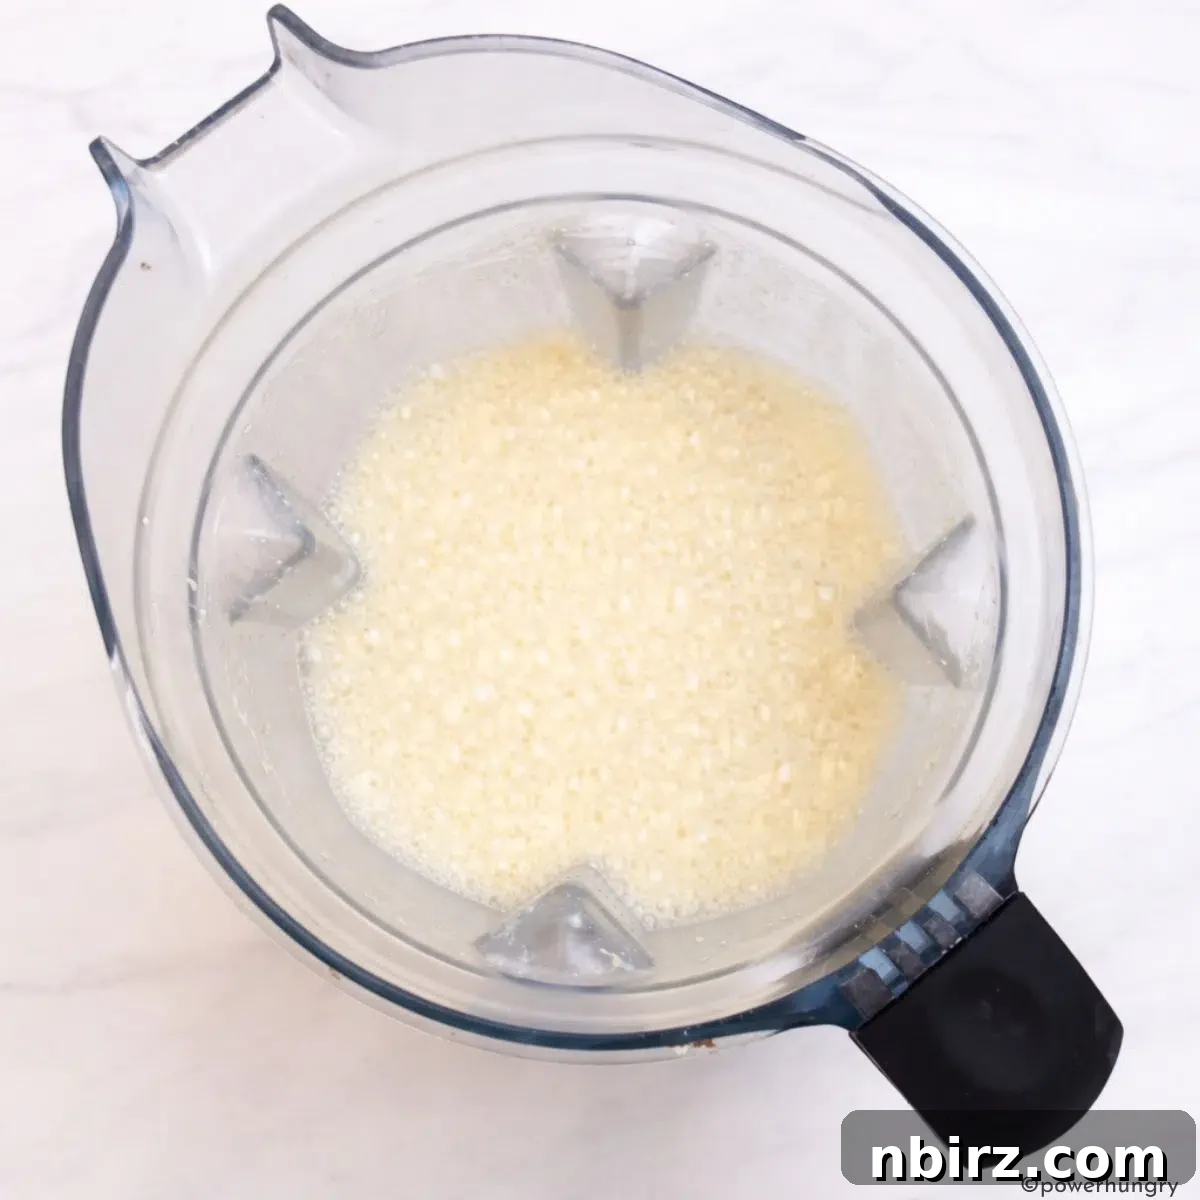
In a blender, combine the drained extra-firm tofu with the specified amount of water. Blend on high speed until the mixture is exceptionally smooth and creamy. There should be no visible lumps of tofu. This smooth consistency is vital for integrating seamlessly with the dry ingredients and creating a uniform bread dough.
Step Four: Combine Wet and Dry Ingredients to Form Dough
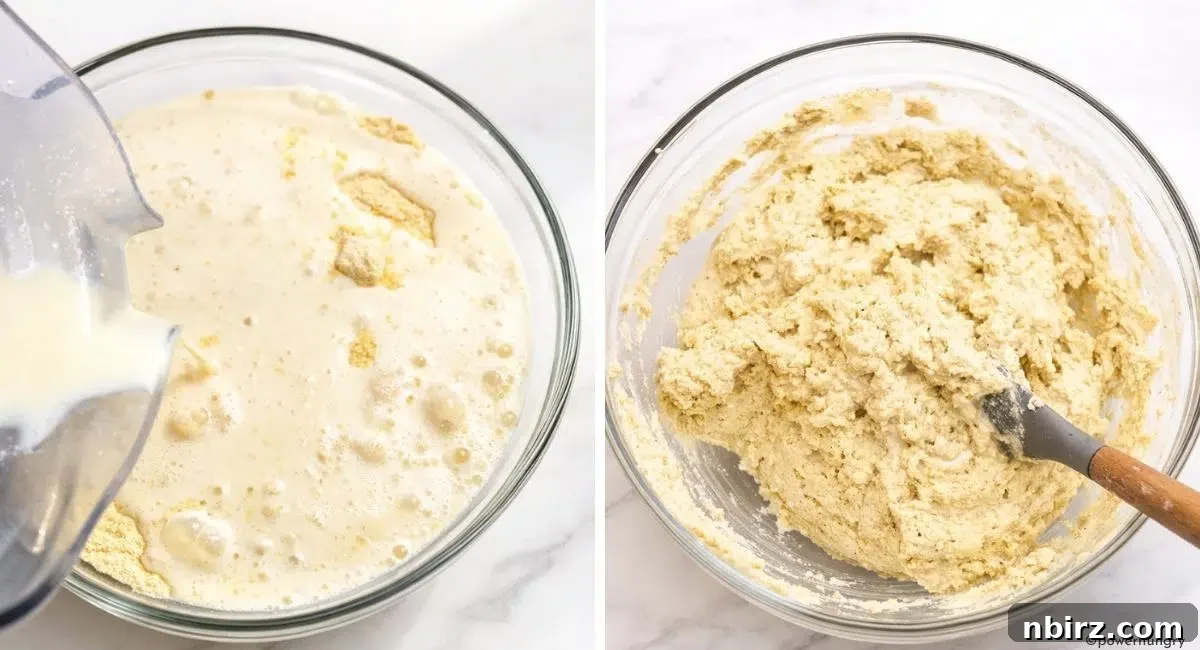
Pour the blended tofu mixture directly into the bowl containing your dry ingredients. Using a sturdy rubber spatula or a large wooden spoon, begin to stir and mix. Continue blending until all the dry ingredients are fully incorporated into the wet mixture, forming a thick, uniform dough. Ensure there are no pockets of dry flour remaining. The dough will be quite thick and somewhat sticky.
Step Five: Transfer Dough to Pan and Prepare for Baking
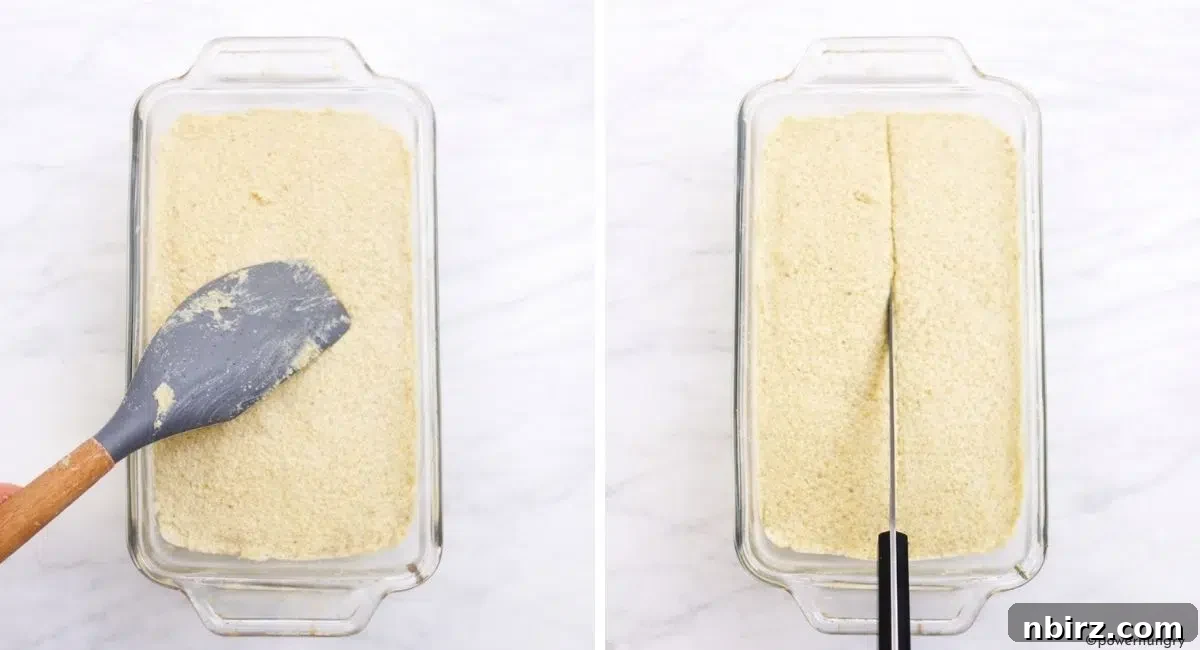
This is a time-sensitive step! Work quickly once the wet and dry ingredients are combined, as the baking powder begins to react immediately. Transfer the thick dough into your prepared baking pan. Use your spoon or spatula to spread the dough evenly across the pan and gently smooth the top surface. For an enhanced aesthetic and to help guide the bread’s rise, use a sharp knife to make a single, lengthwise slash about 1/2-inch (1 cm) deep down the center of the dough. This intentional cut helps control where the bread expands, resulting in a more uniform and attractive loaf.
Step Six: Bake to Golden Perfection
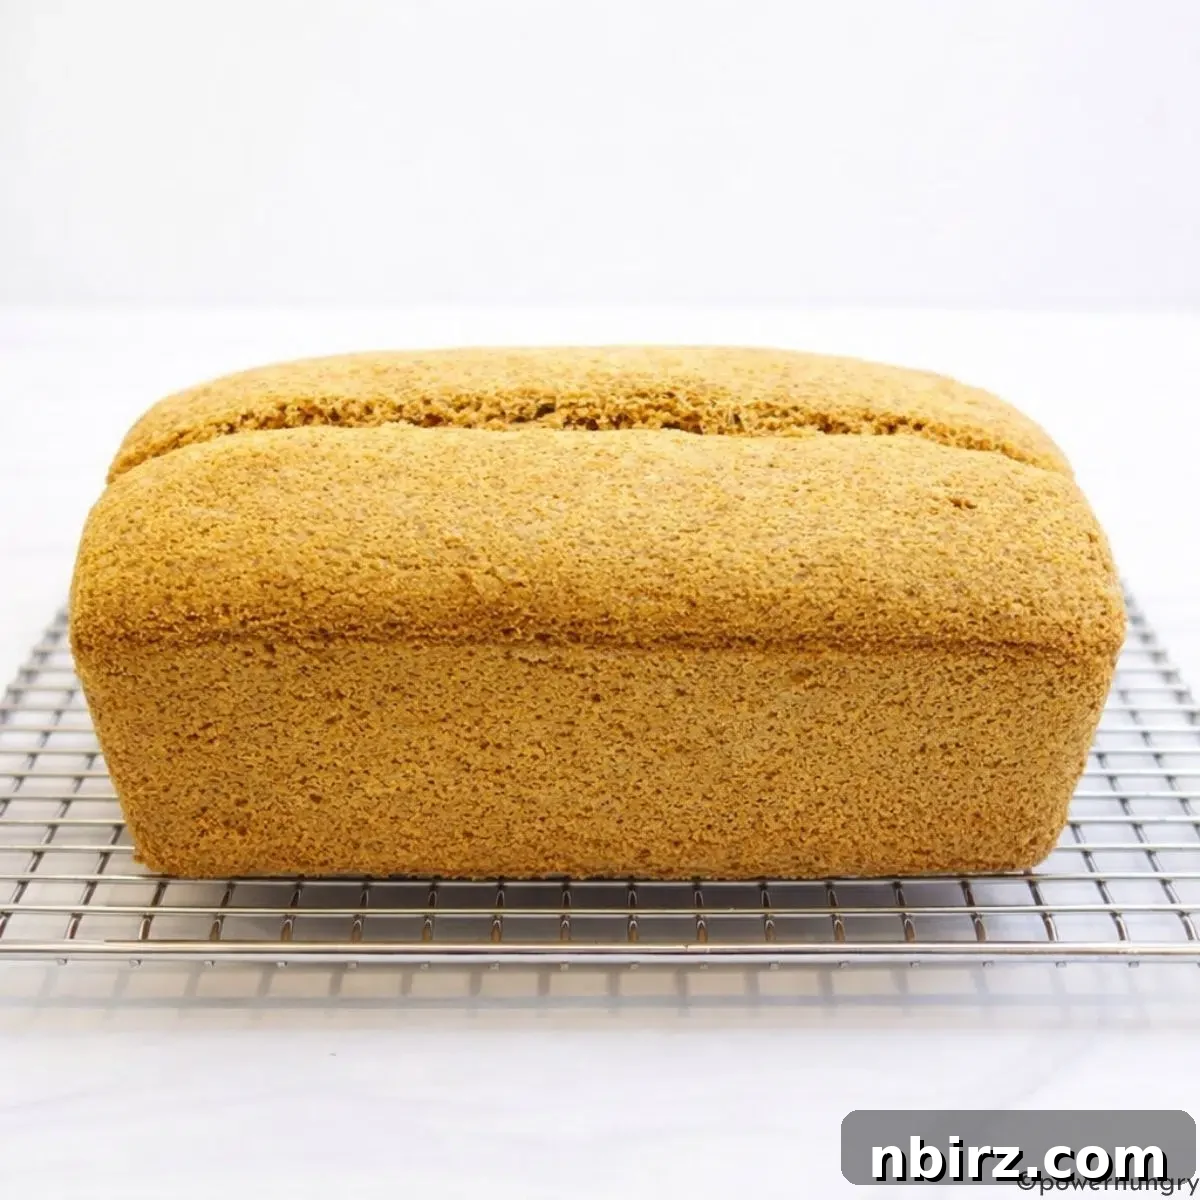
Immediately place the prepared millet bread into the preheated oven. Bake for approximately 80 to 90 minutes. The baking time can vary slightly depending on your oven, so keep an eye out for visual cues: the bread should have risen significantly, forming a distinctive peak; the surface will be beautifully golden brown and exhibit a crack down the center where you made the slash. To confirm doneness, insert a wooden skewer or toothpick near the center of the loaf. It should come out completely clean, indicating the bread is fully baked through. If it’s still moist, continue baking for additional 5-10 minute intervals.
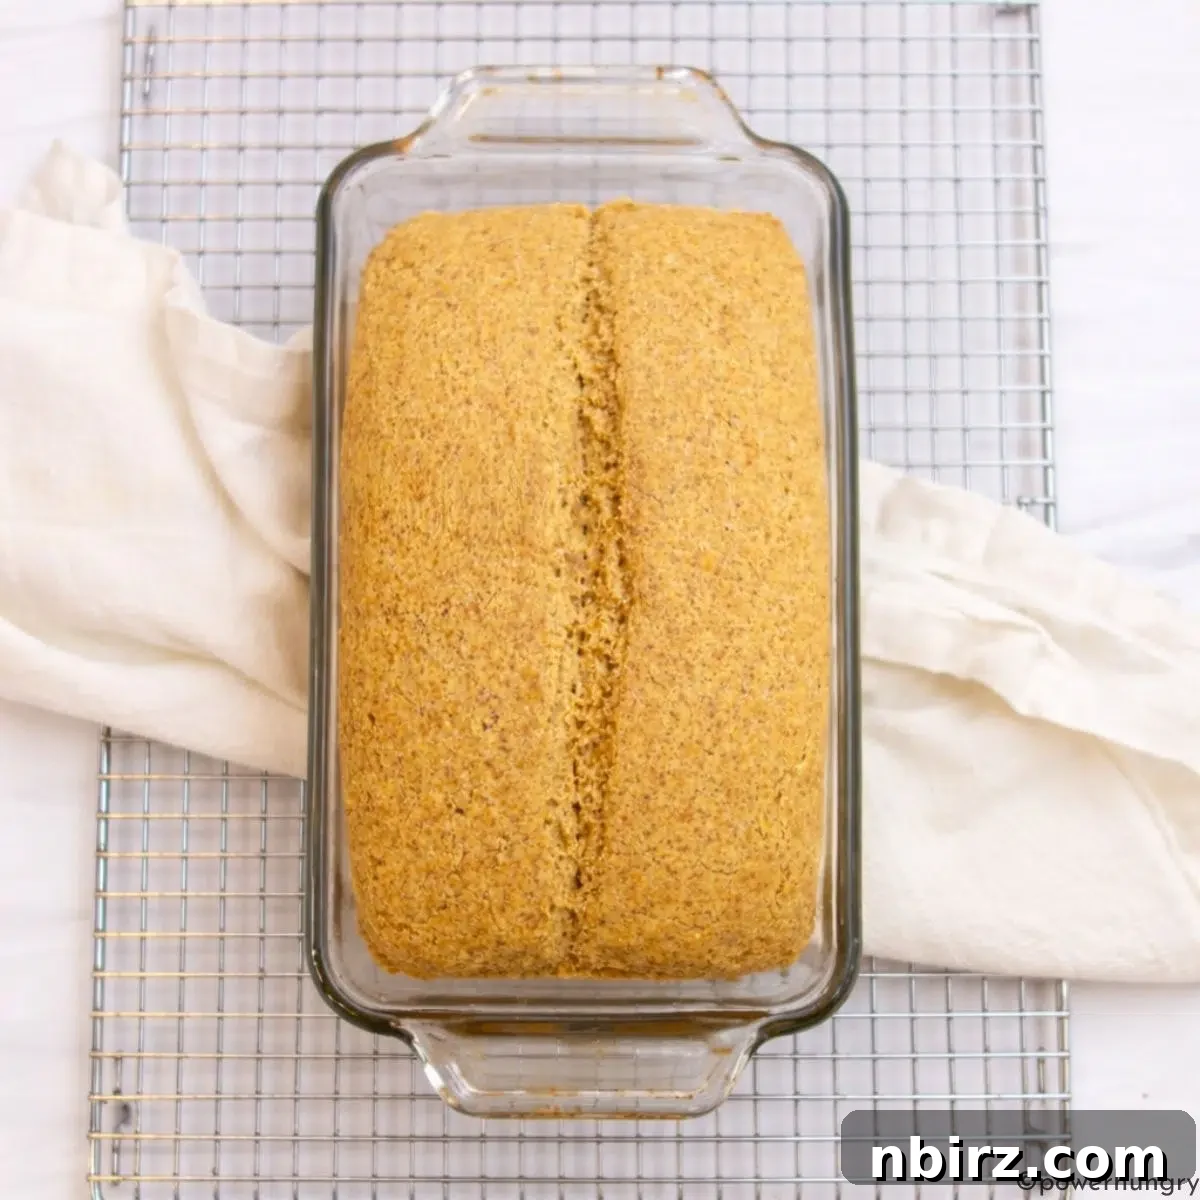
Step Seven: Cool Completely Before Slicing
Once baked, remove the loaf from the oven. Allow the bread to cool in its pan, resting on a cooling rack, for precisely 15 minutes. This initial cooling period allows the internal structure of the bread to set further. After 15 minutes, carefully remove the bread from the pan and transfer the entire loaf to the cooling rack to cool completely. This final cooling stage is critical. Do not attempt to slice the bread while it’s still warm, as it can be gummy or crumble. Once it has reached room temperature, you can confidently cut the bread into slices of your desired thickness. The inherent firmness of this bread means it can be sliced thinly for delicate sandwiches or thicker for hearty toast, without fear of it falling apart.
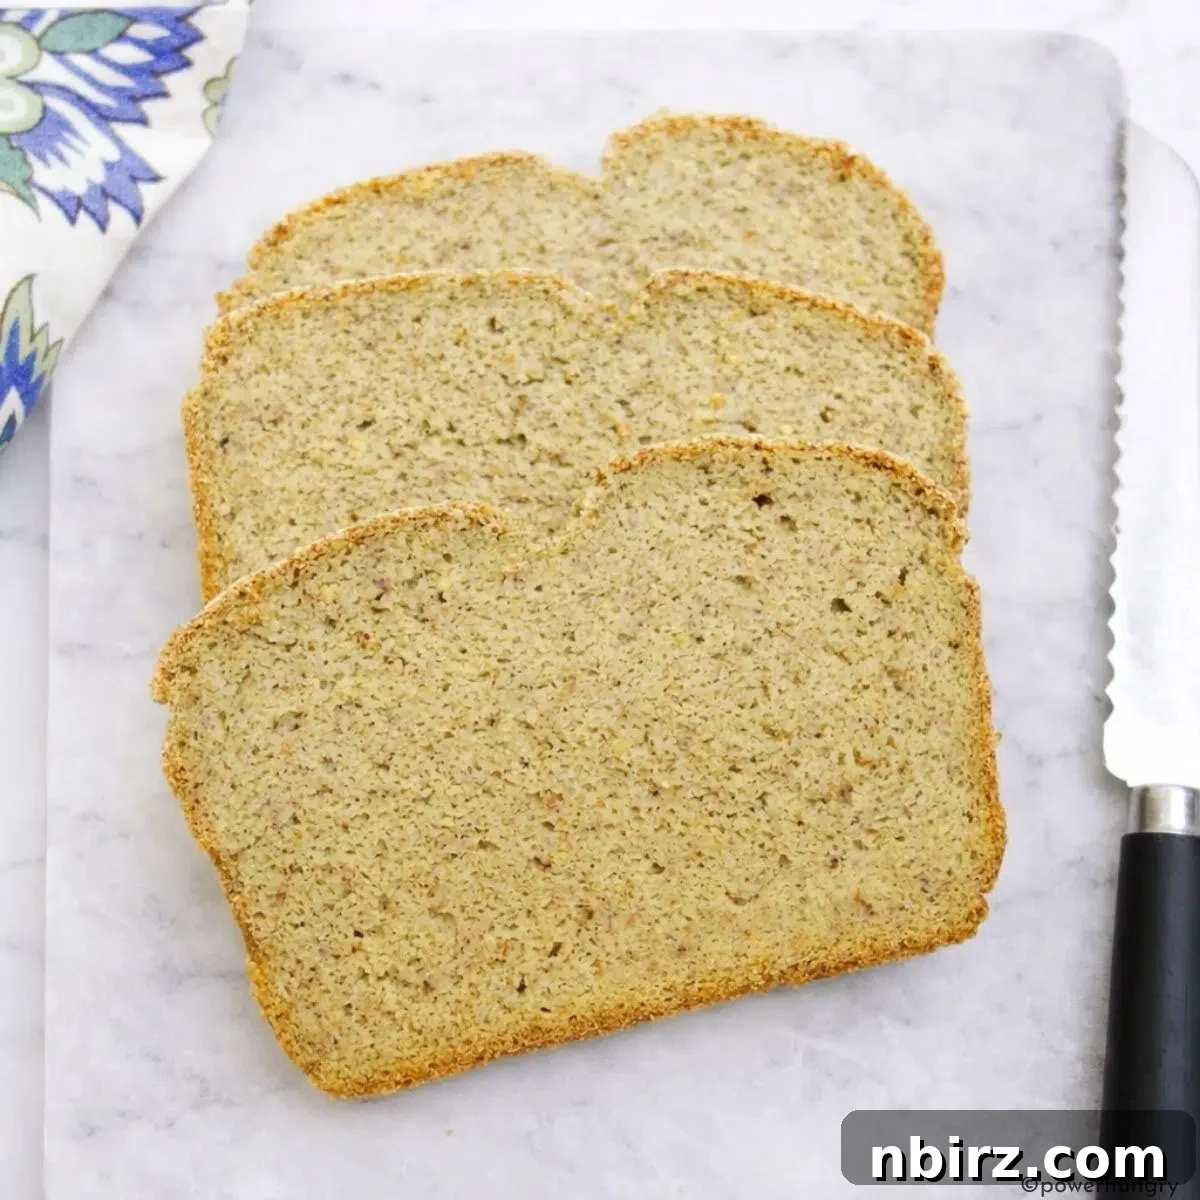
Unveiling the Perfect Texture & Flavor Profile
The beauty of this high-protein millet bread extends far beyond its impressive nutritional stats. Its texture is a harmonious balance, offering a notably crisp crust that gives way to a soft interior. Within, you’ll find a tender, yet remarkably structured crumb that defies the common fragility of many gluten-free breads. This robust internal structure means you can confidently slice it thick for hearty, open-faced sandwiches, or cut it into delicate, thin slices without any worry of crumbling or falling apart.
The flavor profile is thoughtfully designed to be neutral and versatile. While millet often carries a faint, appealing corn-like or slightly grassy note, this characteristic is expertly tempered by the creamy mildness of the tofu. The result is a beautifully balanced, lightly nutty taste that acts as the perfect foundation for an endless array of toppings and pairings. It’s a flavor that doesn’t overpower but instead enhances, making it equally delightful with sweet spreads like fruit preserves or savory additions like hummus and fresh vegetables.
With its generous 7 grams of protein and 7 grams of fiber per slice, this isn’t merely a loaf of bread; it’s a truly substantial and sustaining culinary experience. Each bite delivers satisfying substance, ensuring you feel nourished and energized, making it an ideal choice for a wholesome breakfast, a fulfilling lunch, or a hearty snack.
Creative Ways to Serve Your Millet Protein Bread
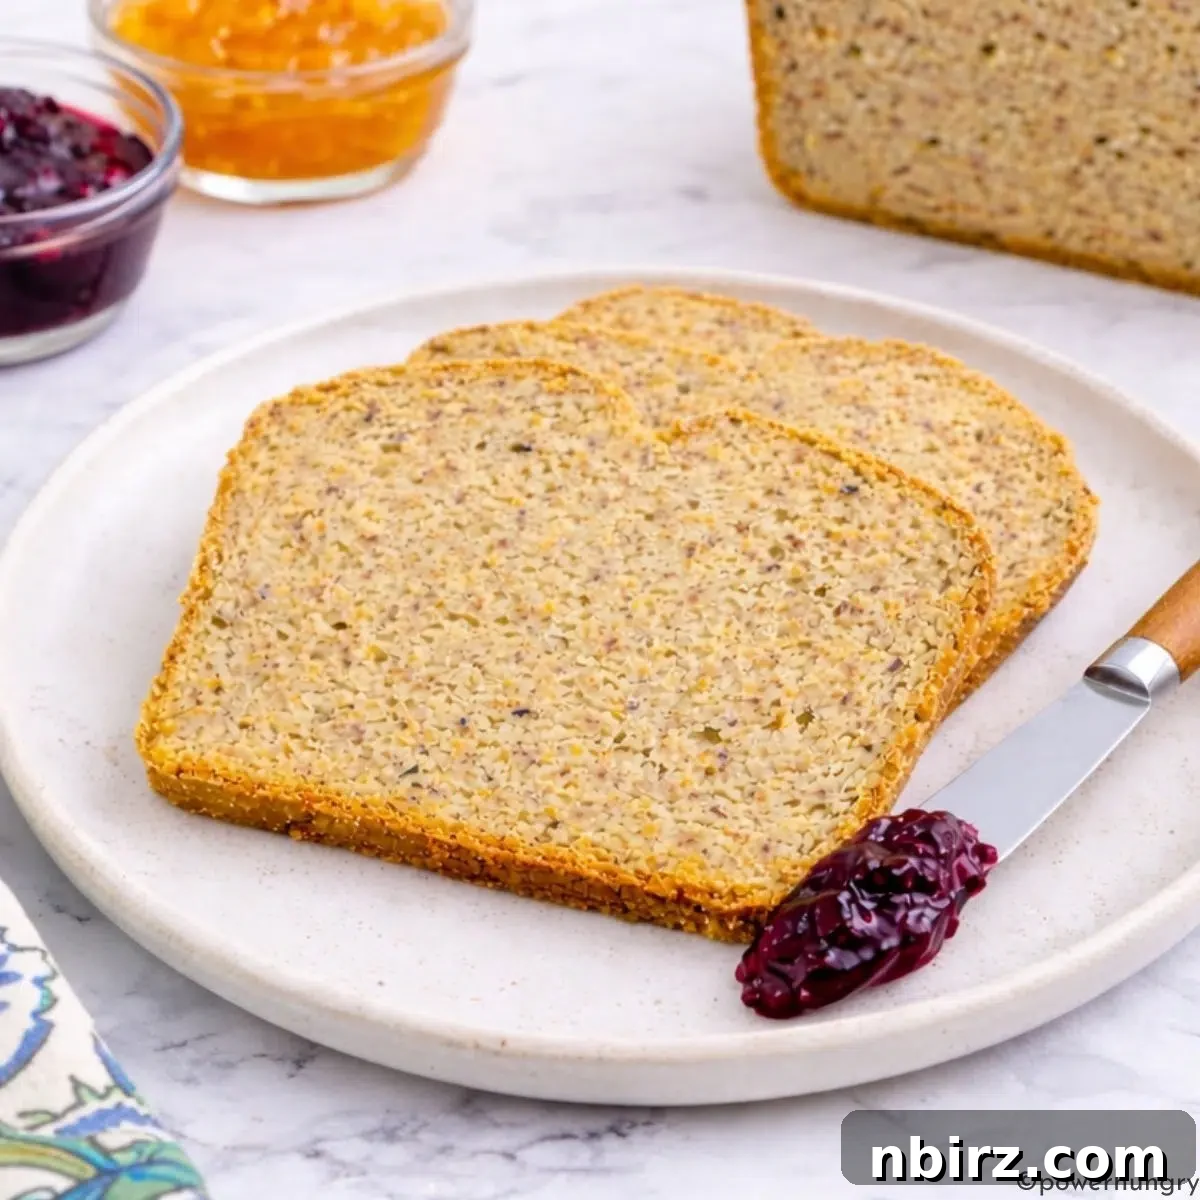
The inherent sturdiness and firm texture of this high-protein millet bread make it an incredibly versatile base for countless meal ideas. Its structural integrity ensures it can hold up to various toppings and preparations, whether you prefer thick, robust slices or delicate, thin cuts.
Here are some delicious ways to enjoy your freshly baked millet protein bread:
- Classic Toast with Nut/Seed Butter: Toast a slice to golden perfection and spread generously with your favorite almond butter, cashew butter, or a sunflower seed butter for a protein-packed breakfast or snack. Add sliced banana or a drizzle of maple syrup for extra indulgence.
- Avocado Toast Elevated: Top a toasted slice with creamy mashed avocado, a sprinkle of flaky sea salt, black pepper, and a dash of red pepper flakes for a vibrant and healthy meal. A squeeze of lime juice enhances the flavors beautifully.
- Savory Sandwich Base: Its firm crumb makes it ideal for robust sandwiches. Pile high with your favorite hummus, thinly sliced cucumber, roasted bell peppers, fresh spinach, and sun-dried tomatoes for a wholesome and satisfying lunch.
- Sweet & Simple: Enjoy it toasted with a thin layer of vegan cream cheese and your favorite berry jam or fruit preserves for a delightful sweet treat.
- Delectable Toast Bites/Croutons: Cut the bread into small cubes, toss with a touch of olive oil (if not strictly oil-free) and your favorite herbs (garlic powder, dried oregano), then bake or air fry until crispy. These savory bites are perfect for topping salads, soups, or as a stand-alone snack.
- Mini Pizzas: Use slices as a personal pizza base! Spread with tomato sauce, vegan cheese, and your choice of vegetable toppings, then bake until heated through and cheese is melted and bubbly.
- Vegan French Toast: While firm, it can also be used for a unique twist on French toast. Dip slices in a spiced plant-milk batter and pan-fry for a hearty breakfast.
Because of its subtly nutty and wonderfully neutral flavor, this high-protein millet bread truly excels in both sweet and savory applications, making it an incredibly versatile staple in any kitchen.
Optimal Storage for Your High-Protein Millet Bread
Proper storage is key to maintaining the freshness and extending the shelf life of your homemade high-protein millet bread. Due to its significant moisture content, it requires specific storage conditions to prevent spoilage and maintain its excellent texture:
- Room Temperature: For immediate consumption, the cooled high-protein bread can be stored in an airtight container at cool room temperature for up to 1 day. This is ideal for enjoying its freshest qualities soon after baking.
- Refrigerator: To prolong its freshness beyond a day, transfer the bread to an airtight container and store it in the refrigerator. It will keep well for up to 1 week. Refrigeration is essential due to the bread’s high moisture content, which can lead to faster spoilage at room temperature.
- Freezer: For long-term storage, freezing is an excellent option. Once completely cooled, slice the bread and store the slices in a freezer-safe bag or airtight container. It can be kept in the freezer for up to six months. Freezing in individual slices allows you to thaw only what you need, reducing waste and ensuring fresh bread whenever you crave it. To thaw, simply take out the desired number of slices and let them come to room temperature, or toast them directly from frozen.
Navigating Ingredient Substitutions and Essential Tips
While this recipe is designed with specific ingredients to achieve its unique high-protein, gluten-free, and yeast-free profile, here’s what you need to know about potential substitutions and key considerations:
- Can I use a different gluten-free flour instead of millet flour?
I strongly advise against substituting the millet flour in this recipe. The precise ratio of wet to dry ingredients and the overall structure are meticulously formulated for the specific properties of millet flour. Other gluten-free flours or blends possess different absorption rates and structural characteristics, which would undoubtedly alter the final texture and stability of the bread, likely leading to unsatisfactory results. If you are exploring alternatives or other types of gluten-free breads, I have a variety of additional vegan and gluten-free bread recipes available on my site – feel free to search for “bread” or “protein bread” for other proven options tailored to different flours.
- Can I use chia seeds instead of flaxseed meal?
Yes, finely ground chia seeds (chia meal) can be substituted for flaxseed meal in an equal amount. Both flax and chia form a gel when mixed with liquid, effectively acting as binders and contributing healthy fats and fiber. Ensure the chia seeds are ground to a meal for best results.
- Can I omit the psyllium husks?
No, the psyllium husks are absolutely essential and cannot be omitted. In gluten-free and yeast-free baking, psyllium husks provide the critical structure and binding properties that gluten would typically offer. Without them, the loaf would likely not rise correctly and would almost certainly collapse or be very crumbly after baking, lacking the desired firm and sliceable texture.
- Can I use soy-free tofu?
Possibly, but I can only guarantee results with extra-firm soy tofu, as this is what the recipe has been rigorously tested with. Tofu alternatives (like chickpea tofu or other legume-based ‘tofus’) can vary significantly in moisture content, protein structure, and binding capabilities. If you choose to experiment with a soy-free alternative, ensure it is extra-firm and understand that the outcome may differ.
Frequently Asked Questions (FAQ) & Troubleshooting
Even with the most straightforward recipes, questions and minor challenges can arise. Here are answers to common inquiries and troubleshooting tips for your high-protein millet bread:
Why is my millet bread gooey in the middle?
If your bread turns out underbaked or gooey in the center, it’s a common issue in dense, high-moisture loaves. Several factors could be at play:
- Insufficient Baking Time: This bread is naturally dense and holds a significant amount of moisture from the tofu. It often requires the full baking time, and sometimes even a little longer, than initially suggested. Continue baking until a skewer or toothpick inserted near the center of the loaf comes out completely clean. Don’t rely solely on the timer; visual and internal tests are key.
- Inaccurate Ingredient Measurements: Precision is paramount in gluten-free baking. Even slight deviations in ingredient quantities, particularly with flours and binders like psyllium, can critically affect the dough’s hydration and the bread’s final structure. For the most consistent and best results, I highly recommend weighing your flour and other dry ingredients using a kitchen scale rather than relying solely on volume measurements.
- Oven Temperature Discrepancy: An oven that runs too hot can cause the exterior of the loaf to bake and brown too quickly, creating a crust while the interior remains undercooked. Conversely, an oven that runs too cool might lead to a dense, soggy loaf. Using an independent oven thermometer is an inexpensive way to verify your oven’s accuracy and ensure it’s heating to the correct temperature.
- Expired Baking Powder: Baking powder is a leavening agent that loses its potency over time. Old or inactive baking powder will not provide sufficient lift, resulting in a dense, heavy loaf that struggles to cook through evenly in the center. Always check the expiration date of your baking powder.
- Delayed Baking After Mixing: The baking powder begins its chemical reaction (creating carbon dioxide bubbles for lift) as soon as it comes into contact with the wet ingredients. If the batter sits too long before being transferred to the oven, these bubbles can dissipate, leading to a diminished rise and a denser interior. Ensure your oven is fully preheated and your loaf pan is ready before you combine the wet and dry ingredients, then transfer the dough to the oven as promptly as possible.
When your high-protein millet bread is perfectly baked and has cooled completely to room temperature, it should feel firm to the touch and slice cleanly and easily with a sharp knife, without any gumminess or sticking.
Can I double the recipe?
While theoretically possible, doubling the recipe can be tricky due to the increased volume of dough and the precise timing required for the baking powder’s activation. If you choose to double, use two separate loaf pans, ensure even mixing, and be mindful that baking times might need slight adjustment.
Why is my crust too hard?
A crust that’s excessively hard can sometimes be due to overbaking or too high an oven temperature. Ensure your oven temperature is accurate (using an oven thermometer). You can also try tenting the bread loosely with aluminum foil for the last 15-20 minutes of baking if the crust is browning too quickly.
How can I get a taller loaf?
The height of the loaf is primarily determined by the leavening (baking powder) and the structural support from psyllium. Ensure your baking powder is fresh and active, and that you are using extra-firm tofu (which has less excess moisture to weigh down the dough). Working quickly after mixing also helps capture the maximum rise from the baking powder.
Exciting Flavor Variations for Your Millet Bread
One of the joys of this high-protein millet bread is its neutral flavor base, which makes it incredibly adaptable to a myriad of flavor enhancements. You can easily transform this versatile loaf to suit your mood or meal with a few simple additions:
- Herbs & Savory Seasonings: For a delightful savory loaf, stir in 1 to 2 tablespoons of dried herbs such as classic Italian herbs, herbes de Provence, or dried rosemary. Alternatively, incorporate 2 to 3 teaspoons of ground spices like earthy cumin, aromatic curry powder, pungent garlic powder, or savory onion powder directly into the dry ingredients before mixing the dough.
- Subtle Sweeteners: If you prefer a touch of sweetness, incorporate 3 to 5 tablespoons of your preferred unrefined sweetener. Great options include coconut sugar, maple syrup, agave nectar, or date sugar. If you opt for a liquid sweetener (maple syrup or agave), remember to reduce the amount of water in the recipe by the same quantity to maintain the correct dough consistency.
- Warm Aromatic Spices: For a lightly sweet and fragrant loaf, especially wonderful for breakfast or with coffee, add 1 to 3 teaspoons total of warm spices. Consider cinnamon on its own, a pumpkin pie spice blend, or a custom mix of cinnamon, cardamom, nutmeg, and allspice. These spices complement the mildness of millet beautifully.
- Crunchy Seeds & Nuts: Add texture and additional nutrients by folding chopped nuts or seeds directly into the batter before transferring it to the pan. Good choices include walnuts, sunflower seeds, hemp seeds, sesame seeds, almonds, or pecans. For a decorative touch and extra crunch, you can also sprinkle a handful of these seeds or nuts over the top of the unbaked loaf, gently pressing them into the surface, before it goes into the oven.
Explore More Wholesome Bread Recipes
- 100% Millet Sandwich Bread (Vegan, Gluten-free, No Yeast)
- 3 Ingredient Millet Flax Bread
- Quinoa Flour Almond Flour Soda Bread (Vegan, Oil-free, GF)
- Vegan Grain-Free Pumpkin Bread (Oil-free)
- 100% Millet Pumpkin Bread (V, GF, Oil-Free)
High-Protein Millet Bread
Equipment
-
1 9×5 inch loaf pan
Ingredients
- 3 1/2 cups millet Flour
- 1/2 cup flaxseed meal
- 1/3 cup whole psyllium husks, (see notes if you have psyllium powder)
- 4 teaspoons baking powder, (certified GF, as needed)
- 14 ounces extra-firm tofu, drained, but not pressed
- 2 cups water, (I use filtered tap water)
- Optional: 3/4 teaspoon salt
Instructions
-
Preheat the oven to 375F (190C). Prepare a 9×5-inch (22.5 x 12.5 cm) loaf pan by lining with parchment paper (to prevent the bread from sticking to the pan/ loaf tin). If you do not need the bread to be 100% oil-free, you can spray (with nonstick cooking spray) or grease/oil the sides of the pan.
-
Whisk the millet flour, flaxseed meal, whole psyllium husks, baking powder and optional salt in a large mixing bowl until blended.
-
Blend the drained extra-firm tofu with water until completely smooth and creamy.
-
Add the blended tofu mixture to the bowl of dry ingredients. Use a rubber spatula or large wooden spoon to stir and blend with a spatula until completely combined into a thick dough.
-
Working quickly (you want to get the bread into the oven as soon as possible), transfer the dough to the prepared baking pan. Use a spoon or spatula to spread the dough evenly and smooth the top. Using a sharp knife, make a lengthwise slash through the dough (at least 1/2-inch/1 cm deep).
-
Bake the millet bread in the preheated oven for approximately 80 to 90 minutes until risen (it will have a peak), the surface of the bread is golden brown and cracked down the center, and a skewer inserted near the center of the bread comes out clean.
-
Let the bread cool, in the pan, on a cooling rack for 15 minutes. After 15 minutes, remove the bread from the pan and cool the loaf completely on a cooling rack. Once completely cool, cut the bread into slices. The bread is very firm, which means it can be cut into thin or thick slices.
Notes
Millet Flour Options: Millet flour can be purchased, or ground at home from whole millet grain. Use a high-speed blender to grind the millet into a very fine flour.
Psyllium Powder vs. Whole Psyllium Husks: I use whole psyllium husks to make this bread. I have not tested it with psyllium powder, but it should work in place of the whole psyllium. Use the same weight of psyllium powder (27 grams) as whole husks, which is roughly 5 and 1/2 teaspoons.
Tofu Tip: Be sure to use extra-firm tofu for the recipe (not firm, or silken).
Nutrition
Like this recipe? Rate and comment below!