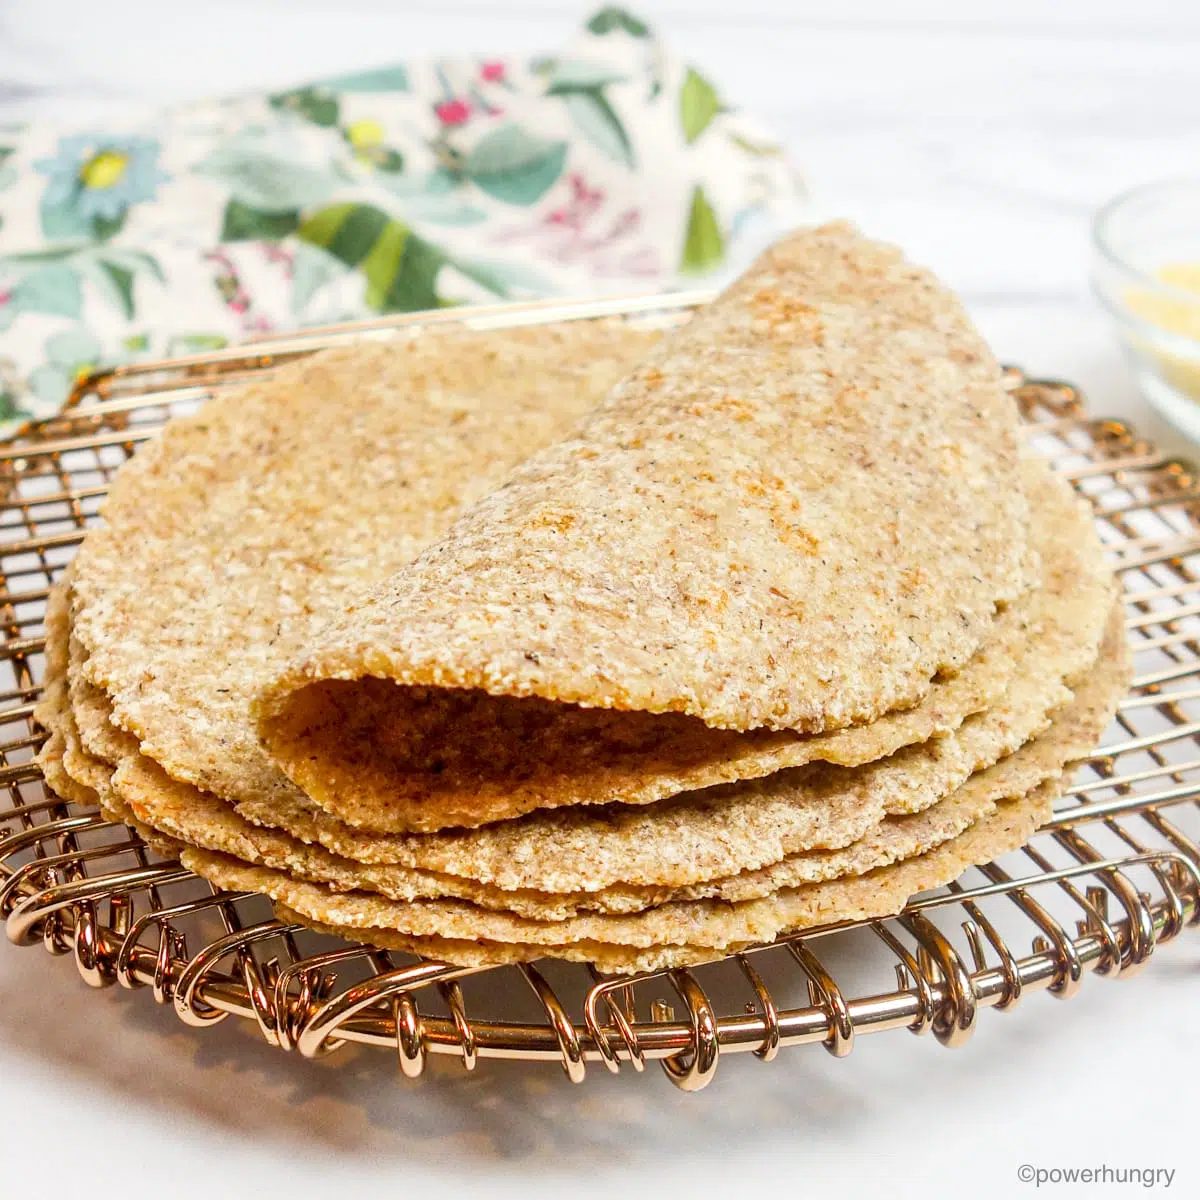
Straightforward millet tortillas are a vegan, oil-free, and gluten-free alternative to traditional corn or wheat tortillas!Made with 2 ingredients, they have a wholesome texture and faint corn flavor that works for all of your tortillas needs.
My love of millet grows with each new recipe, and these straightforward Millet Tortillas are no exception. They are satisfying with everything, and with the addition of some whole psyllium husks to hold them together, they are also flexible, too.
My hope is that i can convince you, too, of the wonders of millet.
Millet is versatile, inexpensive, mild in flavor, and tasty in so many recipes. It is a low-glycemic food (= no extreme spikes in blood sugar levels after eating it), plus rich in dietary fiber (both soluble and insoluble fiber = great for digestive health). A total hero ingredient!
Get ready to love it in these straightforward tortillas.
Recipe Benefits
These wholesome tortillas are nourishing, satisfying, and all of the following, too:
- Vegan (no eggs, no dairy)
- Oil-free
- Gluten-free
- Made with 2 ingredients (plus water and optional salt)
- Frugal
- Sugar-free
- No special equipment needed
- No tortilla-making experience required!
Ingredients for Millet Tortillas
The exact amounts of each ingredient are indicated in the recipe card at the end of the post.Toggle betweenUS Customary(volume) andMetric(weights) for preferred measurement option.
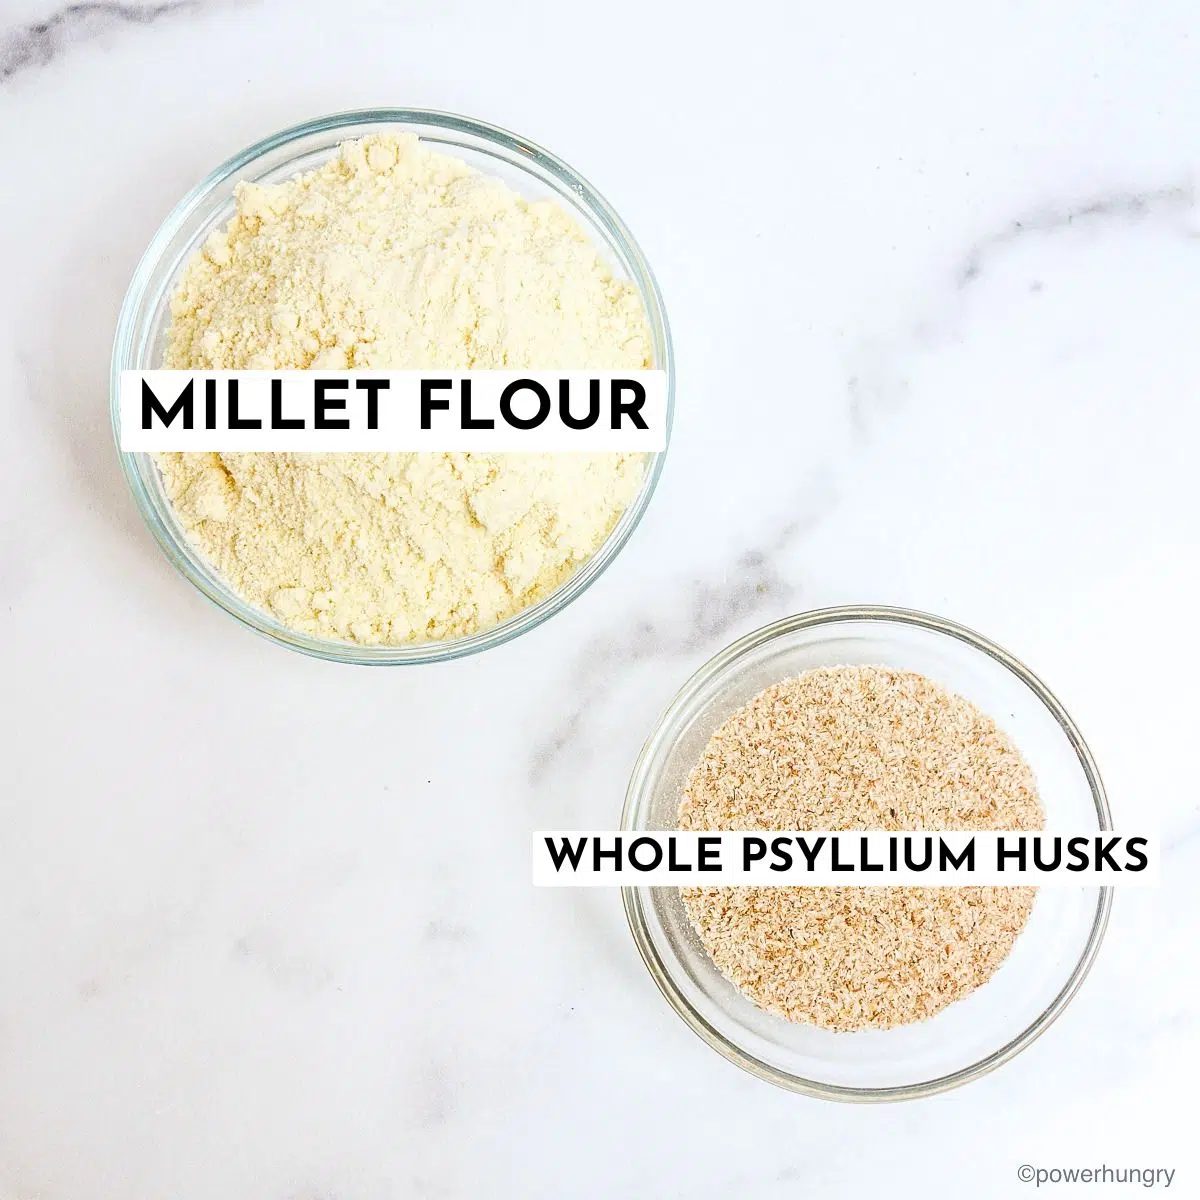
Millet flour and whole psyllium husks are the only two ingredients, besides tap water, needed to make the tortillas. Salt can be added (I like to add a small amount), but it is not required.
Recipe Tip: Grind Your Own Flour
If you have ahigh-speed blender, or a small electric coffee grinder, you can grind your own flour from wholemilletin little time.
High speed blenders will turnmilletintomilletflour in about a minute. If using a coffee grinder, you will need to grind about 1/4 cup at a time (it goes quickly). Place any extra flour in an airtight bag or container and freeze until next time.
Unfortunately, food processors do not work for grinding wholemilletinto fine flour (I’ve tried, and tried again). The tinymilletgrains are hard (and tenacious!), making it difficult to get anything finer than a coarse meal after 10 minutes of grinding.
How to Make Millet Tortillas
Note that the complete instructions are also in the recipe card below.
Step 1: Mix the Dough
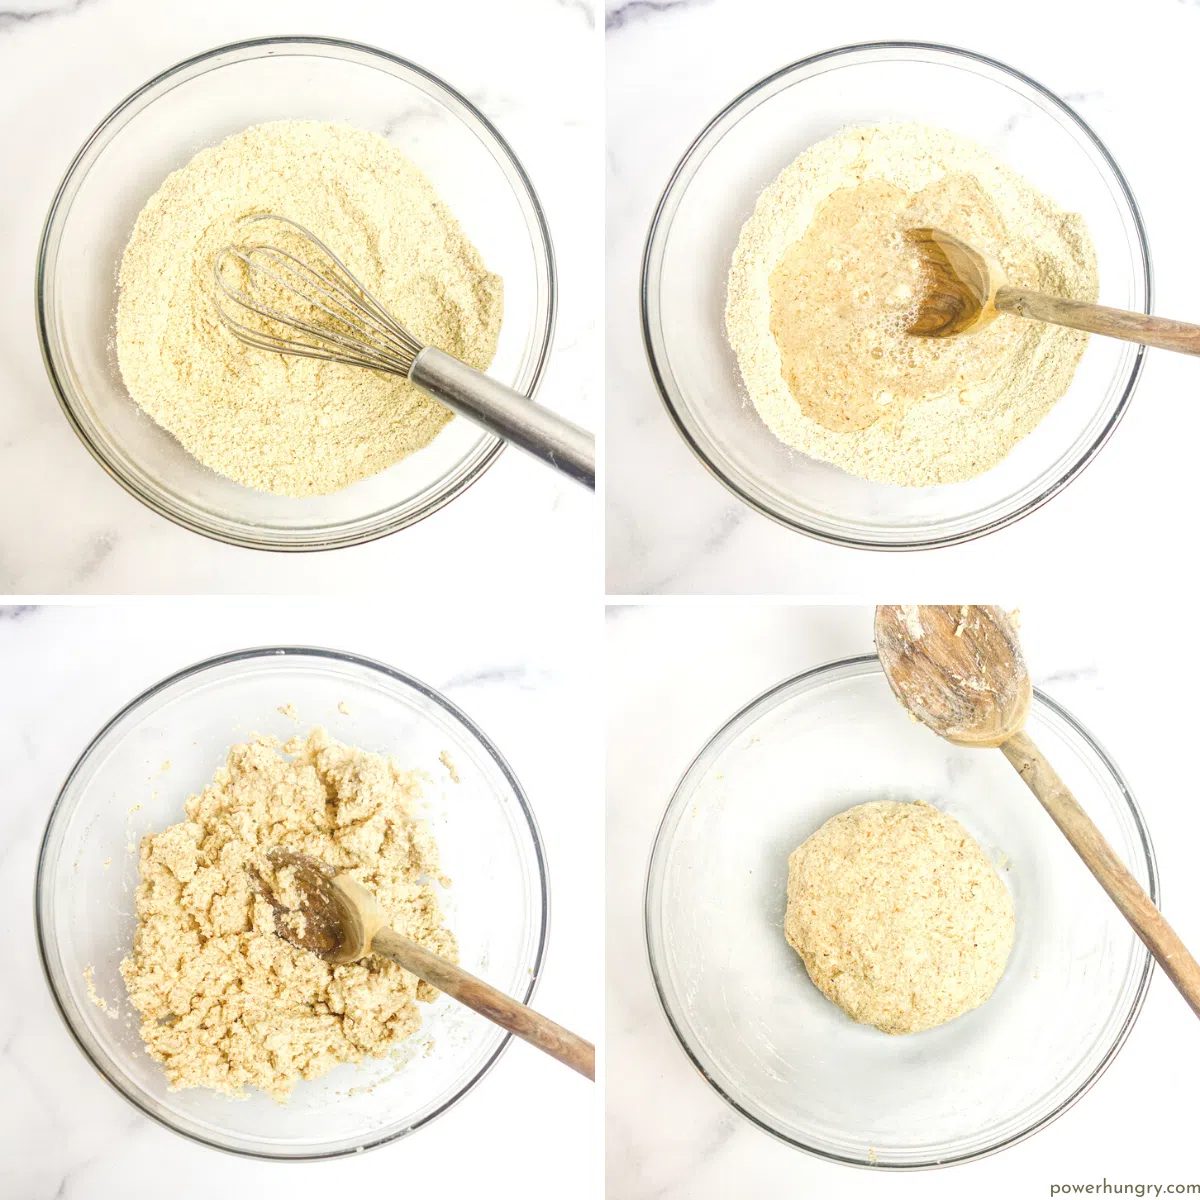
First, whisk the millet flour, whole psyllium husks, and (optional) salt in a small mixing bowl until blended.
Next, add the water to the bowl of dry ingredients, stirring until completely blended. Let the dough stand for about 5 minutes so that the psyllium and millet flour can fully absorb the water. The mixture will quickly come together into a thick dough.
Gather the dough together (I use my hands) in the center of the bowl.
Step 2: Divide the Dough
Shape the millet dough into an even disk or ball. Do not worry about overworking the dough or mishandling it in some other way. It is a durable dough and can be reshaped as many times as needed.
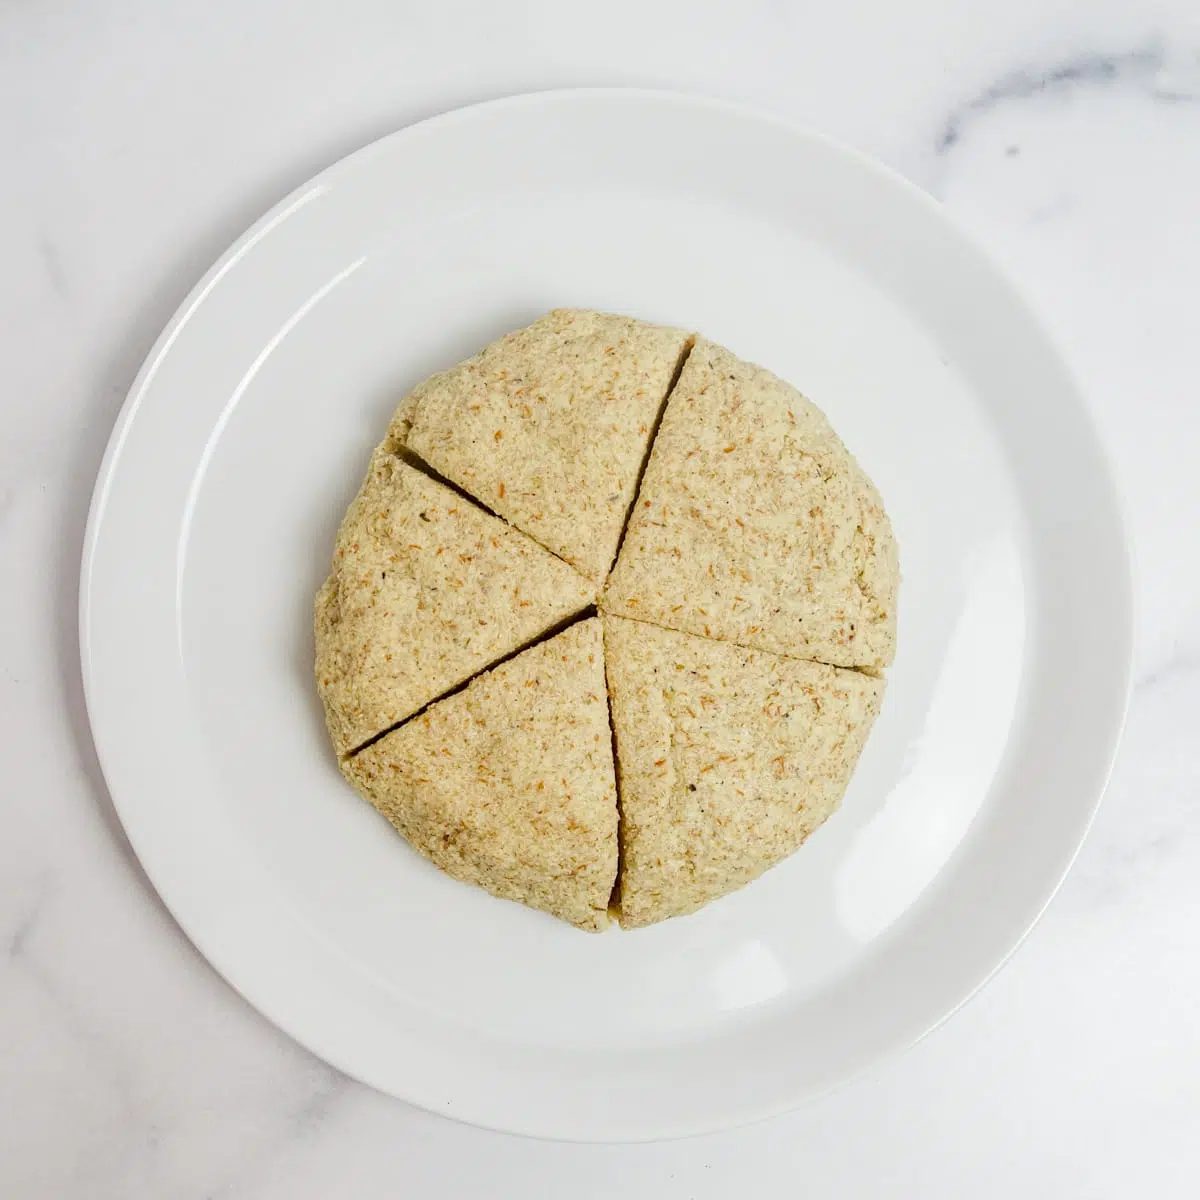
Place the dough disk onto a cutting board and cut into 5 equal pieces. You can also break it off into 5 equal pieces (whichever you find easier).
Step 3: Shape the Dough
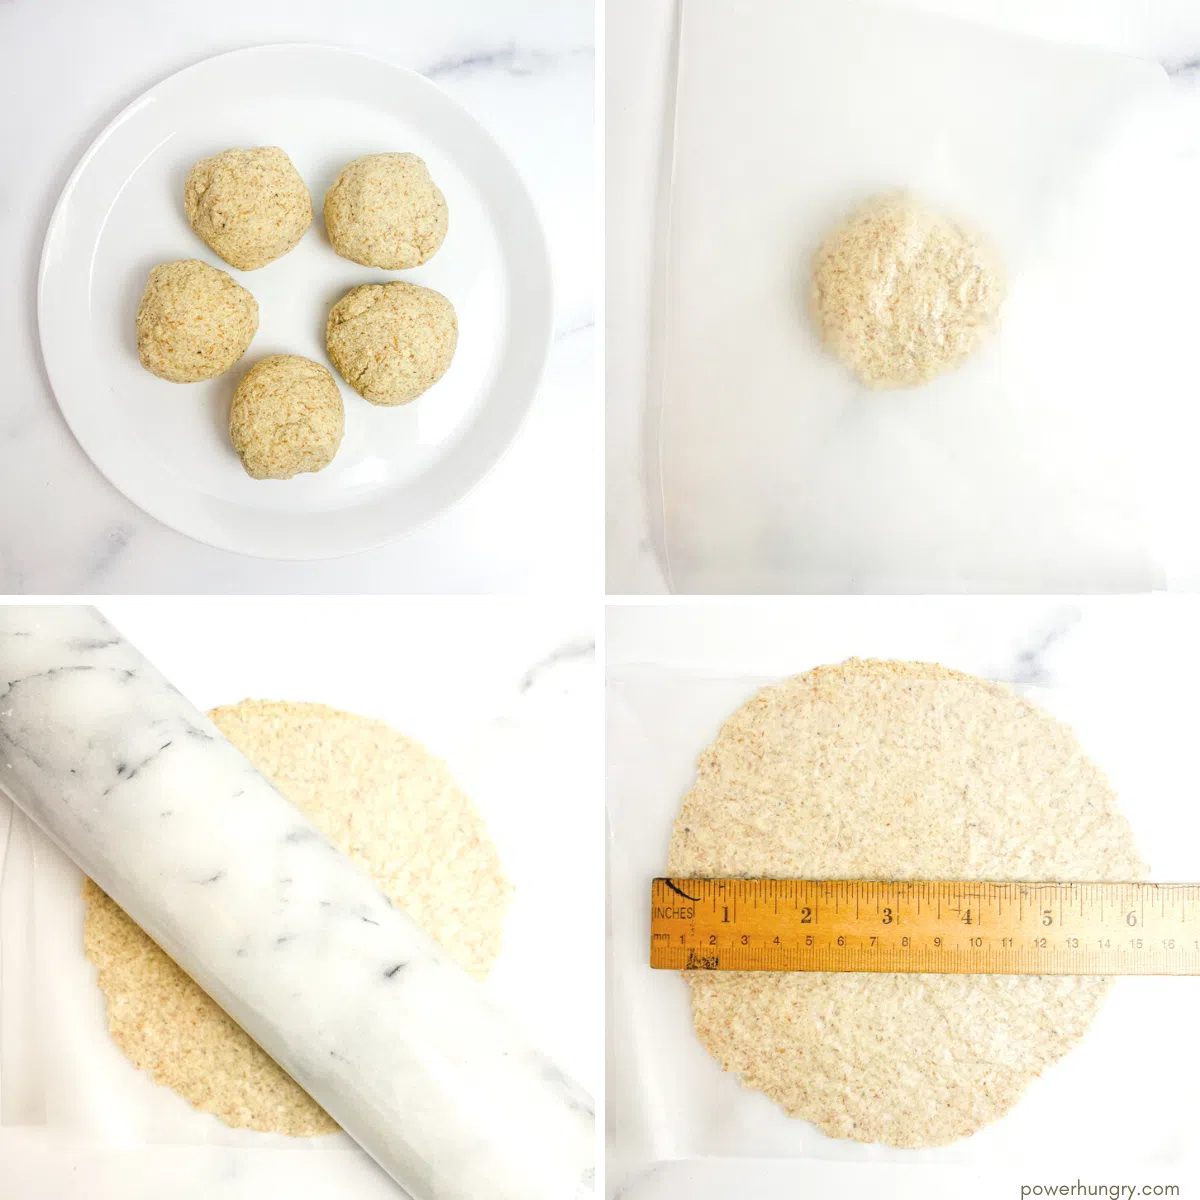
Roll each piece into a ball. Next, place one of the balls between two sheets of plastic wrap, parchment paper or wax paper.Plastic wrap is definitely the reliable choice (by far) for removing the dough after rolling or pressing.
Using a rolling pin, roll the dough into a circle that measures 6 inches (15 cm) across. Perfection is not required, especially after the initial rolling. Simply pinch off pieces of dough from one place and press them into another, as needed.
I do not recommend rolling this portion (1/5) of the dough any larger than 6 inches. It will become too thin to remove from the parchment paper and will likely tear during the cooking process. See my notes at the end for making larger tortillas.
Recipe Tip: Remove Paper from Tortillas
Once the tortilla is rolled out, carefully peel off the top layer of paper. If a few pieces of dough stick to the plastic or paper, simply repress them into the tortilla.
The dough becomes stickier as it gets warmer, so if the paper is really sticking, place the tortilla (in its paper) in the freezer for 3 or 4 minutes (not much longer). The tortilla will come off with ease!
Step 4: Cook the Tortillas.
I recommend using a nonstick skillet, or a very well seasoned case iron pan (one that works as nonstick for you), for cooking the tortillas.
Place the tortilla, dough side down, into the hot skillet and peel off the remaining piece of paper. Turn the heat up to medium.
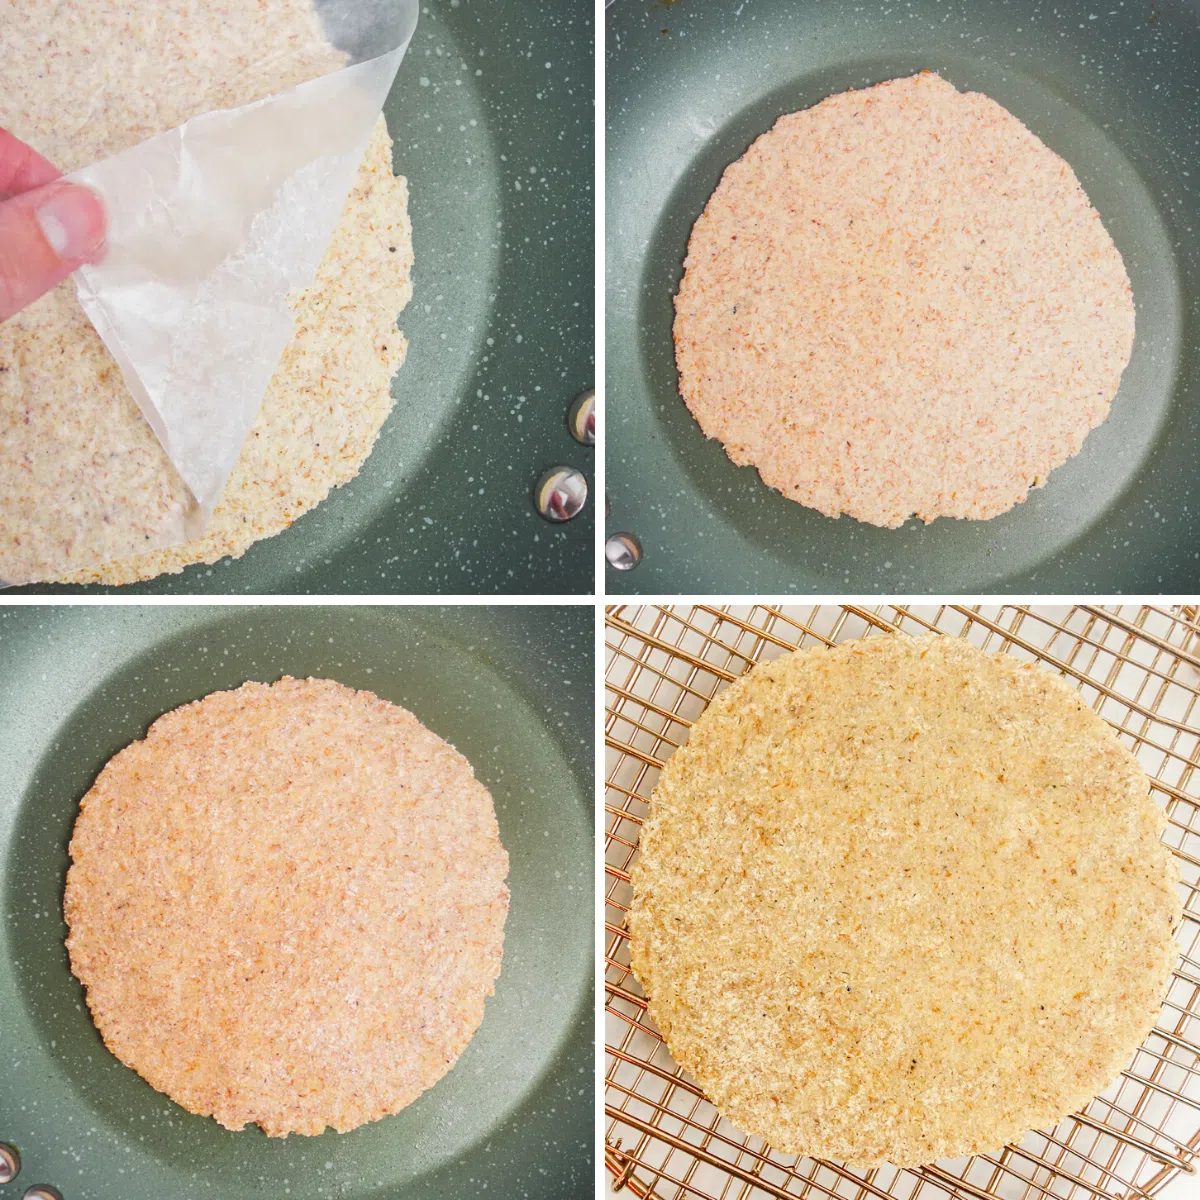
Cook the tortilla for 2 to 4 minutes (it will bubble up, a little bit, in a few places— not in a dramatic way, though). Slide a spatula underneath and lift the tortilla slightly to check that it can release without sticking (i.e., the bottom side is cooked).
Once you have determined that the tortilla is not sticking, flip the tortilla over. Cook for 1 to 2 minutes longer until the other side is dry and slightly darker. Notethat these tortillas do not brown a lot.
Transfer the tortilla to a cooling rack to cool and repeat with the remaining pieces of dough.
Millet tortillas, done!
Serving Suggestions
Use the tortillas for tacos, burritos, quesadillas, or for scooping up beans, salsa, guacamole, stews, curries, and vegetables.
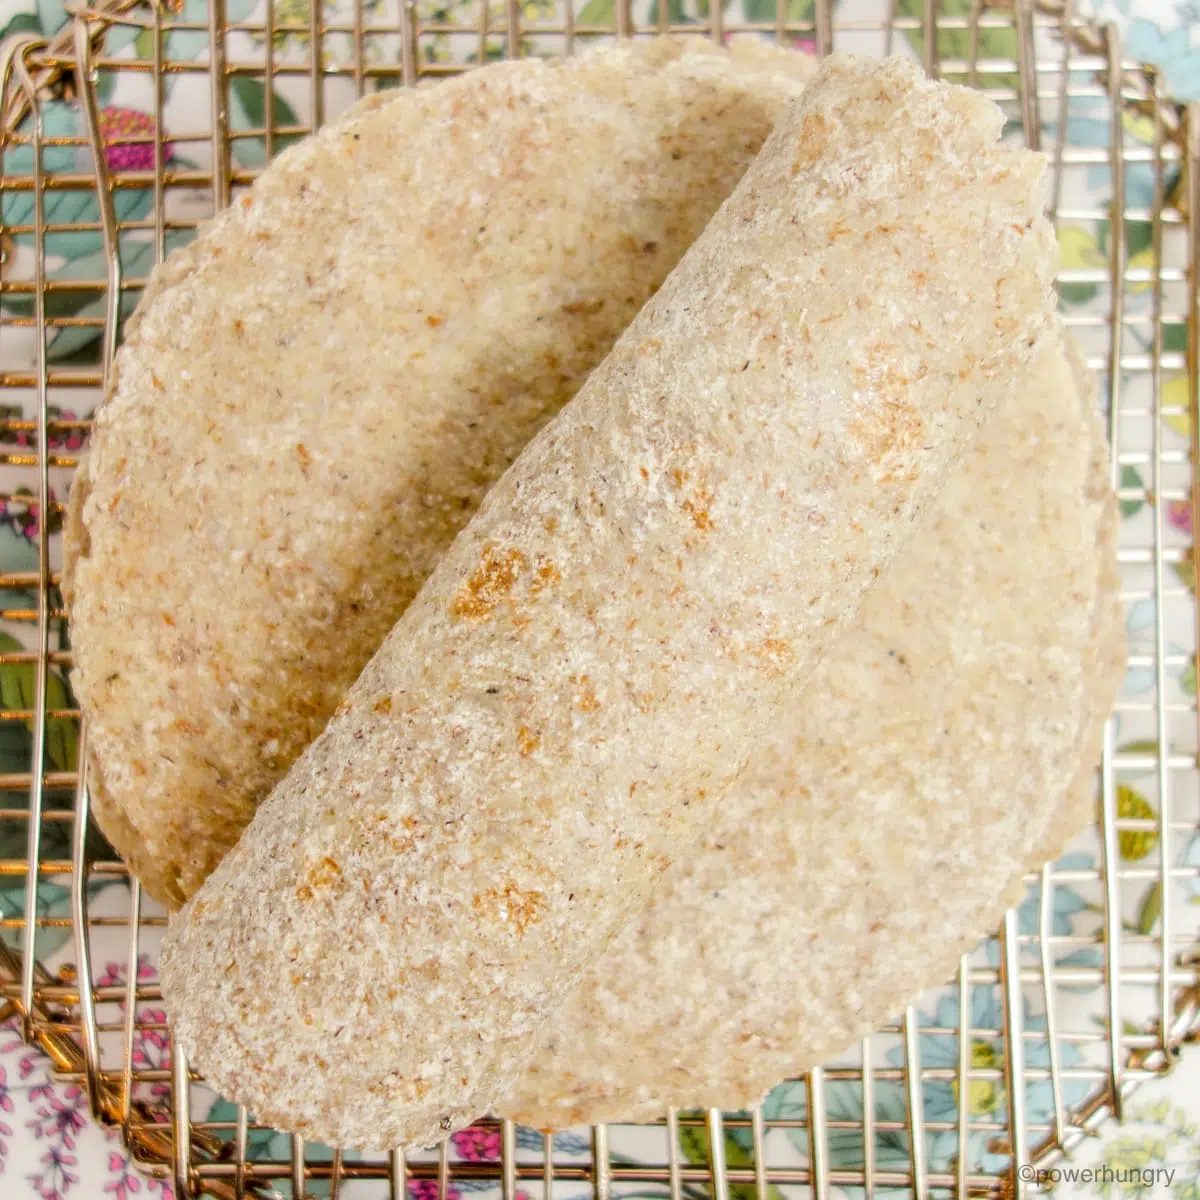
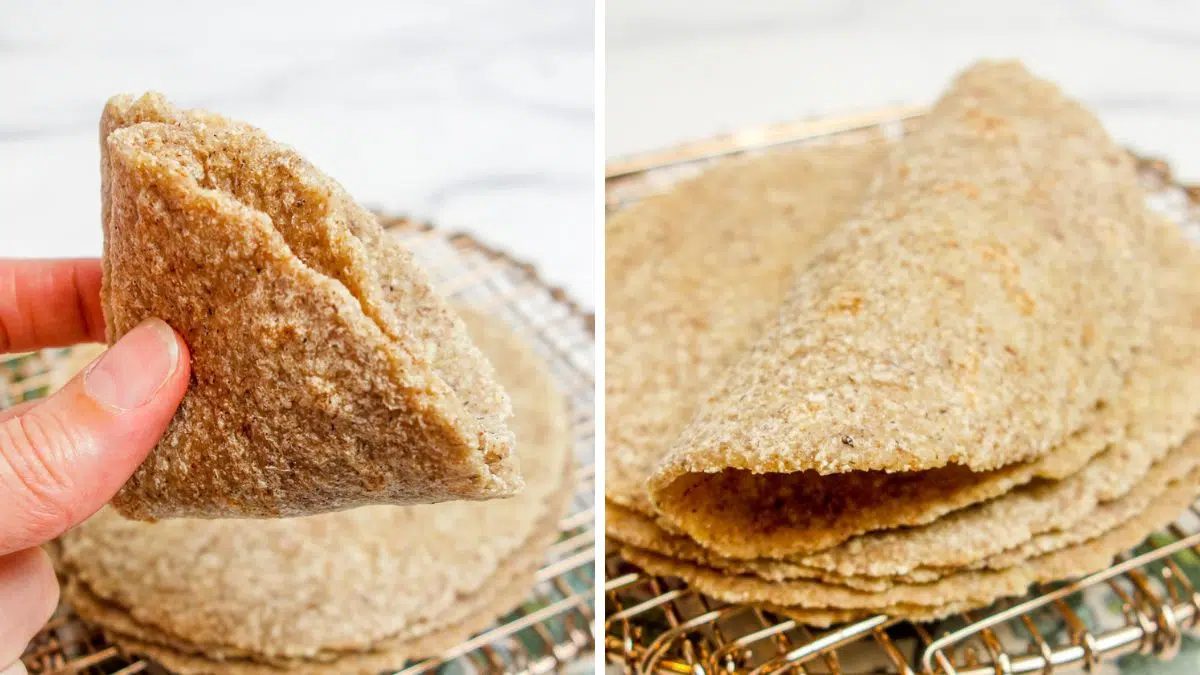
The millet tortillas are very flexible! You can roll them, fold them or quarter them. This makes them great for making sandwiches, wraps, and so much more. They are a a bit rustic and hearty to be used for dessert (e.g., as a substitute for crepes). Then again, that has not stopped me from smearing them with chocolate hazelnut spread.
Happy eating!
Storage for the Millet Tortillas
Store the cooled tortillas in an airtight container at cool room temperature for 2 days, the refrigerator for 2 weeks or the freezer for up to 6 months.
Ingredient Substitutions
- Psyllium husk powder:Replace the 3 tablespoons ofwhole psyllium huskswith an equal weight of psyllium husk powder:15 grams, or 3 teaspoons. Do not substitute 13 tablespoons of powder, since psyllium powder is much more concentrated by volume.
Frequently Asked Questions (FAQ)
- My Dough Is Too Dry/Moist. What Should I Do?This is very flexible recipe in more ways than one. If the dough feels too dry, simply add a little bit more water. Conversely, if the dough is too wet, add a pinch more psyllium husks and/or millet flour) so that the dough is moist but not wet.
- Can I MakeLargeMillet Tortillas?Yes! You can divide this quantity of dough in half (to roll 10-inch tortillas) or into thirds (to roll 8-inch tortillas). Use a large nonstick skillet and use extra care when turning/flipping the tortillas because of the larger size.
- Can I Make the Dough Ahead of Time?Absolutely! The dough can be made and stored–in an airtight container in the refrigerator–for up to 1 week.
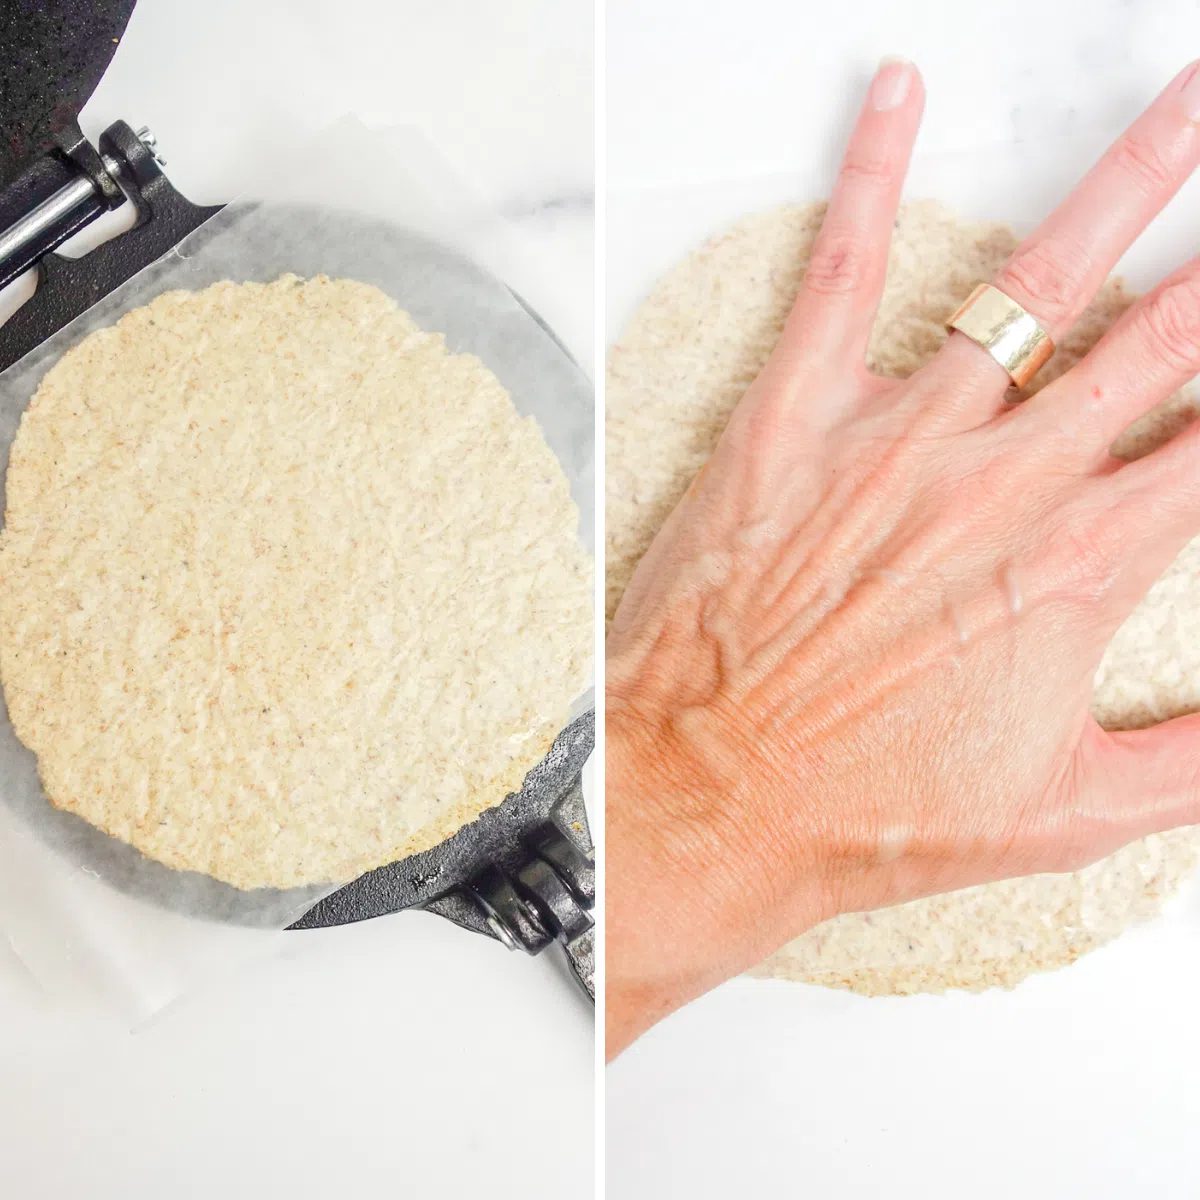
- I do not have a rolling pin. What are other ways I can flatten the tortilla dough?A large (still filled) can or wine bottle can take its place. If you have a tortilla press, use it! It will work perfectly to press these evenly and efficiently. You will still want to use plastic wrap, wax paper or parchment paper to prevent sticking. You can also use your fingers and palm to press the dough. Press out the dough into a rough circle (do still place the dough between sheets of wax paper pr parchment paper).
More Grain-Free & Vegan Tortillas to Love:
- 2-Ingredient Coconut Flour Tortillas
- 1-Ingredient Red Lentil Tortillas
- 2-Ingredient Chickpea Flour Tortillas
- 3-Ingredient Sweet Potato Tortillas
- 1-Ingredient Black Bean Tortillas
- Grain-Free Spinach Tortillas {2 ingredients}
- 1-Ingredient Split Pea Tortillas
Millet Tortillas
- Prep Time: 15 minutes
- Cook Time: 6 minutes
- Servings: 5 tortillas
Ingredients
- 3/4 cup millet flour
- 3 tablespoons whole psyllium husks (see notes for using psyllium powder)
- 2/3 cup water (more, if needed)
- Optional: 1/4 teaspoon salt
Method
- In a small mixing bowl, whisk the millet flour , whole psyllium husks , and (optional) salt, until blended.
- Add the water to the bowl, stirring until combined. Let stand 5 minutes to thicken and then shape dough into a ball (it will feel firm and moist, but not wet. Add a pinch more psyllium husks and/or millet flour if too wet; add a bit more water if too dry).
- Cut, or otherwise divide, the dough into 5 equal pieces. Shape each piece of dough into a ball.
- Place one dough ball between two large pieces of plastic wrap, wax paper or parchment paper . Using a rolling pin or tortilla press , roll or press into a 6-inch (15 cm) circle. Carefully peel off top layer of plastic wrap or paper.
- Place tortilla, dough side down, into nonstick skillet and carefully peel off second piece of wrap/paper.
- Cook the tortilla for 2 to 4 minutes until it bubbles up a little bit in a few places and releases easily when lifted with a spatula. Flip the tortilla and cook the other side for 1 to 2 minutes longer.
- Transfer tortilla to a metal cooling rack and repeat with remaining pieces of dough.
- The tortillas are satisfying warm, room temperature, or cold.
Notes
Storage: Store the cooled tortillas in an airtight container at cool room temperature for 2 days, the refrigerator for 2 weeks or the freezer for up to 6 months. Psyllium husk powder: Replace the 3 tablespoons of whole psyllium husks with an equal weight of psyllium husk powder: 15 grams, or 3 teaspoons . Do not substitute 13 tablespoons of powder, since psyllium powder is much more concentrated by volume. Grind Your Own Millet Flour : a high speed blenders will turn millet into millet flour in about a minute. If using a coffee grinder, you will need to grind about 1/4 cup at a time (it goes quickly). Place any extra flour in an airtight bag or container and freeze until next time. Unfortunately, food processors do not work for grinding whole millet into fine flour.