
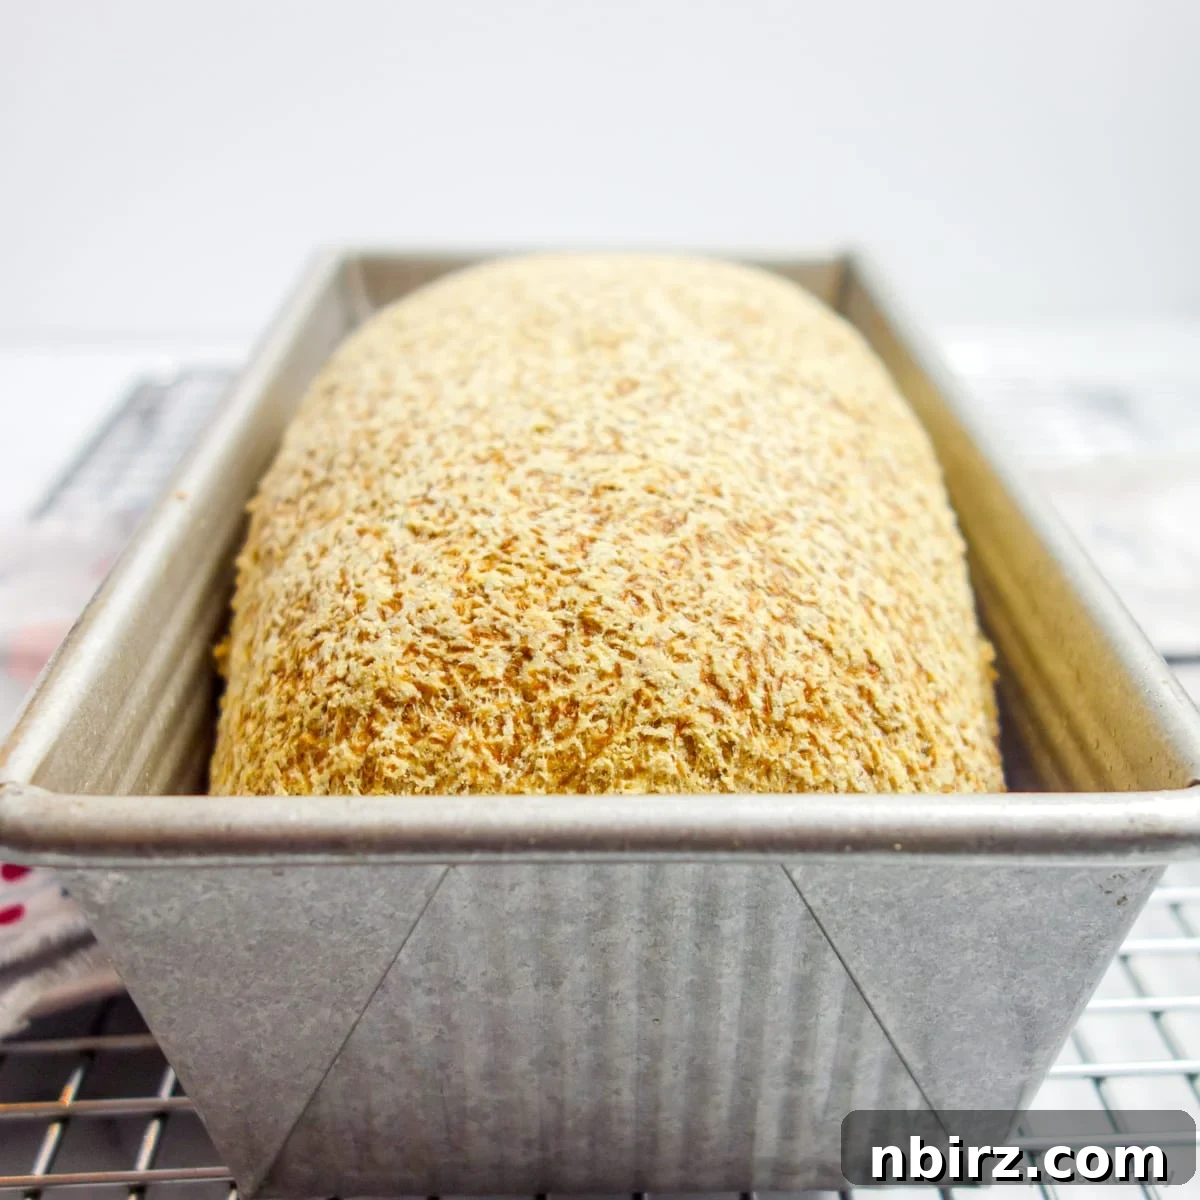
Welcome to the world of truly satisfying homemade bread! This recipe for the best vegan coconut flour sandwich bread is designed to be FAST, EASY, and consistently delivers a high-rising, perfectly crusty loaf. It’s not just delicious; it’s a nutritional powerhouse, being completely gluten-free, oil-free, sugar-free, and yeast-free. Prepare to meet your new favorite bread, perfect for any sandwich or toast craving.
Mastering Egg-Free Coconut Flour Sandwich Bread
Baking with coconut flour offers a unique blend of deliciousness and a profound sense of accomplishment. The delicious aspect is simple to grasp: coconut flour naturally possesses a delightful, slightly sweet flavor with a subtle hint of coconut. How many other flours can genuinely make such a claim, tasting good even on its own? It imparts a distinct richness and an inviting aroma that elevates any baked good.
However, the satisfaction truly comes from successfully working with it. Coconut flour is notoriously tricky; it demands significant structural support, or it will inevitably collapse and crumble. Its high absorbency means it needs a lot of liquid and a powerful binder to achieve a bread-like consistency. This is where many gluten-free recipes fall short, resulting in dense, dry, or crumbly loaves.
I thrive on tackling such baking challenges, especially when it comes to creating exceptional vegan and gluten-free recipes. My latest endeavor with coconut flour has culminated in this remarkable creation: a hearty, wholesome, and wonderfully structured loaf of Gluten-Free Vegan Coconut Flour Sandwich Bread. It’s a testament to thoughtful recipe development, ensuring that every slice is both delightful to eat and satisfying to have made.
Delicious and satisfying? Absolutely, checked off both boxes!
Unmatched Benefits of This Vegan Bread Recipe
This bread isn’t just another gluten-free option; it’s a game-changer. It proudly boasts a comprehensive list of attributes that cater to a wide array of dietary needs and preferences, making it truly exceptional:
- Gluten-Free: Ideal for those with celiac disease or gluten sensitivity, ensuring no discomfort.
- Vegan (Egg-Free & Dairy-Free): Perfect for individuals following a plant-based diet, without compromising on taste or texture.
- Yeast-Free: A fantastic alternative for those sensitive to yeast, or for bakers looking for a quicker rise without the waiting time.
- Xanthan Gum-Free: Many gluten-free breads rely on xanthan gum for structure, but this recipe achieves excellent results without it, offering a cleaner ingredient list.
- Oil-Free: Made without added oils, contributing to a lighter, healthier profile without sacrificing moisture.
- Sugar-Free: Completely free of added sugars, making it suitable for those managing blood sugar or seeking to reduce sugar intake.
- Nut-Free: A safe choice for individuals with nut allergies, allowing more people to enjoy homemade bread.
- Seed-Free: Another allergy-friendly aspect, ensuring it’s safe for those avoiding seeds.
- High in Fiber: Thanks to coconut flour and psyllium husks, this bread is rich in dietary fiber, promoting digestive health and satiety.
- Minimal Ingredients: Simple and accessible, requiring only a handful of staple ingredients, making it less intimidating for new bakers.
- Easy to Make: Designed with simplicity in mind, ensuring a straightforward process from start to finish.
Beyond these, this bread offers incredible versatility. It’s robust enough for hearty sandwiches, toasts beautifully for breakfast, and its neutral yet satisfying flavor makes it a perfect canvas for both sweet and savory toppings.
Essential Ingredients for Your Perfect Loaf
For precise measurements of each ingredient, please refer to the detailed recipe card conveniently located at the end of this post. You can easily switch between US Customary (volume) and Metric (weights) options to suit your preferred measurement system.
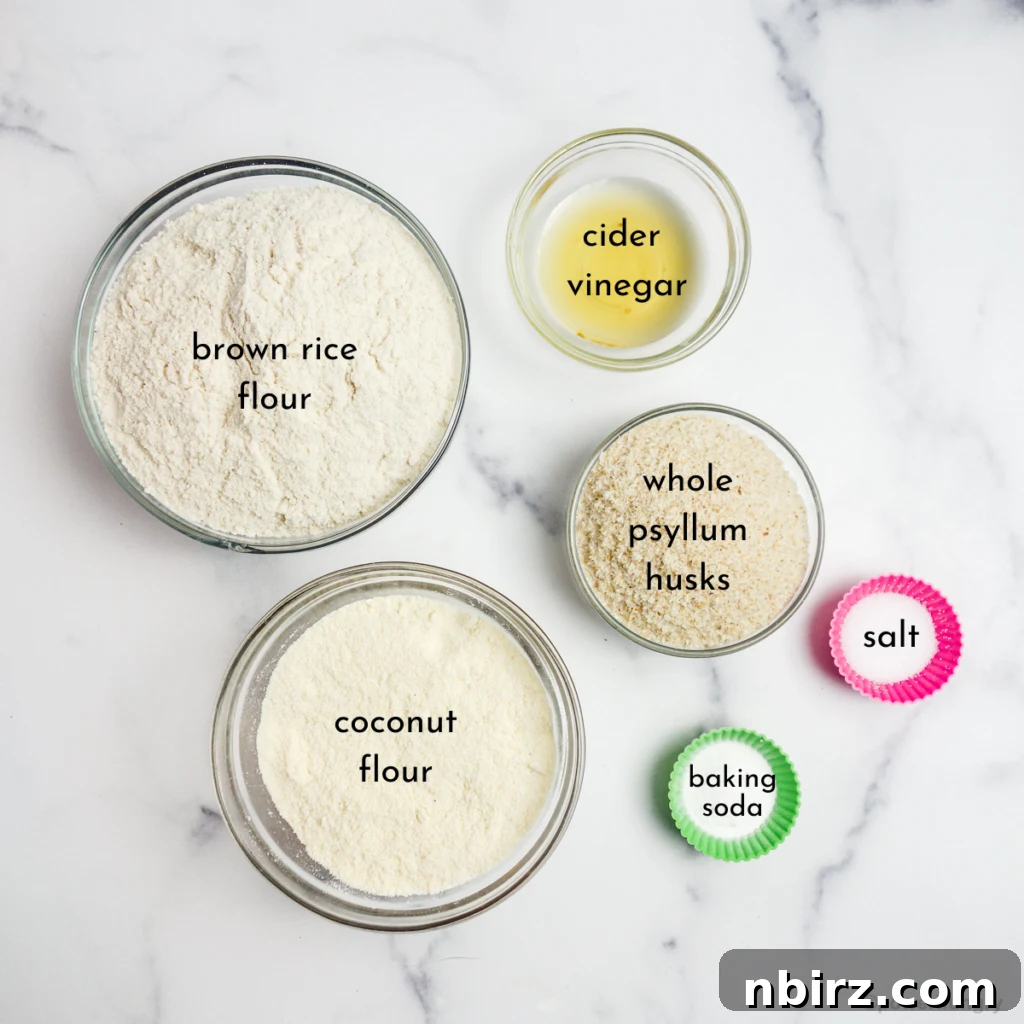
Forget complex gluten-free vegan bread recipes that demand an exhaustive list of obscure ingredients. This remarkable recipe stands out by relying on just three core ingredients, supplemented by essential leavening agents and liquid.
- Coconut Flour: The star of the show. Known for its high fiber content and exceptional absorbency, it gives the bread its unique texture and mild flavor.
- Brown Rice Flour: This provides a crucial balance to the coconut flour, contributing to the bread’s structure and a pleasant, wholesome taste. It’s also incredibly simple and cost-effective to prepare yourself (instructions below!).
- Whole Psyllium Husks: Not psyllium powder! This is the magic ingredient that acts as our gluten replacement, binding the dough, providing elasticity, and ensuring the bread rises high and holds its shape without collapsing.
- Baking Soda: Our primary leavening agent, working in conjunction with an acid to create the rise.
- Salt: Essential for enhancing all the flavors in the bread and adding depth. Adjust to your preference.
- Cider Vinegar: The acid component that reacts with baking soda, producing carbon dioxide for a light, airy texture.
- Tap Water: The liquid that brings all the dry ingredients together, forming a pliable dough.
Each ingredient plays a vital role in achieving the desired texture and flavor, so sticking to the specified types and quantities is key for optimal results.
Pro Tip: Save Money and Enhance Freshness by Grinding Your Own Brown Rice Flour
If you own a high-speed blender – or even a standard blender – you have the power to transform whole brown rice into fresh, fine brown rice flour in approximately 60 seconds. This simple step not only guarantees superior freshness, which can significantly impact the taste and texture of your baked goods, but it also offers substantial cost savings compared to purchasing pre-ground rice flour.
For High-Speed Blenders: Place about 1.5 to 2 cups of raw whole brown rice into your blender container. Secure the lid and blend on high speed until a fine flour consistency is achieved. High-speed blenders are incredibly efficient and can handle larger quantities with ease.
For Regular Blenders: While a regular blender can also do the job, it’s crucial to proceed with caution to avoid overheating the motor. I strongly recommend grinding no more than 1/2 cup of rice at a time. This allows the blender to process the rice effectively without strain, producing a consistently fine flour.
Any extra flour you grind can be stored for future use. Simply transfer it to an airtight bag or container and freeze it. This method keeps the flour fresh and ready whenever you decide to bake another loaf (and trust me, once you taste this bread, you’ll be making it again and again!). Grinding your own flour is a small effort with a big payoff in terms of quality and economy.
Exploring Vinegar and Acid Alternatives
While apple cider vinegar is specified in this recipe for its mild flavor and effective reaction with baking soda, you have flexibility with your acid choice. Any other vinegar – whether light varieties like white vinegar or darker ones like balsamic (though it might slightly tint the bread) – can be used in an equal amount as a substitute.
If you prefer not to use vinegar, or if it’s a dietary restriction, an equal quantity of freshly squeezed lemon juice or lime juice will work just as effectively. The key is to provide the acidic component necessary to activate the baking soda, which is crucial for the bread’s rise and texture. Always ensure your chosen substitute maintains the same volume measurement for consistent results.
Detailed Step-By-Step Baking Instructions
While the process of making this bread is straightforward and relatively easy, adherence to the specified ingredients and written directions is paramount. Bread-making, in general, is quite precise, and gluten-free vegan bread-making demands even more attention to detail. For the most successful and delicious outcome, please stick closely to the plan. This ensures your loaf achieves the perfect rise, texture, and crust we’re aiming for.
Ready to bake a masterpiece? Let’s begin!
Step One: Prepare Your Oven and Loaf Pan
Begin by preheating your oven to 350°F (180°C). This consistent temperature is essential for the bread to rise properly and bake evenly. While the oven preheats, prepare your 9×5-inch (22.5 x 12.5 cm) loaf pan. Generously spray it with a nonstick cooking spray, or alternatively, lightly grease or oil the interior surfaces. Proper pan preparation prevents sticking and ensures your beautiful loaf can be easily removed after baking.
Step Two: Thoroughly Combine the Dry Ingredients
In a spacious mixing bowl, combine the coconut flour, brown rice flour, baking soda, and salt. Use a whisk to vigorously blend these ingredients together. It’s crucial to ensure they are thoroughly incorporated, as this prevents pockets of unmixed leavening agent or uneven distribution of flavors. A well-whisked dry mixture sets the foundation for a uniform and perfectly risen loaf.
Step Three: Prepare the Psyllium Gel Mixture
In a separate, medium-sized mixing bowl, whisk together the water, cider vinegar, and whole psyllium husks until they are well combined. Once mixed, let this mixture stand undisturbed for approximately 5 minutes. During this brief resting period, the psyllium husks will begin to absorb the liquid and swell, transforming the mixture into a loose, pale gel. This gelling action is absolutely critical for the success of your vegan coconut flour bread.
Psyllium husk is the unsung hero in this recipe. In gluten-free and vegan baking, it acts as a phenomenal binder, effectively replacing the structural role of gluten and eggs. It provides the necessary elasticity and viscosity to the dough, preventing it from crumbling. More importantly, it creates a robust internal structure that allows the baking soda to leaven the bread, ensuring it rises beautifully and, crucially, stays risen without collapsing. The resulting mixture will have a consistency similar to flax or chia gels, though typically less sticky, indicating it’s ready for the next step.
Step Four: Bring the Dough Together
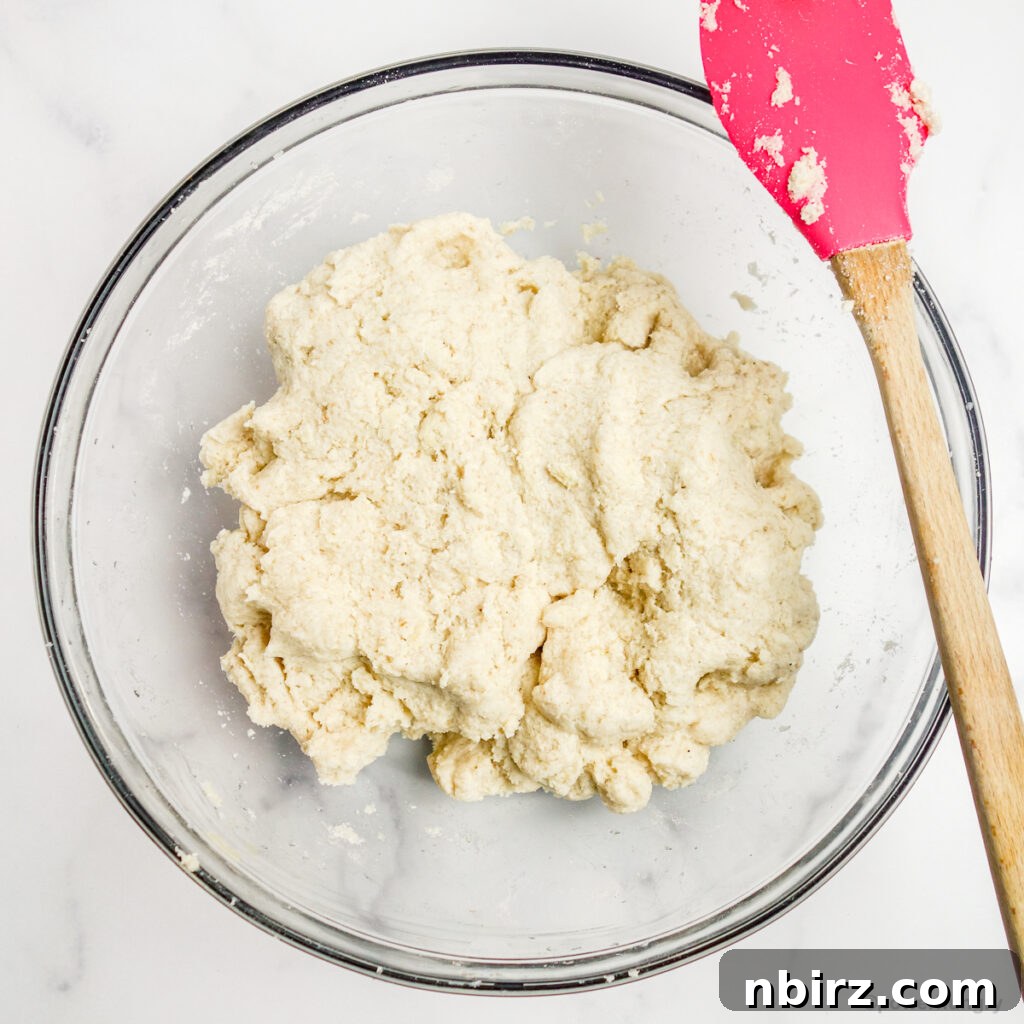
Now, add the prepared psyllium gel mixture to the bowl containing your dry flour blend. This is where the magic happens! The most efficient and effective way to combine these ingredients into a cohesive dough is by using your clean hands to mix and “squish” everything together. This method allows you to truly feel the dough’s consistency and ensures all dry pockets are thoroughly hydrated.
Important: Do not be tempted to add more liquid! The dough will initially appear dry or crumbly, but with consistent squishing and kneading for about one to two minutes, it will come together into a firm, moist, and pliable dough. It requires a bit of patience, but the dough will transform. If you prefer not to use your hands, a standing mixer fitted with a paddle attachment is an excellent alternative, providing the necessary force to combine the ingredients effectively.
Step Five: Shape and Prepare for Baking
Once your dough has come together, it’s time to shape it for baking. While the dough is still in the mixing bowl, lightly moisten your hands. This prevents the dough from sticking and allows for easier manipulation. Roughly shape the dough into an oblong loaf shape, pressing and compacting it firmly to eliminate any air pockets or holes within the structure. This step is crucial for an even rise and a sturdy finished bread.
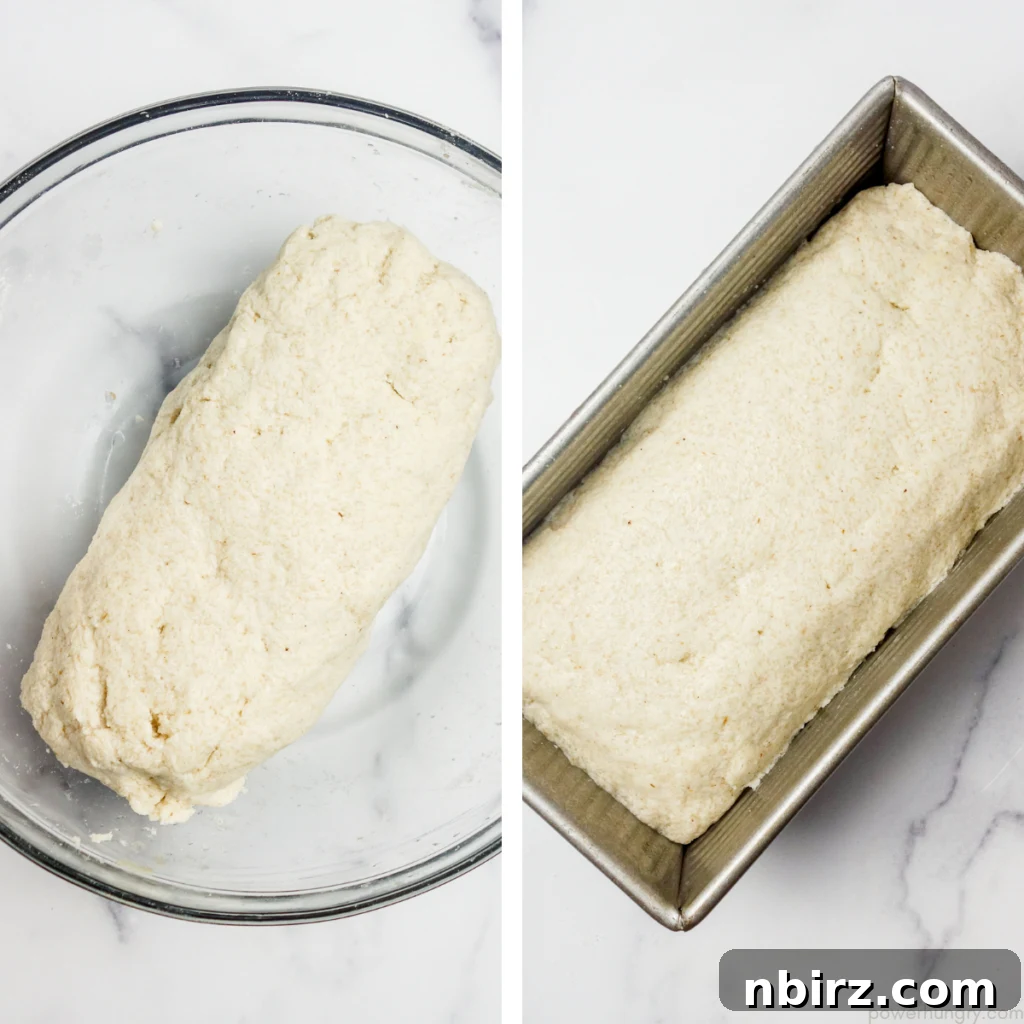
Carefully transfer the shaped loaf into your prepared (sprayed or greased) loaf pan. Once in the pan, use your moist hands again to gently smooth the top surface of the dough. You can also slightly round the sides to give it a more traditional bread shape. If desired, this is the perfect moment to sprinkle the surface of your loaf with optional toppings, such as sesame seeds, poppy seeds, or oats, for added texture and visual appeal.
Step Six: Bake and Cool to Perfection
Place the prepared loaf pan into your preheated 350°F (180°C) oven. Bake for approximately 80 to 90 minutes. This longer baking time is essential for gluten-free breads to cook through and develop a robust structure. You’ll know the bread is ready when it has risen significantly, showcasing a beautiful golden-brown, dry, and distinctly crusty surface. Another reliable indicator of doneness is when you tap the top of the loaf, it should sound hollow. This indicates that the interior is fully cooked and no longer dense.
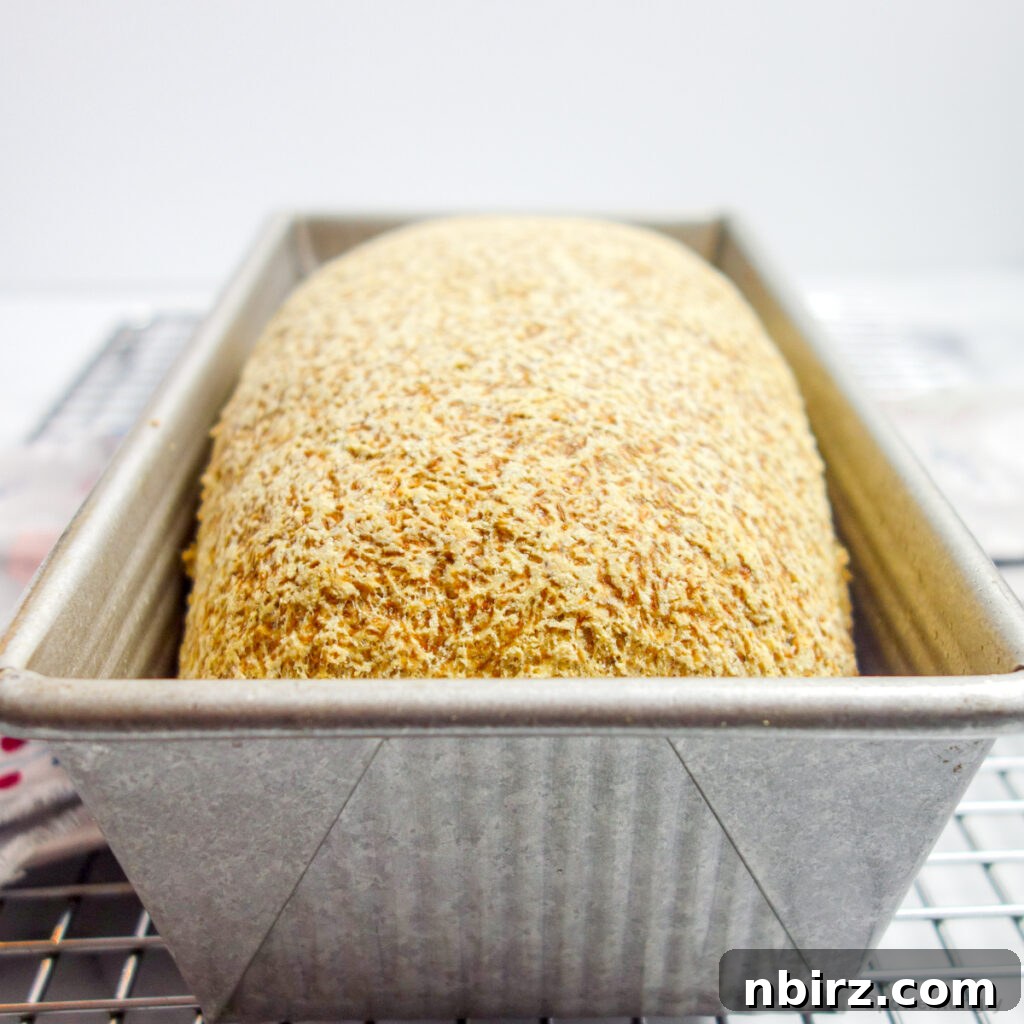
Once baked, remove the pan from the oven and allow the bread to cool in the pan on a wire cooling rack for a minimum of 15 minutes. This initial cooling period allows the bread to set and firm up, preventing it from crumbling when removed. After 15 minutes, carefully remove the vegan coconut flour sandwich bread from the pan and transfer it directly to the cooling rack to cool completely. Allowing it to cool fully is crucial for achieving the ideal texture and for easy, clean slicing. Resisting the urge to slice too early is key!
Once completely cool, your homemade, wholesome, and delicious bread is ready to be enjoyed. Pretty amazing, right?
Customizing Your Slices: Thick or Thin
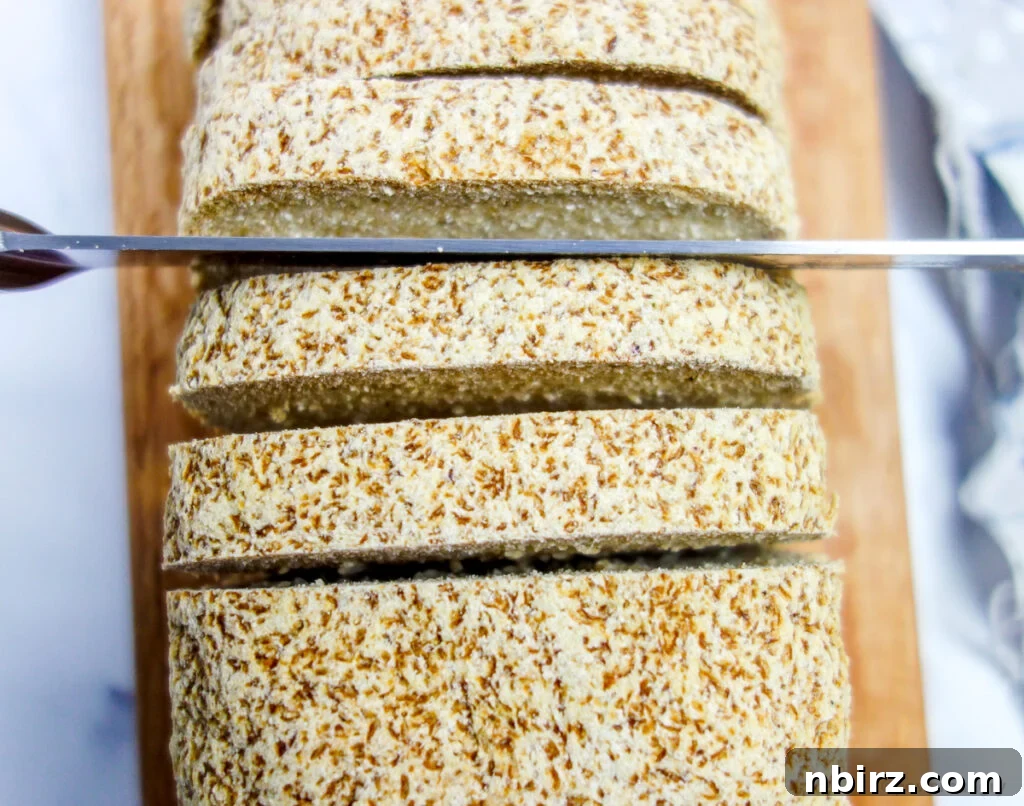
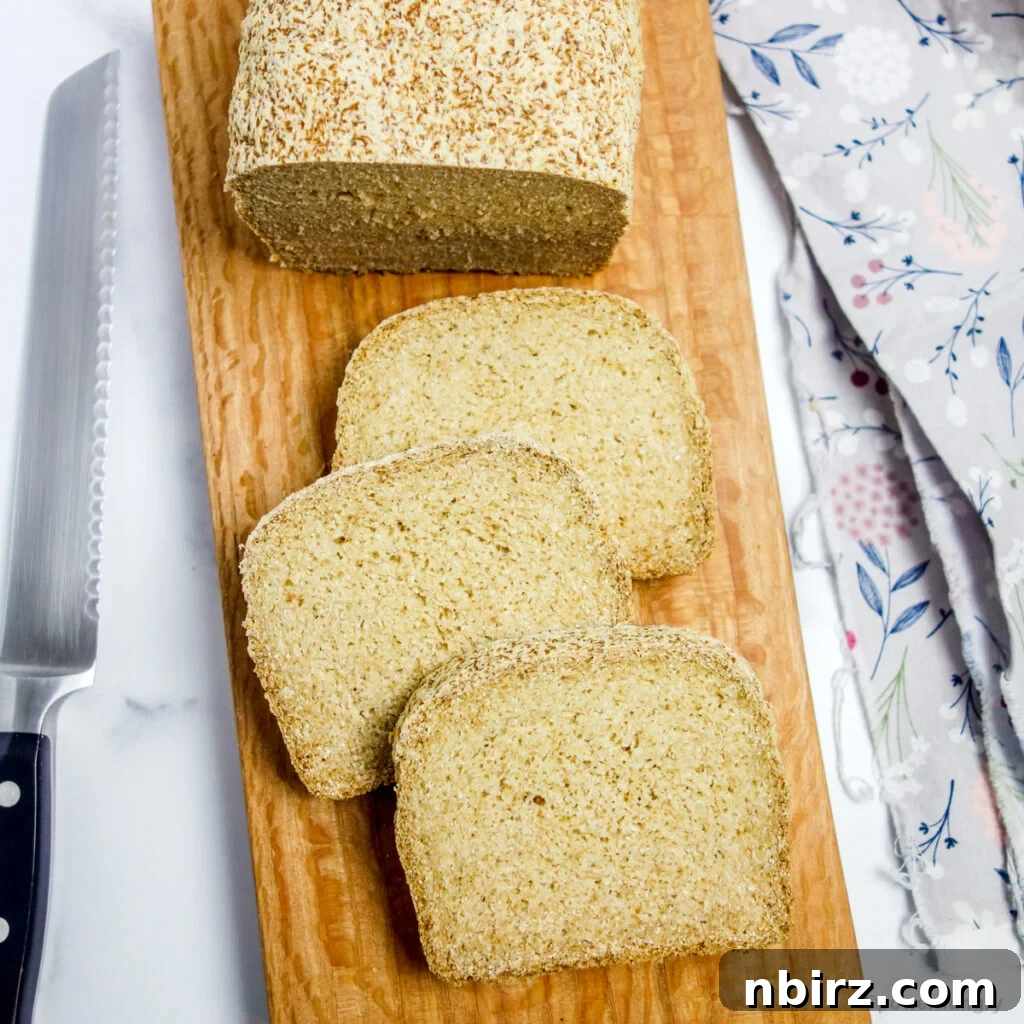
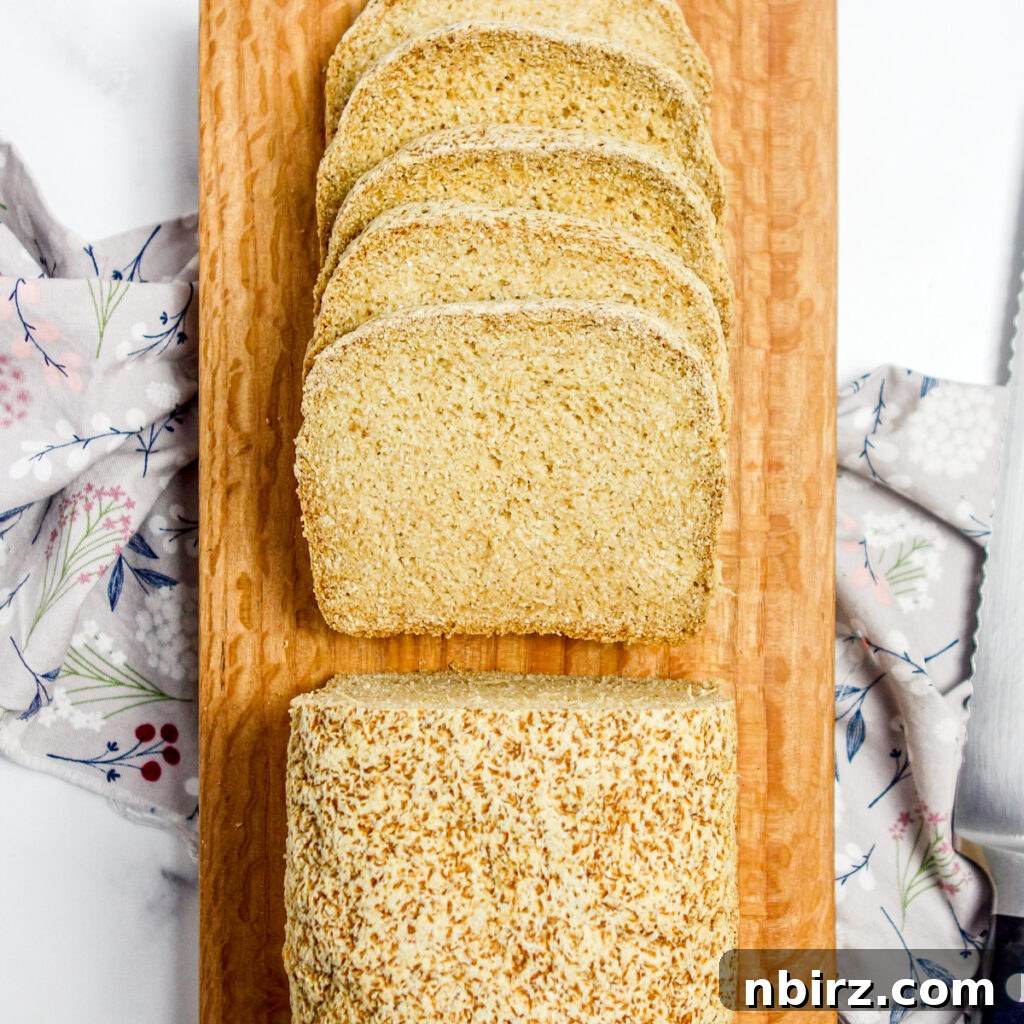
One of the many joys of baking your own bread is the freedom to customize. With this sturdy vegan coconut flour bread, you can slice it exactly to your preference – whether you prefer thick, satisfying slabs perfect for hearty sandwiches, or thinner slices ideal for delicate toast and light nibbling. The beauty of this recipe is its robust structure, which means absolutely no crumbling, regardless of how you slice it. This bread holds together beautifully, making it versatile for any culinary adventure.
The Unique Texture & Delightful Taste of This Vegan Coconut Flour Sandwich Bread
Prepare for a truly satisfying sensory experience with this remarkable bread:
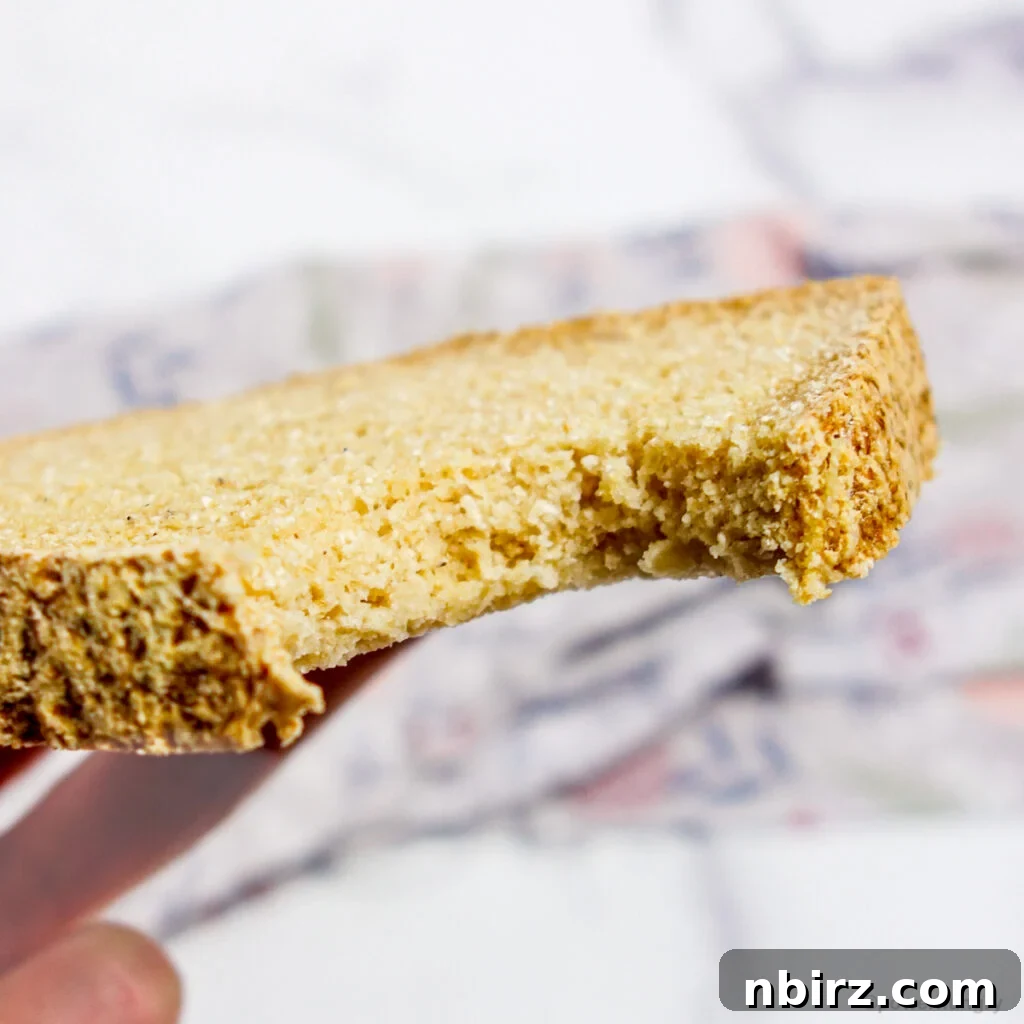
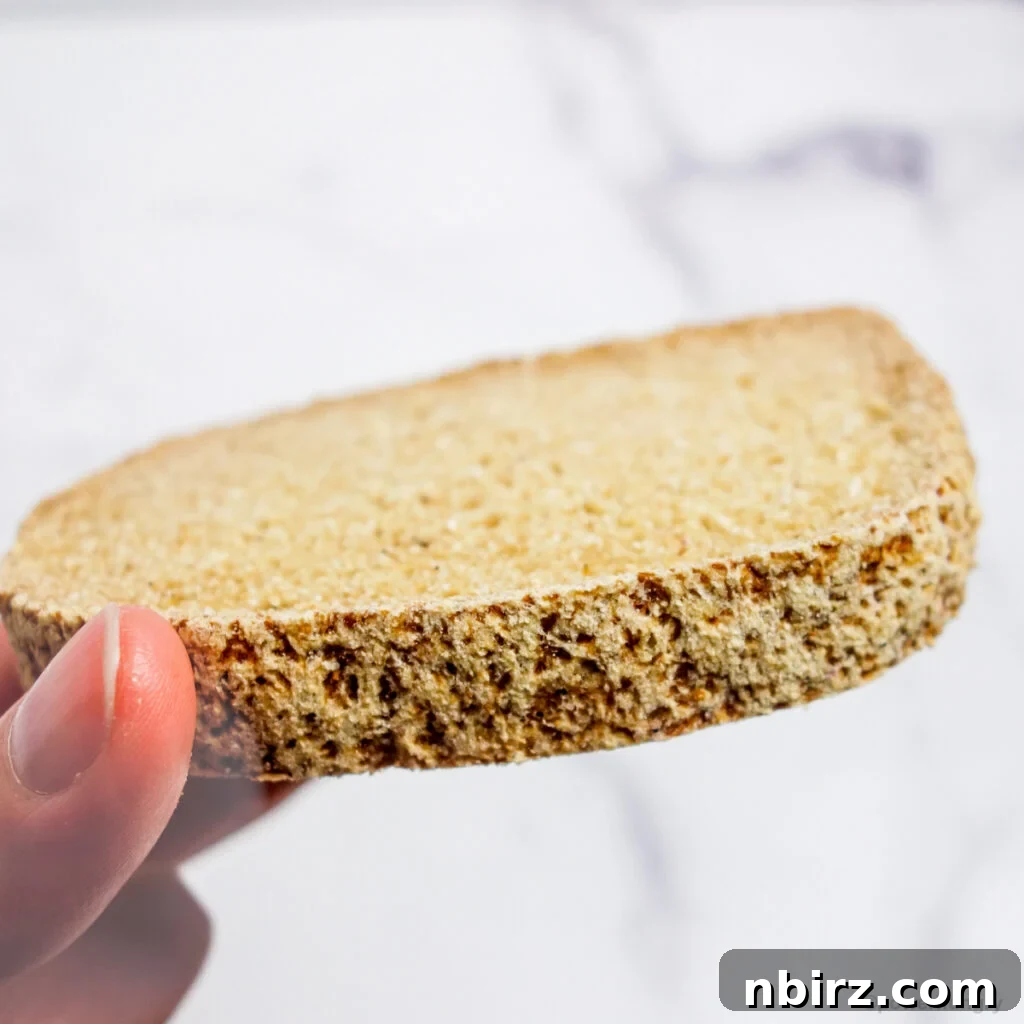
First, let’s talk texture: This bread boasts a wonderfully fine, yet firm texture, completely free of any gumminess often found in other gluten-free alternatives. It closely mimics the comforting, substantial feel of traditional wheat-based bread. One of its most delightful features is its pronounced crust, which becomes even more wonderfully crusty and flavorful a day after baking. When toasted, each slice transforms into a crisp, crunchy, and incredibly filling base for any topping, making it an ideal choice for a satisfying meal.
Now, for the taste: The flavor profile of this bread is delightfully mild, with a wholesome, toasted nuance reminiscent of a classic whole wheat bread. The distinct taste of buckwheat, often strong in other recipes, is beautifully mellowed and balanced by the neutral flavor of the brown rice flour. This creates a harmonious blend that is neither overpowering nor bland. The result is a versatile loaf that serves as the perfect canvas for virtually any topping or filling you might crave – from rich avocado toast and savory spreads to sweet jams and nut butters. Its subtle flavor allows other ingredients to shine, making it truly adaptable for any meal of the day.
Frequently Asked Questions & Ingredient Substitutions
Navigating gluten-free and vegan baking can sometimes raise questions about ingredient flexibility. Here are answers to some common queries regarding this specific recipe:
Can I use different flours in place of coconut flour and brown rice flour?
I strongly advise against making substitutions for the coconut flour and brown rice flour in this recipe. The precise ratios of wet to dry ingredients, as well as the critical amount of psyllium husk, have been meticulously developed and balanced specifically for this combination of flours. Coconut flour, in particular, is highly absorbent and behaves very differently from other flours, making direct substitutions incredibly challenging.
The one possible exception where you might see some success is substituting quinoa flour for brown rice flour. Quinoa flour generally shares some similar properties with brown rice flour and can sometimes work as a direct replacement in certain gluten-free recipes without drastically altering the outcome. However, for best and most consistent results, especially on your first attempt, stick to the recipe as written.
Can I use something other than whole psyllium husks?
Regrettably, no. For this particular recipe, it is absolutely essential to use whole psyllium husks. Other gelling agents, such as ground flaxseed meal or chia seeds, do not possess the same binding and structural capabilities as whole psyllium husks. While they are wonderful in other recipes, they will not function as direct, one-to-one substitutes here. Using them would require significant experimentation to determine their efficacy and adjust quantities, likely leading to a very different result.
Furthermore, I do not recommend using psyllium powder instead of whole husks. Psyllium powder is much more concentrated and absorbent, and using it in this recipe will result in a dough that is too dry and dense, leading to a brick-like bread. Whole psyllium husks are key to achieving the desired light texture and impressive rise.
How should I store this bread to maintain freshness?
Once your bread has completely cooled, store it in an airtight container at cool room temperature for up to 2 days. For longer storage, it can be kept in the refrigerator for up to 1 week. For the freshest possible experience, or if you’ve baked a large batch, this bread freezes exceptionally well. Slice the cooled loaf, then place the slices in a freezer-safe bag or container, separating them with parchment paper if desired. It can be stored in the freezer for up to 6 months. Simply toast slices directly from frozen for a quick and delicious meal.
Can I add nuts or seeds to the bread?
Yes, you can certainly add nuts or seeds for extra flavor and texture! If you wish to incorporate them, gently fold about 1/4 to 1/2 cup of your favorite chopped nuts (like walnuts or pecans) or seeds (such as sunflower, pumpkin, or sesame) into the dough during Step Four, just before shaping. This will add a wonderful crunch and nutritional boost to your loaf. Alternatively, you can sprinkle them on top of the loaf before baking, as mentioned in Step Five, for a decorative and flavorful crust.
Happy baking! Please don’t hesitate to share your experience if you give this incredible recipe a try. Your feedback is always welcome and appreciated!
More Delicious Vegan & Gluten-Free Recipes You’ll Love
If you’ve enjoyed baking and eating this Vegan Coconut Flour Sandwich Bread, you’ll be thrilled to explore more of our wholesome, plant-based, and gluten-free creations. These recipes share similar dietary benefits and a commitment to delicious, easy-to-make baking:
- Vegan Chocolate Buckwheat Cookies {Easy & Gluten-Free}
- 3-Ingredient Keto Vegan Almond Bread {Grain-Free & Oil-Free}
- Vegan Oil-Free Coconut Flour Bread {4 Ingredients & GF}
- Soft Vegan Banana Oat Cookies {Gluten-Free & Oil-Free}
- Vegan Gluten-Free Oat Sandwich Bread {Oil-Free & Yeast-Free}
Vegan Coconut Flour Sandwich Bread {Gluten-Free, Oil-Free}
Ingredients
- 3/4 cup (84 g) coconut flour
- 2 cups (280 g) brown rice flour
- 1 teaspoon (5 g) baking soda
- 3/4 teaspoon salt
- 2 and 2/3 cups (650 mL) water
- 1 tablespoon (15 mL) apple cider vinegar
- 1/2 cup (40 g) whole psyllium husks
Instructions
- Preheat the oven to 350F (180C). Spray a 9×5-inch (22.5×12.5 cm) loaf baking pan with nonstick cooking spray (or lightly oil or grease the pan).
- In a large mixing bowl, whisk the coconut flour, brown rice flour, baking soda, and salt until blended.
- In a medium bowl, whisk the water, vinegar, and psyllium husks until blended. Let stand for about 5 minutes to thicken.
- Add the psyllium mixture to the flour mixture and mix to completely combine into a dough (the best method: use clean hands to squish the ingredients together. Alternatively, use the paddle attachment on a stand mixer).
- While the dough is still in the bowl, roughly shape into a loaf. Place in the prepared pan. Use moist hands to smooth the top and round the sides slightly.
- Bake in the preheated oven for 80 to 90 minutes until the surface appears golden brown, dry and crusty. The bread will sound hollow when tapped. Cool in the pan, on a cooling rack, for 15 minutes.
- Remove the bread from the pan and cool completely on the cooling rack before slicing.
Notes
- Storage: Store the cooled bread in an airtight container at cool room temperature for 2 days, in the refrigerator for 1 week, and in the freezer for up to 6 months.
- Vinegar Options: An equal amount of any other vinegar, or lemon or lime juice, can be used in place of the cider vinegar.
- Psyllium Tip: Be sure to use whole psyllium husks, not psyllium powder. Psyllium husks look like small flakes and are pale tan in color.
Nutrition
Like this recipe? Rate and comment below!