
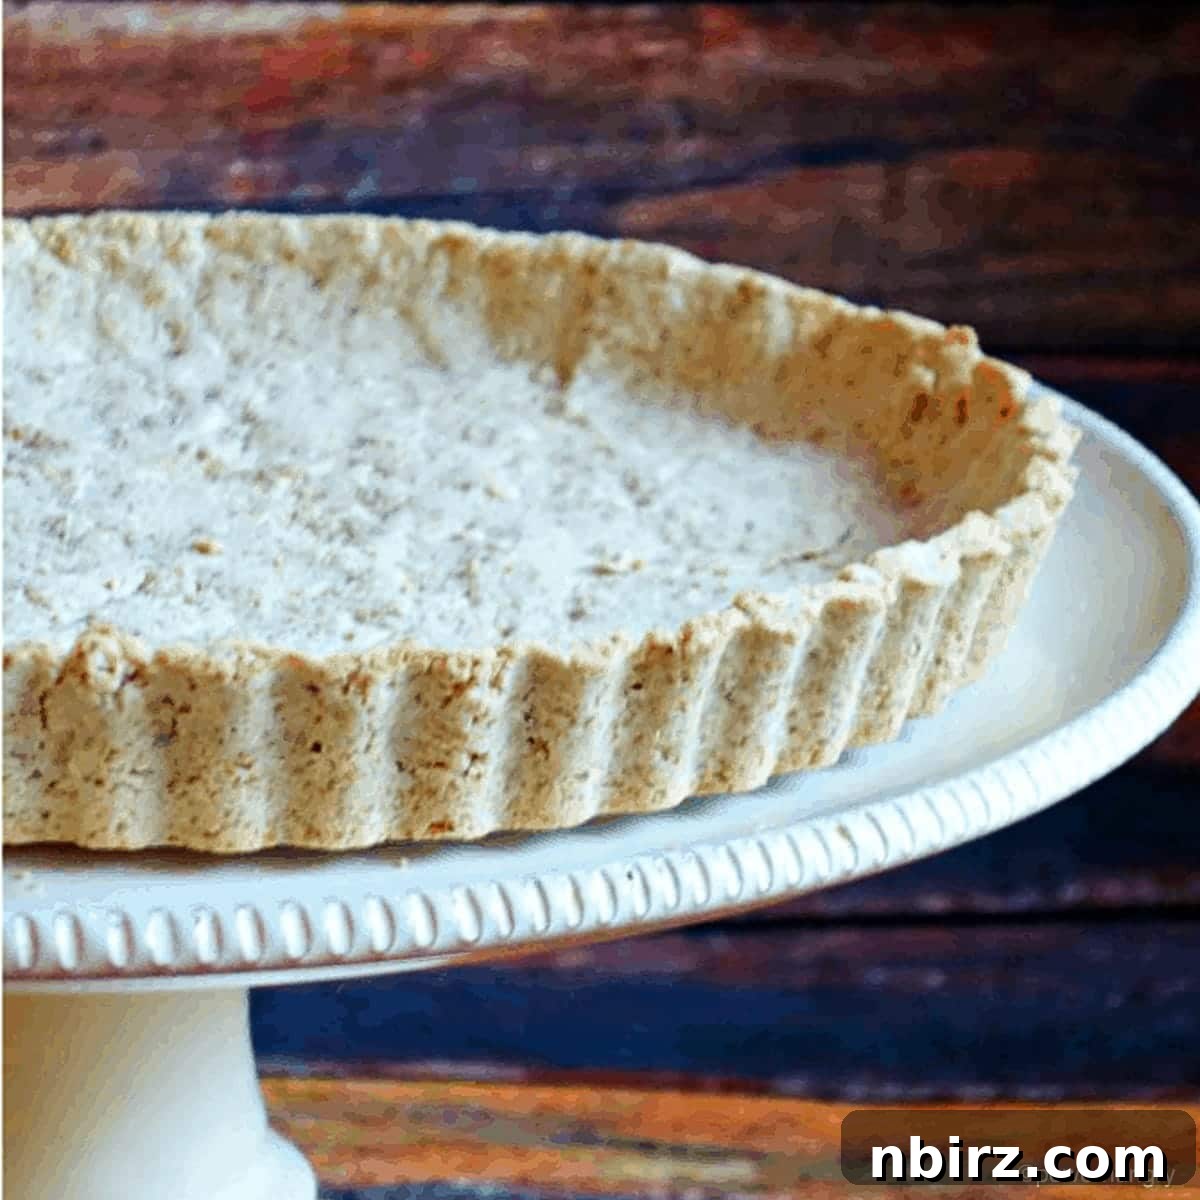
Pie crust perfection, thanks to tiger nut flour! This one-bowl, mix-press-bake tiger nut flour pie crust is naturally sweet, crisp, tender and all around amazing. It also happens to be grain-free, gluten-free, vegan & paleo.
Are you searching for a pie crust that perfectly balances flavor, texture, and dietary needs? Look no further! This holiday season, or any time you crave a delicious homemade pie, my remarkable Tiger Nut Flour Pie Crust will quickly become your go-to recipe. It’s so much more than just a crust; it’s a culinary revelation that will revolutionize your baking.
Forget the endless searching for complicated, restrictive recipes. This crust is designed for simplicity and incredible results. It’s not just good; it’s truly exceptional, offering a delicate crispness, a tender crumb, and a delightful natural sweetness that complements a wide array of fillings. Whether you’re a seasoned baker or just starting your journey with alternative flours, this recipe promises success and satisfaction. Prepare to fall in love with baking pies again!
Unveiling the Magic of Tiger Nut Flour
Before we dive into the delicious details of this pie crust, let’s take a moment to understand the star ingredient: tiger nut flour. Despite its misleading name, tiger nuts are not actually nuts at all. They are small, wrinkly tubers, much like miniature potatoes, harvested from a plant called Cyperus esculentus. This makes them an excellent, safe choice for anyone managing nut allergies.
Traditionally enjoyed as a sweet and fibrous snack, tiger nuts can also be expertly milled into a fine, lightly sweet flour. This flour has gained immense popularity in the world of health-conscious baking due to its incredible versatility and impressive nutritional profile. It’s naturally:
- **Grain-Free:** Ideal for those avoiding grains.
- **Nut-Free:** A fantastic alternative for individuals with nut allergies.
- **Gluten-Free:** Perfect for celiac and gluten-sensitive diets.
- **High in Fiber:** Promotes digestive health and keeps you feeling satisfied.
- **Rich in Potassium:** An essential mineral for heart health and blood pressure regulation.
- **Packed with Vitamins and Minerals:** A good source of magnesium, iron, zinc, and vitamins C and E.
But beyond its health benefits, tiger nut flour truly shines in its flavor. Even uncooked, it boasts a unique, delightful taste — a harmonious blend reminiscent of a cashew’s creaminess combined with the subtle sweetness of a sweet potato. This inherent sweetness and distinctive flavor mean your baked goods will require less added sugar, making for a healthier and more flavorful outcome. I’m so enamored with its taste that I’m already envisioning its use in future no-bake energy bars!
Why This Tiger Nut Pie Crust is a Dream Come True
This isn’t just another pie crust recipe; it’s a carefully crafted solution for effortless, healthy baking. Here’s why this Tiger Nut Flour Pie Crust will quickly become your favorite:
- Effortlessly Simple: One-Bowl, Mix-Press-Bake. Forget the tedious rolling and chilling of traditional pie dough. This recipe streamlines the process into a single bowl. Simply mix, press into your pie pan, and bake. It’s perfect for busy schedules and minimizes cleanup.
- Light, Tender, and Subtly Crisp: Experience a crust with a delicate balance of textures. It’s tender enough to melt in your mouth, yet provides that satisfying crispness that every great pie crust needs.
- Naturally Sweet & Flavorful: The inherent sweetness and unique flavor of tiger nut flour eliminate the need for excessive added sugars. This allows the natural taste of your pie filling to truly shine, creating a more wholesome and balanced dessert.
- Dietary Inclusivity: Grain-Free, Gluten-Free, Vegan & Paleo. This recipe ticks all the boxes for a wide range of dietary preferences and restrictions. It’s a safe and delicious option for almost everyone, making it ideal for gatherings where diverse diets are present.
- Nut-Allergy Friendly: Since tiger nuts are tubers, not botanical nuts, this crust offers a wonderful alternative for individuals with nut sensitivities, ensuring everyone can enjoy a slice of pie without worry.
Whether you’re making a sweet fruit pie, a creamy custard, or a savory quiche, this crust provides the perfect foundation, elevating your dishes with its superb taste and texture.
Essential Ingredients and Smart Substitutions
Creating this magnificent pie crust requires just a few key ingredients. The beauty lies in their simplicity and how they work together to form a cohesive, delicious dough. You’ll find the exact measurements detailed in the recipe card at the end of this post, with options for both US Customary (volume) and Metric (weights) measurements.
Key Ingredients:
- Tiger Nut Flour: The foundational ingredient, providing its unique flavor, texture, and nutritional benefits. Ensure you’re using finely ground tiger nut flour for the best results.
- Arrowroot Powder: This acts as a binder and helps create that desirable crisp texture. It’s crucial for the structural integrity of the crust, especially in a grain-free recipe.
- Coconut Oil: Provides the necessary fat for a tender, flaky crust. When melted and slightly cooled, it blends beautifully with the dry ingredients.
- Water: Just a small amount of cold water brings the dough together, allowing it to be easily pressed into the pie pan.
- Salt (Optional but Recommended): A pinch of fine sea salt enhances the overall flavor, balancing the natural sweetness of the tiger nuts and bringing out the best in the crust.
Ingredient Substitutions:
- Coconut Oil Substitute: If you prefer to use dairy, unsalted butter or ghee can be used in an equal amount as a direct substitute for coconut oil. Ensure it’s melted and slightly cooled, just like the coconut oil.
- Arrowroot Powder Substitute: Tapioca flour (also known as tapioca starch) is an excellent and widely available alternative for arrowroot powder. Use an equal amount for similar binding and crisping properties.
These simple ingredients, combined with easy steps, will yield a truly remarkable pie crust.
How to Make Your No-Roll Tiger Nut Flour Pie Crust
The beauty of this pie crust recipe lies in its incredibly straightforward, no-fuss approach. You don’t need special equipment or advanced baking skills. All the complete directions are also conveniently listed in the recipe card below.
Step One: Prepare Your Oven
Begin by preheating your oven to 350°F (180°C). Proper preheating is essential for ensuring an even bake and achieving that perfect crispness from the moment your crust enters the oven. An oven that isn’t fully preheated can lead to a soggy or unevenly baked crust.
Step Two: Combine Your Ingredients in One Bowl
In a medium-sized mixing bowl, whisk together the tiger nut flour, arrowroot powder, and optional salt. Take a moment to break up any lumps in the dry ingredients to ensure a smooth, even texture throughout the dough. Next, pour in the melted and slightly cooled coconut oil. Using a spoon or your fingertips, thoroughly combine the mixture. You’ll notice it transform into a moist, crumbly texture, resembling wet sand. Finally, add the water, stirring until the mixture comes together into a cohesive dough. Be careful not to overmix; just enough to combine.
Step Three: Press the Dough into the Pan
Transfer the prepared dough into an 8-inch (20 cm) or 9-inch (22.5 cm) pie pan or tart tin. Using your fingertips or the back of a spoon, press the dough evenly across the bottom and up the sides of the pan. Aim for a consistent thickness to ensure uniform baking. For neat edges, you can use the tines of a fork to create a decorative pattern or simply smooth them by hand.
Step Four: Choose Your Baking Option
This versatile tiger nut flour pie crust offers three distinct baking options, making it suitable for almost any pie or tart recipe you have in mind.
Option One: Fill & Bake (Unbaked Crust)
For recipes that call for an unbaked pie or pastry crust, such as many custard pies or fruit pies, your tiger nut crust is ready! Simply add your desired filling directly into the unbaked crust, and then proceed with your recipe’s baking instructions. This option allows the crust and filling to bake together, creating a harmonious blend of flavors and textures. The unbaked crust can also be loosely covered with plastic wrap and refrigerated for up to 2-3 days before filling and baking.
Option Two: Partially Bake the Crust (Par-bake)
Some recipes, particularly those with very wet fillings like quiches or certain cream pies, benefit from a partially baked crust (often called par-baking or blind baking). To par-bake, gently prick the bottom of the crust 2 or 3 times with a fork. This step allows steam to escape, preventing the crust from puffing up. Bake in your preheated oven for approximately 12 minutes. The crust will be lightly set but not fully browned. Let it cool on a wire rack before adding your filling and continuing with your recipe.
Option Three: Fully Bake the Crust
For no-bake pie and tart fillings, such as ice cream pies, chocolate puddings, or fresh fruit tarts where the filling itself doesn’t require baking, a fully baked crust is ideal. To achieve this, prick the bottom of the crust 2 or 3 times with a fork. Bake in your preheated oven for 25 to 30 minutes, or until the crust reaches a beautiful light golden brown color. Once fully baked, allow it to cool completely on a wire rack before adding your no-bake filling. This ensures a firm, crisp base that won’t get soggy.
Tips for Pie Crust Perfection
- Don’t Overmix: Overmixing the dough can develop the starches in the flour, making the crust tough. Mix just until combined.
- Cold Water is Key: Using cold water helps keep the coconut oil (or butter/ghee) from melting too quickly, which contributes to a more tender texture.
- Press Evenly: A consistent thickness ensures even baking. Pay attention to the edges to prevent them from becoming too thin and prone to burning.
- Cool Completely: Regardless of the baking option, allow the crust to cool fully before adding wet fillings. This prevents a soggy bottom.
- Experiment with Fillings: The naturally sweet and subtle flavor of this crust makes it incredibly versatile. It pairs wonderfully with both sweet and savory fillings. Think apple pie, pumpkin pie, lemon meringue, or even a savory vegetable quiche.
I absolutely adore how this crust beautifully showcases the natural, unique, and delectable flavor of tiger nuts. It’s a taste experience that stands on its own and elevates any pie it cradles.
Give this incredible recipe a try, and let me know your thoughts! I’m confident it will become a new favorite in your kitchen.
More Grain-Free & Vegan Delights You’ll Love:
- Coconut Flour Pumpkin Pie Bars {Vegan, Grain-Free, Oil-Free}
- Fresh Apple Pie Granola {Vegan, Gluten-Free}
- Tiger Nut Flour Ginger Cookies (Vegan, GF)
- One-Bowl Chickpea Flour Brownies {vegan, grain-free}
- Vegan Tigernut Flour Brownies {grain-free, nut-free, GF}
- Chickpea Flour Pumpkin Muffins {Vegan, Grain-Free, Oil-Free}
- Pumpkin Almond Flour Cookies {vegan, oil-free, grain-free)
- Vegan Cashew Cheesecake {grain-free, easy}
Print Recipe
Tiger Nut Flour Pie Crust (Grain-Free, Vegan)
By: Camilla
Pie crust perfection, thanks to tiger nut flour! This one-bowl, mix-press-bake tiger nut flour pie crust is naturally sweet, crisp, tender and all around amazing. It also happens to be grain-free, gluten-free, vegan & paleo.
Ingredients
- 1 cup + 3 tablespoons tiger nut flour
- 1/3 cup arrowroot powder
- 1/4 teaspoon fine sea salt
- 5 tablespoons coconut oil, melted and cooled slightly
- 1 1/2 tablespoons water
Instructions
- Preheat oven to 350°F (180°C).
- In a medium bowl, whisk together tiger nut flour, arrowroot, and salt, breaking up any lumps.
- Add the oil to the bowl, stirring or using fingers to completely combine (it will have a moist, crumbly texture). Add the water, stirring until combined.
- Press dough evenly into the bottom and sides of an 8-inch (20 cm) or 9-inch (22.5 cm) pie pan or tart tin.
- Unbaked Crust: The crust is ready for use in recipes calling for an unbaked crust (i.e., add filling and then bake). It can also be loosely covered with plastic wrap and refrigerated until ready to fill and bake.
- Par-baked Crust: Prick the bottom of the crust 2 or 3 times with a fork (to release steam). Bake in preheated oven for 12 minutes. Cool on a wire rack and use in recipes calling for par-baked crust.
- Fully-baked Crust: Prick the bottom of the crust 2 or 3 times with a fork (to release steam). Bake in preheated oven for 25 to 30 minutes until light golden brown. Cool on a wire rack and use in recipes calling for fully-baked crust.
Notes
- Coconut Oil Substitute: If you eat dairy, feel free to use an equal amount of unsalted butter or ghee in place of the coconut oil.
- Arrowroot Substitute: An equal amount of tapioca flour/starch can be used in place of the arrowroot starch.
Nutrition
Serving: 1 serving | Calories: 257kcal | Carbohydrates: 17g | Protein: 6g | Fat: 19g | Saturated Fat: 9g | Polyunsaturated Fat: 9g | Sodium: 122mg | Fiber: 2g | Sugar: 1g
Love this recipe? Don’t forget to share your creations and thoughts in the comments below!