
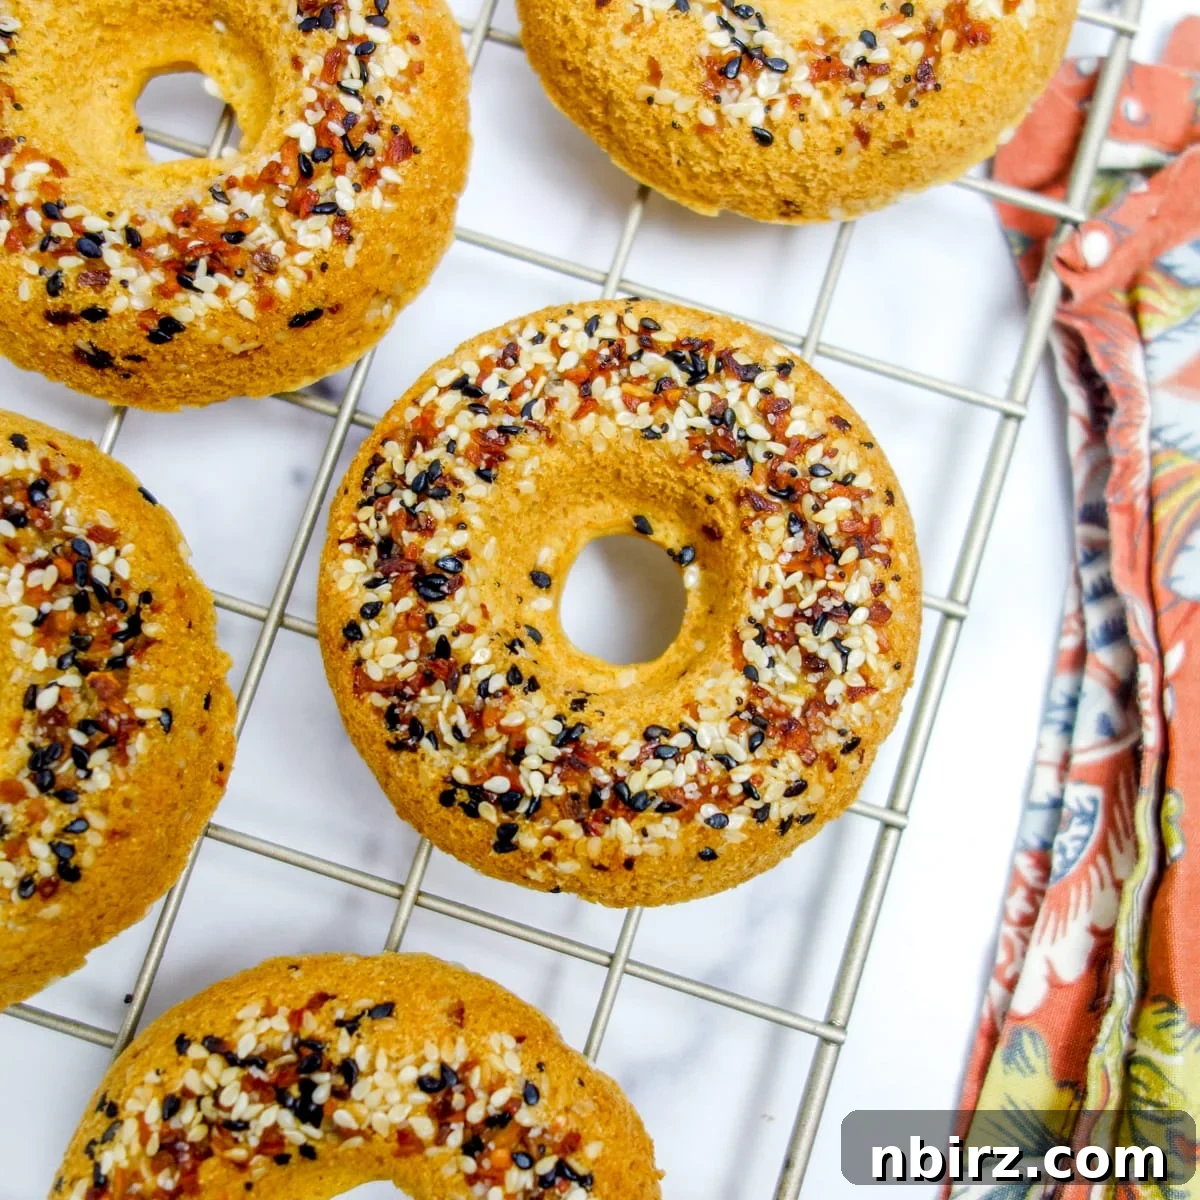
Welcome to the world of revolutionary vegan bagels! Forget everything you thought you knew about traditional bagel baking, because these vegan chickpea flour bagels are here to redefine your expectations. They are incredibly quick and easy to prepare, offering a delightful flavor and satisfying texture that will surely capture your heart. What makes them truly special is their impressive list of dietary benefits: they are proudly grain-free, gluten-free, oil-free, nut-free, and yeast-free, making them accessible to a wide range of dietary needs and preferences. Perfectly paired with a generous dollop of creamy vegan cream cheese, these innovative bagels are set to become a staple in your healthy kitchen.
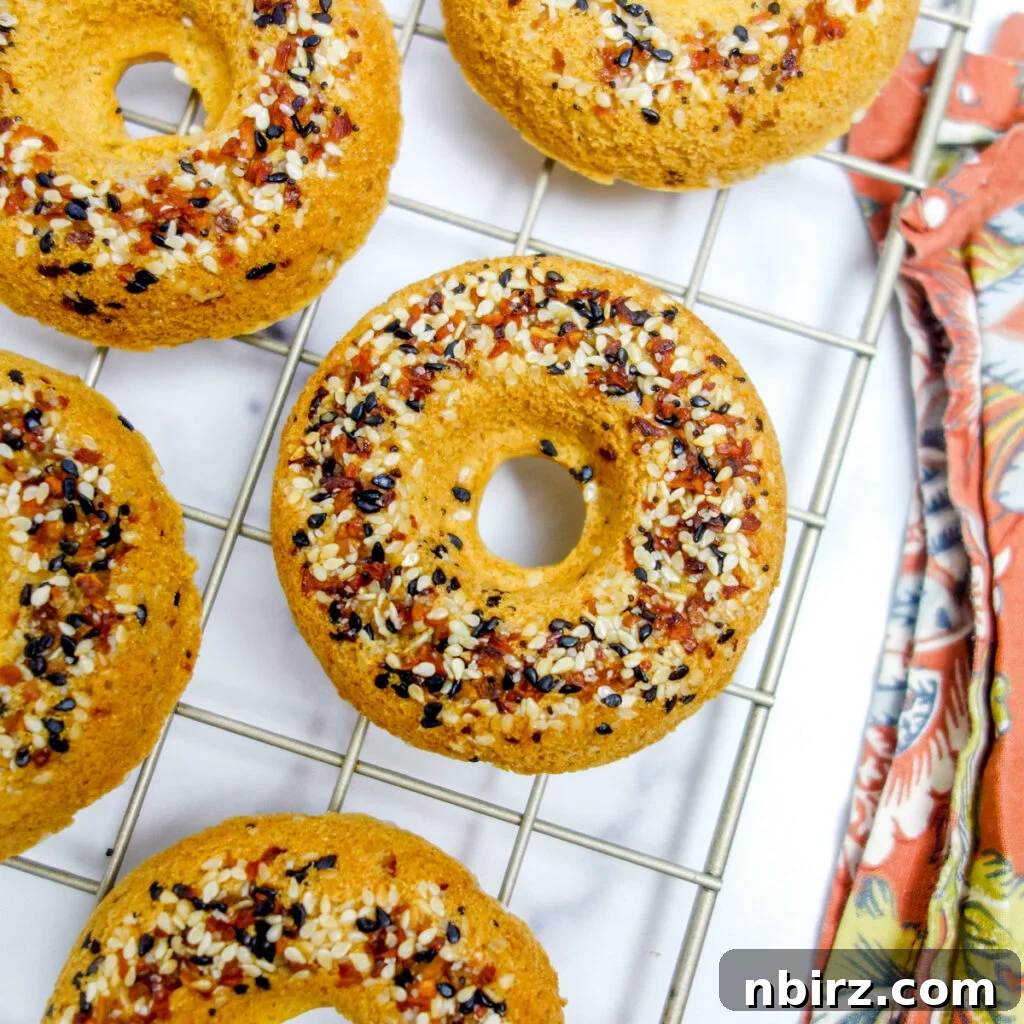
Let’s be upfront: these vegan chickpea flour bagels are far from your typical, everyday bagel. They challenge the conventional methods and ingredients, yet deliver an experience that is equally, if not more, satisfying. If you’ve ever dreamt of enjoying a homemade bagel without the lengthy proofing times, complex boiling steps, or reliance on gluten and yeast, then prepare to be amazed. These aren’t just an alternative; they are a delightful destination for your taste buds.
What sets these exceptional bagels apart from the crowd?
- Effortlessly Baked in a Donut Pan: No need for special shaping techniques or complicated steps; a standard donut pan simplifies the process.
- Naturally Leavened (No Yeast Required): They rise beautifully thanks to a simple reaction between baking soda and vinegar, making them yeast-free and quick.
- Boiling is a Bygone Era: Unlike traditional bagels that require a water bath, these go straight from the pan to the oven, saving you time and effort.
- Wholesome Chickpea Flour Base: This incredibly versatile flour provides a unique nutty flavor and fantastic texture, while keeping them naturally gluten-free and grain-free.
We understand that these distinctions might raise an eyebrow for traditionalists. “No boiling? No yeast?” you might exclaim! But trust us, the proof is in the tasting. These bagels are utterly scrumptious. When sliced in half and generously adorned with a dollop of creamy cashew cream cheese or the savory tang of vegan Boursin, they effortlessly quell any bagel craving. We are confident that they will quickly become a favorite in your household, too. So, let the delightful gnoshing begin!
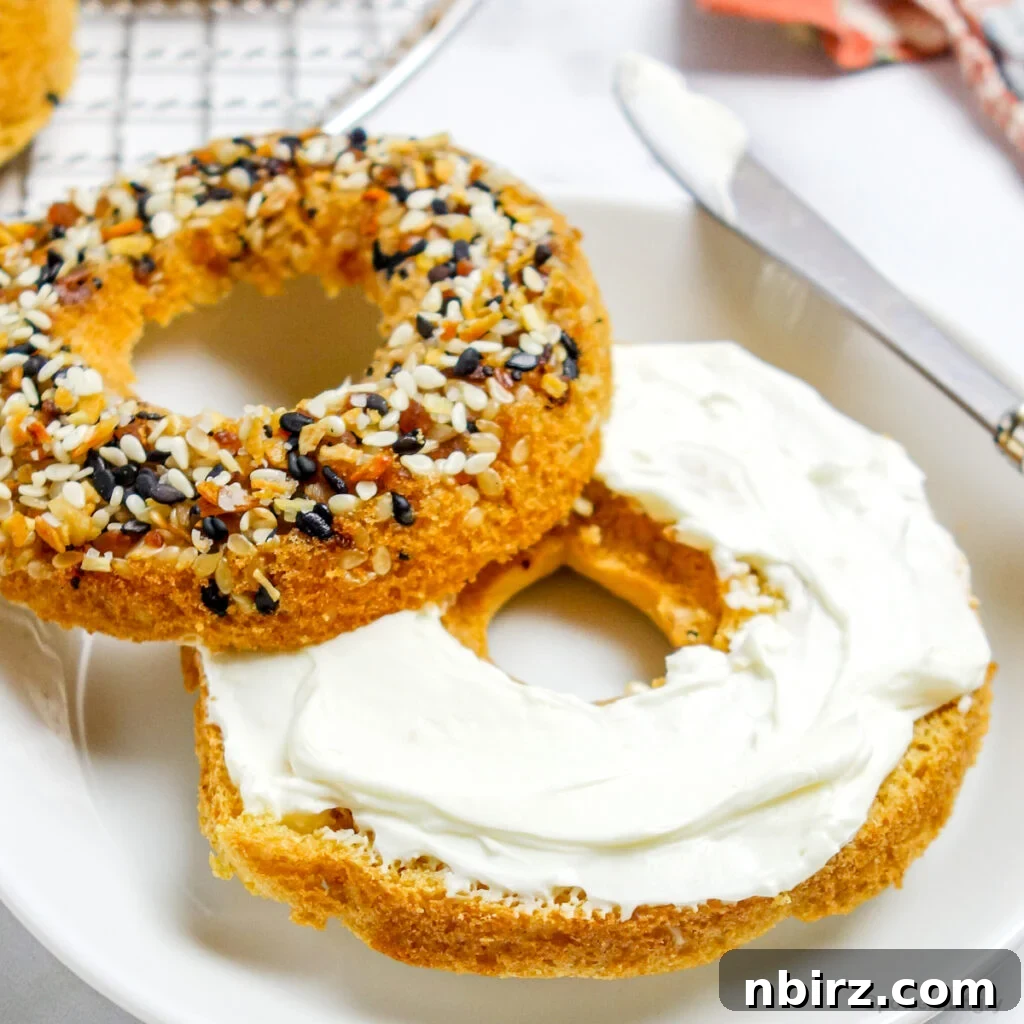
Unlock a World of Benefits with These Chickpea Flour Bagels
These “everything” bagels truly boast an impressive list of advantages, catering to various dietary needs and health-conscious lifestyles. Each benefit contributes to making them a smart and delicious choice for breakfast, lunch, or snack time:
- Grain-Free & Gluten-Free: Ideal for those following specific dietary regimens or sensitive to grains and gluten. Chickpea flour offers a wonderful alternative to wheat-based products.
- Vegan (Egg-Free & Dairy-Free): Made entirely from plant-based ingredients, these bagels are perfect for vegans, vegetarians, and anyone looking to incorporate more plant-based foods into their diet without compromising on taste or texture.
- Yeast-Free: A fantastic solution for individuals with yeast sensitivities or those seeking a quicker, simpler baking process. The baking soda and vinegar provide all the lift needed.
- Xanthan Gum-Free: Many gluten-free recipes rely on xanthan gum for binding, but these bagels achieve their perfect texture naturally, without this common additive.
- Oil-Free: This recipe minimizes fat content, making these bagels a lighter option without sacrificing moisture or flavor.
- Nut-Free: A safe and delicious choice for individuals with nut allergies, ensuring everyone can enjoy a delightful bagel experience.
- High in Protein: Each bagel provides a significant 5 grams of protein, helping you feel fuller for longer and supporting muscle health.
- Low in Calories: At just 97 calories per bagel, they offer a guilt-free indulgence that fits well into calorie-conscious meal plans.
- Minimal Ingredients: Simple, accessible ingredients mean less shopping and a straightforward preparation.
- Frugal & Economical: Chickpea flour is generally an inexpensive grain-free flour, making these bagels a cost-effective way to enjoy wholesome, specialty baked goods at home.
- Fast & Easy to Make: Designed for efficiency, this recipe requires minimal time and effort, perfect for busy mornings or spontaneous baking sessions.
Essential Ingredients for Your Perfect Chickpea Bagels
The precise measurements for each ingredient are thoughtfully detailed in the comprehensive recipe card located at the end of this post. You can easily switch between US Customary (volume) and Metric (weights) units to suit your preferred measurement system.
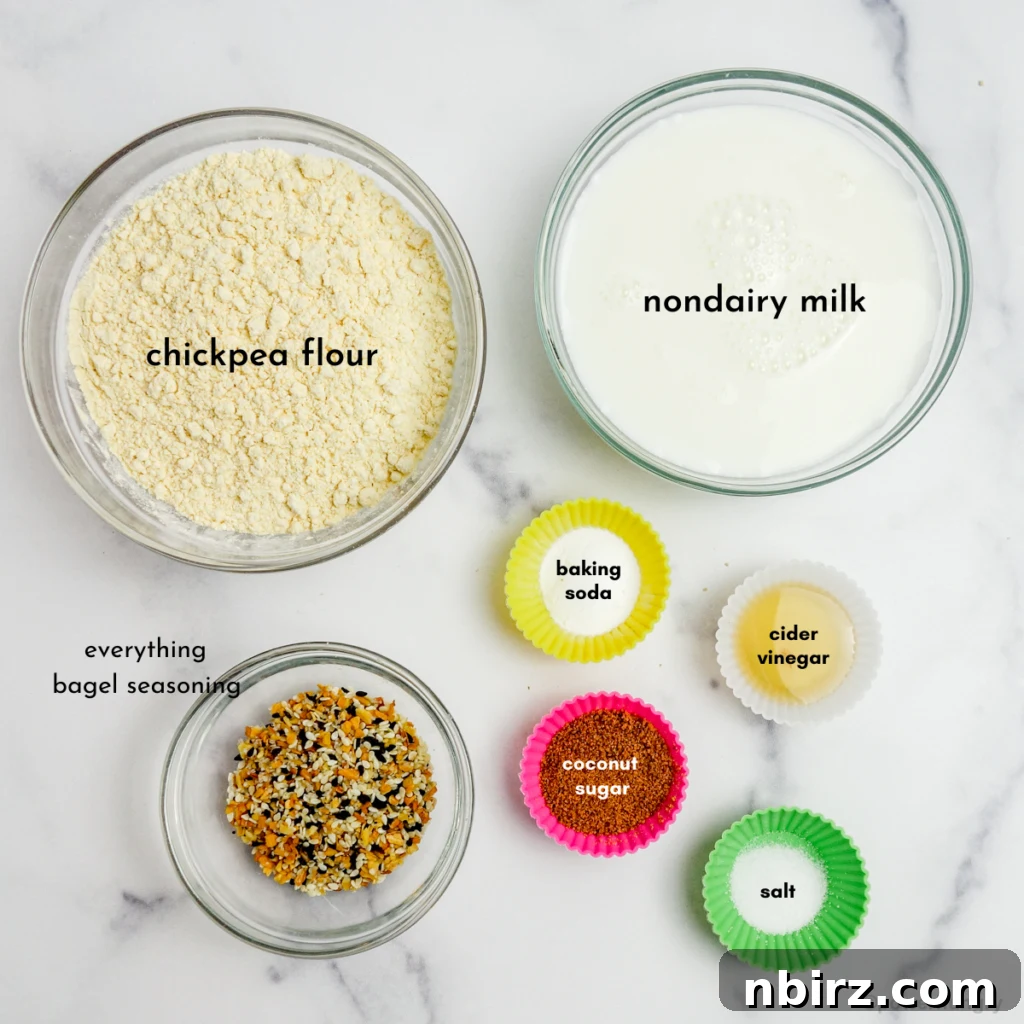
At the heart of this recipe is chickpea flour, a remarkable ingredient that performs a solo act, expertly replacing the conventional all-purpose flour, eggs, and other binders typically found in baked goods. Its unique properties are key to the texture and flavor of these bagels. Here’s the concise list of what you’ll need to create a batch of these delicious vegan, grain-free, and gluten-free bagels:
- Chickpea Flour: This is the star of the show. You might also find it labeled as garbanzo bean flour, besan, or gram flour. Ensure you’re using pure chickpea flour for the best results, as other flours won’t behave the same way.
- Non-Dairy Milk: Any unsweetened variety works beautifully, such as almond, soy, oat, or cashew milk. This provides the necessary liquid for the batter.
- Cider Vinegar: Essential for reacting with the baking soda to create the lift and airy texture without yeast.
- Coconut Sugar: Just a small amount to balance the nutty flavor of the chickpea flour and assist with browning. We offer various substitution options within the recipe for your preference.
- Baking Soda: The primary leavening agent that, when combined with vinegar, ensures these bagels rise perfectly.
- Optional Salt: This will largely depend on your choice of Everything Bagel seasoning. Refer to the detailed tip below for guidance on whether to add it to the batter.
- Everything Bagel Seasoning (or Preferred Toppings): This classic topping adds incredible flavor and crunch, but feel free to customize with your favorites.
That’s truly all you need! A handful of simple ingredients transform into these wonderful, guilt-free bagels.
To Salt or Not to Salt? A Guide for Your Bagel Batter
Choosing whether to add salt to your bagel batter largely depends on your chosen topping, particularly if you’re using a pre-mixed Everything Bagel Seasoning. Many commercial “Everything Bagel” blends already contain a generous amount of coarse salt, which can easily lead to an over-salted bagel if additional salt is included in the batter.
In our testing, we found that when using a store-bought Everything Bagel Seasoning (which includes sesame seeds, dried onion, dried garlic, and salt), adding even a quarter teaspoon of salt to the batter made the finished bagels too salty. By omitting the salt from the batter, the overall saltiness was perfectly balanced, allowing the flavors of the seasoning to shine without overwhelming the palate.
Therefore, if you opt for a prepared Everything Bagel Seasoning that lists salt as an ingredient, we highly recommend skipping the additional salt in the bagel batter. This ensures a harmonious flavor profile.
However, if you prefer plain bagels or plan to use alternative, salt-free toppings (such as poppy seeds, plain sesame seeds, or a custom spice blend), then a small amount of salt in the batter is essential for flavor. In this case, add 1/8 to 1/4 teaspoon of salt to the batter, adjusting to your personal preference. We enjoy a more pronounced saltiness, so 1/4 teaspoon is our go-to, but 1/8 teaspoon is sufficient if you prefer a lighter touch.
Versatile Vinegar & Acid Options
While the recipe specifies cider vinegar, feel free to use any other vinegar you have on hand – whether it’s white vinegar, distilled vinegar, or even a light rice vinegar. The key is the acidic component, which reacts with the baking soda to create the leavening. The specific flavor of the vinegar is mostly neutralized during baking.
If you don’t have vinegar readily available, or if you avoid it for dietary reasons, an equal amount of fresh lemon juice or lime juice will work just as effectively. These citrus juices provide the necessary acidity for the chemical reaction, ensuring your bagels achieve that lovely, light texture. Just ensure it’s fresh for the best results!
Effortless Step-By-Step Guide to Baking Vegan Chickpea Flour Bagels
One of the greatest joys of this recipe is its simplicity and speed. You can whip up a batch of these delightful bagels in almost no time, making them ideal for a quick morning treat. The process is so straightforward that it requires minimal mental effort – truly the kind of baking that’s achievable even before your first cup of coffee has kicked in.
Step One: Preheat Oven & Prepare Your Donut Pan
Begin by preheating your oven to 400°F (200°C). This ensures the oven is at the correct temperature when your batter is ready, which is crucial for a good rise.
Next, take a full-size donut pan – one with 6 wells, each approximately 3.25 inches (8.2 centimeters) in diameter. Lightly spray each of the 6 wells with a nonstick cooking spray, ensuring full coverage to prevent sticking. Alternatively, you can use a small amount of oil to lightly grease each well. Then, for that classic bagel flair, generously sprinkle about a teaspoon (or more, to your liking) of Everything Bagel seasoning into the bottom of each prepared well. This will create a flavorful, textured crust on the top of your finished bagels once inverted.
Step Two: Thoroughly Combine Dry Ingredients
In a medium-sized mixing bowl, combine your dry ingredients: the chickpea flour, coconut sugar, baking soda, and the optional salt (remembering the guidance on salt from earlier). Using a whisk, thoroughly blend these ingredients together. It’s important to break up any lumps, especially with chickpea flour, which can sometimes be a bit clumpy depending on the brand. If your flour is particularly lumpy, consider sifting it first to ensure a smooth, even batter. This step helps to evenly distribute the leavening agent and sweetener, ensuring a consistent texture and flavor throughout your bagels.
Step Three: Incorporate Wet Ingredients for the Batter
Now, add the non-dairy milk and cider vinegar to the bowl containing your dry ingredients. Whisk everything together until the mixture is completely smooth and well-blended. You’ll notice the batter will quickly transform into a consistency similar to a thick pancake batter. It’s fascinating to observe that the batter will continue to thicken slightly within thirty to sixty seconds of whisking; this is a natural process as the chickpea flour begins to absorb the liquid, a phenomenon known as flour hydration. Ensure there are no dry pockets and the batter is uniform before moving to the next crucial step.
Step Four: Swiftly Fill the Donut Pan
This is where speed becomes your ally! Once the wet and dry ingredients are combined, the baking soda and vinegar immediately begin their reaction, creating carbon dioxide bubbles that give the bagels their rise. To maximize this leavening effect, it’s crucial to get the batter into the oven as quickly as possible. Don’t delay!
Carefully spoon or pour the thick batter into the prepared wells of your donut pan. Use the back of your spoon or a small spatula to gently nudge and spread the batter evenly into each well, ensuring it fills the entire cavity. Don’t be shy; the chickpea flour bagel batter should reach the very tops of each well. Filling them completely will result in beautifully formed, full-sized bagels.
Pro Tip: The Easiest Way to Fill a Donut Pan Flawlessly
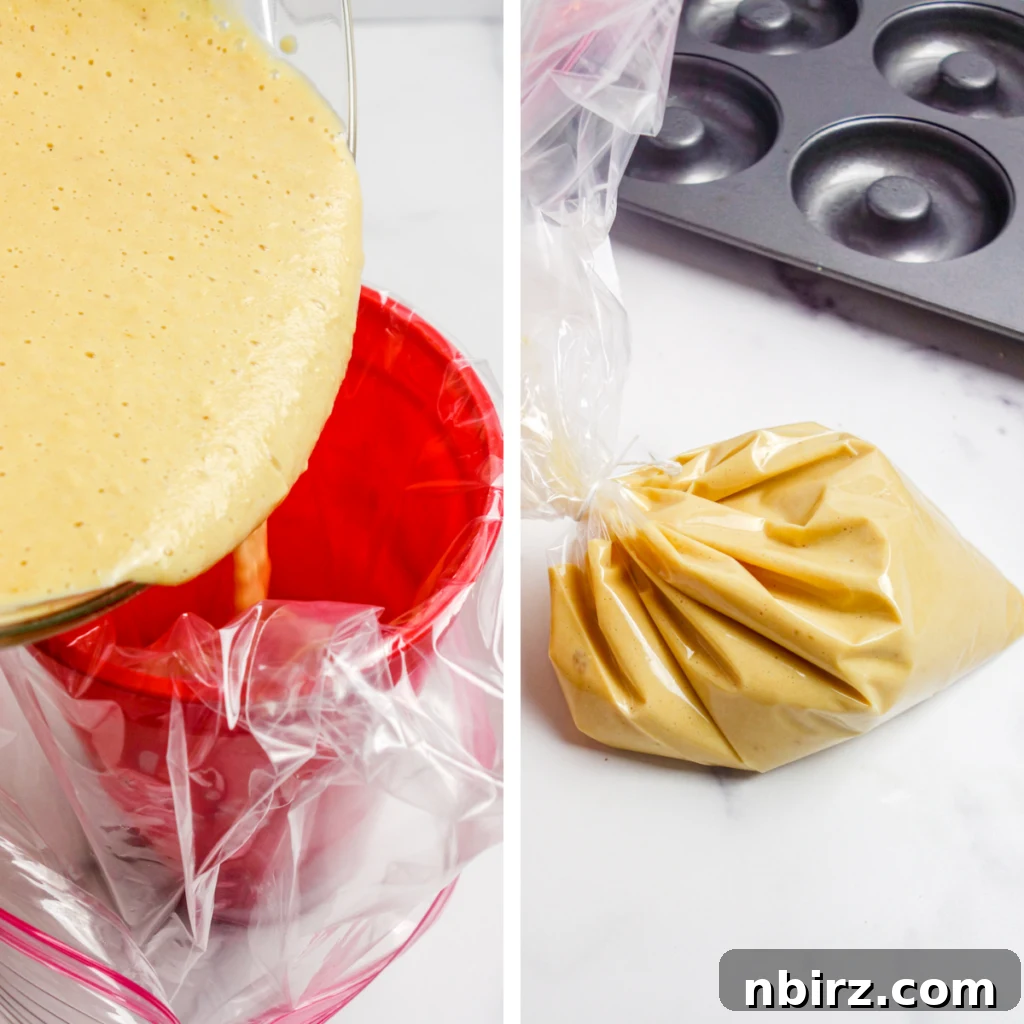
While spooning or pouring batter into the donut pan wells is perfectly fine, for maximum ease and speed – especially when working quickly to preserve the leavening – we highly recommend piping the batter using a simple plastic bag. No specialized piping skills or fancy equipment are needed, just a large, sturdy plastic storage bag (like a freezer bag).
To do this, push one corner of the plastic bag into a tall glass or cup, allowing the top edges of the bag to hang over the rim. Scrape all the bagel batter into the bag. Once the batter is in, gently gather the top of the bag and seal it securely, either by using a zip tie, a rubber band, or by simply tying a knot in the bag itself, ensuring it’s close to the batter to prevent air pockets.
Next, snip off one of the bottom corners of the bag, creating an opening about 1/2-inch wide. Now, you can easily squeeze the batter directly and precisely into each of the donut pan wells, minimizing mess and ensuring even distribution. This method is incredibly efficient and neat.
A Friendly Warning: Be prepared for an immediate and intense love affair with this piping technique. It’s so simple and effective, you might find yourself piping all sorts of batters from now on!
Step Five: Bake Your Golden Bagels to Perfection
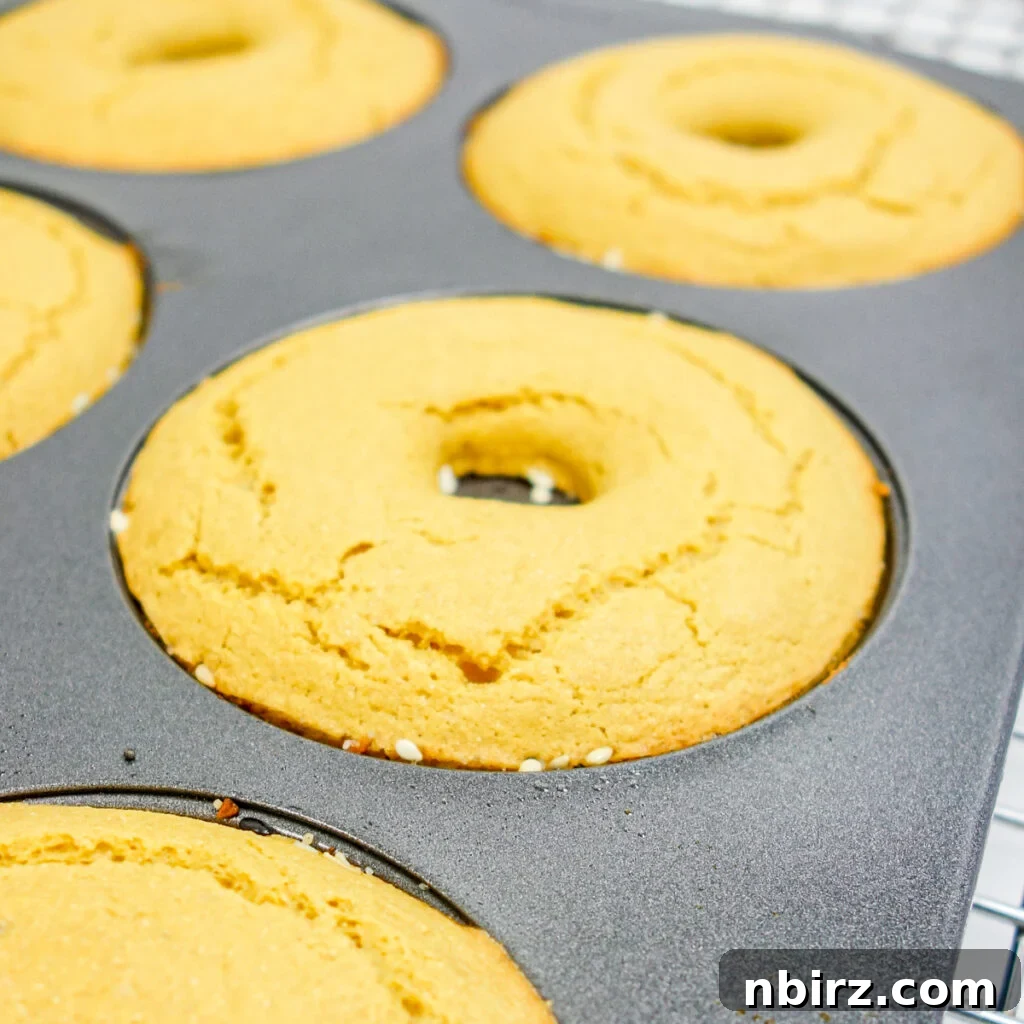
Once your donut pan is filled, immediately place it into the preheated 400°F (200°C) oven. Bake the bagels for approximately 10 to 12 minutes. You’ll know they are perfectly baked when their tops have risen beautifully, feel firm to the touch, and have achieved a lovely golden-brown hue. The exact baking time may vary slightly depending on your oven, so keep an eye on them towards the end.
After baking, carefully remove the pan from the oven. Allow the bagels to cool in the pan on a wire cooling rack for about 5 minutes. This brief cooling period helps them set and makes them easier to remove.
Step Six: Gently Remove and Serve Your Fresh Bagels
After the initial cooling period in the pan, it’s time to release your perfectly baked bagels. Take a small spoon or a dull knife and carefully run its tip around the inner edge of each well in the donut pan. You might find that the chickpea flour batter has a tendency to cling to any tiny, un-sprayed or un-oiled parts of the pan. While this can be a tiny bit annoying, even with theoretically nonstick pans, only a gentle nudge is usually required to free each bagel.
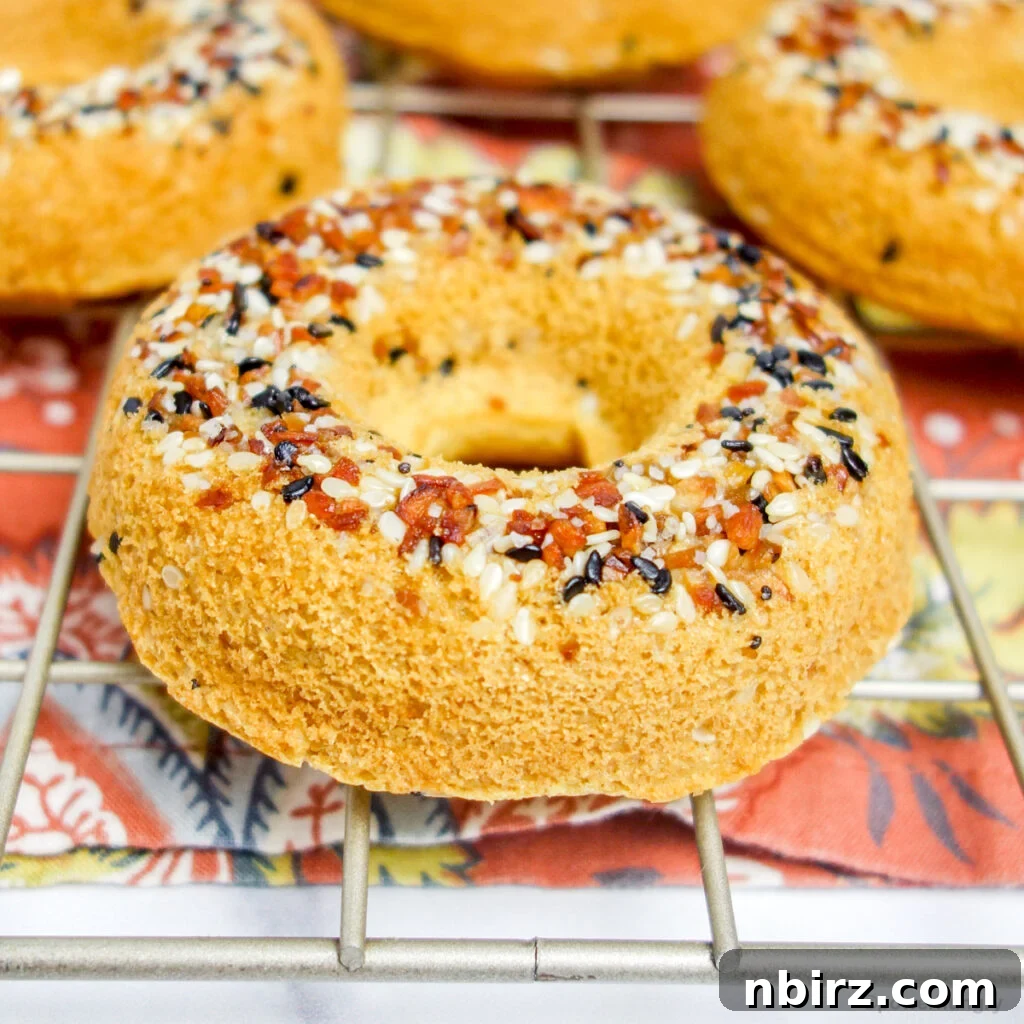
Behold the satisfying culmination of your efforts: a beautiful half-dozen homemade bagels! Once removed, transfer them to a wire rack to cool completely. However, if you simply can’t wait, these bagels are also absolutely divine when served warm. So, go ahead and gnosh immediately if your cravings are calling!
Allow the bagels to cool completely on a wire rack if you plan to store them. Or, if you’re like us and can’t resist, enjoy them warm straight from the oven! They are absolutely delightful either way. Split them open and load them up with your favorite spreads for an instant treat.
Do Vegan Chickpea Flour Bagels Mimic Traditional Bagel Flavor and Texture?
It’s important to set realistic expectations: these vegan chickpea flour bagels do not replicate the exact taste and texture of traditional, New York-style bagels. Traditional bagels owe their distinctive chewy interiors and crisp, slightly shiny exteriors to specific ingredients and meticulous processes. These typically include high-gluten flour, yeast for fermentation and rise, extensive kneading, a period of proofing, and crucially, a brief boil in water (often with malt or lye) before baking. This combination creates that characteristic dense chew and unique crust.
However, what these chickpea flour bagels *do* offer is a profoundly satisfying and equally delicious alternative, especially considering how little time, effort, and expense they require! They carve out their own delightful niche in the world of baked goods.
Vegan chickpea flour bagels have a firm yet remarkably tender texture. They are robust enough to handle a generous smear of cream cheese or any other topping without falling apart, making them a practical and enjoyable vessel. They also toast beautifully, developing a pleasant crispness that enhances their appeal.
The flavor profile is distinctively nutty and wholesome, a natural characteristic of chickpea flour. When adorned with the “everything bagel” seasoning, this nutty base becomes an ideal canvas, driving you straight into a comforting, savory bagel experience that is undeniably delicious in its own right.
Frequently Asked Questions & Creative Substitutions
Here are some common questions and helpful substitution tips to ensure your chickpea flour bagel baking experience is a success!
Can I Substitute Another Flour for Chickpea Flour?
Unfortunately, no. This recipe has been specifically developed to harness the unique binding and textural properties of chickpea flour. Chickpea flour acts as both the primary flour and a binder, thanks to its specific protein and starch composition. Other flours, including other gluten-free flours like almond flour, oat flour, or rice flour, have different absorption rates and structural characteristics. Substituting them will not yield the same firm, yet tender texture, and the bagels may not hold their shape or rise correctly. For best results, it’s essential to stick with chickpea flour.
Can I Substitute a Different Sweetener for Coconut Sugar? Or Leave it Out?
Absolutely, you have flexibility here! You can substitute an equal amount of almost any other granular or liquid sweetener for the coconut sugar. Great options include maple syrup, agave nectar, unrefined cane sugar, light brown sugar, or even a measure-for-measure sugar replacement if you’re managing sugar intake.
You can also choose to omit the coconut sugar (or any other sweetener) entirely from the recipe. We find that the small addition of coconut sugar beautifully balances the naturally earthy and nutty flavor of the chickpea flour, preventing it from tasting too savory or “beany.” It also plays a role in achieving that lovely golden-brown crust. If you omit the sweetener, your bagels will still be delicious, but they might have a slightly lighter, more tan color rather than a rich golden hue, and the flavor will be purely savory.
I Don’t Have a Donut Pan. What Else Can I Use to Bake the Chickpea Flour Bagels?
No donut pan? No problem! While they won’t have the classic bagel shape, you can still enjoy these delicious chickpea flour “bagel bites” by baking them in a standard-sized muffin tin. The results will be equally wonderful and just as satisfying.
To use a muffin tin: Lightly spray the bottoms of 10 muffin cups of a standard-sized muffin tin with nonstick cooking spray (no need to spray the sides extensively, as the batter won’t rise too high). Sprinkle a pinch of Everything Bagel seasoning (or your chosen topping) into the bottom of each prepared muffin cup. Divide the batter evenly among the 10 muffin cups; they will be somewhat shallow. Bake them in a preheated 400°F (200°C) oven for a shorter duration, typically 7 to 9 minutes, or until golden and firm to the touch. Keep an eye on them, as muffin tins tend to bake faster due to the smaller portion size.
Do I Have to Use Everything Bagel Seasoning on Chickpea Flour Bagels?
Absolutely not! The beauty of this recipe is its versatility. While Everything Bagel seasoning is a popular and delicious choice, you have full creative freedom with your toppings and flavor profiles. Here are some ideas:
- Plain: Simply leave them un-topped for a versatile base.
- Single Seed Toppings: Use sesame seeds (white or black), poppy seeds, or sunflower seeds for a different texture and flavor.
- Garlic & Onion: Sprinkle with dried minced garlic or dried onion flakes for an aromatic kick.
- Herbs & Spices (in Batter): You can incorporate dried herbs like oregano, thyme, or rosemary directly into the batter for a savory herb bagel. A pinch of black pepper or a touch of smoked paprika would also be delightful.
- Sweet Direction: To create a sweet version, increase the coconut sugar to 4 or 5 teaspoons total (or to taste) and mix in your favorite sweet spices like cinnamon, pumpkin pie spice, nutmeg, or a dash of cardamom. You could top these with a sprinkle of cinnamon sugar before baking, or even a few chocolate chips!
Don’t be afraid to experiment and personalize your bagels to suit your mood and preferences. Happy bagel baking!
More Delicious Recipes Featuring Chickpea Flour!
- 3-Ingredient Chickpea Flour Vegetable Flatbread
- Chickpea Flour Soda Bread {vegan, grain-free}
- Socca, Chickpea Flour Crepe {gluten-free, oil-free}
- Oat Almond Donut Muffins {vegan, oil-free, gluten-free}
- Chickpea Flour No-Corn Bread (vegan, grain-free)
- Chickpea Flour Sandwich Bread (5 ingredients, vegan)
- Mini Chickpea Flour Pizzas (Vegan, Easy)
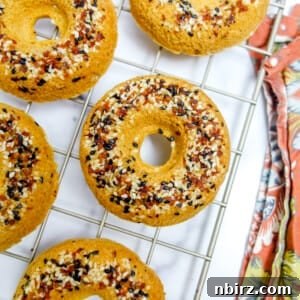
Vegan Chickpea Flour Bagels {Grain-Free, Oil-Free}
Ingredients
- Nonstick cooking spray
- 1 and 1/2 tablespoons everything bagel topping
- 1 and 1/4 cups (150 g) chickpea flour
- 2 teaspoons (10 g) coconut sugar
- 1/2 teaspoon baking soda
- Optional: 1/4 teaspoon salt (only if NOT using salted bagel topping)
- 3/4 cup non-dairy milk
- 1 teaspoon cider vinegar
Instructions
-
Preheat the oven to 400F (200C). Spray (or oil) the 6 wells of a full-size donut pan (3.25 inches / 8.2 centimeters in diameter) with nonstick cooking spray. Sprinkle a teaspoon (or more, as desired) of everything bagel seasoning in each well to cover the bottoms.
-
In a medium mixing bowl, whisk the chickpea flour, coconut sugar, baking soda, and optional salt until blended.
-
Add the non-dairy milk and vinegar to the bowl, whisking until completely blended. The result will resemble a thick pancake batter.
-
Working quickly, spoon, pour, or pipe (see post for a how-to) the batter into the prepared wells of the donut pan. Use a spoon to nudge the batter evenly into each well.
-
Bake the bagels in the preheated oven for 10 to 12 minutes until the tops have risen, are firm to the touch, and the color is golden brown. Cool, in the pan, on a cooling rack for 5 minutes.
-
Run the tip of a spoon or dull knife around the edge of each of the wells on the donut pan to remove the bagels. Serve warm or cool completely. Split and serve with your favorite spreads!
Notes
Vinegar Options: An equal amount of any other vinegar, or lemon or lime juice, can be used in place of the cider vinegar.
Coconut Sugar Options: An equal amount of another liquid or granular sweetener (e.g., maple syrup, unrefined sugar, agave nectar, brown sugar) can be used in place of the coconut sugar. It can also be left out of the recipe, if desired.
Nutrition
Like this recipe? We’d love to hear from you! Please consider leaving a rating and a comment below to share your experience and any creative twists you’ve added. Your feedback helps our community of bakers!