
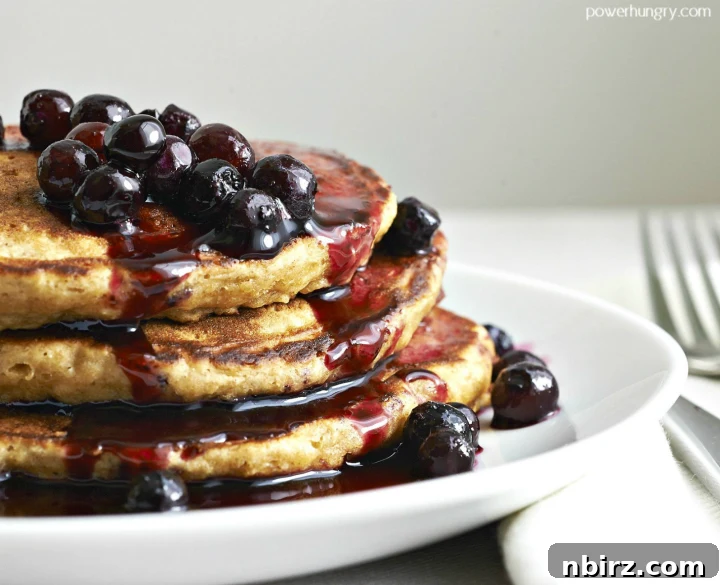
Experience the magic of simplicity with these 3-ingredient vegan chickpea flour pancakes. Naturally grain-free, gluten-free, oil-free, and packed with plant-based protein, they are truly a breakfast revelation. Prepare to be amazed by their ease, delicious flavor, and wonderfully fluffy texture!
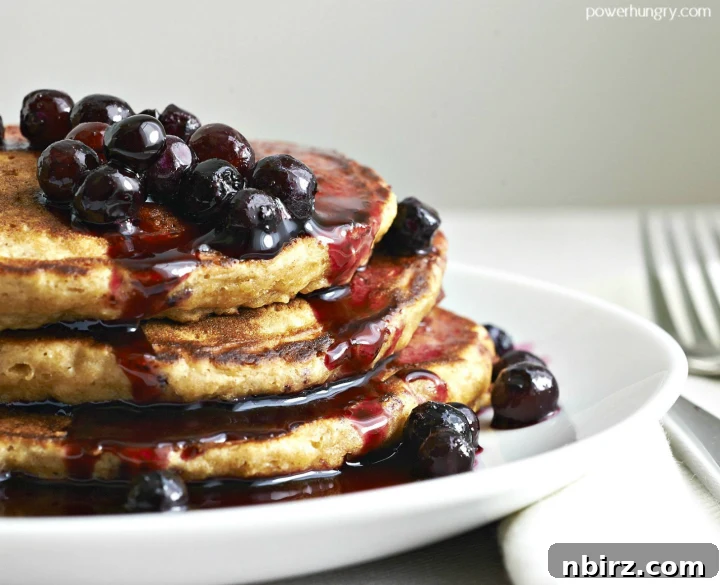
Effortless Vegan Chickpea Flour Pancakes: Your New Favorite Breakfast!
Imagine a breakfast that not only tantalizes your taste buds but also aligns perfectly with your health and dietary preferences. These incredible vegan chickpea flour pancakes are exactly that! Crafted with just three core ingredients, they deliver on all fronts: ease of preparation, fantastic taste, and a delightfully fluffy texture that will make you forget they’re dairy-free, egg-free, gluten-free, and grain-free.
Beyond their simple elegance, these pancakes are a nutritional powerhouse, making them an ideal choice for a wholesome start to your day. Whether you’re a seasoned vegan, someone managing dietary restrictions, or simply looking for a quick and healthy breakfast option, these chickpea flour pancakes are a game-changer. They prove that healthy eating doesn’t have to be complicated or compromise on flavor.
Unlocking the Benefits: Why These Pancakes Are a Nutritional Hero
These chickpea flour pancakes aren’t just easy to make; they are loaded with health benefits that cater to a wide range of dietary needs and preferences. Here’s a closer look at what makes them so special:
- Vegan (Dairy-Free, Egg-Free): Perfect for those following a plant-based diet or anyone avoiding dairy and eggs due to allergies or ethical choices. Chickpea flour naturally acts as a binder, eliminating the need for traditional egg replacers.
- Gluten-Free: Made entirely from chickpea flour, these pancakes are naturally free from wheat, barley, and rye. This makes them a safe and delicious option for individuals with celiac disease or gluten sensitivity.
- Grain-Free: For those on a grain-free diet, chickpea flour is an excellent alternative to conventional flours like oats or rice, which are grains. It offers a unique texture and nutritional profile without any grains.
- Made with Just 3 Ingredients: Simplicity is key! Fewer ingredients mean quicker preparation, less fuss, and a more accessible recipe for everyone, regardless of cooking experience.
- A Good Source of Plant Protein: Chickpeas are renowned for their high protein content, and chickpea flour carries this benefit directly into your pancakes. Protein helps keep you feeling full and energized throughout the morning.
- High in Fiber: Fiber is crucial for digestive health, satiety, and blood sugar regulation. These pancakes deliver a significant amount of dietary fiber, contributing to your daily intake.
- Nut-Free: A fantastic option for those with nut allergies, offering a delicious and safe breakfast alternative without compromising on flavor or texture.
- Oil-Free: By using a nonstick griddle or pan and minimal (or no) oil spray, these pancakes keep fat content low, aligning with oil-free dietary approaches for heart health.
It might sound too good to be true – a recipe that is so simple, yet so versatile and beneficial. But rest assured, these 3-Ingredient Chickpea Flour Pancakes are 100% real and ready to become a staple in your kitchen.
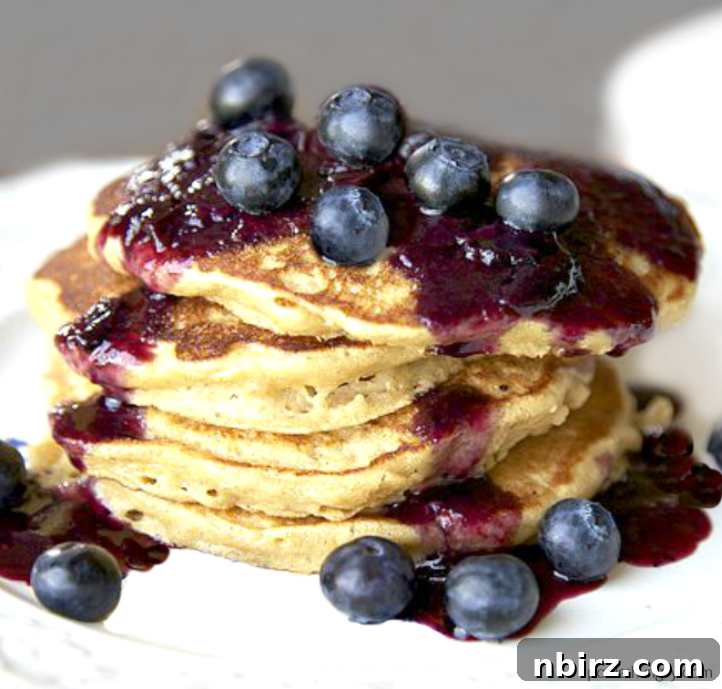
Delving into Chickpea Flour: The Star Ingredient
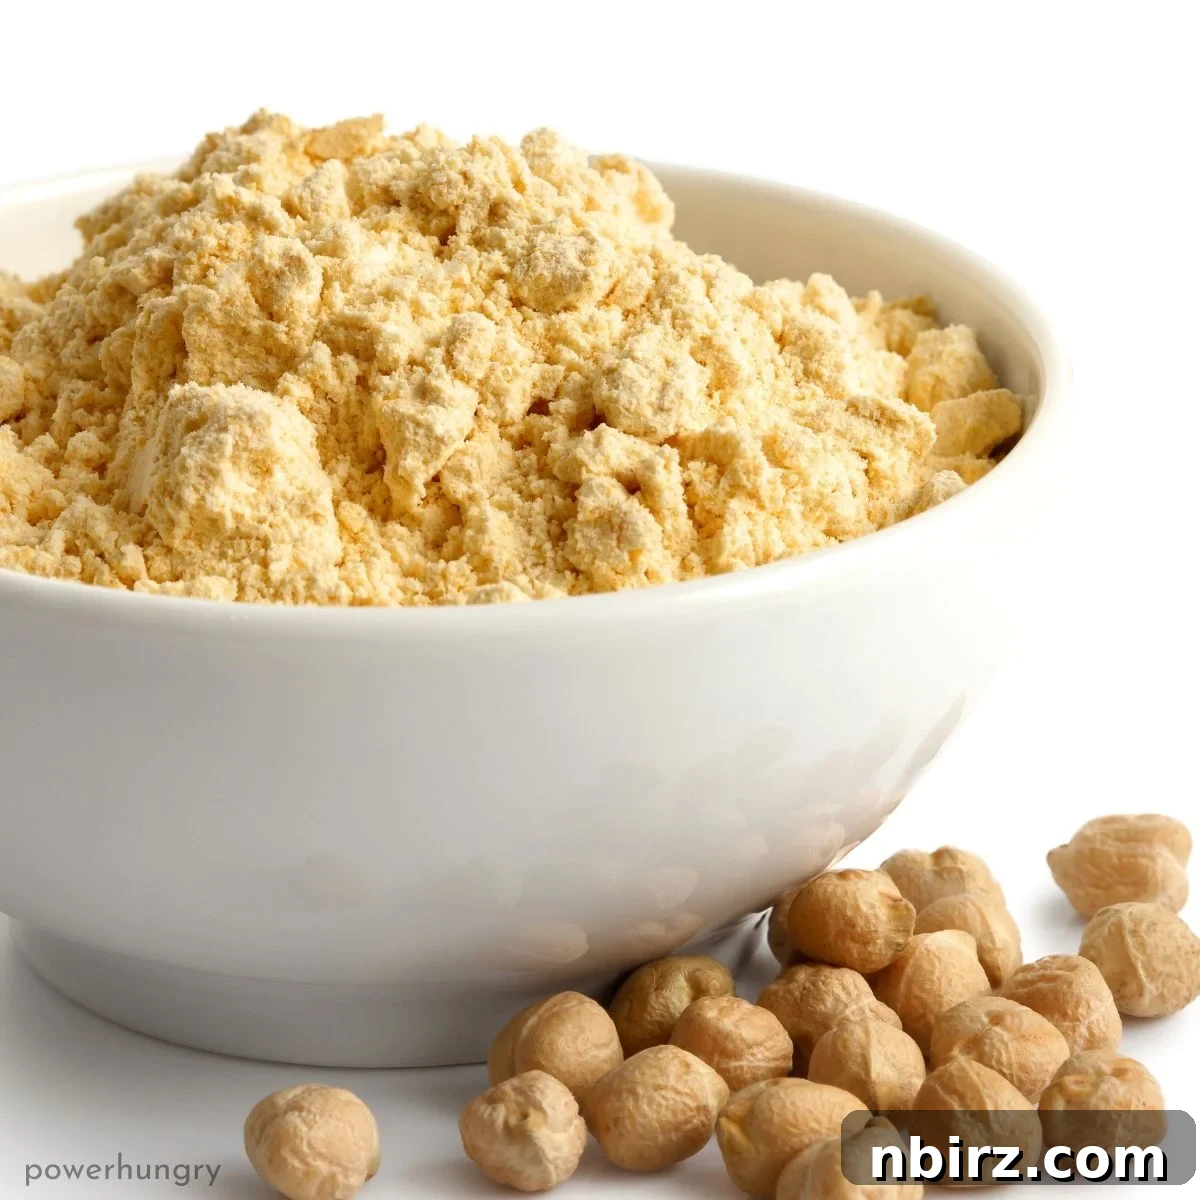
At the heart of these delightful pancakes lies chickpea flour, a truly remarkable ingredient that deserves its moment in the spotlight. Also widely known as garbanzo bean flour, besan, or gram flour, it is crafted from very finely ground dried chickpeas. This flour has been a staple in South Asian, Middle Eastern, and Mediterranean cuisines for centuries, prized for its unique properties and nutritional value.
What Makes Chickpea Flour So Special?
Chickpea flour boasts a robust nutritional profile that sets it apart from many traditional grain flours. It is exceptionally high in plant-based protein, providing a substantial boost that contributes to feelings of fullness and supports muscle maintenance. Coupled with its high fiber content, it aids in healthy digestion and helps stabilize blood sugar levels, making it an excellent choice for sustained energy.
Beyond its nutritional benefits, chickpea flour offers incredible versatility in the kitchen. Its natural binding properties make it an outstanding multi-purpose egg substitute when mixed with water – a revelation for vegan baking and cooking. It can be used to thicken sauces, create crispy coatings, or even form savory fritters and flatbreads like “socca” or “farinata.” When incorporated into sweet dishes like these pancakes, its subtle, earthy flavor provides a wonderful depth that complements various toppings.
If you haven’t yet explored the world of chickpea flour, I genuinely hope this recipe inspires you to give it a try. Its ability to create light, fluffy, and satisfying pancakes without grains, gluten, eggs, or dairy is nothing short of amazing!
The Simple Essentials: Ingredients for Your Pancakes
One of the most appealing aspects of this recipe is its minimal ingredient list. You only need a handful of pantry staples to create a batch of these delicious and healthy pancakes. The exact measurements are provided in the recipe card below, where you can also toggle between US customary (volume) and metric (weights) measurements for your convenience.
The exact amounts for each ingredient are detailed in the recipe card at the end of this post. You can switch between US Customary (volume) and Metric (weights) for your preferred measurement option.
To prepare these fluffy chickpea flour pancakes, gather the following:
- Chickpea Flour: This is the foundation of our pancakes. If your chickpea flour tends to be lumpy, a quick sift before mixing will ensure a smooth, uniform batter and prevent any dry pockets in your finished pancakes.
- Coconut Sugar: This natural sweetener provides a lovely, subtle caramel note. However, it’s highly versatile! Feel free to substitute with an equal amount of brown sugar, natural cane sugar, or regular granulated sugar. For a sugar-free option, you can omit the sweetener entirely or use your favorite sugar-free substitute, such as erythritol blends. If using a liquid sweetener like maple syrup, slightly reduce the amount of water in the recipe (by about 1 tablespoon) to maintain the correct batter consistency.
- Baking Powder: Essential for leavening, baking powder gives these pancakes their wonderful lift and fluffy texture. Be sure to use a gluten-free or grain-free certified baking powder if you have specific dietary requirements.
You will also need a small amount of water to bring the batter together. I typically use filtered tap water, but for an even richer flavor, you can easily substitute it with your preferred non-dairy milk (like almond, soy, or oat milk). Additionally, I love adding a small pinch of fine sea salt to enhance all the flavors, though this is entirely optional.
For an extra layer of flavor, consider incorporating optional additions like 1 teaspoon of vanilla extract for a classic pancake taste, or 1/2 teaspoon of ground cinnamon to add a warm spice note. These small touches can elevate your pancake experience even further.
Step-by-Step Guide: Crafting Your Perfect Chickpea Flour Pancakes
Please note that the complete, detailed directions are also available in the recipe card below.
Creating these delightful pancakes is surprisingly straightforward. Follow these simple steps for a perfect batch every time:
- Prepare the Dry Ingredients: In a medium-sized mixing bowl, combine the chickpea flour, coconut sugar, and baking powder. If you’re including the optional pinch of salt or ground cinnamon, add them in at this stage as well. Whisk these dry ingredients together thoroughly to ensure they are well combined and evenly distributed. This step is crucial for consistent leavening and flavor throughout your pancakes.
- Add Wet Ingredients to Form Batter: Gradually pour in the water (or non-dairy milk) to the dry mixture. If you’re using optional vanilla extract, add it now. Stir with a whisk until a medium-thick, smooth batter forms. It’s important not to overmix the batter; mix just until there are no visible lumps of dry flour. The batter should be thick enough to hold its shape when poured but still pourable. If it’s too thick, add water a teaspoon at a time until the desired consistency is reached.
- Heat Your Griddle or Pan: Place a large nonstick skillet or griddle over medium heat. Allow it to heat up properly for a few minutes. Lightly spritz the surface with a neutral cooking oil spray or a small amount of oil. While the original recipe is oil-free, a tiny bit of oil can help achieve a beautiful golden-brown crust, but it’s not strictly necessary if your pan is truly nonstick.
- Cook the Pancakes: Once the pan is hot, pour approximately 1/4 cup (60 mL) of batter per pancake onto the skillet. Leave enough space between each pancake to allow for easy flipping. Cook for about 3-4 minutes on the first side, or until small bubbles begin to appear and pop on the surface, and the edges look set. The underside should be golden brown.
- Flip and Finish Cooking: Carefully flip each pancake using a spatula. Reduce the heat slightly to medium-low if they are browning too quickly. Cook the second side for another 2-3 minutes, or until the pancakes are cooked through and golden brown on both sides. You can press lightly on the center of a pancake; if it springs back, it’s ready.
- Keep Warm and Repeat: Transfer the cooked pancakes to a plate and keep them warm while you cook the remaining batter. You can cover the plate with foil or place it in a low-temperature oven (around 200°F / 95°C). Remember to spritz the skillet again before adding each new batch of batter to prevent sticking.
- Serve and Enjoy: Serve your fresh, fluffy chickpea flour pancakes warm with your favorite toppings!
The results are truly delightful: fluffy, surprisingly filling, and incredibly delicious! I love piling on fresh fruit like blueberries or sliced bananas, but these pancakes are wonderfully versatile. Drizzle with maple syrup, spread with your favorite nut butter, or add a dollop of vegan yogurt. Feel free to get creative with your accessories!
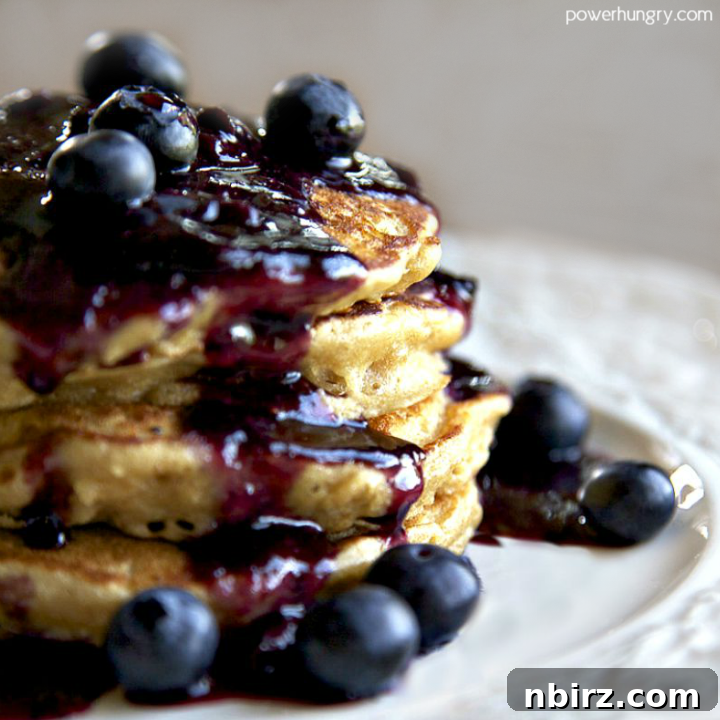
These pancakes are also fantastic without any added sugar, opening up a world of savory possibilities! Consider adding chopped green onions, minced garlic, a pinch of turmeric, cumin, or other spices to the batter. Serve savory pancakes with a side of avocado, salsa, or a dollop of vegan sour cream for a unique and satisfying meal.
Happy cooking, everyone! Here’s to creating many happy and healthy pancake memories with this simple yet sensational recipe!
Tips for Perfect Chickpea Flour Pancakes Every Time
Achieving perfectly fluffy and delicious chickpea flour pancakes is easy with a few simple tips:
- Sift Your Flour: Chickpea flour can sometimes be a bit lumpy. Sifting it before mixing helps create a smoother batter, ensuring no dry pockets in your pancakes and a more consistent texture.
- Don’t Overmix the Batter: Mix just until the ingredients are combined and no dry streaks of flour remain. Overmixing can develop gluten (even in gluten-free flours to some extent, affecting texture) and lead to tougher pancakes. A few small lumps are perfectly fine.
- Batter Consistency is Key: The batter should be thick enough to hold its shape but still pourable. If your batter seems too thick, add water or non-dairy milk one teaspoon at a time until it reaches a pourable, yet substantial, consistency. If it’s too thin, a tablespoon more of chickpea flour can help.
- Let the Batter Rest (Optional but Recommended): Allowing the batter to rest for 5-10 minutes can help the chickpea flour fully hydrate and the baking powder to activate, leading to an even fluffier result.
- Proper Pan Temperature: This is crucial! A medium heat setting is usually ideal. If the pan is too hot, the outside will burn before the inside cooks through. If it’s too cool, the pancakes won’t brown nicely and might become dense. Test the heat with a tiny drop of water – it should sizzle and evaporate quickly.
- Look for Bubbles: The appearance of bubbles on the surface of the pancake is your visual cue that it’s time to flip. These bubbles popping signify that the leavening agents are working and the bottom is likely golden brown.
- Storage and Reheating: Leftover pancakes store beautifully in an airtight container in the refrigerator for up to 3-4 days. You can reheat them in a toaster, a dry skillet, or even a microwave for a quick breakfast. They can also be frozen for longer storage; just place parchment paper between them to prevent sticking.
- Customize Your Flavors: Don’t be afraid to experiment! Add citrus zest (lemon, orange), a pinch of cardamom, or a touch of pureed fruit to the batter. For savory versions, herbs like rosemary or thyme, nutritional yeast for a cheesy flavor, or a sprinkle of chili flakes can be wonderful additions.
With these tips, you’re well on your way to mastering the art of chickpea flour pancakes!
Related Recipes You’ll Love
If you’ve enjoyed these simple and delicious chickpea flour pancakes, you’re in for a treat! Here are a few more plant-based and gluten-free recipes that share the same spirit of ease and healthy goodness:
- Vegan Oat Blender Pancakes (Gluten-Free, No Bananas): Another incredibly easy pancake recipe, perfect for busy mornings.
- Zucchini Soccatas (Chickpea Flour Omelets): Explore more savory uses for chickpea flour with these delightful “omelets.”
- 4-Ingredient Chocolate Quinoa Muffins {Vegan, Oil-Free, GF}: Indulge in a healthy chocolate treat with minimal ingredients.
- 3-Ingredient Vegan Oat Pancakes {Gluten-Free, Oil-Free}: A classic oat pancake recipe, simplified and made vegan.
- Vegan Sheet Pan Pancake {Gluten-Free, 5 Ingredients}: Perfect for feeding a crowd or meal prepping, this method makes pancakes effortless.
Vegan Chickpea Flour Pancakes (3-Ingredients, Grain-Free) Recipe
Recipe Overview
- By: Camilla
- Summary: These 3-ingredient vegan chickpea flour pancakes are an absolute dream come true! They are naturally grain-free, gluten-free, and oil-free, offering a delicious and healthy breakfast option with minimal effort.
Preparation Details
- Prep Time: 5 minutes
- Cook Time: 4 minutes
- Total Time: 9 minutes
- Servings: 6 pancakes
Ingredients
- 1 cup (120 g) chickpea flour (sifted, if lumpy)
- 1 1/2 tablespoons coconut sugar (see notes for options)
- 2 1/4 teaspoons baking powder
- 1/2 cup water (or non-dairy milk)
- Optional: 1/4 teaspoon fine sea salt
- Optional: 1 teaspoon vanilla extract and/or 1/2 teaspoon ground cinnamon
Instructions
- In a medium bowl, whisk together the chickpea flour, coconut sugar, and baking powder. If adding optional salt or cinnamon, include them here as well.
- Whisk in the water and (optional) vanilla extract to form a smooth, medium-thick batter. Ensure there are no lumps of dry flour.
- Heat a large nonstick skillet or griddle over medium heat. Lightly spritz with oil or cooking spray if desired.
- Pour 1/4 cup (60 mL) of batter per pancake onto the skillet, leaving some space between each. Cook for 3-4 minutes until bubbles appear and pop on the surface, and the edges look set.
- Carefully flip the pancakes. Turn off the heat and let the pancakes continue to cook in the residual heat of the pan for an additional 2-3 minutes, or until cooked through and golden brown on both sides.
- Transfer the cooked pancakes to a plate to keep warm.
- Repeat steps 3-6 with the remaining batter, lightly spritzing the skillet with oil or cooking spray before each new batch.
- Serve the pancakes warm with your favorite toppings, such as fresh fruit, maple syrup, or nut butter.
Notes
Sweetener Options: An equal amount of brown sugar, natural cane sugar, or regular granulated sugar can be used in place of coconut sugar. If you prefer using maple syrup, reduce the water quantity by about 1 tablespoon to maintain batter consistency. To make the pancakes completely sugar-free, simply omit the sweetener or use your preferred sugar-free substitute (e.g., Sukrin Gold or other erythritol blends).
Nutrition Information (Approximate per 2 pancakes)
- Serving: 2 pancakes
- Calories: 145 kcal
- Carbohydrates: 24.9 g
- Protein: 7 g
- Fat: 2 g
- Saturated Fat: 0.3 g
- Sodium: 385.4 mg
- Fiber: 3.3 g
- Sugar: 9.6 g