
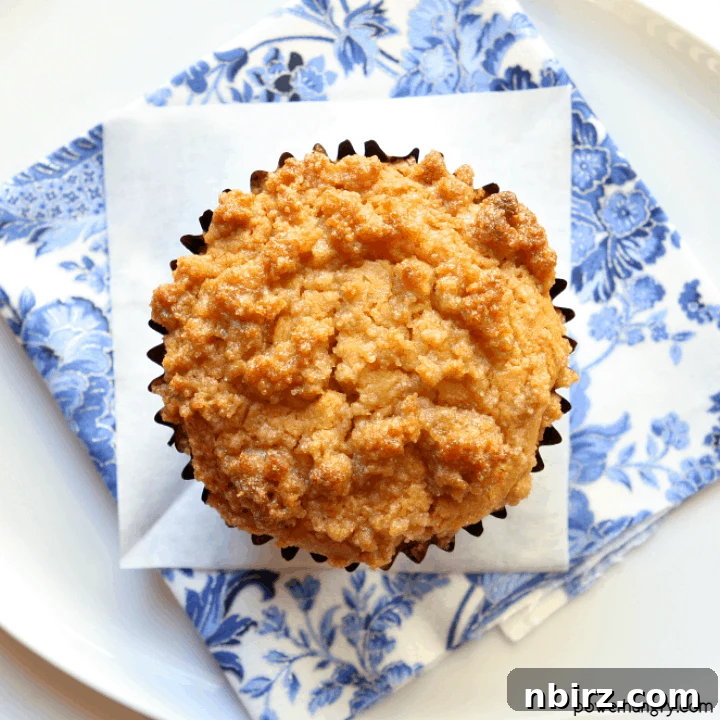
Deliciously Simple: Grain-Free, Gluten-Free, Vegan Crumb Coffee Cake Muffins

There’s something truly special about starting the day with a warm cup of coffee and a delightful treat, especially when shared with loved ones. As someone who cherishes early morning gatherings—be it volunteer events, post-run meet-ups, or lively weekend little league games—I find immense joy in providing delicious food that brings smiles to faces. However, this joy often comes with a common challenge: catering to diverse dietary needs without compromising on flavor or quality. The desire to ensure everyone can enjoy the food, regardless of whether they avoid dairy, eggs, grains, nuts, or refined sugar, has always been a top priority for me.
This commitment to inclusive baking, coupled with an occasional need for sleep (because even bakers need their rest!), inspired the creation of a truly versatile and universally loved recipe. The goal was simple: to develop a baked good that is not only quick and easy to prepare but also incredibly satisfying and accommodating to a wide array of dietary restrictions. The result? These magnificent **Vegan Crumb Coffee Cake Muffins**, a recipe designed to delight every palate while being naturally vegan, grain-free, gluten-free, and entirely free of refined sugars.
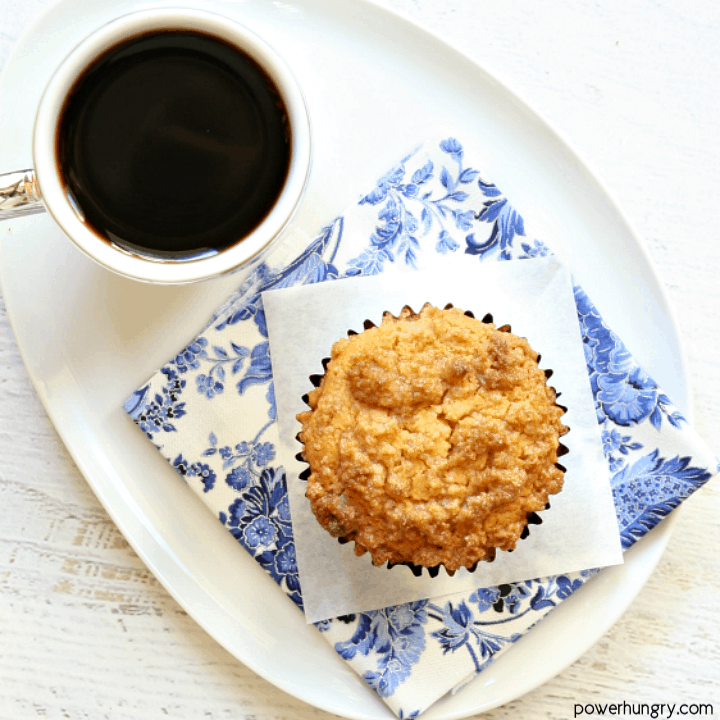
Why These Muffins Are a Must-Try: Unpacking the Benefits
These Vegan Crumb Coffee Cake Muffins aren’t just another recipe; they’re a testament to how flavorful and satisfying mindful baking can be. Designed with health and inclusivity in mind, they offer a host of benefits that make them stand out:
- Vegan (Grain-Free and Gluten-Free): This recipe proudly serves the vegan community, ensuring no animal products are used. Beyond that, it caters to those avoiding grains and gluten, making it suitable for a broader audience seeking plant-based and allergen-friendly options. This thoughtful combination means more people can enjoy a delicious treat without worry.
- Gluten-Free: By carefully selecting flours like chickpea and coconut, we completely bypass gluten-containing grains. This makes these muffins a safe and enjoyable choice for individuals with celiac disease or gluten sensitivities, allowing them to indulge without any discomfort.
- Grain-Free: For those following a grain-free diet, these muffins are an ideal solution. They provide a wholesome alternative to traditional baked goods, focusing on nutrient-dense ingredients that support various dietary lifestyles.
- Simple to Make and Bake: Don’t let the “specialty” ingredients intimidate you. This recipe is surprisingly straightforward. With clear, step-by-step instructions and minimal fuss, even novice bakers can achieve perfectly delightful results, making it perfect for busy mornings or impromptu gatherings.
- Nut-Free: Addressing another common allergen, these muffins are completely nut-free. This makes them a fantastic option for school events, potlucks, or any occasion where nut allergies might be a concern, ensuring peace of mind for hosts and guests alike.
- Refined Sugar-Free: Sweetened naturally with ingredients like coconut sugar and maple syrup, these muffins offer a healthier alternative to conventional coffee cakes loaded with refined sugars. This approach helps maintain stable energy levels and makes them a better choice for those mindful of their sugar intake.
- Delicious & Satisfying: Despite all their health-conscious attributes, the primary benefit is their incredible taste! These muffins are moist, tender, and topped with a delightful crumb, making them utterly irresistible. They truly hit the spot alongside a strong cup of coffee or tea, proving that healthy can indeed be delicious.
Key Ingredients for Your Perfect Muffins
For precise measurements of each ingredient, please refer to the detailed recipe card at the conclusion of this article. You can easily switch between US Customary (volume) and Metric (weights) for your preferred measurement system.
The magic of these muffins lies in their unique blend of flours and natural sweeteners, creating a texture and flavor profile that rivals traditional coffee cakes. Here’s a closer look at the stars of this recipe:
- Chickpea Flour: Also known as garbanzo bean flour or besan, chickpea flour is a fantastic gluten-free and grain-free alternative. It’s high in protein and fiber, contributing to a satisfying and nutrient-dense muffin. Its unique properties help bind the batter, giving these muffins a lovely structure.
- Coconut Flour: This highly absorbent flour is another gluten-free and grain-free gem. It adds a subtle sweetness and a tender crumb to the muffins. Because it absorbs a lot of liquid, a little goes a long way, making it an efficient ingredient in allergen-friendly baking.
- Coconut Sugar: A natural, unrefined sweetener derived from the coconut palm sap. It offers a caramel-like flavor and has a lower glycemic index than regular table sugar, making it a healthier choice for sweetness.
- Ground Cinnamon: Essential for that classic coffee cake flavor, ground cinnamon adds warmth and aromatic spice to both the crumb topping and the muffin batter.
- Virgin Coconut Oil: Used in both the topping and batter, coconut oil provides healthy fats and helps create a moist texture. When melted, it blends seamlessly into the mixture, contributing to the rich flavor.
- Vanilla Extract: A touch of vanilla enhances all the other flavors, adding a comforting and familiar aroma to your baked goods.
- Baking Powder: As a leavening agent, baking powder ensures your muffins rise beautifully and have a light, airy texture. Ensure you use a gluten-free certified baking powder if strict gluten avoidance is necessary.
- Nondairy Milk (e.g., Almond Milk, Hemp Milk, Coconut Milk): Any unsweetened nondairy milk will work wonderfully, providing the necessary liquid for the batter without adding dairy. Choose your favorite based on taste preference and availability.
- Maple Syrup: Another natural sweetener, pure maple syrup adds depth of flavor and moisture. Its liquid form helps to create a smooth batter, complementing the coconut sugar perfectly.
Beyond these primary ingredients, you’ll also need basic pantry staples like water (filtered tap water is perfectly fine) and a pinch of salt. Salt, while often optional or adjustable to taste, plays a crucial role in balancing the sweetness and enhancing the overall flavor profile of these delectable muffins.
Crafting Your Muffins: Step-by-Step Directions
All specific ingredient quantities are listed in the recipe card at the end of this post. You can switch between US Customary (volume) and Metric (weights) units there.
Step One: Prepare for Baking
Begin by preheating your oven to 375°F (190°C). While the oven heats up, prepare a standard muffin tin by lining 8 of its cups with foil or paper liners. This step ensures easy removal of your beautiful muffins and simplifies cleanup.
Step Two: Craft the Signature Crumb Topping
The crumb topping is what gives these muffins their quintessential coffee cake appeal, and this recipe makes it exceptionally easy. Gather all the ingredients specified for the topping and place them into the bowl of a small food processor. Pulse the mixture until it comes together, forming moist, coarse crumbs. Unlike traditional crumb toppings that require cutting in cold butter, this method is quick and foolproof, thanks to the properties of coconut oil and the flours. Once combined, transfer these delightful crumbs to a small bowl. There’s no need to clean out your food processor bowl yet, as you’ll be using it for the batter. For best results and to help the topping hold its shape during baking, place the bowl of crumbs in the freezer while you prepare the muffin batter.

Step Three: Prepare the Muffin Batter
Now, it’s time for the muffin batter. Place all of the batter ingredients into the same food processor bowl (no need to wash it after the topping, as the flavors are complementary). Process the ingredients until the mixture becomes completely smooth and well-combined. The batter will be thick, which is characteristic of chickpea and coconut flour recipes. Ensure there are no lumps to achieve a uniform texture in your baked muffins.

Step Four: Assemble the Muffins
Carefully divide the prepared muffin batter evenly among the 8 lined muffin cups. An ice cream scoop can be helpful for this task, ensuring consistent muffin sizes. Once the batter is distributed, retrieve the chilled crumb topping from the freezer. Generously sprinkle the topping evenly over the batter in each muffin cup. Don’t press the topping down; a light sprinkle will do, allowing it to form a beautiful, golden crust as it bakes.
Step Five: Bake to Golden Perfection
Place the muffin tin into your preheated oven. Bake for approximately 19 to 23 minutes. Baking time can vary slightly depending on your oven, so keep an eye on them. The muffins are ready when the crumb topping is beautifully browned and a wooden toothpick inserted into the center of a muffin comes out clean, indicating that the batter is fully cooked through. The aroma filling your kitchen will be a wonderful indicator that they are almost done!
Step Six: Cool and Enjoy
Once baked, remove the muffin tin from the oven. Allow the muffins to cool in the tin for about five minutes. This brief cooling period helps them set and makes them easier to handle. After five minutes, carefully remove the muffins from the tin and transfer them to a wire cooling rack. Let them cool completely on the rack. While it’s tempting to dive in immediately, allowing them to cool fully enhances their texture and flavor, ensuring the crumb topping remains crisp and the interior perfectly moist. These muffins are truly a delight, offering a guilt-free pleasure with every bite.

These muffins are more than just a recipe; they are a celebration of delicious, inclusive baking. I can personally attest to their universal appeal—from the pickiest eaters and grumpy teenagers (yes, they’ve been known to bring smiles to both!) to marathoners, busy baseball moms, and soccer dads, everyone in between adores them. The best part? No one will ever guess that these incredibly satisfying treats are entirely grain-free, gluten-free, egg-free, and dairy-free, making them an all-around wholesome food choice. The fact that they are also remarkably simple to prepare is our little secret—or perhaps, it’s a secret that’s meant to be shared!

Here’s to many more early morning get-togethers, filled with delightful baked goods and steaming cups of coffee for all! I genuinely hope you give these incredible muffins a try. Please don’t hesitate to share your thoughts and experiences with me—I would absolutely love to hear what you think of them. Happy baking, and may your kitchen always be filled with delicious aromas!
Frequently Asked Questions (FAQ)
To help you get the most out of this recipe, here are answers to some common questions:
- How should I store these delicious muffins?
For optimal freshness, store your baked muffins in an airtight container. They will stay fresh at a cool room temperature for up to 1 day. If you wish to extend their freshness, transfer them to the refrigerator where they can last for up to 5 days. For longer storage, these muffins freeze beautifully for up to 3 months. Simply thaw at room temperature or gently warm before serving.
- Can I substitute chickpea flour or coconut flour with other types of flours?
Unfortunately, no. This recipe has been specifically developed and tested with the unique properties of chickpea flour and coconut flour in mind. Their distinct absorbency and binding qualities are crucial for the texture and structure of these muffins, especially given their grain-free and gluten-free nature. Substituting them with other flours, even other gluten-free flours, will likely result in a very different and potentially unsuccessful outcome. It’s best to stick to the flours specified for this recipe.
- What can I use instead of coconut sugar?
If coconut sugar is not available or you prefer an alternative, an equal amount of packed brown sugar (either dark brown sugar or light brown sugar) can be used in its place. Brown sugar will provide a similar moisture and caramel-like flavor, maintaining the delicious essence of the muffins.
- Are there any alternatives for maple syrup?
Absolutely! If you don’t have maple syrup on hand, an equal amount of agave nectar or brown rice syrup can be used as a direct substitute. Both options will provide the necessary sweetness and liquid consistency for the batter, ensuring your muffins turn out perfectly.
- Can I add additional ingredients to customize the muffins?
Yes, certainly! These muffins are wonderfully versatile. Consider folding in about 1/2 to 2/3 cup of fresh blueberries or raspberries into the muffin batter for a fruity twist. Alternatively, for a touch of indulgence, add about 1/4 cup of miniature semisweet chocolate chips. These additions will introduce new flavors and textures, making each batch uniquely yours.
More Delicious Recipes Featuring Chickpea Flour & Coconut Flour
If you loved these muffins and are eager to explore more baking with chickpea and coconut flour, here are some other fantastic recipes to try:
- Chickpea Flour Breakfast Cookies
- Chickpea Flour Pumpkin Cookies
- Chocolate Raisin Breakfast Cookies (made with Chickpea flour & Coconut flour)
- Vegan Coconut Flour Biscotti
Print Recipe
Vegan Crumb Coffee Cake Muffins (Gluten-Free, Grain-Free)
Ingredients
Topping:
- 2 tablespoons chickpea flour
- 1 tablespoon coconut flour
- 3 tablespoons coconut palm sugar, or packed brown sugar
- 1/2 teaspoon ground cinnamon
- Pinch of salt
- 1 1/2 tablespoons virgin coconut oil, melted
- 1 1/2 teaspoons water
- 1/2 teaspoon (2.1g) vanilla extract
Batter:
- 1 cup chickpea flour
- 1/4 cup coconut flour
- 1 1/2 teaspoons baking powder
- 1/4 teaspoon salt
- 1/2 cup nondairy milk (I used almond milk)
- 1/3 cup maple syrup or agave nectar
- 3 tablespoons virgin coconut oil, melted
- 1 teaspoon vanilla extract
Instructions
-
Preheat oven to 375°F (190°C). Line 8 cups of a standard muffin tin with foil or paper liners.
-
Topping: Place all of the topping ingredients into the bowl of a small food processor; process until mixture clumps together into moist crumbs. Transfer mixture to a small bowl. Place crumbs in freezer while making batter.
-
Batter: Place all of the batter ingredients into the bowl of the food processor; process until completely smooth. Divide batter evenly between prepared cups. Sprinkle evenly with prepared topping.
-
Bake in the preheated oven for 19 to 23 minutes until topping is browned and a toothpick inserted in center of cake comes out clean. Cool 5 minutes in tin and then transfer cakes to a cooling rack to cool completely.
Notes
Nutrition
Enjoyed this recipe? Please share your thoughts and rate it below!