
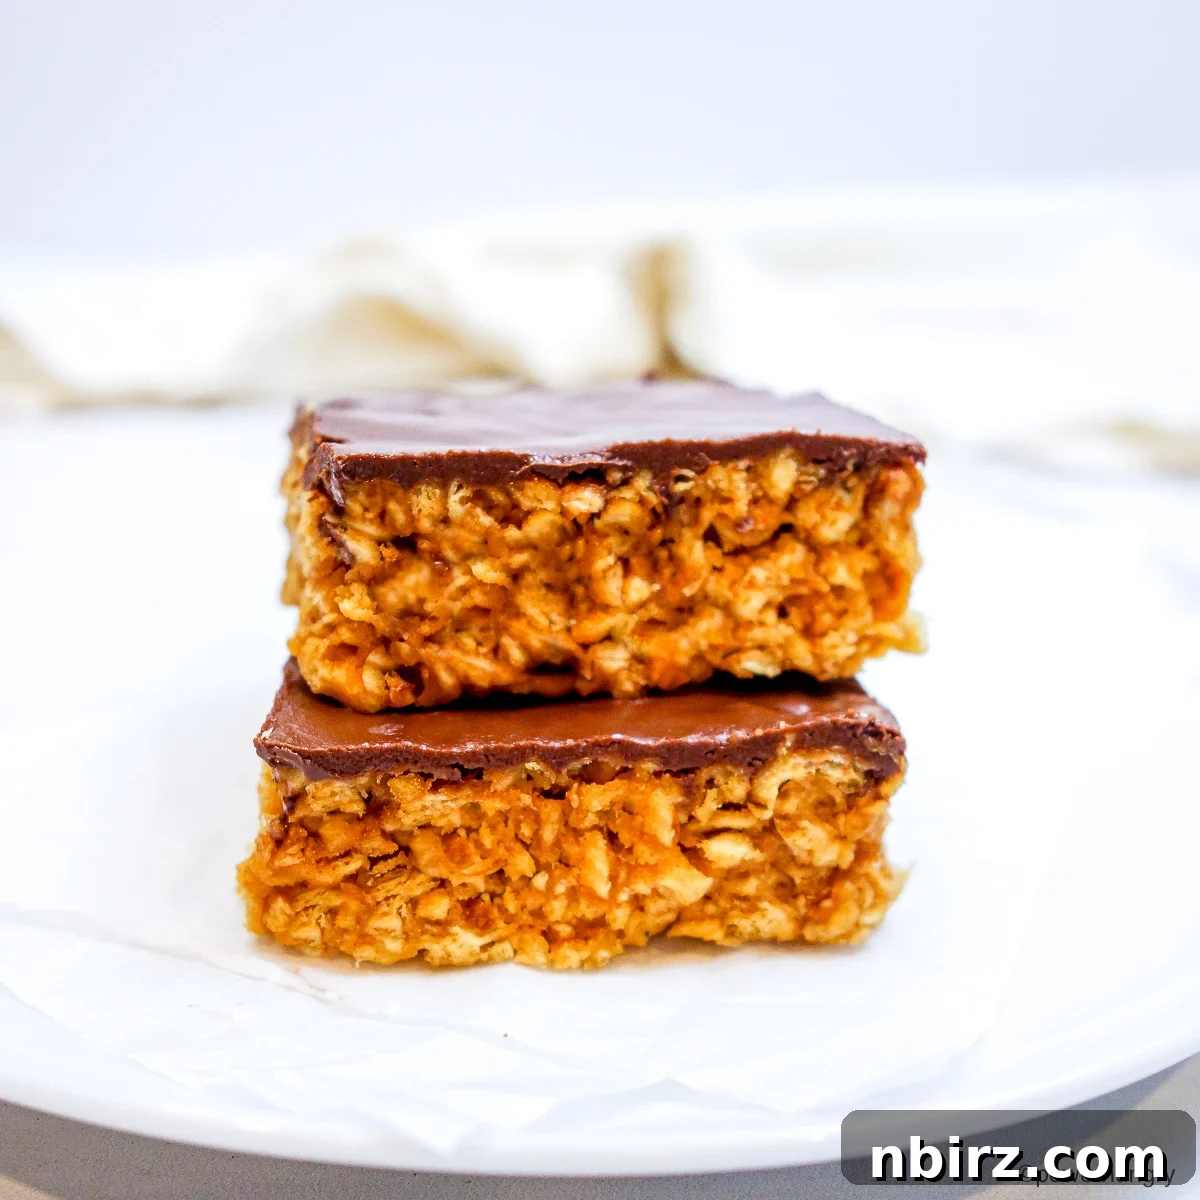
Are you searching for a delicious, healthy, and incredibly easy-to-make vegan snack that’s also packed with protein? Look no further! Our revolutionary No-Bake TVP Protein Crispy Treats offer a fresh take on the classic crispy treat, delivering an impressive 12 grams of plant-based protein per serving. These wholesome bars are completely grain-free, oil-free, and come together with just four simple ingredients, proving that healthy eating can be both convenient and supremely satisfying.
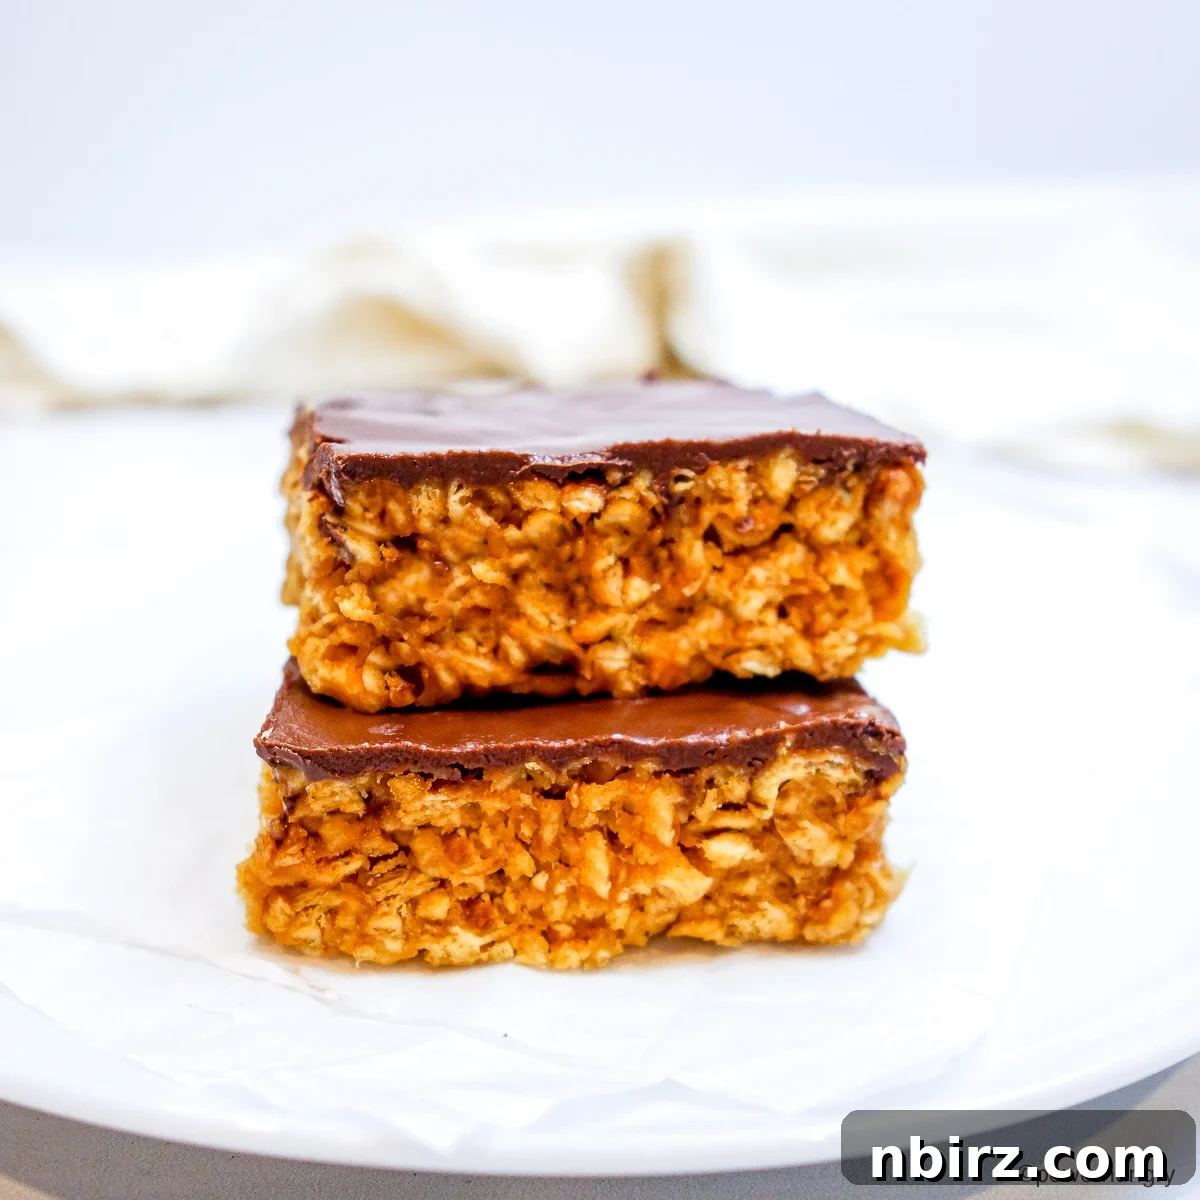
Inspired by the success of our high-protein No-Bake Chocolate TVP Cookies, we embarked on a mission to explore new, innovative ways to incorporate Texturized Vegetable Protein (TVP) into everyday snacks. The result is these phenomenal TVP Protein Crispy Treats – a recipe that embodies everything we adore: simplicity, nutritional value, and minimal effort. Imagine the delightful crunch of traditional rice crispy treats, but without any grains whatsoever, crafted from wholesome ingredients that fuel your body and delight your taste buds.
Each bar is a powerhouse, offering significant plant protein and fiber, making them an ideal choice for a post-workout refuel, a quick breakfast on the go, or a guilt-free dessert. With no baking required, you can whip up a batch of these treats in minutes, perfect for meal prepping your week’s snacks. Vegan, oil-free, and naturally gluten-free, they are the ultimate feel-good indulgence that effortlessly serves as a versatile protein bar.
Why You’ll Love These TVP Protein Crispy Treats
Beyond their irresistible taste and delightful texture, these no-bake treats boast a myriad of benefits that make them a must-try for anyone seeking a healthier snack option:
- Outstanding Protein Content: With 12 grams of protein per bar, these treats are a fantastic way to boost your daily protein intake, essential for muscle repair and satiety, without relying on protein powders.
- Rich in Fiber: Each bar contains 4 grams of dietary fiber, supporting digestive health and helping you feel fuller for longer.
- Completely Grain-Free: Perfect for those avoiding grains, these bars use TVP for their crispy texture, making them a unique alternative to oat-based or rice crispy treats.
- Naturally Gluten-Free: Made with ingredients free from gluten, they are suitable for individuals with gluten sensitivities or those following a gluten-free diet.
- Oil-Free & Wholesome: We skip added oils, relying on the natural fats from peanut butter (or your chosen nut butter) for a healthier profile.
- 100% Vegan: Crafted entirely from plant-based ingredients, these bars are free from eggs and dairy, making them a compassionate and inclusive snack.
- No Protein Powder Needed: The protein comes directly from the whole-food ingredients, particularly TVP, avoiding the sometimes artificial flavors and sweeteners found in protein powders.
- No Artificial Sweeteners: Sweetened naturally with maple syrup, you won’t find any stevia or other artificial sweeteners here.
- Effortlessly No-Bake: Save time and keep your kitchen cool! These treats require zero oven time, making them quick and convenient.
- Quick & Easy Preparation: With only 4 ingredients and simple steps, you can prepare a batch in mere minutes.
- Marshmallow-Free: A healthier alternative to traditional crispy treats, these contain no marshmallows, yet deliver a wonderful chewy-crispy texture.
The precise measurements for each ingredient are provided in the comprehensive recipe card located at the end of this post. You can easily switch between US Customary (volume) and Metric (weights) units to suit your preference.
Essential Ingredients for Success
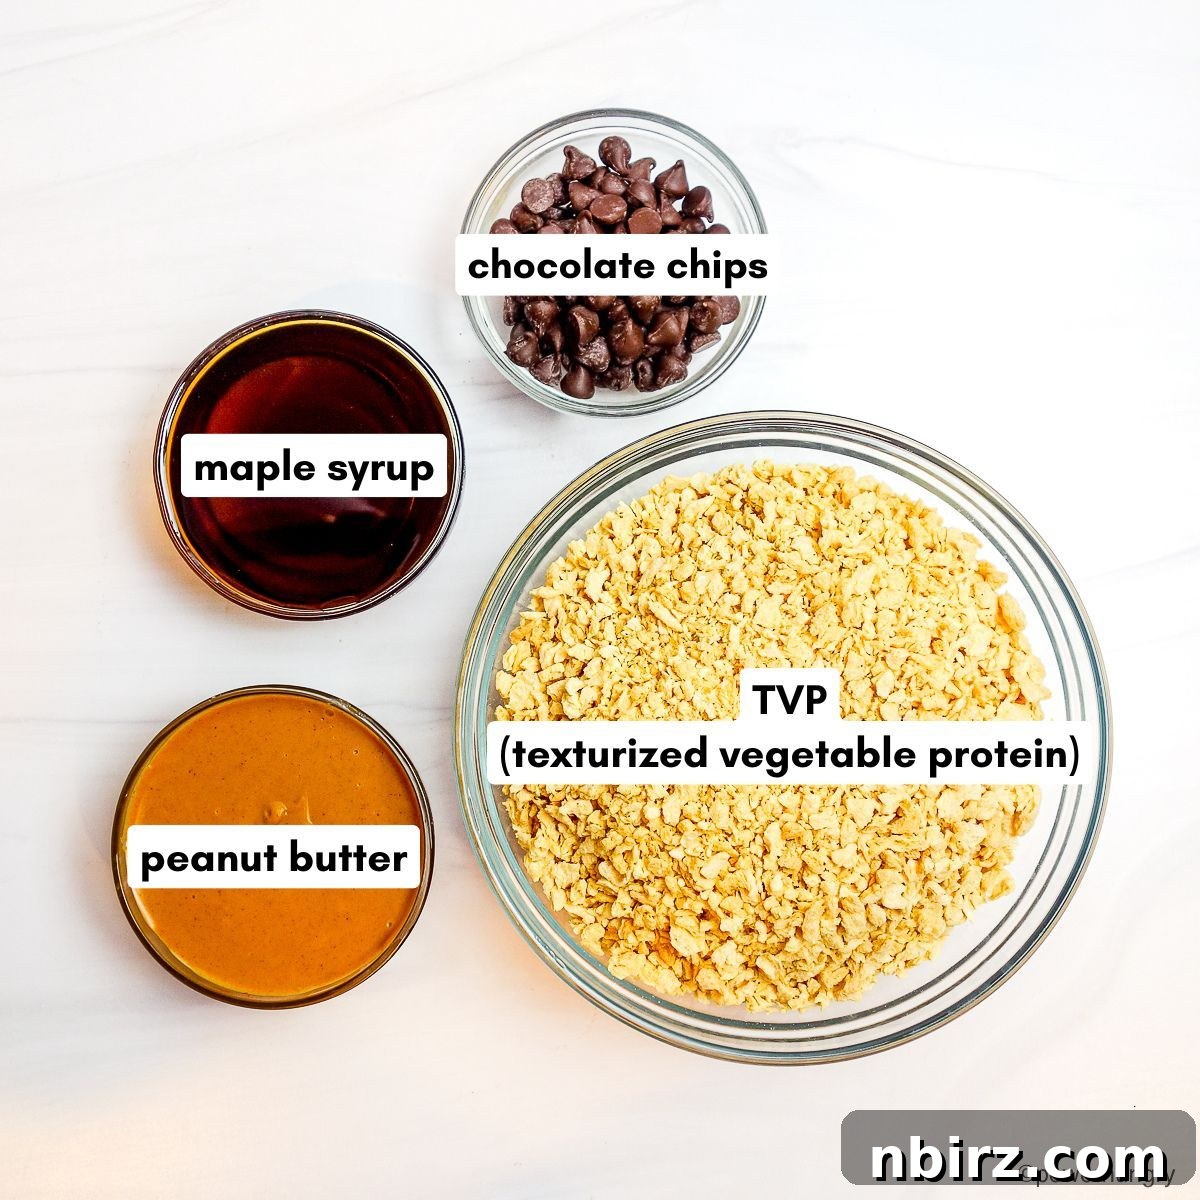
This recipe shines with its minimalist approach, requiring only a handful of key ingredients. Each plays a crucial role in delivering the perfect texture and flavor:
- TVP (Texturized Vegetable Protein): This is our star ingredient! TVP is a highly versatile plant-based protein made from defatted soy flour, a natural byproduct of soybean oil production. While commonly rehydrated and used as a meat substitute, we’re leveraging its dry, crispy nature in an innovative way. When used un-rehydrated, TVP becomes light, incredibly crispy, and boasts a remarkably neutral flavor profile, making it the perfect base for our treats. For best results, refer to our detailed TVP buying guidelines below.
- Maple Syrup: Beyond adding a delightful natural sweetness, maple syrup acts as a vital binder in this no-bake recipe, ensuring the ingredients come together to form firm, cohesive bars instead of crumbles. It contributes a subtle, rich flavor that complements the other components beautifully. For alternatives, check the recipe notes and card.
- Peanut Butter: We recommend using smooth peanut butter for a consistent texture. Both natural (with only peanuts and salt) or traditional creamy peanut butter work well. Peanut butter provides essential fats, a creamy richness, and helps bind the bars while adding a classic, comforting flavor. If you have a peanut allergy or simply prefer other options, any smooth nut butter (like almond or cashew butter) or seed butter (like sunflower seed butter or tahini) can be substituted. Full details on alternatives are in the recipe notes.
- Chocolate Chips: A delicious melted chocolate layer coats the top of these bars, adding a touch of decadence. Semisweet or dark chocolate chips are ideal, but you can also use an equal weight of finely chopped dark or semisweet chocolate. For those who prefer a simpler, unadorned bar, the chocolate layer can be omitted entirely.
Chef’s Tip: If your chosen peanut butter is unsalted, we highly recommend adding a generous pinch of salt to the mixture. Salt enhances and balances the flavors, bringing out the best in the maple syrup and chocolate.
Guidelines for Buying the Best TVP (Texturized Vegetable Protein)
Selecting high-quality TVP is crucial for the success and flavor of your crispy treats. Follow these expert tips to ensure you’re purchasing the best possible product:
- Ingredient List Scrutiny: The only ingredient listed should be defatted soy flour. Be vigilant and steer clear of any products that include added flavorings, artificial colorings, preservatives, or oils. Purity is key for a neutral base.
- Non-GMO Certification: Prioritize TVP that is clearly labeled as Non-GMO or carries the official Non-GMO Project Verified seal. This certification guarantees that the soybeans used were not genetically modified.
- Opt for Organic (If Possible): While not strictly necessary, choosing organic certified TVP offers an additional layer of assurance that the soybeans were cultivated without synthetic pesticides or herbicides.
- Inspect Packaging Carefully: Always ensure the TVP is sold in a sealed, airtight bag or container. Avoid any packaging that appears damaged, torn, or poorly sealed, as TVP can readily absorb ambient odors and moisture, compromising its quality.
- Check for Freshness: Upon opening the package, high-quality TVP should possess no noticeable smell. A stale, overly bean-y, or rancid odor is a clear indicator of poor quality or an expired product.
- Purchase from Trusted Brands/Suppliers: Select TVP from reputable companies known for transparent labeling and stringent quality-control practices. Health food stores and well-known natural food brands are often reliable sources for purer options.
- Observe Texture and Color: Ideal TVP will have a light beige color and a light, flaky, or granular texture. Avoid products that appear dark, discolored, or have a hard, pebble-like consistency, as these can signal improper storage or age.
- Buy in Sensible Quantities: While TVP is shelf-stable, for optimal freshness and texture, it’s best to purchase only the amount you anticipate using within a few months.
- Proper Storage Post-Opening: Once opened, transfer your TVP to an airtight glass jar or a durable freezer bag. Store it in a cool, dark pantry or, for extended freshness, keep it in the freezer to prevent the absorption of odors or moisture.
- Avoid Instant-Flavored Varieties: Some TVP products are pre-seasoned for convenience. However, these often contain undesirable additives, such as caramel coloring or excessive sodium. Always double-check labels to ensure you’re getting pure, unflavored TVP.
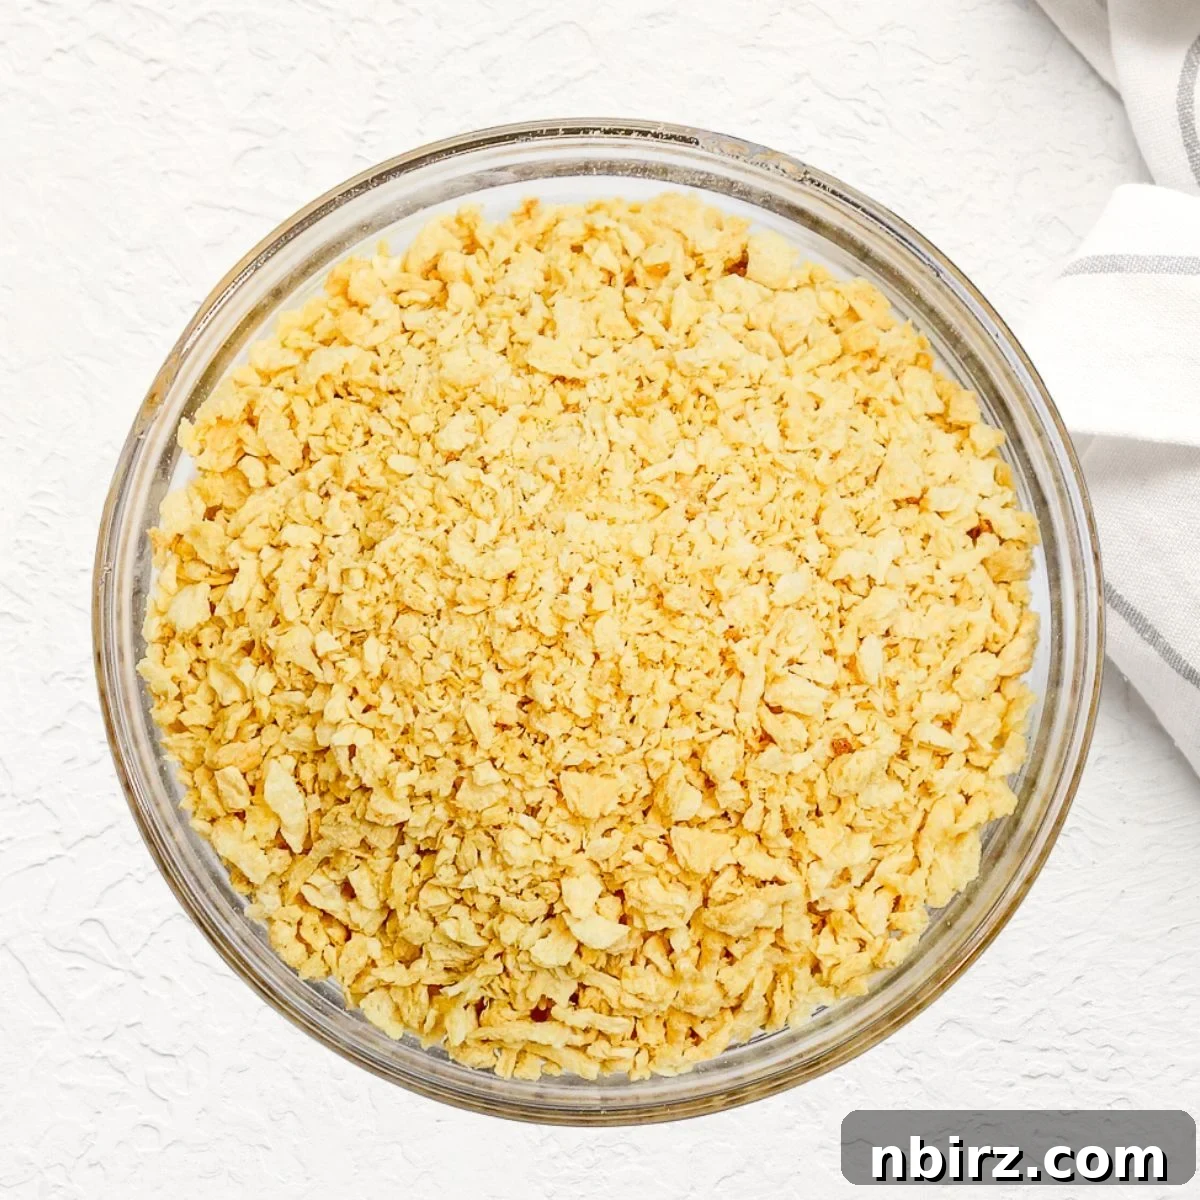
Step-by-Step Instructions for No-Bake Perfection
Please note that the complete and detailed directions, including exact measurements, are also conveniently available in the recipe card at the bottom of this page.
Step One: Prepare the TVP (No Rehydration Needed!)
This is a crucial point for this particular recipe: unlike most TVP applications where you would rehydrate it in water or broth, here we use Texturized Vegetable Protein in its dry, raw state. The dry TVP provides the essential crispiness and crunch, acting much like crisp rice cereal or rolled oats would in other no-bake bars. Simply measure it out and set aside.
Step Two: Prepare Your Baking Pan
To ensure easy removal of your finished bars and to simplify cleanup, line a 9-inch (22.5 cm) square baking dish with either parchment paper or aluminum foil. Make sure the paper or foil extends over the edges, creating “handles” that you can use later to lift the entire batch of bars out of the pan.
Step Three: Combine and Heat the Wet Ingredients
In a medium-sized, microwave-safe mixing bowl, combine the smooth peanut butter and maple syrup. Microwave the mixture in short intervals of 20 to 30 seconds, stirring well after each interval. Continue until the mixture is visibly hot – the peanut butter will appear melted and glossy, and the maple syrup will begin to show small bubbles around the edges. Whisk thoroughly until the mixture is completely smooth, homogenous, and well-blended. This heating process is vital for creating a pliable and effective binder.
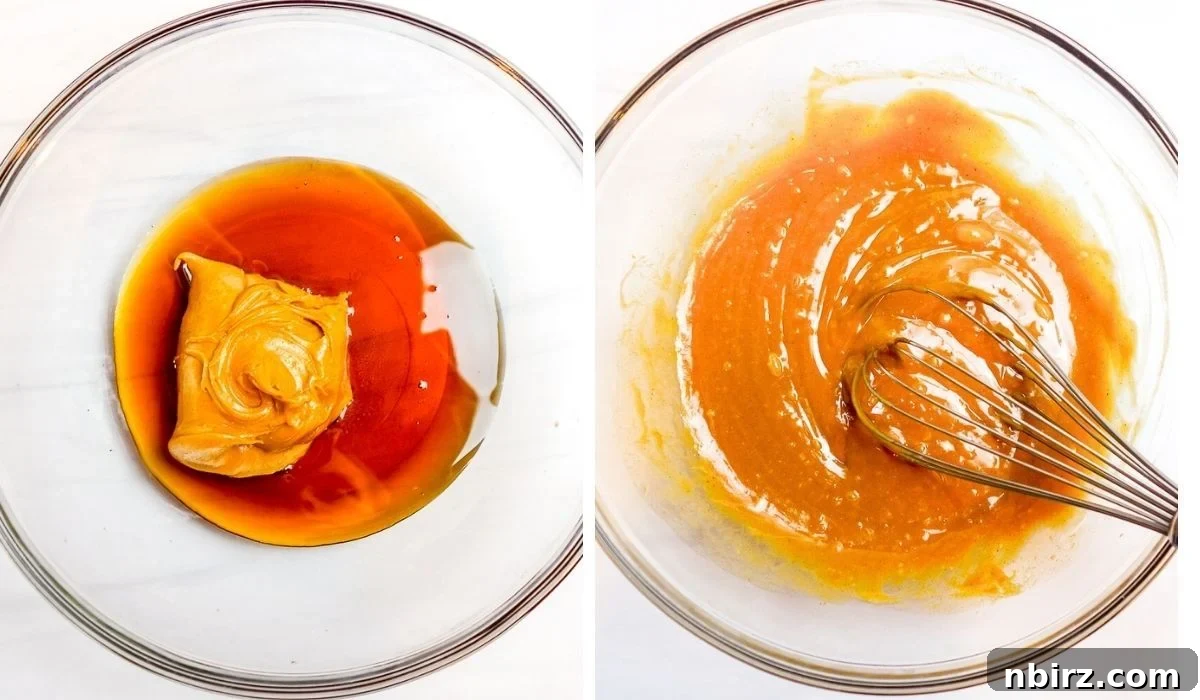
Step Four: Incorporate the Dry Ingredients
Add the measured dry TVP to the warm peanut butter and maple syrup mixture. If you’re using unsalted peanut butter, now is the time to add an optional pinch of salt to enhance the flavors. Stir vigorously and thoroughly until every piece of TVP is completely coated with the sticky wet mixture. Ensure there are no dry pockets left, as this will affect the texture and integrity of your bars.
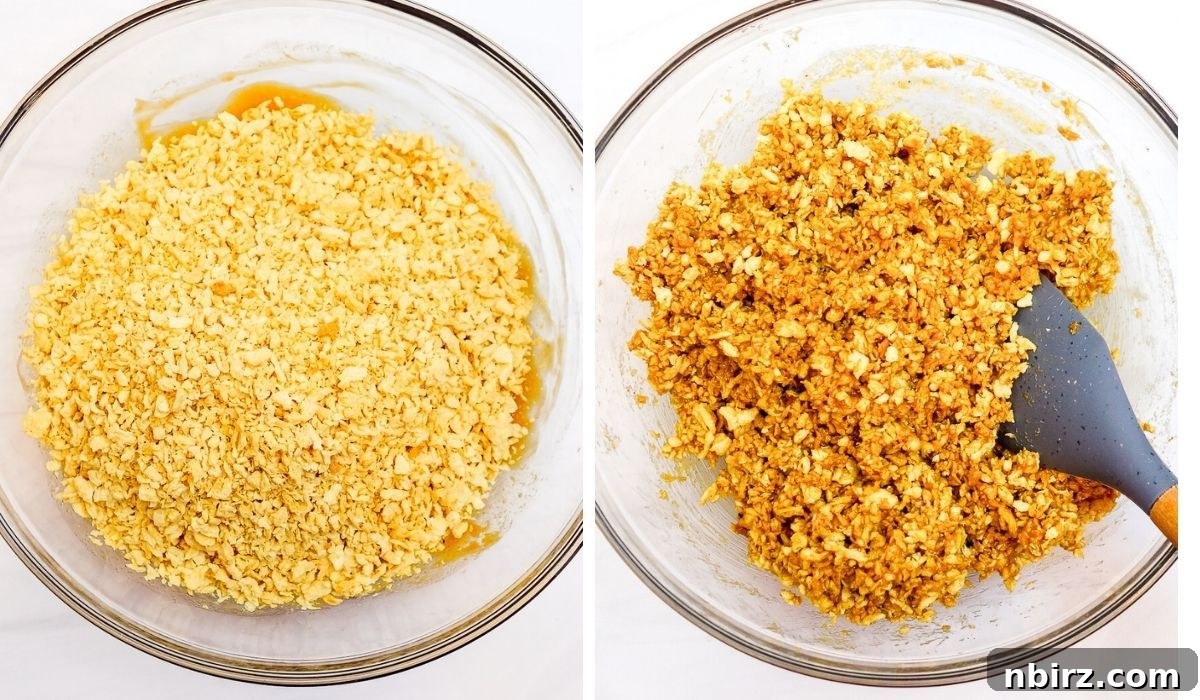
Step Five: Press Firmly into the Pan
Scrape the entire TVP bar mixture into your prepared baking pan. Use a spatula to initially spread the mixture evenly across the bottom of the pan. Now, it’s time to apply pressure! Use the flat bottom of a smaller pan, a sturdy mug, or even measuring cups to very firmly tamp down and compact the TVP mixture into an even, dense layer. The firmer you press, the more cohesive and less crumbly your bars will be. For best results and to prevent sticking, you can place an extra piece of parchment paper between your pressing tool and the TVP mixture.
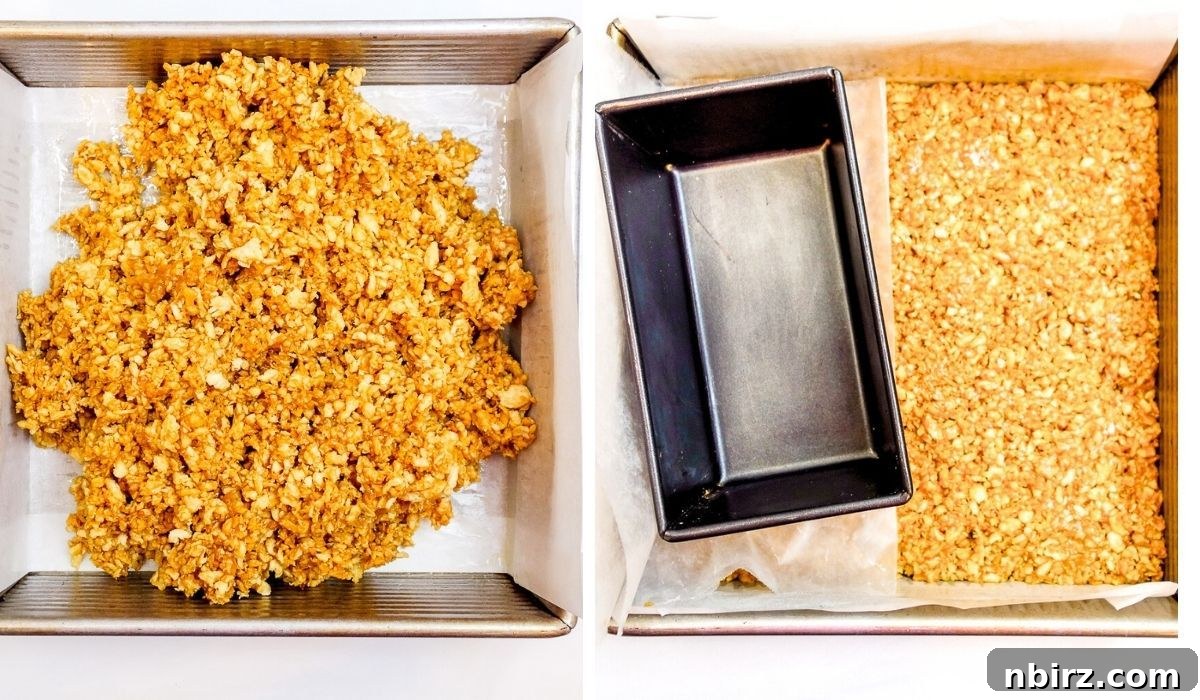
Step Six: Add the Decadent Chocolate Layer
Place your chocolate chips into a small, microwave-safe mixing bowl. Microwave in short bursts of 10 to 15 seconds, stirring gently after each interval, until the chocolate is fully melted and smooth. Be careful not to overheat the chocolate, as it can seize. Once melted, pour the glossy chocolate over the compacted TVP mixture in the pan. Use a spatula or the back of a spoon to gently spread it into an even, luscious layer, covering the entire surface of the bars.
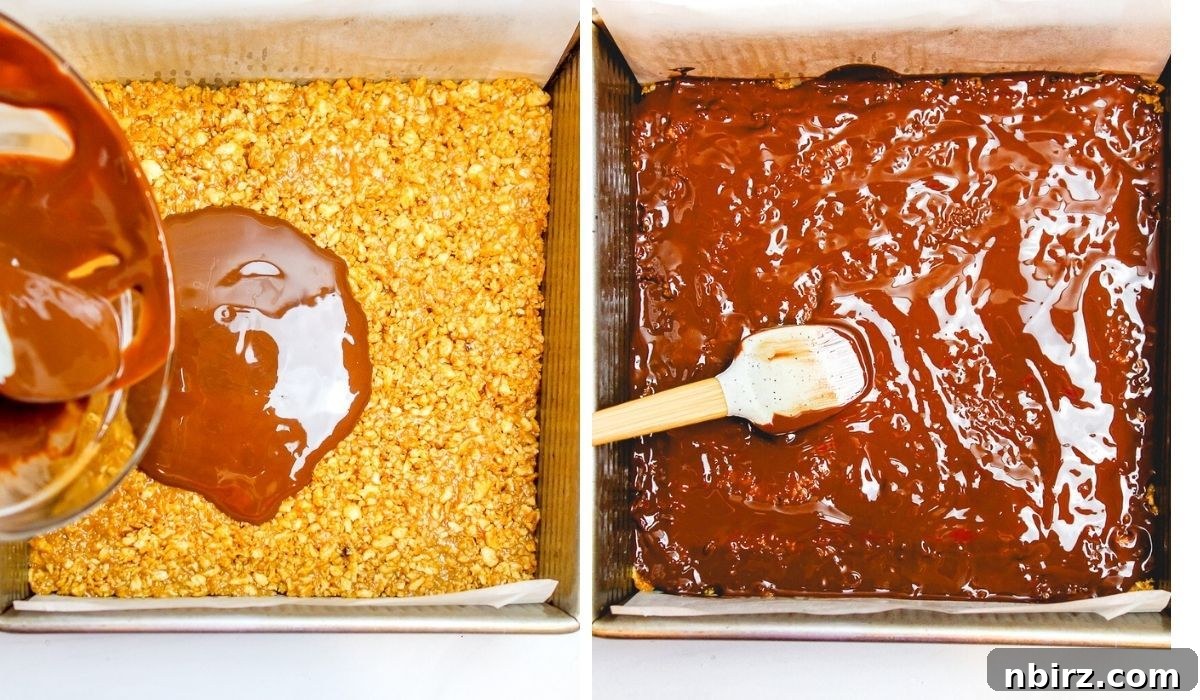
Step Seven: Chill Until Firm
Transfer the baking pan with the bars to the refrigerator and chill for at least 90 minutes. If you’re in a hurry, you can place them in the freezer for a minimum of 30 minutes. The chilling process is crucial for the bars to set properly and for the chocolate topping to firm up, ensuring they hold their shape perfectly when cut.
Step Eight: Cut into Individual Bars
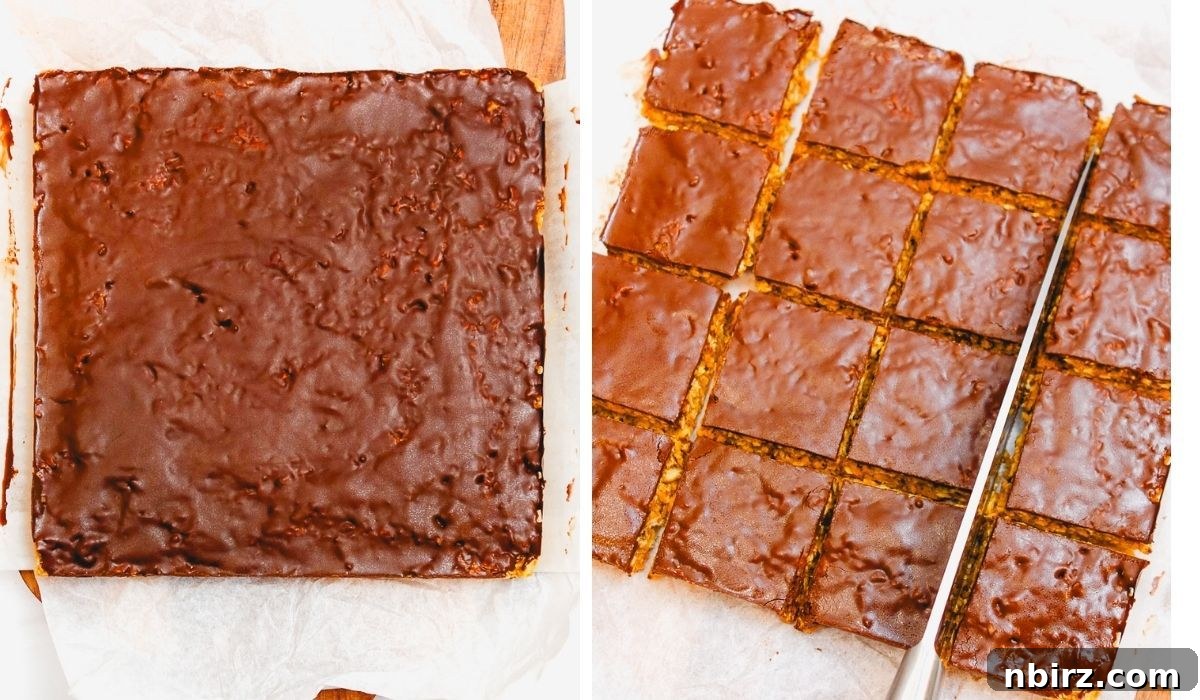
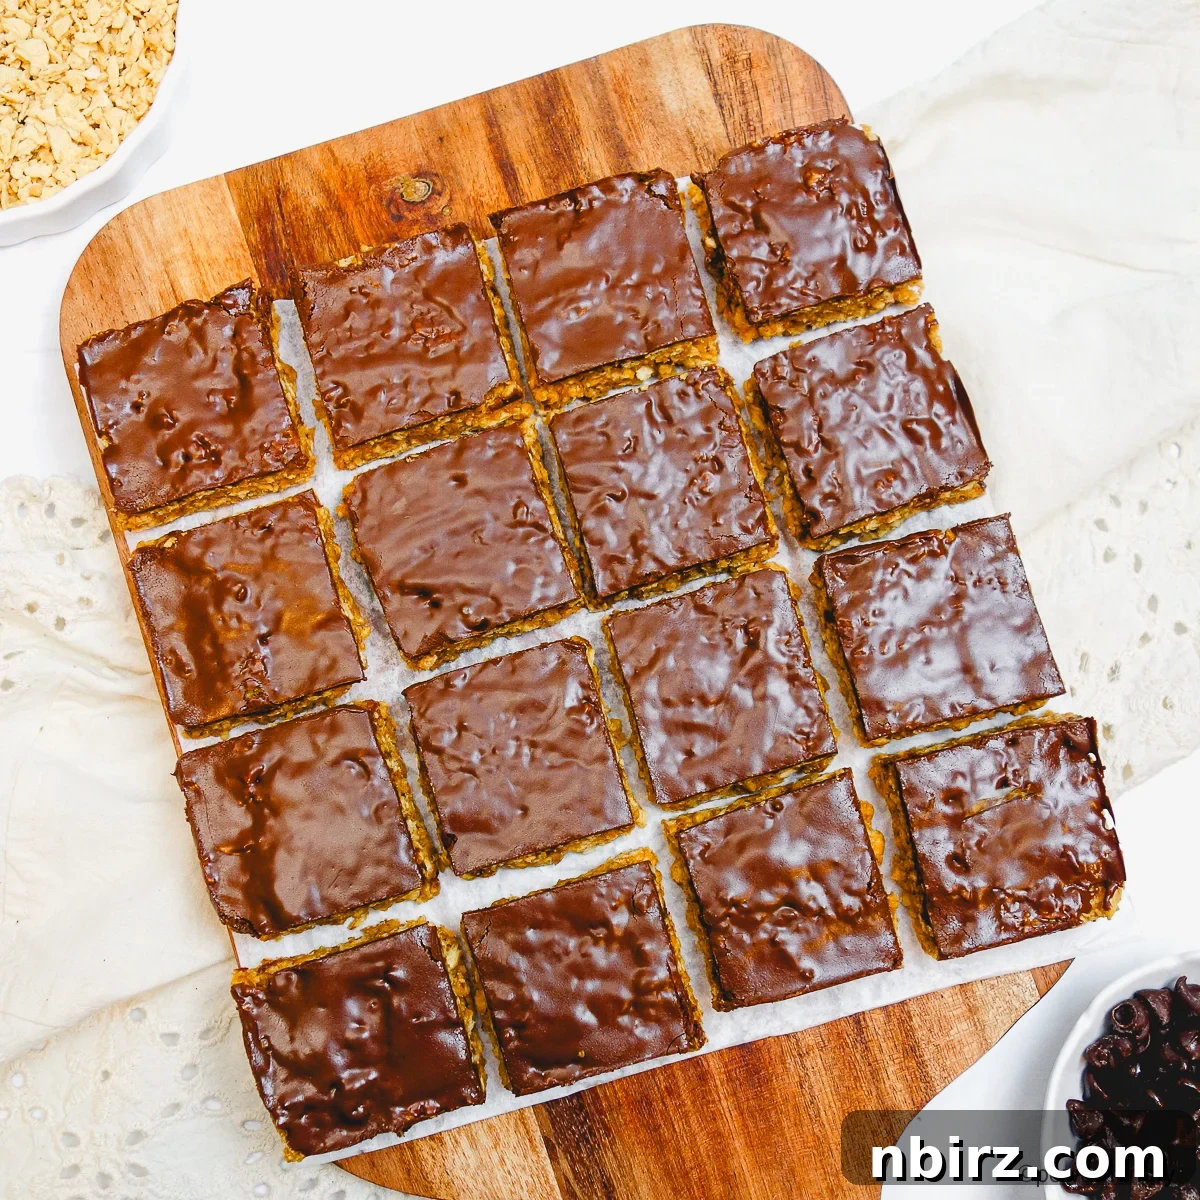
Once thoroughly chilled and firm, use the parchment paper or foil “handles” to carefully lift the entire slab of treats from the baking pan onto a clean cutting board. With a sharp knife, slice the large slab into 16 evenly sized bars. For clean cuts, you might want to warm your knife slightly with hot water and dry it between cuts.
Storage and Meal Prep for TVP Crispy Bars
These No-Bake TVP Protein Crispy Treats are fantastic for meal prepping and remain delicious for an extended period. Store them in an airtight container in the refrigerator for up to one week. For longer storage, they can be kept in the freezer for up to six months. The great news is that these bars are wonderful eaten straight from the freezer – they maintain a pleasant chewiness and don’t become excessively hard, making them a perfect grab-and-go snack even when frozen.
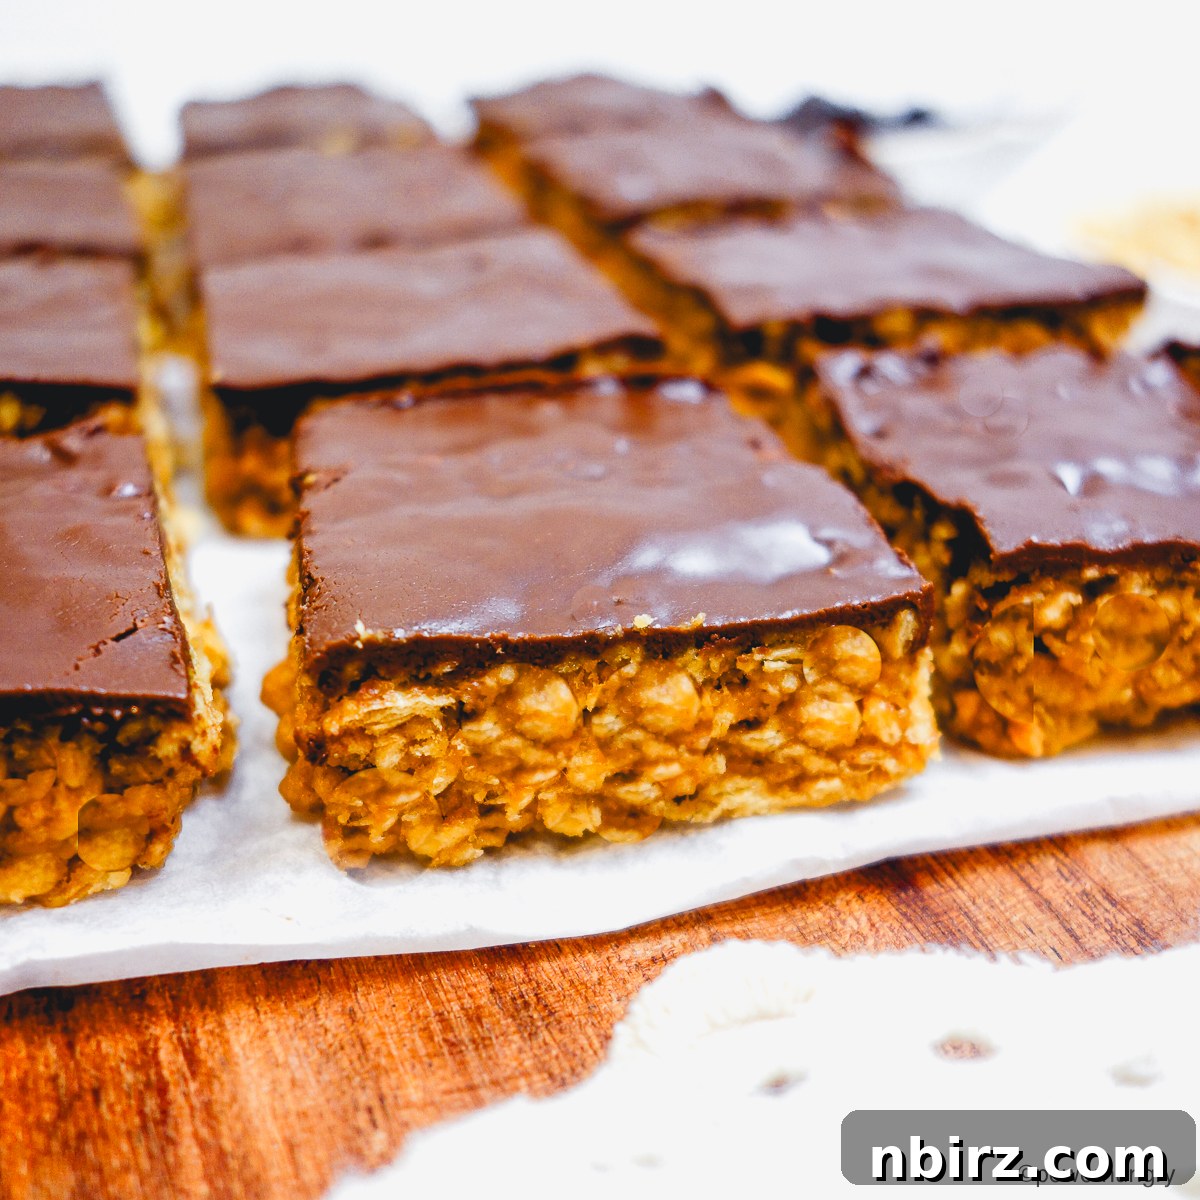
Taste & Texture: A Delightful Surprise
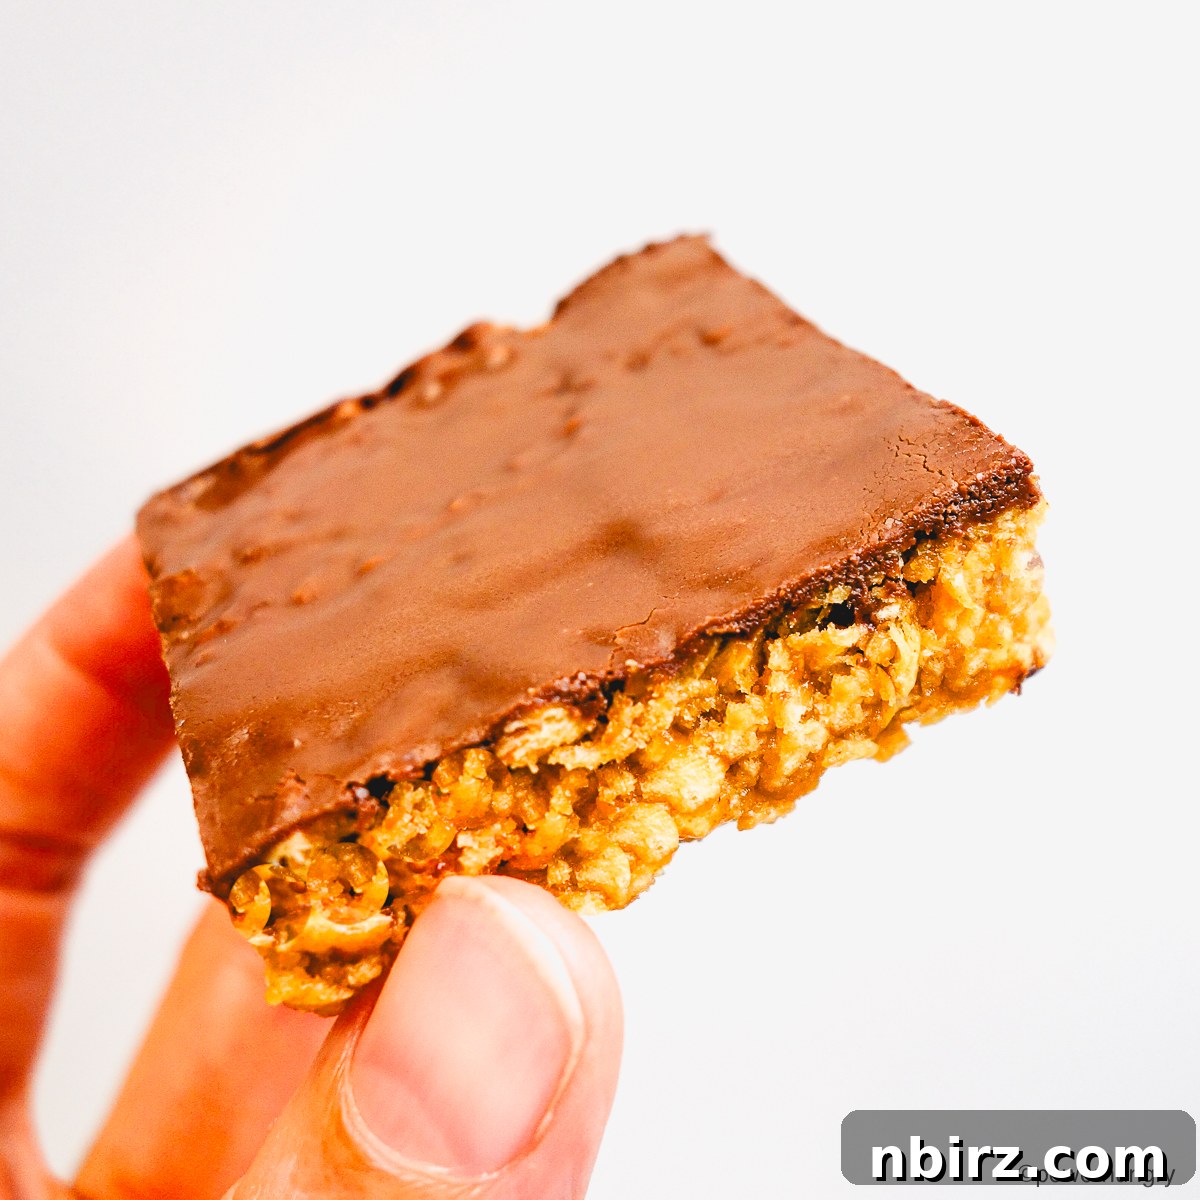
The beauty of TVP in this recipe lies in its neutral flavor, allowing the delicious combination of maple syrup, peanut butter, and chocolate to truly shine. Each bite delivers a uniquely satisfying crisp-chewy texture, wonderfully reminiscent of classic peanut butter rice crispy treats or even the nostalgic “Special K chewies” some may remember. They are perfectly sweet without being overly indulgent, and their substantial texture ensures they are incredibly filling, making them an ideal snack to keep hunger at bay.
Stovetop Instructions: Microwave-Free Method
If you prefer not to use a microwave, or simply don’t have one, you can easily prepare these protein crispy treats using a stovetop. Here’s how:
- For the Peanut Butter Mixture: Place the peanut butter and maple syrup in a medium saucepan. Set it over medium-low heat. Cook, stirring continuously, until the mixture is hot and just beginning to bubble around the edges. Remove the saucepan from the heat immediately and then proceed with adding the TVP as directed in Step Four.
- For the Chocolate Topping: To melt the chocolate without a microwave, create a double boiler. Place the chocolate chips in a heatproof glass bowl set over a small saucepan containing about an inch or two of simmering water (ensure the bottom of the bowl does not touch the water). Stir gently and continuously until the chocolate is fully melted and smooth. Then, pour it over the bars as instructed.
Recipe Tips for Perfection and Customization
Elevate your TVP protein crispy treats with these helpful tips and ingredient alternatives:
- Peanut Butter Alternatives: For those with allergies or different preferences, an equal amount of any smooth nut butter works beautifully. Consider almond butter, cashew butter, or even a mixed nut butter for varied flavor. For a nut-free option, smooth sunflower seed butter (like SunButter), pumpkin seed butter, or tahini are excellent choices.
- Maple Syrup Alternatives: While maple syrup provides a unique flavor, you can substitute it with an equal amount of agave nectar or brown rice syrup for similar binding and sweetness. If you are not following a vegan diet, honey can also be used as a direct substitute.
- Adjusting Chocolate Content: To reduce the overall sugar content and calories while still enjoying a hint of chocolate, simply use 3 to 4 tablespoons of chocolate chips instead of 1/2 cup. Melt the chocolate as directed and then drizzle it artistically over the bars rather than spreading a full layer. This still provides that lovely chocolatey touch without excess.
Flavor Variations: Get Creative with Your Treats!
These TVP Protein Crispy Treats are wonderfully adaptable. Feel free to experiment with these delicious additions to customize your snack:
- Dried Fruit Infusion: Add up to 1/4 cup of finely chopped dried fruit to the TVP mixture for an extra burst of sweetness and chewiness. Fantastic options include raisins, dried apricots, dried cherries, dried cranberries, dried blueberries, or chopped dried figs.
- Nut or Seed Boost: Incorporate 1/4 cup of chopped nuts or seeds into the TVP mixture for added crunch and nutrients. Walnuts, pecans, peanuts, almonds, pepitas (pumpkin seeds), or sunflower seeds are all excellent choices. Alternatively, sprinkle them over the melted chocolate layer before chilling for a beautiful garnish and extra texture.
- Alternate Chocolates: Don’t limit yourself to dark chocolate! Experiment with an equal amount of dairy-free white chocolate chips for a different flavor profile, or even vegan butterscotch chips for a nostalgic twist.
Frequently Asked Questions About TVP Crispy Treats
Here are some common questions you might have about making and enjoying these high-protein bars:
- What exactly is TVP and is it healthy? TVP (Texturized Vegetable Protein) is a highly nutritious and economical plant-based protein derived from defatted soy flour. It’s an excellent source of complete protein, fiber, and essential minerals like iron and magnesium. Because it’s processed from defatted soy flour, it’s very low in fat.
- Can I use crunchy peanut butter? While smooth peanut butter is recommended for a consistent, well-bound bar, you can certainly try crunchy peanut butter for added texture. Just be aware that the bars might be slightly more crumbly.
- My mixture is too dry/crumbly, what happened? This usually means your wet ingredients (peanut butter and maple syrup) weren’t heated enough, or the ratio of wet to dry ingredients is off. Ensure the wet mixture is hot and very fluid before adding the TVP, and press very firmly into the pan.
- How long do these bars last? When stored in an airtight container in the refrigerator, they stay fresh for up to a week. In the freezer, they can last for up to six months, making them perfect for batch prepping.
- Can I make these nut-free? Absolutely! Simply substitute the peanut butter with an equal amount of a smooth seed butter like sunflower seed butter or tahini. Ensure your chocolate chips are also nut-free if you have severe allergies.
- Is it okay to use different sweeteners? Maple syrup provides crucial binding. While agave nectar or brown rice syrup are good vegan alternatives, other liquid sweeteners like date syrup might work but could alter the flavor and binding properties. Avoid granular sweeteners as they won’t bind the bars.
- Why is it important not to rehydrate the TVP? For this specific recipe, we want the TVP to retain its dry, crunchy texture, similar to rice cereal. Rehydrating it would make it soft and chewy, changing the desired crispy outcome of the bars.
Related Vegan & Power-Hungry Recipes
- No-Bake Chocolate TVP Protein Cookies
- Easy Vegan TVP Meatballs (High Protein, Grain-Free)
- Chocolate Chip Peanut Butter Banana Oat Bars (4 Ingredients)
- Vegan Grain-Free Peanut Butter Muffins (Oil-Free)
- 2-Ingredient Peanut Butter Banana Cookies (V, GF, Oil-Free)
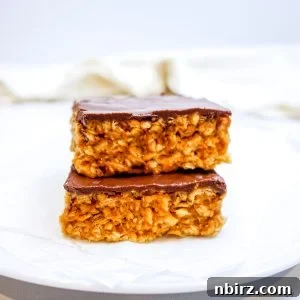
TVP Protein Crispy Treats (Grain-Free, Oil-Free)
Ready for a new take on vegan rice crispy treats? Then you will love these no-bake TVP protein crispy treats. They have 12 grams protein each and are vegan, grain-free, oil-free, & easy to make with 4 ingredients.
0 minutes
16 bars
Equipment
-
1 9-inch (22.5 cm) square baking pan
-
parchment paper
Ingredients
- 3/4 cup peanut butter (smooth), (see notes for alternatives)
- 2/3 cup maple syrup, (see notes for alternatives)
- 3 cups TVP, (see tips for buying TVP, above)
- Optional: pinch of salt, (if the peanut butter is unsalted)
- 1/2 cup dark chocolate chips
Instructions
-
Line a 9-inch (22.5 cm) square baking pan with parchment paper or foil (for easy cleanup and removal of bars from pan).
-
In a medium mixing bowl, place the peanut butter and maple syrup. Microwave, in 20 to 30 second intervals, until the mixture is hot (the peanut butter will look melty and the maple syrup will be starting to bubble). Whisk until smooth. (see notes for stovetop instructions).
-
Add the dry TVP and optional salt to the bowl. Stir until completely combined and all TVP is coated.
-
Scrape all of the TVP bar mixture into the prepared baking pan. Use a spatula to spread the mixture in an even layer. Use the spatula to begin pressing and compacting the mixture into the pan.
Now, press more: Use the bottom of a smaller pan, or a flat bottom mug or measuring cup, to very firmly tamp down the TVP mixture. I like to place a piece of parchment paper between my tamping “tool” and the TVP mixture to prevent sticking.
-
Place the chocolate chips in a small mixing bowl. Microwave in 10 to 15 second intervals (stir each time) until the chocolate is melted. Pour the melted chocolate over the bars. Spread in an even layer to cover the bars.
-
Chill the bars in the refrigerator (at least 90 minutes) or freezer (at least 30 minutes) until firm and the chocolate is set.
-
Use the parchment paper liner to transfer the chilled bars to a cutting board. Cut into 16 bars.
Notes
Storage: Store the crispy treats in an airtight container in the refrigerator for one week, or the freezer for up to six months. The bars are perfect straight from the freezer (they do not become too hard when frozen).
- Peanut Butter Mixture: Place the peanut butter and maple syrup in a medium saucepan set over medium-low heat. Cook and stir until hot and beginning to bubble. Remove from heat and proceed with the remaining instructions.
- Chocolate: Melt the chocolate in a double boiler (or a glass bowl set over a saucepan of simmering water). Stir until the chocolate is melted.
Recipe Tips
- Peanut butter alternatives: Use an equal amount of any smooth nut butter or seed butter you prefer. For example, almond butter, cashew butter, sunflower seed butter, pumpkin seed butter, or tahini.
- Maple syrup alternatives: Use an equal amount of agave nectar or brown rice syrup. If you do not follow a vegan diet, you can also use an equal amount of honey.
- Use less chocolate: Reduce the amount of sugar and calories (while still getting a good dose of chocolate) by using only 3 to 4 tablespoons of chocolate chips. Melt the chocolate as directed and drizzle over the bars.
Flavor Variations
- Dried Fruit: Add up to 1/4 cup of chopped dried fruit, such as raisins, dried apricots, dried cherries, dried cranberries, dried blueberries, or dried figs to the TVP mixture.
- Nuts or Seeds: Add 1/4 cup chopped nuts or seeds, such as walnuts, pecans, peanuts, almonds, pepitas, or sunflower seeds to the TVP mixture (or sprinkle on top of the melted chocolate layer before chilling).
- Other Chocolates: Use an equal amount of dairy-free white chocolate chips in place of the dark chocolate chips.
TVP Shopping Checklist ✅
- Ingredients: Only defatted soy flour
- Labeled Non-GMO (and organic, if possible)
- No flavorings, colorings, preservatives, or oils
- Sealed, airtight packaging (no rips or leaks)
- Light beige color, uniform texture
- No smell when package is opened
- Buy from a trusted brand/source
- Purchase in small quantities for freshness
- Store airtight in a cool, dark place (or freezer)
Nutrition
Calories: 195kcal |
Carbohydrates: 20g |
Protein: 12g |
Fat: 8g |
Saturated Fat: 3g |
Polyunsaturated Fat: 2g |
Monounsaturated Fat: 3g |
Cholesterol: 0.1mg |
Sodium: 61mg |
Potassium: 134mg |
Fiber: 4g |
Sugar: 13g |
Vitamin A: 1IU |
Vitamin C: 0.03mg |
Calcium: 93mg |
Iron: 2mg
Like this recipe? Rate and comment below!